Overview
ChatGPT Pro users, as well as Enterprise and Business workspace owners and admins can set up Google Drive app with sync in their ChatGPT Admin Apps settings, which enables workspace members to use ChatGPT to use up-to-date information from their internal sources. Connections can be created, deleted, or modified at any time.
Below outlines steps for each user type to connect the Google Drive app with sync to their ChatGPT account.
Note: Google Docs, Sheets, and Slides actions are now available as Google Drive actions. This unifies all actions into the Google drive app - simplifying Google app usage. Standalone Google Docs, Sheets, and Slides apps rare no longer available on the ChatGPT app directory, and users should connect to the Google Drive app for Docs, Sheets and Slides access.
For ChatGPT Enterprise/Edu, these new unified Google Drive actions are off by default until a workspace admin enables them. For ChatGPT Business, they are on by default. After enablement, Google Workspace admins may need to re-authorize updated Google Drive scopes before users can use these actions, or new users can connect. If you receive complaints from your users that they are unable to connect to Google Drive, please check your Google workspace scope authorizations for Google Drive, Docs, Sheets and Slides, and confirm that all actions in the app have scopes that have been authorized, or turn off actions that you do not want to authorize.
Note that the sync feature remains unaffected with this change.
Pro
Start by selecting your Profile Icon -> Settings -> Apps. Access the ChatGPT app directory, find Google Drive, and click Connect.
Select the Sync option.
You will be redirected to log in to Google Drive, as well as authorize ChatGPT to see and download all your Google Drive files.
Once completed, files will start syncing to your ChatGPT account. Note that it may take some time for the sync to fully complete.
Business and Enterprise
ChatGPT Workspace Admins can configure apps with sync with one of the following methods:
| Self-service | Ideal for flexible deployments where admins want users to connect their own Google accounts quickly without managing service accounts. Setup: Admin enables the app. Admins can choose to enable for all users by selecting Deploy to my team, or allow specific users. Individual users then connect their Google accounts via OAuth (sign in with Google). |
| Admin-managed (Deploy to my team) | Ideal if admins prefer centralized authentication via service accounts. Setup: Admin sets up service account, so that individual users don’t need to authenticate individually. Google Workspace admins will need to create a Google service account and an admin account configured with read-only access to Google Drive. ChatGPT then syncs files and existing permissions automatically for all users who are enabled. After admin configuration is complete, this works automatically for end users (no action required). |
When using Deploy to Your Team, ChatGPT Workspace Admins have three options for managing shared drives:
Include all shared drives: Default selection with no exclusions.
Include most shared drives (exclude specific ones): Include by default and specify IDs for drives to exclude.
Exclude most shared drives (include specific ones): Exclude by default and specify IDs for drives to include.
Start by selecting Workspace settings -> Apps -> Enabled -> Enable sync
Note that for Enterprise/Edu workspaces, the Google Drive app with sync supports in-region data residency in supported regions. Learn more about data residency.
Connecting Google Drive to your workspace
To begin set up, Click on Connect for Google Drive:
We strongly recommend Quick setup for ChatGPT workspaces with ten or fewer users - this option requires minimal admin setup.
For an Admin-controlled access set up, a Google Workspace admin will create a Google service account and an admin account. These will be configured with read-only access to your organization’s Google Drive. ChatGPT will then sync files and permissions on behalf of the users you enable the app for. After you’ve completed the setup no action is needed by users of your workspaces. Please follow these steps for admin-managed setup.
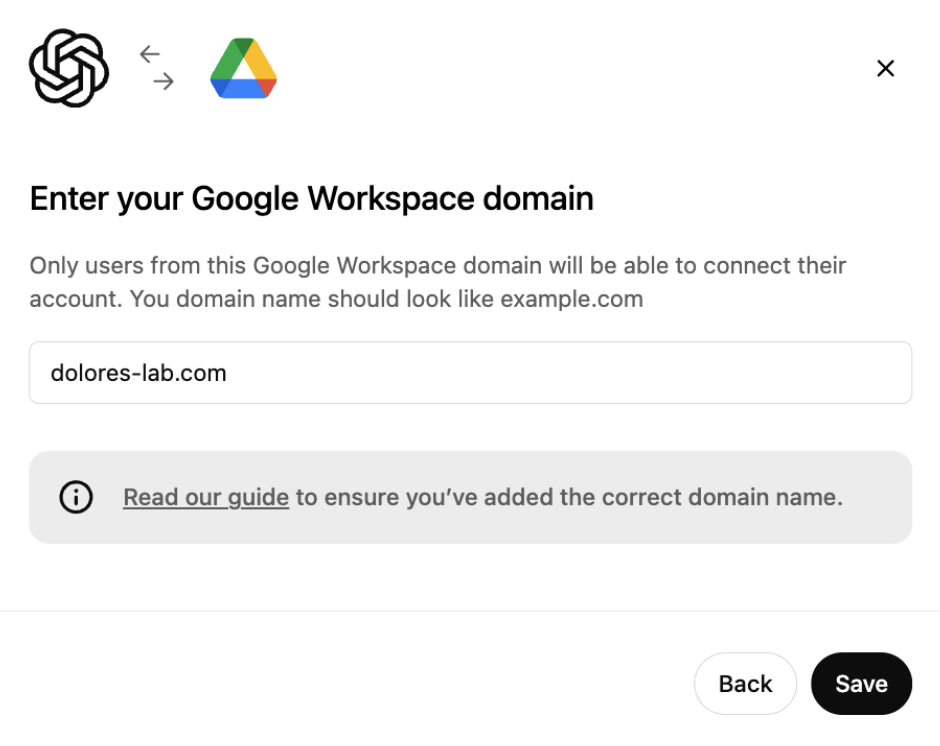
You’ll be prompted to enter the domain name, usually the one that belongs to your work email address. If not everyone at your company has the same email domain, then you’ll need to provide the primary domain — see this Google help article for details.
Please note that this must be a Google Workspace domain: gmail.com and googlemail.com are not supported.

New ChatGPT users will not automatically have access to Google Drive synced connectors.
If you add new users to your ChatGPT workspace and want them to use this connection, you will need to also add them as a user of this connection.
Click Next to review the creation of this connection:
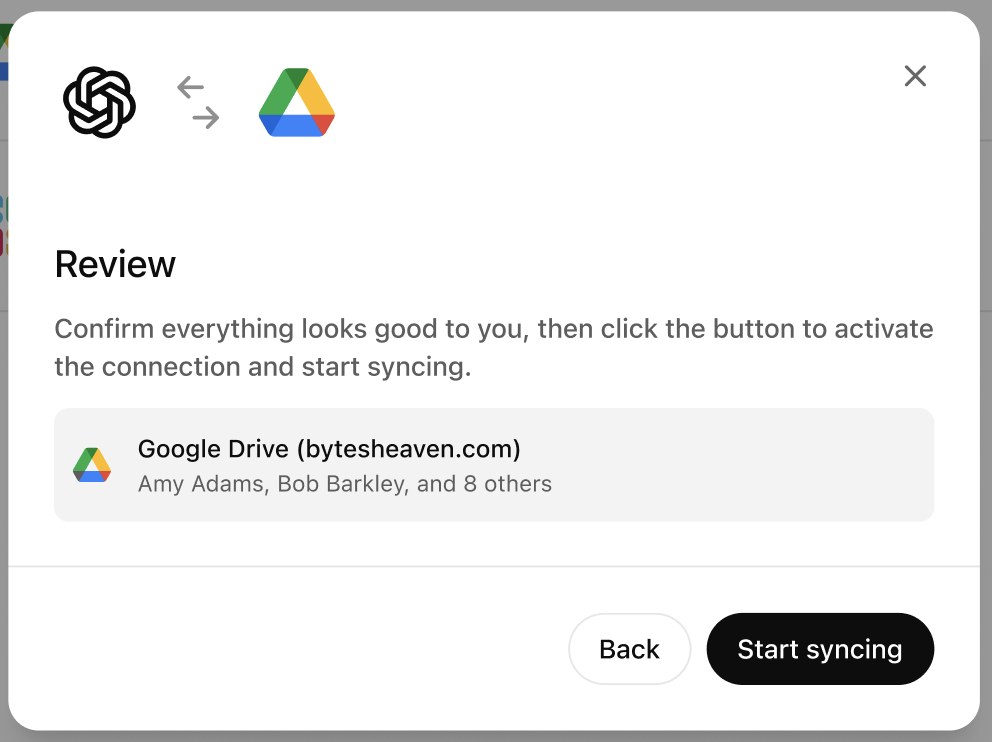
Once you select Start syncing, the connection will appear in the admin console:

At this point in time, files in your company’s Google Drive have not yet started syncing to ChatGPT. This will begin as soon as each user goes through the self-service flow.
If using Oauth(self-service set up); each individual workspace member is required to follow the steps below to use the GDrive connector.
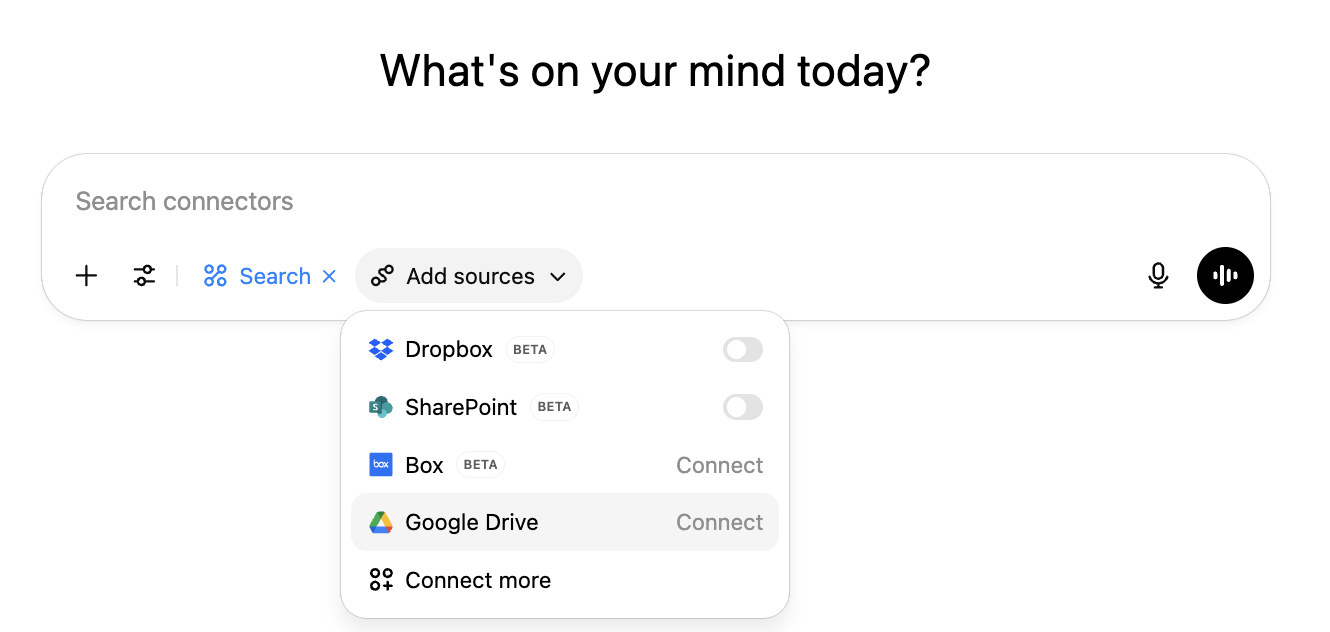
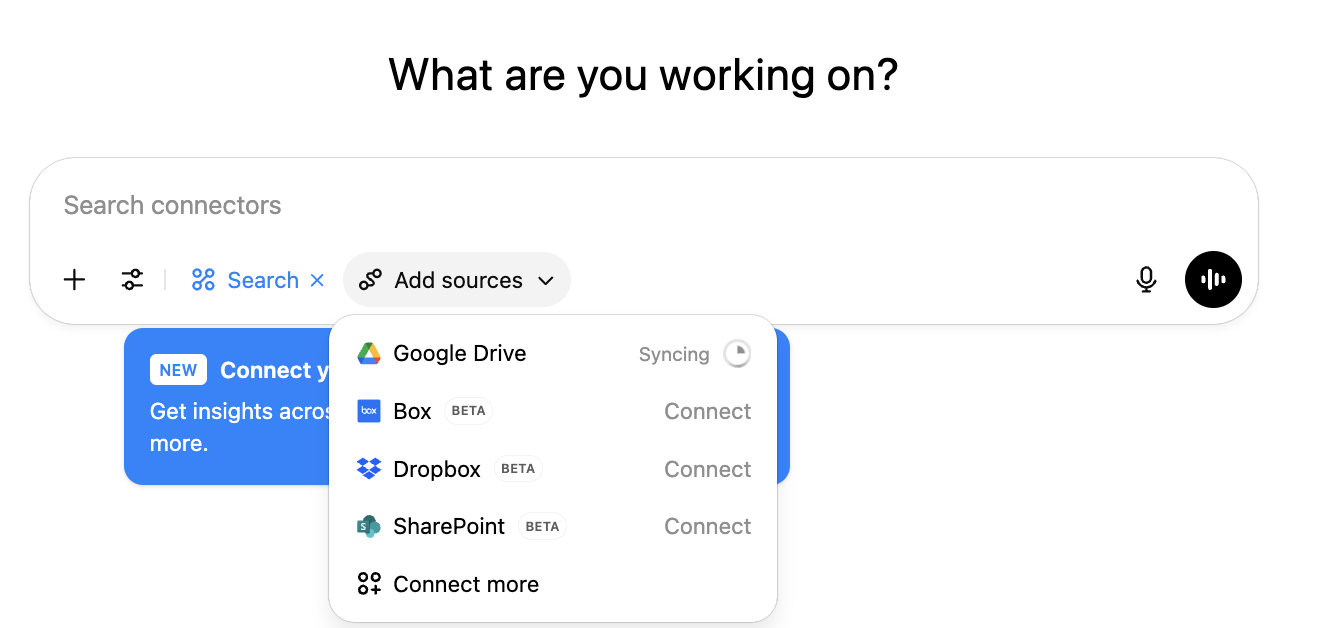
Each workspace member can now enable a connection to Google Drive. On ChatGPT, Google Drive is now available for connecting (you can do this in the composer, the settings page, or via a banner on the home screen):
Users can also enable this connection in the ChatGPT settings, which can be found by clicking on your profile icon > Settings > Apps, then finding the Google drive app in the app directory.
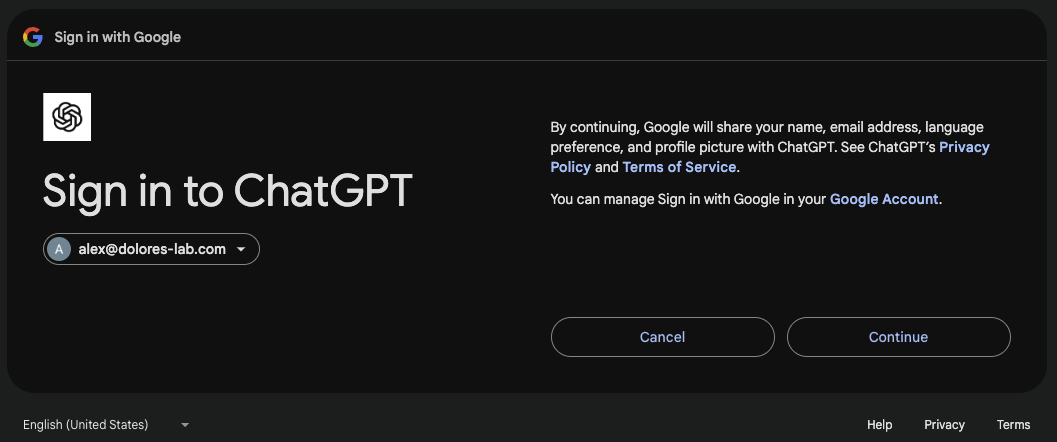
Each user will need to click Connect. A modal will appear explaining that their files will be synced and if they choose Continue then they’ll be directed to Google to complete the flow.
If employees are signed into more than one Google account, they should choose the one they use for work. To prevent accidentally connecting the wrong account, we will ensure the chosen account’s domain matches what you provided when creating the connection.
Upon choosing the account to connect, Google will ask the user to Continue.
When Google asks what ChatGPT can access, select 'See and download all your Google Drive files' before continuing. If this permission is not granted, sync setup will fail due to missing OAuth permissions, and you'll need to disconnect and reconnect Google Drive from ChatGPT, granting all requested permissions.
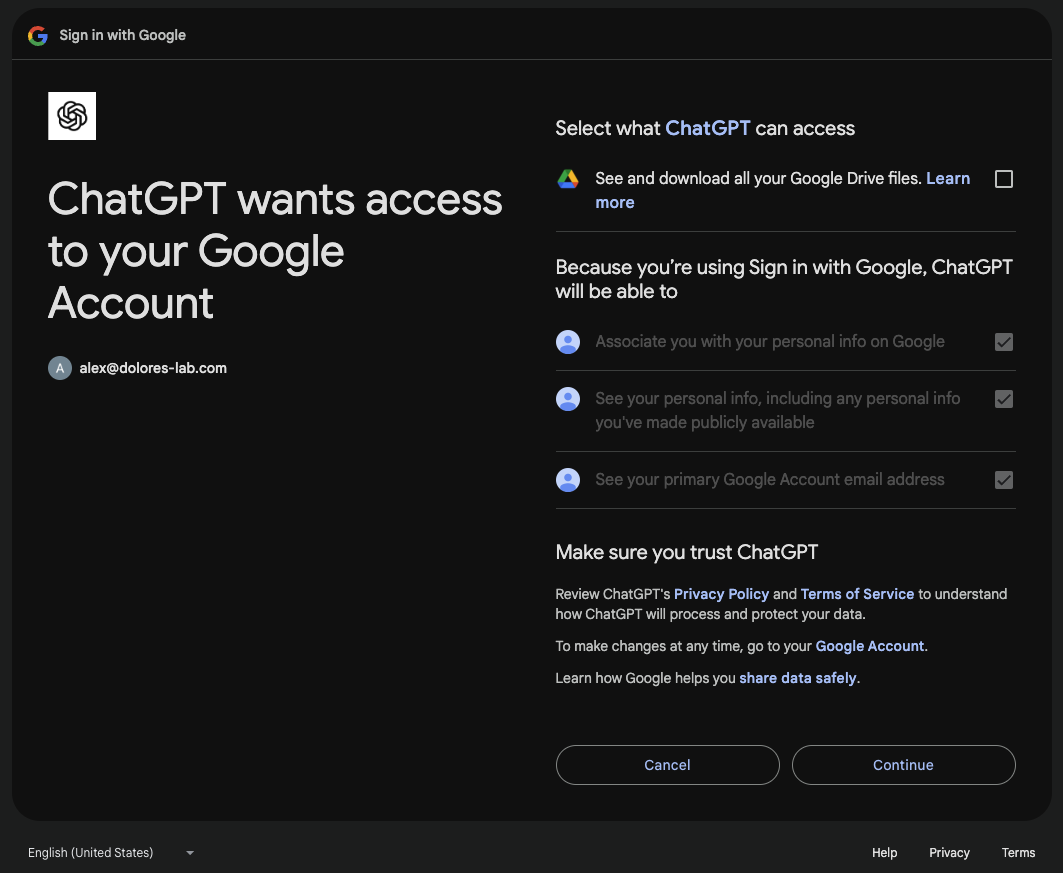
Ensure the first check box is checked before clicking Continue:

Syncing in progress
Once you complete the connection flow, Google Drive will begin syncing.
As your Drive is indexed, you'll see real-time progress here. A partial sync allows you to search recently synced files while the rest continues syncing. Depending on the number of files, full indexing may take anywhere from a few hours to a few days (especially for larger organizations).

When the progress marker disappears, syncing is complete. From that point forward, ChatGPT will continuously sync any new changes or additions to your Google Drive.