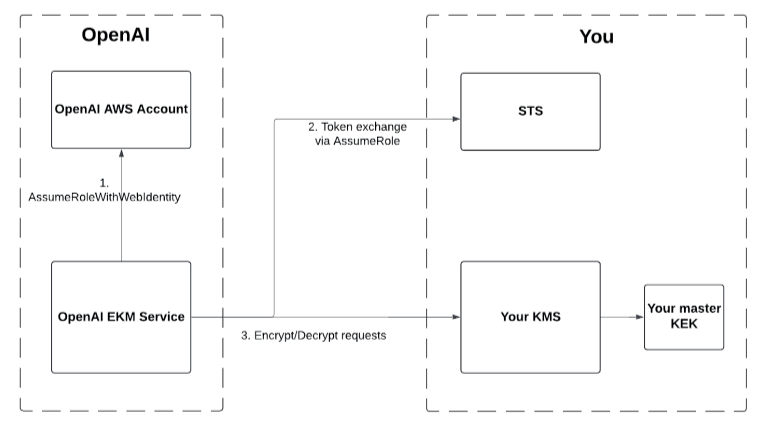
Overview
Enterprise Key Management (EKM) allows OpenAI to encrypt data using a master key that you control. This document shows how to set up your AWS account to give OpenAI limited permissions on your KMS.
Steps
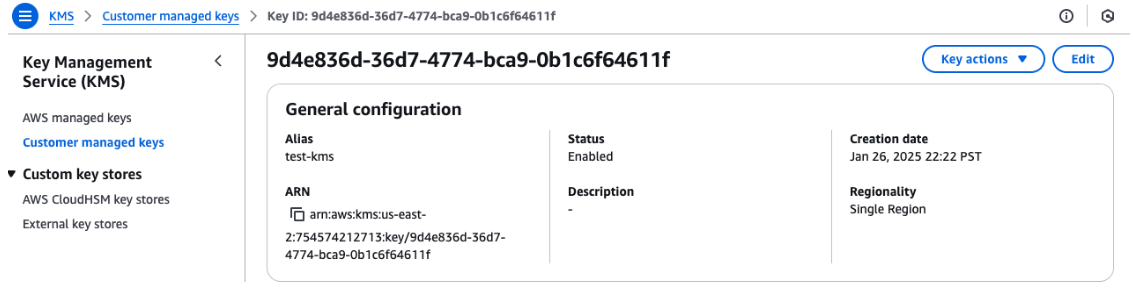
1. Create a new KMS key
Go to KMS -> Customer managed keys, then click Create Key.
Select a symmetric encryption algorithm.
After your key is created, note its ARN. Supported formats include
arn:aws:kms:<region>:<account_number>:key/<uuid>,...:key/mrk-*, or...:alias/<alias_name>.
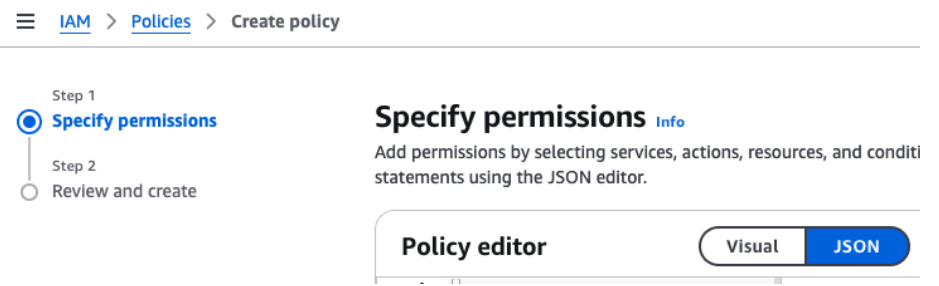
2. Create a custom policy for limited access to the KMS key
Go to IAM -> Policies, then click Create Policy.
In the Specify permissions step, select JSON and enter the following to give the policy KMS access actions. Make sure you replace YOUR_KMS_ARN with the ARN of the Key you created.
{
    "Version": "2012-10-17",
    "Statement": [
        {
            "Sid": "AllowEncryptDecrypt",
            "Effect": "Allow",
            "Action": [

                "kms:Decrypt",
                "kms:Encrypt"

            ],
            "Resource": <YOUR_KMS_ARN>
        }
    ]
}
3. Create an IAM Role for OpenAI to assume, and assign it to the policy with limited access to your KMS
OpenAI will call AssumeRole from an OpenAI-owned AWS account. This step lets OpenAI's AWS principal assume the limited role for accessing your KMS.
Go to IAM -> Roles, then click Create Role.
In the Select trusted entity step, select Custom trust policy.
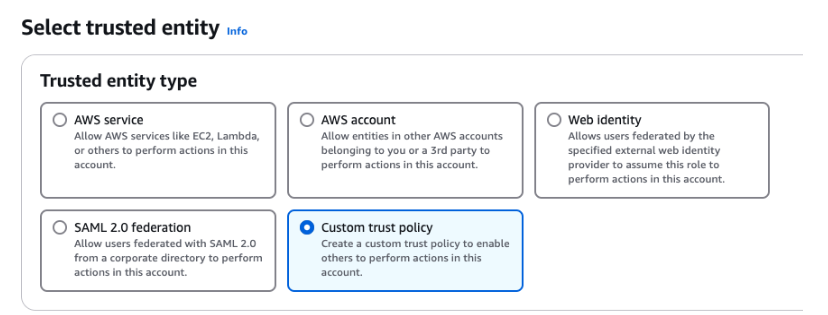
Next, enter the following in the Custom trust policy to allow access to OpenAI's AWS principal.
The principal is OpenAI's AWS principal:
arn:aws:iam::790389265272:role/EnterpriseKeyManagement.Indicate which ExternalId OpenAI should pass during the
AssumeRoleprocess.For ChatGPT or API, use the organization ID (org-xxx) associated with your workspace: https://platform.api.openai.org/settings/organization/general.
For API, you can use a specific API project ID for more granularity.
{
"Version": "2012-10-17",
"Statement": [
{
"Effect": "Allow",
"Principal": {
"AWS": "arn:aws:iam::790389265272:role/EnterpriseKeyManagement"
},
"Action": "sts:AssumeRole",
"Condition": {
"StringEquals": {
"sts:ExternalId": [
<YOUR_OPENAI_ORGANIZATION_ID>,
]
}
}
}
]
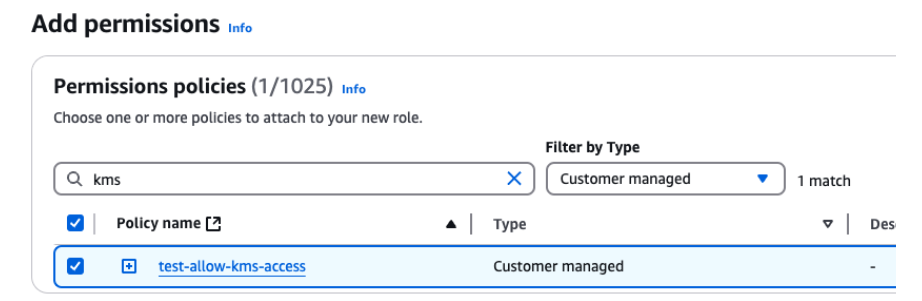
}Then, in the Add permissions step, search for the policy name of the IAM policy you created in the previous step. Click the checkbox next to the policy name, then click Next.
Finally, in the Name, review, and create section, select any role name.
4. Apply any additional restrictions in line with your own security practices
Above is the minimum required information OpenAI needs to set up EKM. You are free to apply additional key policies or restrictions in line with your own internal security practices, as long as OpenAI is able to call encrypt and decrypt operations on your KMS. When you call the key registration endpoint with OpenAI that's described below, we will validate your setup.
After completing the above steps
ChatGPT Enterprise
Please reach out to your OpenAI contact and share the following:
"role_arn": "arn:aws:iam::<YOUR_AWS_ACCOUNT_NUMBER>:role/<YOUR_ROLE>"The Role ARN that OpenAI will assume in your cloud.
"kms_arn": "arn:aws:kms:<REGION>:<YOUR_AWS_ACCOUNT_NUMBER>:key/<UUID>"The Key Management System ARN for the master key you manage.
We will enable EKM for your ChatGPT organization/workspace.
API
Register your external key with OpenAI
Follow the instructions in this API reference: External Keys in the Management API.
First, register your external key at the OpenAI organization level, which will generate an external key ID.
In this step, we will validate that your input is valid and that we can authenticate to your KMS.
This won't add EKM to your OpenAI project yet.
curl -X POST \
-H "Content-type: application/json" \
-H "Authorization: Bearer $TOKEN" \

"https://api.openai.com/v1/organization/external_keys" \
-d '{
  "type": "aws",
  "name": "AWS EKM Config",
  "role_arn": "arn:aws:iam::<YOUR_AWS_ACCOUNT_NUMBER>:role/<YOUR_ROLE>",
  "kms_arn": "arn:aws:kms:<REGION>:<YOUR_AWS_ACCOUNT_NUMBER>:key/<UUID>",
  "external_id": <your org id or project id>
}'
Then, create an OpenAI project associated with the external key. After this, EKM is activated on your project. The response body of this API call will give you the project ID (proj_xxx).
curl -X POST \
-H "Content-type: application/json" \
-H "Authorization: Bearer $TOKEN" \
"https://api.openai.com/v1/organization/projects" \
-d '{
   "name": "Some Project",

   "external_key_id": "extkey_xxxx"
}'