Overview
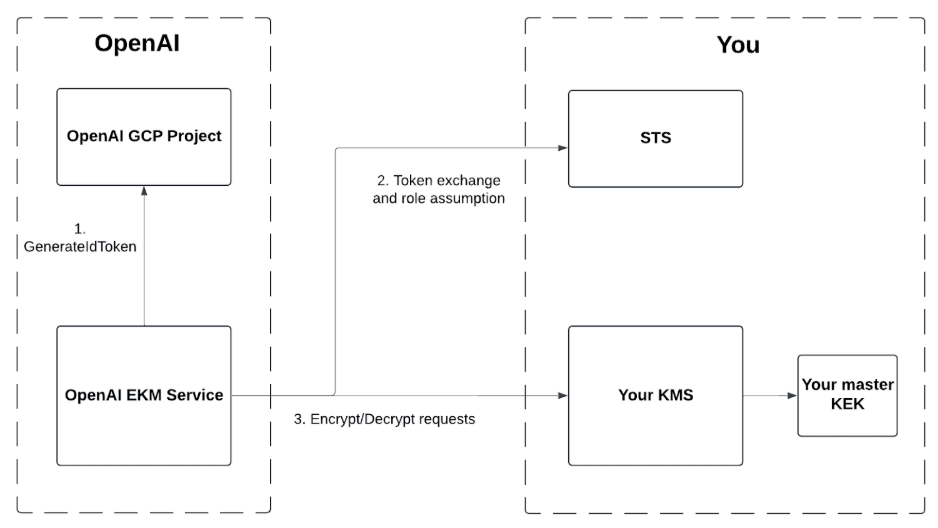
Enterprise Key Management (EKM) allows OpenAI to encrypt data using a master key that you control. This document shows how to set up your GCP account to give OpenAI limited permissions on your KMS.
Steps
1. Create a federated identity for OpenAI
OpenAI will be issuing an identity token from an OpenAI-owned GCP account that looks something like this.
The azp and sub are OpenAI's service account ID in GCP
The aud is your OpenAI organization ID. You can also pick another audience such as your OpenAI project ID - see the instructions below
{
  "aud": "org-xxxx",
  "azp": "105900137572174660365",
  "exp": 1747876928,
  "iat": 1747873328,
  "iss": "https://accounts.google.com",
  "sub": "105900137572174660365"
}
This step recognizes the claims made by that identity token and enables your GCP STS to issue an access token when that identity token is supplied.
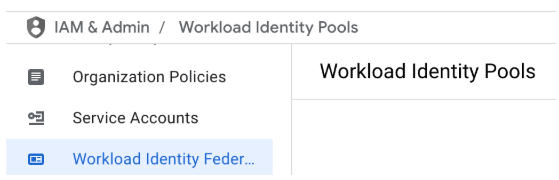
Go to IAM & Admin -> Workload Identity Federation and click on Create Pool
In the step Create an identity pool, enter anything for the pool name.
In the step Add a provider to pool:
In Select a provider, select OpenID Connect (OIDC)
Enter anything for the provider name.
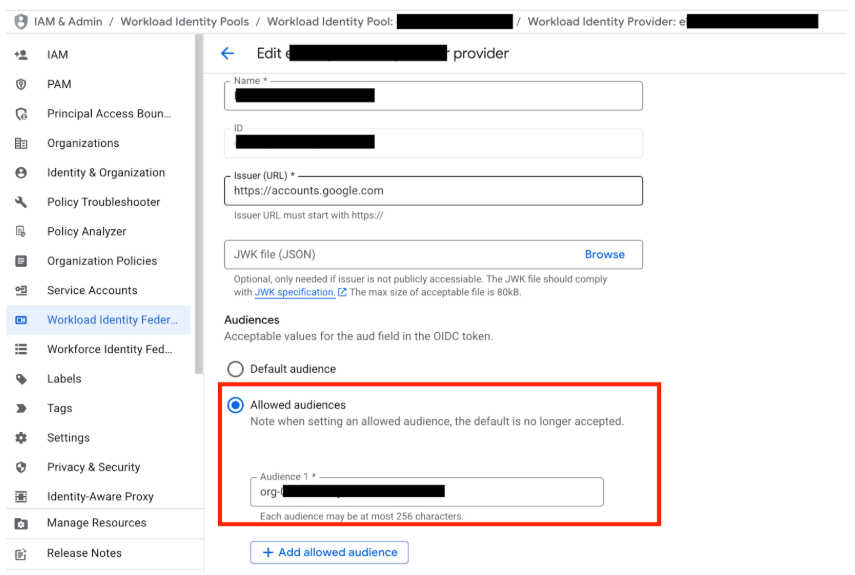
In the Issuer (URL) section, enter https://accounts.google.com
In the Audiences section
Select Allowed audiences
Enter the audience that OpenAI should indicate when we pass you a token.
For ChatGPT or API: You can put the OpenAI API organization ID (org-xxx)
For API: you can put a specific API project id for more granularity.
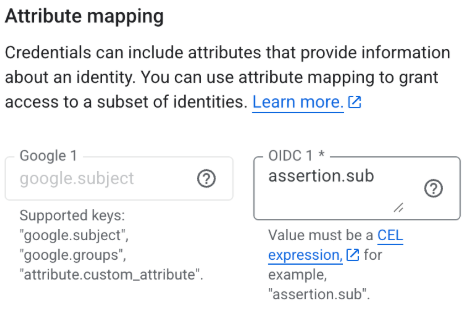
In the Attribute mapping section
for google.subject enter assertion.sub
In the Attribute conditions section
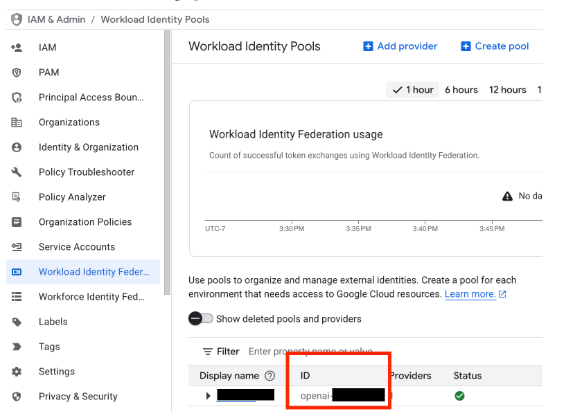
Now you should see your workload identity pool and workload identity provider listed in the https://console.cloud.google.com/iam-admin/workload-identity-pools page
Workload identity pool id
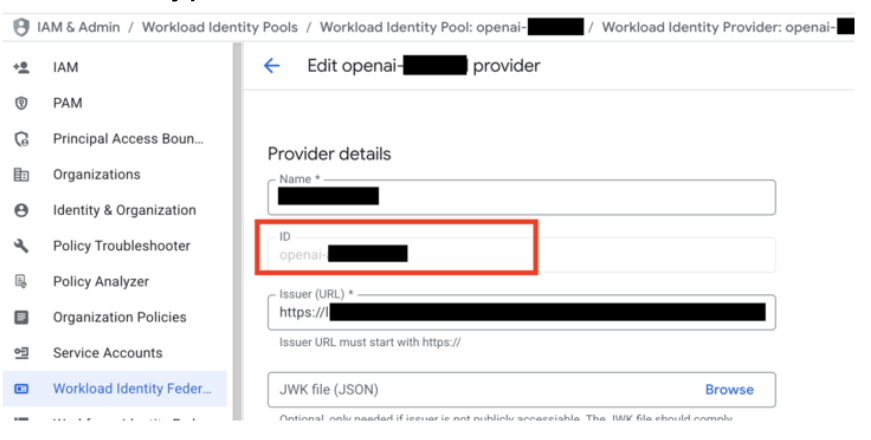
Workload identity provider ID
2. Ensure KMS is enabled
Go to https://console.developers.google.com/apis/api/cloudkms.googleapis.com/overview to enable KMS. You are not required to create your KMS in the same GCP project where you recognized OpenAI's federated identity; however, if the projects differ, the KMS product must at least be enabled in both projects.
3. Create a new KMS Key
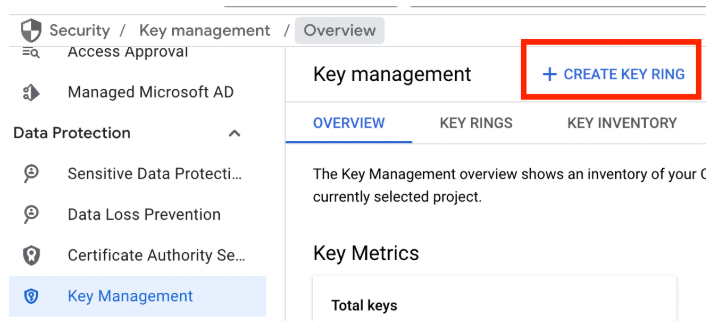
Go to Security -> Data Protection > Key Management
Under the Overview tab click on Create key ring
Choose any name for your key ring
For Purpose and algorithm, select Symmetric encrypt/decrypt
Once you’ve created a key ring, it should be listed in the Key Rings tab. Click on the key ring.
In the key ring details, click on Create Key
Choose any name for your key
4. Create a limited role for encrypt/decrypt operations on the KMS
Go to IAM & Admin -> Roles -> Create role
Enter anything for the role title and ID
Click Add Permissions, then add the following
cloudkms.cryptoKeyVersions.useToDecrypt
cloudkms.cryptoKeyVersions.useToEncrypt
5. Assign OpenAI’s federated identity to the limited KMS role for encrypt/decrypt operations
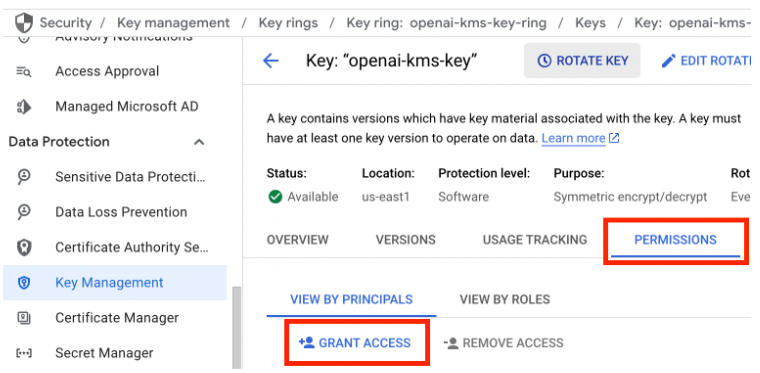
Go to Security -> Data Protection > Key Management
Click on your key ring name, then click on your key name to get to your key details page.
Click on the Permissions tab, then click the button Grant Access
Assign the OpenAI federated identity to the custom role you previously created
For the Add principals section, enter principal://iam.googleapis.com/projects/<YOUR_GCP_PROJECT_NUMBER>/locations/global/workloadIdentityPools/<YOUR_GCP_WORKLOAD_IDENTITY_POOL>/subject/105900137572174660365
In the Assign roles section, select the custom role you created in the previous step for limited EKM permissions
6. Apply any additional restrictions in line with your own security practices
Above is the minimum required information OpenAI needs to set up EKM. You are free to apply additional key policies or restrictions in line with your own internal security practices, as long as OpenAI is able to call encrypt and decrypt operations on your KMS. When you call the key registration endpoint with OpenAI that's described below, we will validate your setup.
After completing the above steps
ChatGPT Enterprise
Please reach out to your OpenAI contact and share the following:
"workload_identity_project_number": "123456789012",
"workload_identity_pool_id": "openai-azure",
"workload_identity_provider_id": "openai-ekm-service-role",
"kms_project_id": "adjective-noun-12345",
"kms_key_name": "openai-kms-key",
"kms_key_ring_name": "openai-kms-key-ring",
"kms_key_location": "us-east1"
The region where your Key Management System master key is located
We will enable EKM for your ChatGPT organization/workspace.
API
Register your external key with OpenAI
Follow the instructions in this API reference External Keys in the Management API
First, register your external key at the OpenAI organization level, which will generate an external key id.
In this step, we will validate your setup on GCP by checking that we can auth to your KMS.
This won't add EKM to your OpenAI project yet.
curl -X POST \
-H "Content-type: application/json" \
-H "Authorization: Bearer $TOKEN" \
"https://api.openai.com/v1/organization/external_keys" \
-d '{
   "type": "gcp",
   "name": "GCP EKM Config",
   "workload_identity_project_number": "123456789012",
   "workload_identity_pool_id": "openai-azure",
   "workload_identity_provider_id": "openai-ekm-service-role",
   "audience": <your org id or project id>,
   "kms_project_id": "adjective-noun-12345",
   "kms_key_name": "openai-kms-key",
   "kms_key_ring_name": "openai-kms-key-ring",
   "kms_key_location": "us-east1"
}'
Then, create an OpenAI project associated with the external key. After this, EKM is activated on your project.
curl -X POST \
-H "Content-type: application/json" \
-H "Authorization: Bearer $TOKEN" \
"https://api.openai.com/v1/organization/projects" \
-d '{
   "name": "Some Project",

   "external_key_id": "extkey_xxxx"

}'