
Overview
Projects organize work within an API organization. Use them to manage access, configure model and rate limits, create service accounts, and track usage, billing, and spend limits for a defined set of resources, such as models, capabilities, threads, assistants, fine-tuning, and storage.
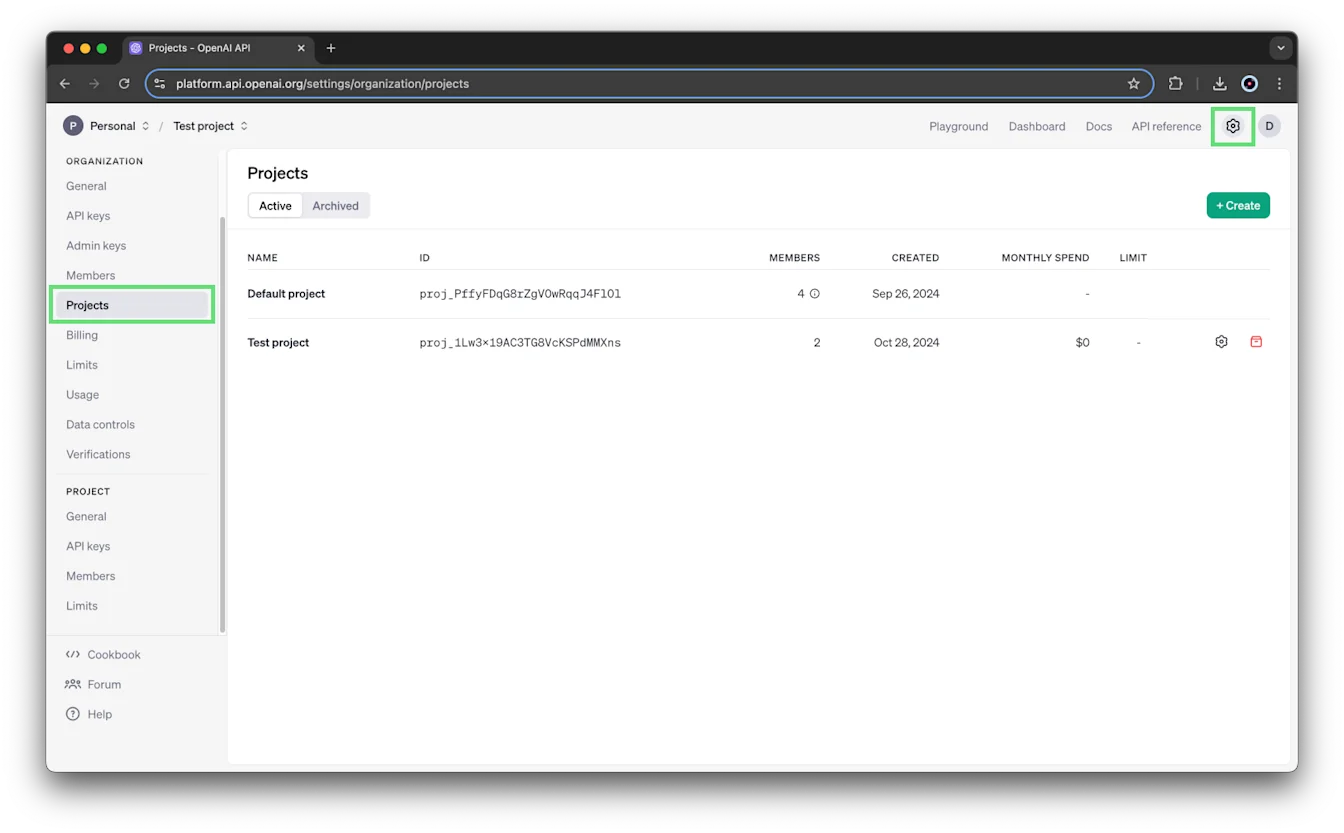
Organization owners can view all active and archived projects on the Projects page.
Before you begin
You need the organization owner role to create a project. Organizations can create up to 2,000 projects by default.
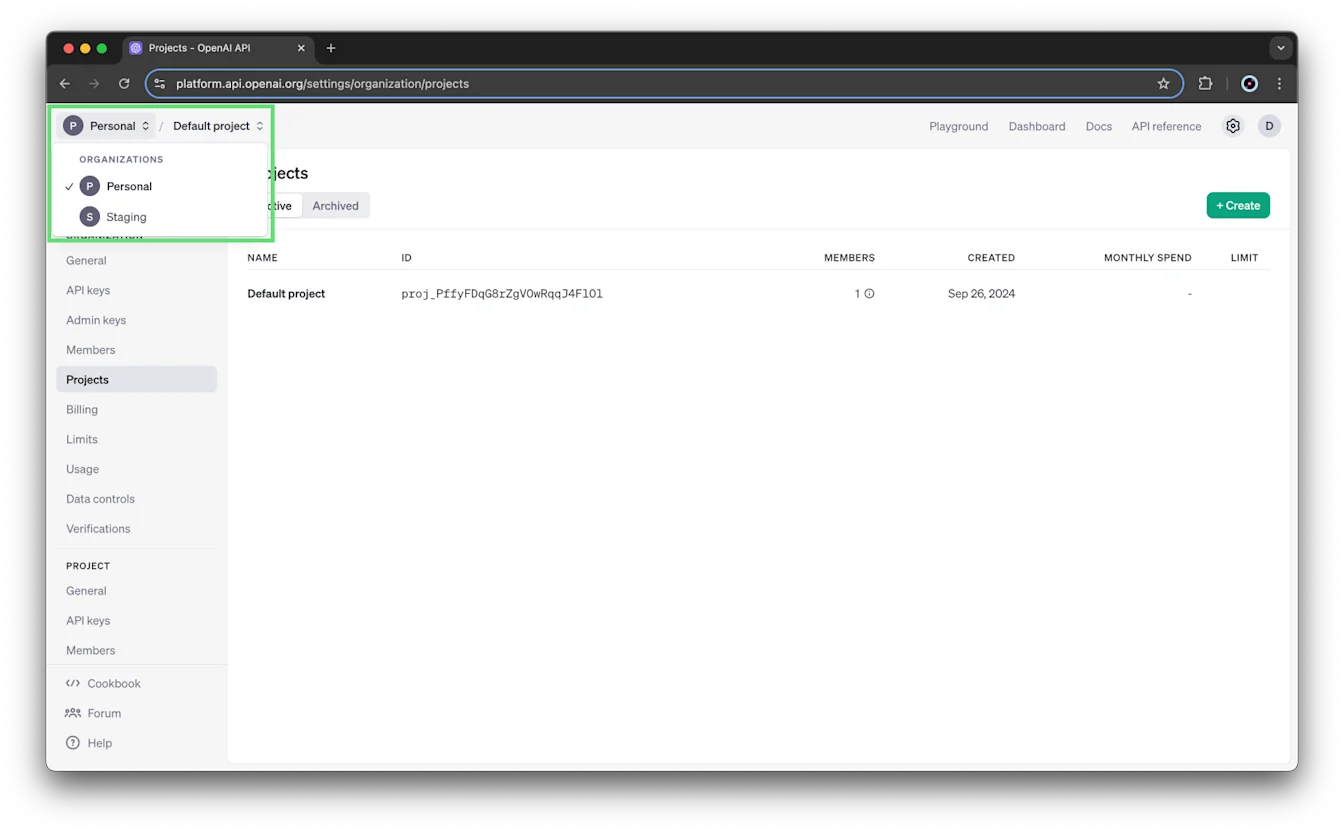
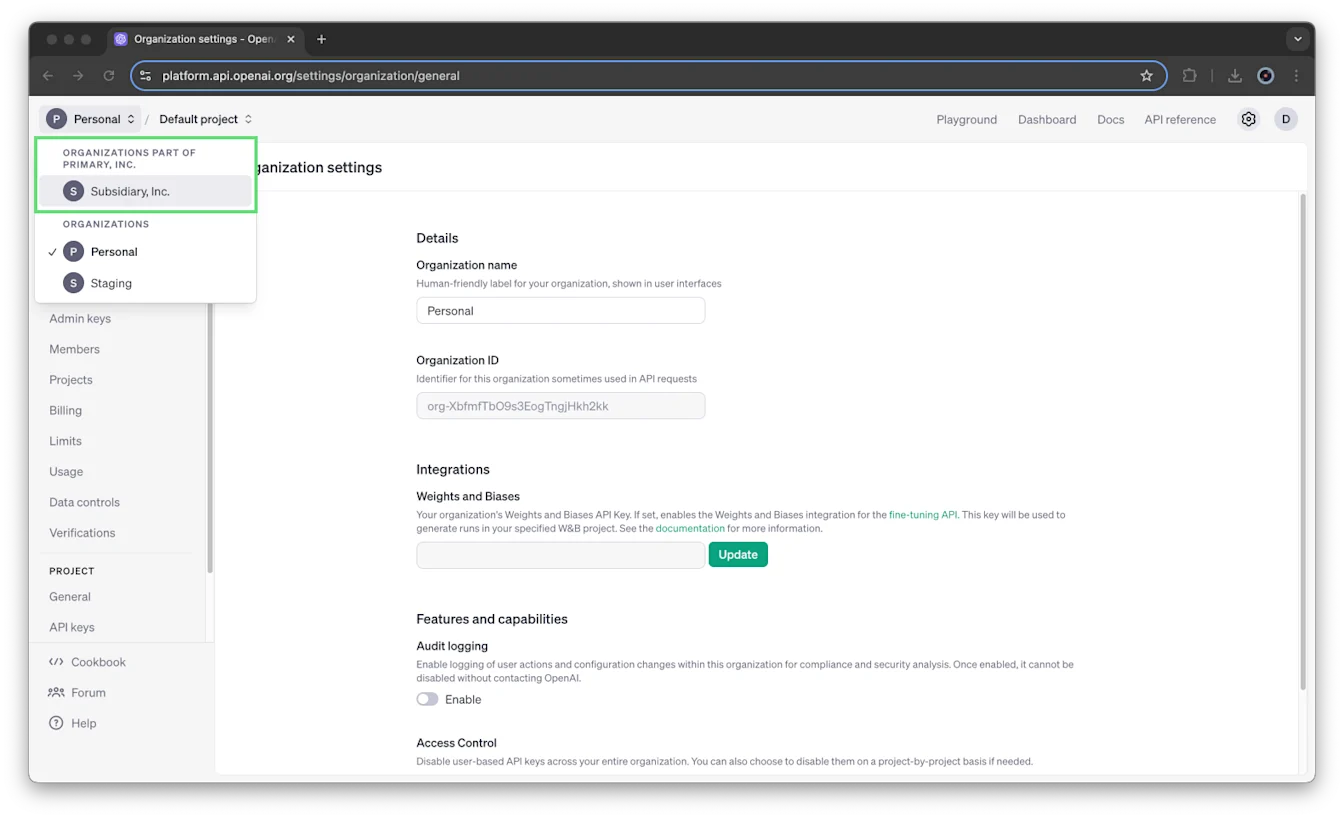
If your organization uses consolidated billing, sub-organizations appear separately in the organization selector. You can’t create projects within a sub-organization.
To switch organizations, open the organization selector and select the organization you want to use.
Default project
Every organization includes a Default project, which can’t be deleted. It inherits the organization’s full configuration. You can configure its rate limits, virtual model permissions, and spend limits.
You can’t add members or service accounts directly to the Default project. You can include Default-project access when inviting someone to the organization, using the organization-invitation steps in this article.
Create a project
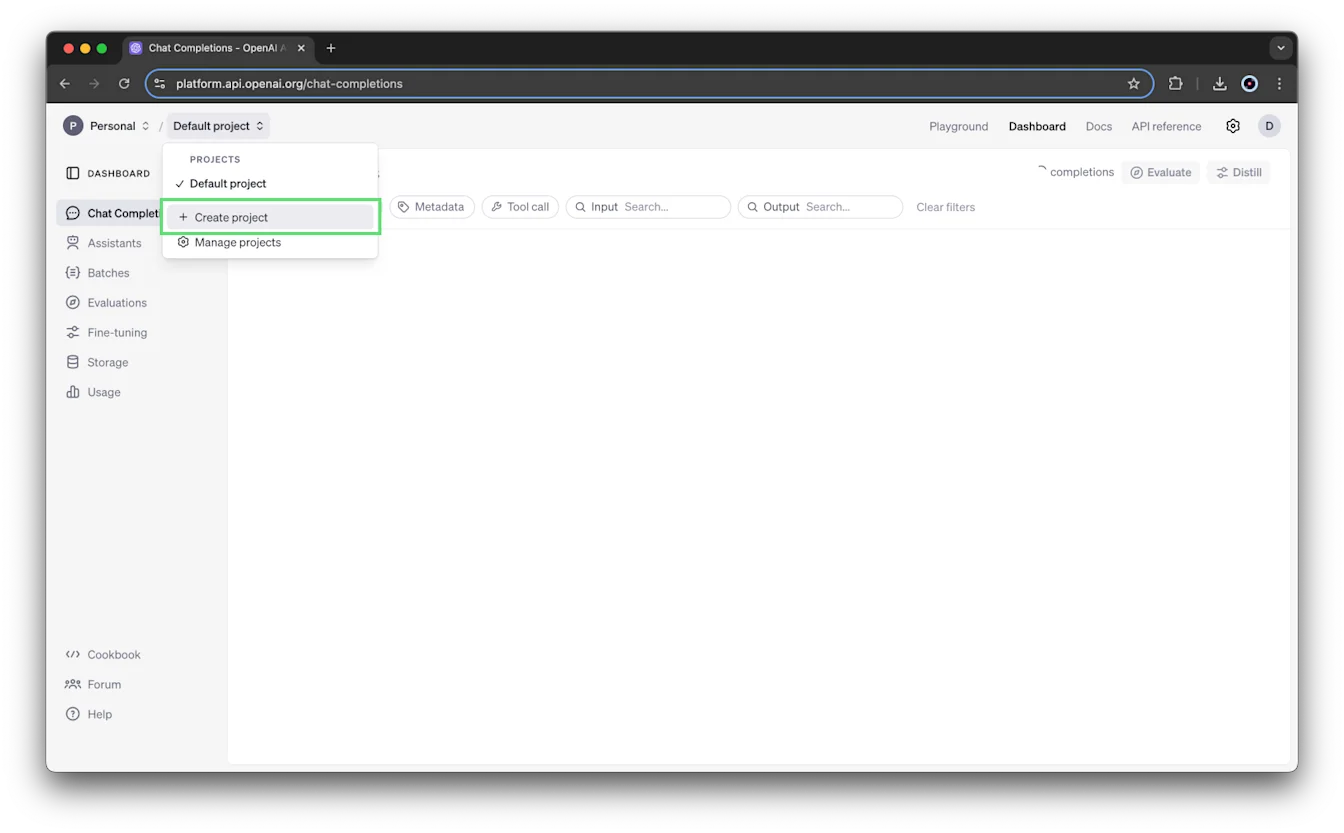
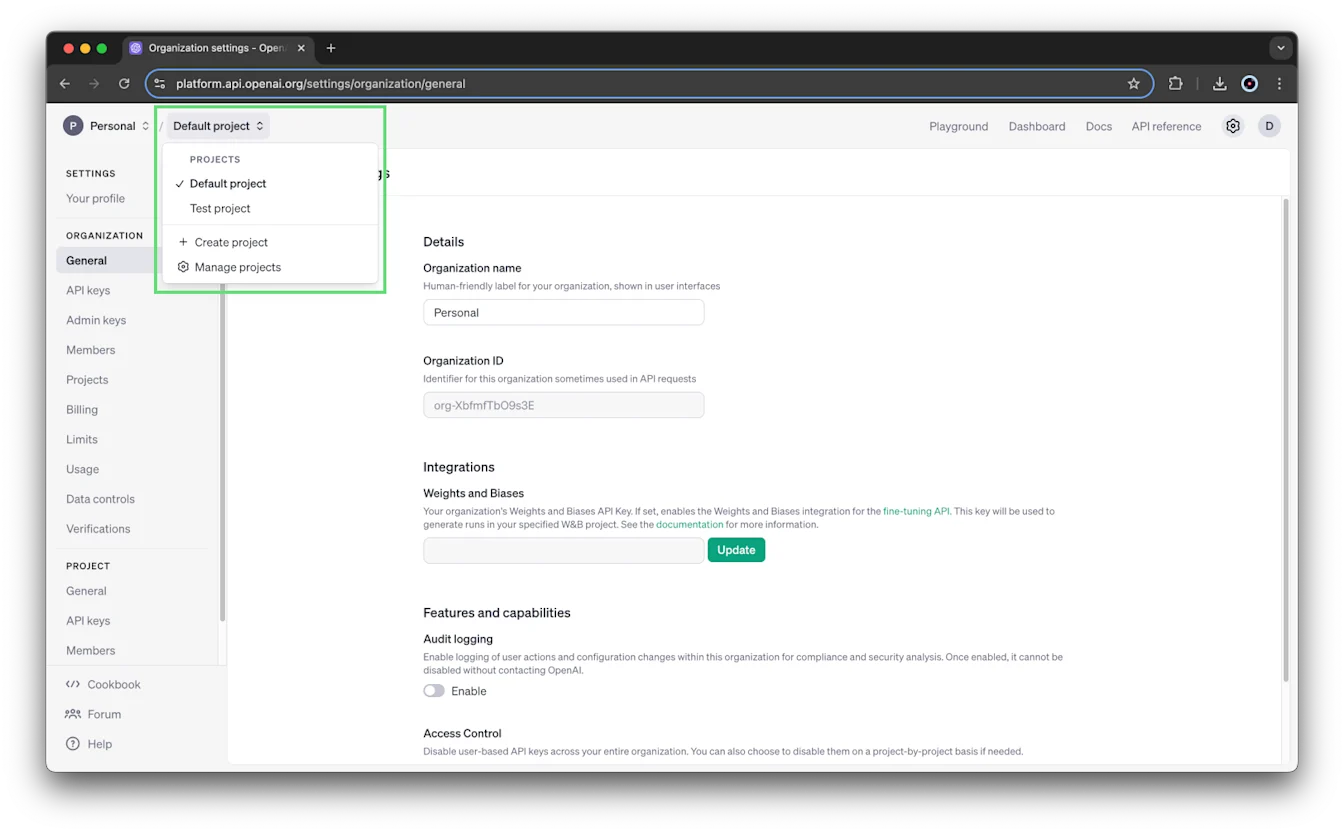
Open the project selector and select Create project.
Enter a name, description, and website for your project.
Select Create.
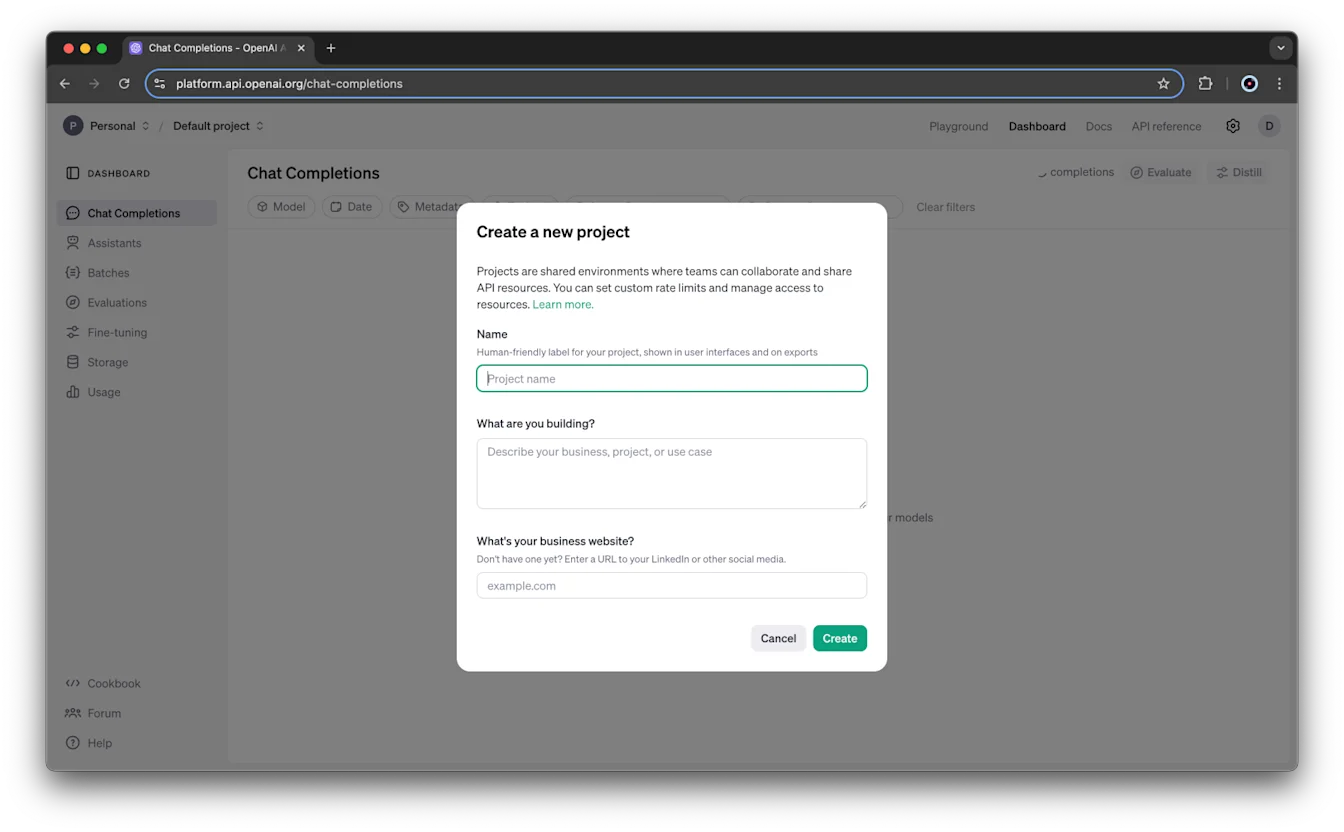
Organization owners are automatically added as owners to new projects.
Understand roles and access
The table summarizes the organization owner and reader roles and the project owner and member roles used in these steps. Project members have permissions similar to organization readers.
| Role | Scope | Permissions |
|---|---|---|
| Owner | Organization | Create and view all projects, users, and API keys. Monitor projects on the Projects page. Set organization and project spend limits. Grant access to other users’ usage information. Archive projects. |
| Reader | Organization | Be added to projects, perform inference, use resources, and create keys in those projects. Can’t create projects or manage users. |
| Owner | Project | All member permissions, plus add users, manage project members and settings, rename the project, set its spend limits, and archive it. |
| Member | Project | Perform inference, use resources, create project-level keys, and make API requests that read or modify data. |
For organization role details, see: organization roles. For additional roles, custom roles, and complete permissions, see the API roles and permissions guide.
Project visibility
With these standard roles, users who aren’t organization owners can see only the projects they belong to. Organization owners can see all projects, members, and project-level API keys, and can access the Projects page.
Project members can see the other members of their project and each member’s role. Only project members and organization owners can see the fine-tuned models, assistant threads, and files created or added within that project.
You can belong to as many projects as you need. A personal API key created within a project is scoped to that project and its resources.
Resource boundaries
Files, assistants, storage, and threads are scoped to their project. Non-admin members outside that project can’t access its resources, and resources can’t be moved between projects.
Fine-tuned models in the Default project are an exception: they can be accessed from other projects.
Manage project members
Invite someone to your organization
Someone must belong to your organization before you can add them to a project.
When you invite someone to the organization, you can include access to the Default project by selecting that option in the invitation form. Leave it unselected if you don’t want to grant Default-project access. New organization members aren’t automatically added to the Default project.
You don’t need to create another project before inviting someone. You can also add someone to a project after they accept the organization invitation.
Invitations sent through the Admin API follow the rules for the /organization/invites endpoint.
Add an organization member to a project
Organization and project owners can add members:
Go to organization settings.
Select the project, then open Members.
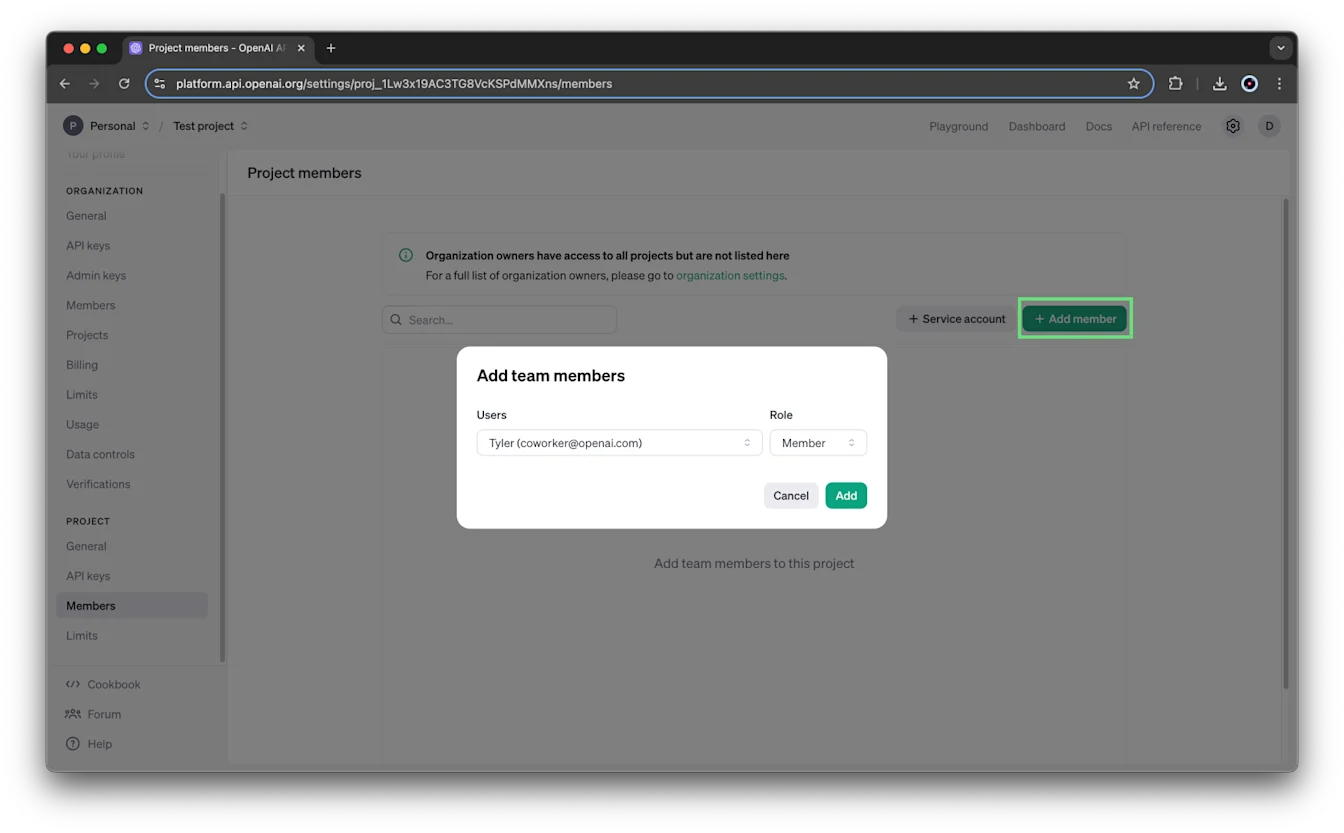
Select + Add member.
Select the user and assign the Member or Owner role.
The user list shows organization users with the Reader role. It doesn’t include service accounts.
If an invitation fails in the UI or Admin API, confirm that the target project exists and isn’t archived before you resend the invitation.
Change a role or remove a member
Organization and project owners can change a user’s project role or remove a user from that project.
Go to organization settings.
Select the project, then open Members.
Set the user’s role to Member or Owner, or select Remove to remove them.
Create and manage service accounts
A service account provides system access rather than representing an individual user. Service accounts are scoped to projects.
Creating service accounts requires service-account management permissions. Organization and project owners have these permissions.
Create a service account
Choose the project in the project selector.
Go to organization settings and select the project.
Open Members and select + Service account.
Enter a unique service account ID using letters, numbers, and hyphens.
Select Create.
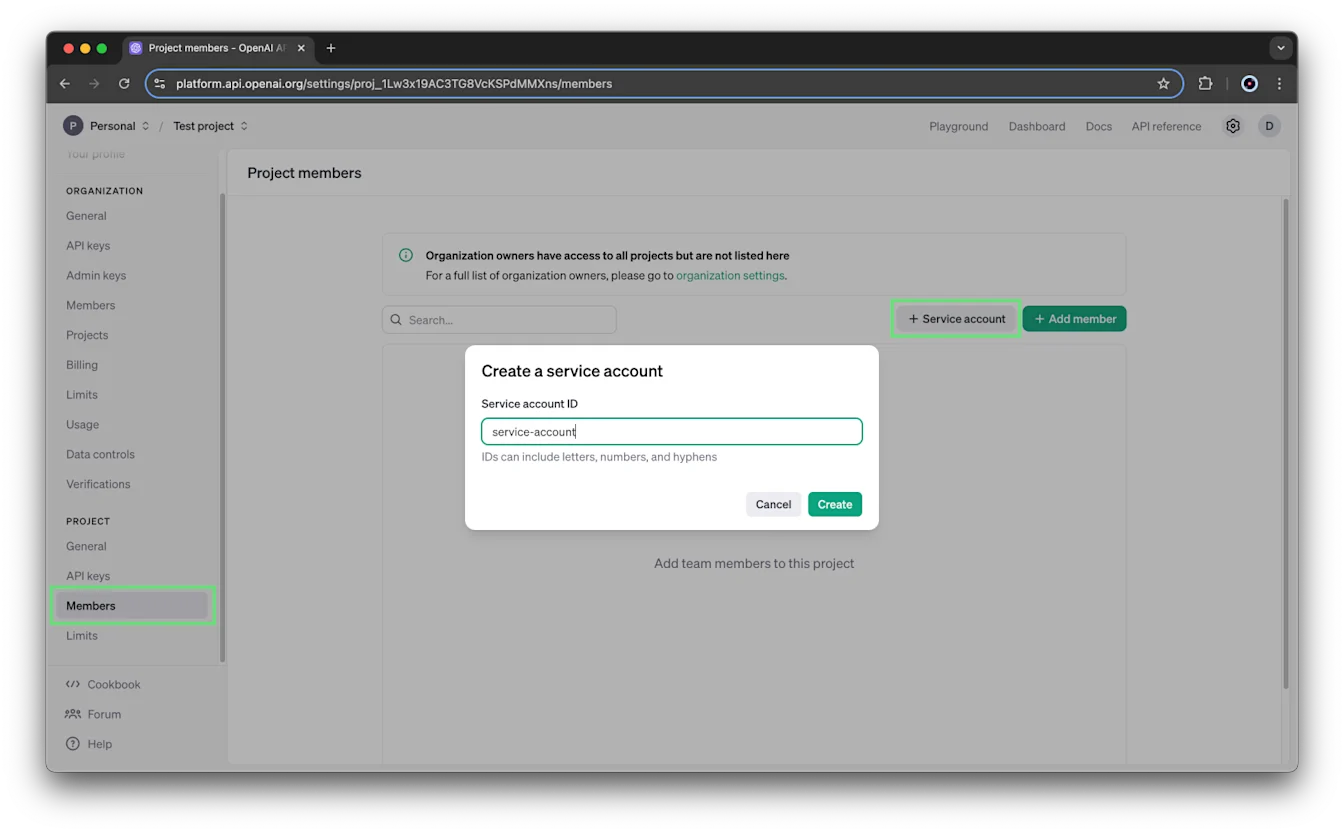
The same ID format applies whether you create the service account from organization-level or project-level settings.
A service account created for a project is unique to that project and can’t be used outside it.
Save the secret key
Creating the service account immediately creates an API key and displays its secret key. Save the secret key securely. You can’t view it again through your OpenAI account. If you lose it, generate a new key.
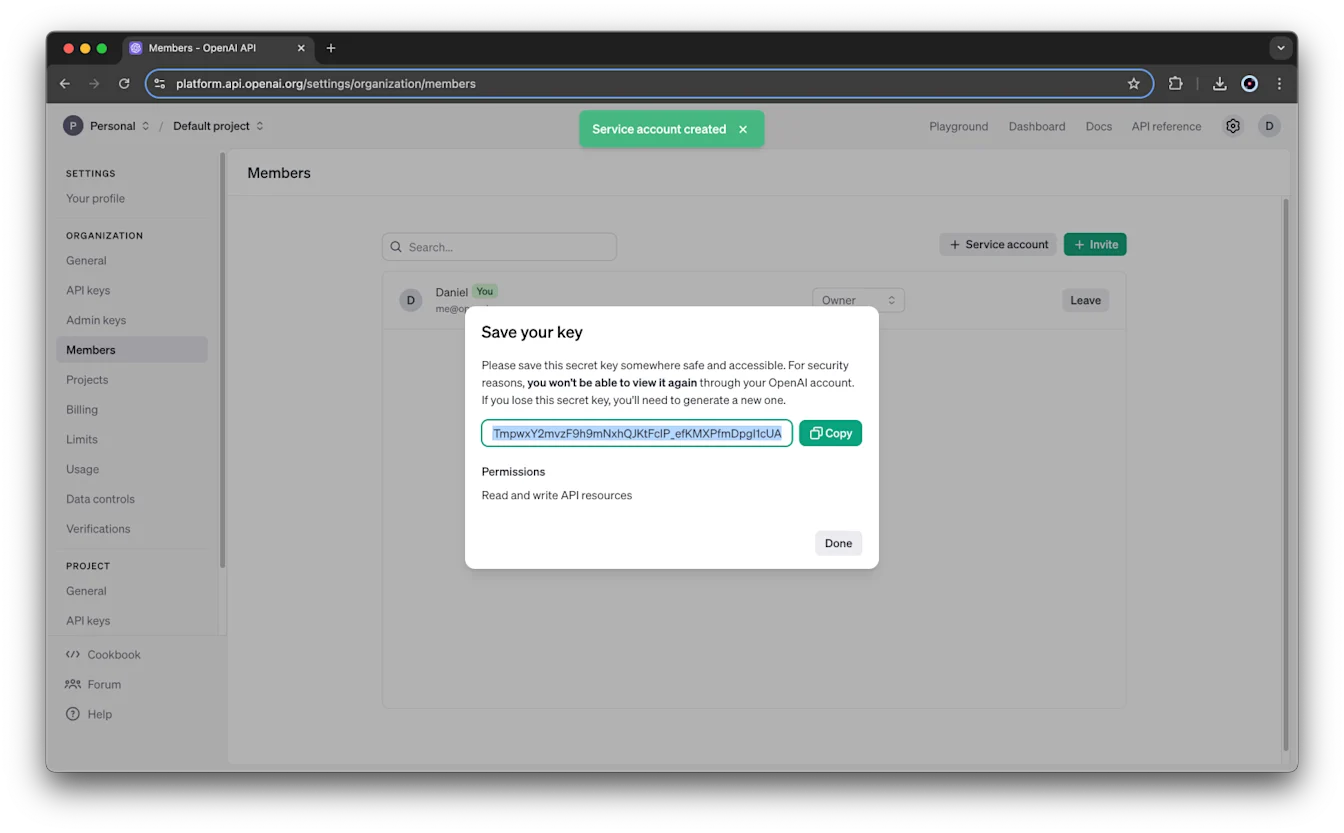
By default, the service account key can read and write all API resources in its project. You can change those permissions afterward in the project’s API Keys settings.
Update or remove a service account
Service accounts appear alongside users in the project’s Members settings. Manage their project access using the same role-change and removal steps as other project members.
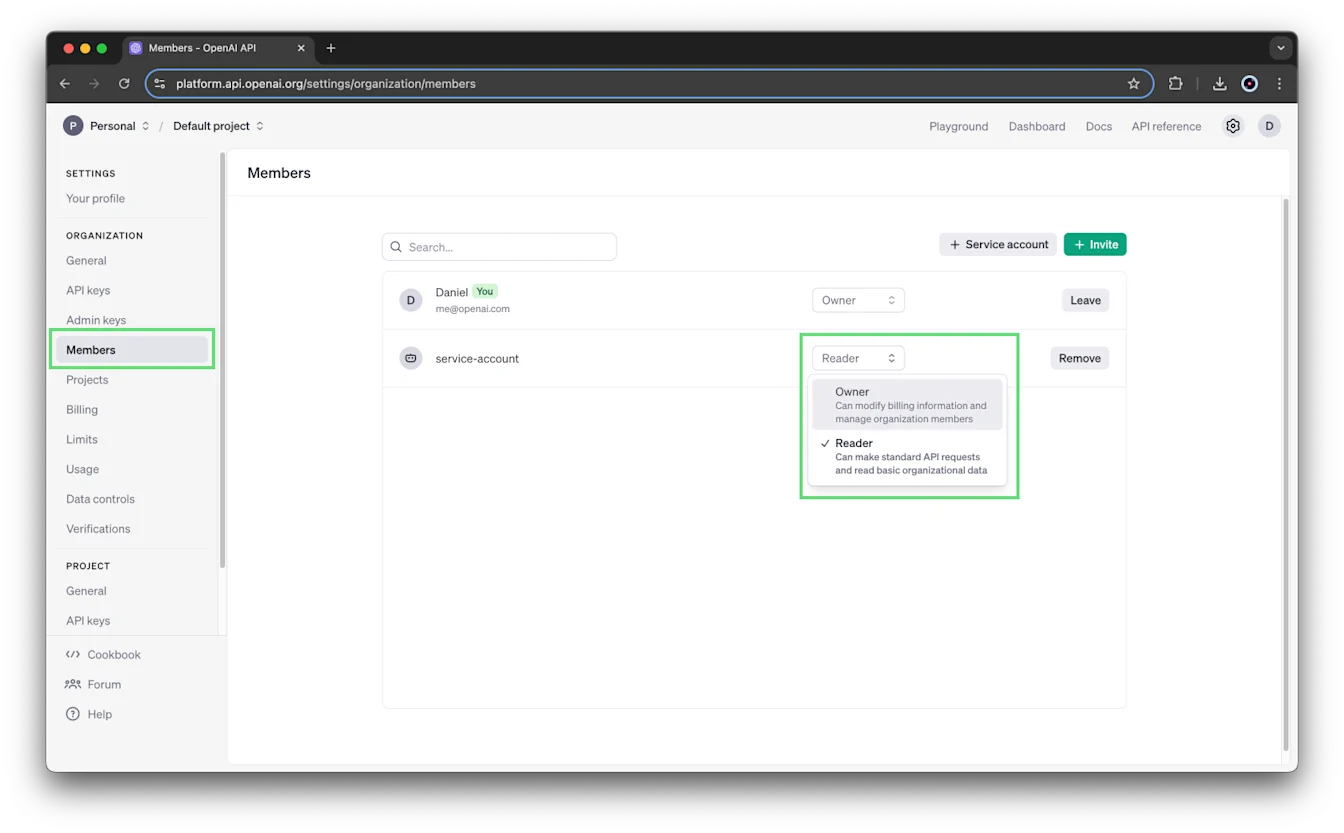
All service accounts also appear alongside users on the organization’s Members page, including accounts created from organization-level and project-level settings.
From the organization’s Members menu, you can change a service account’s role or select Remove.
Create and manage API keys
Each project has its own API keys:
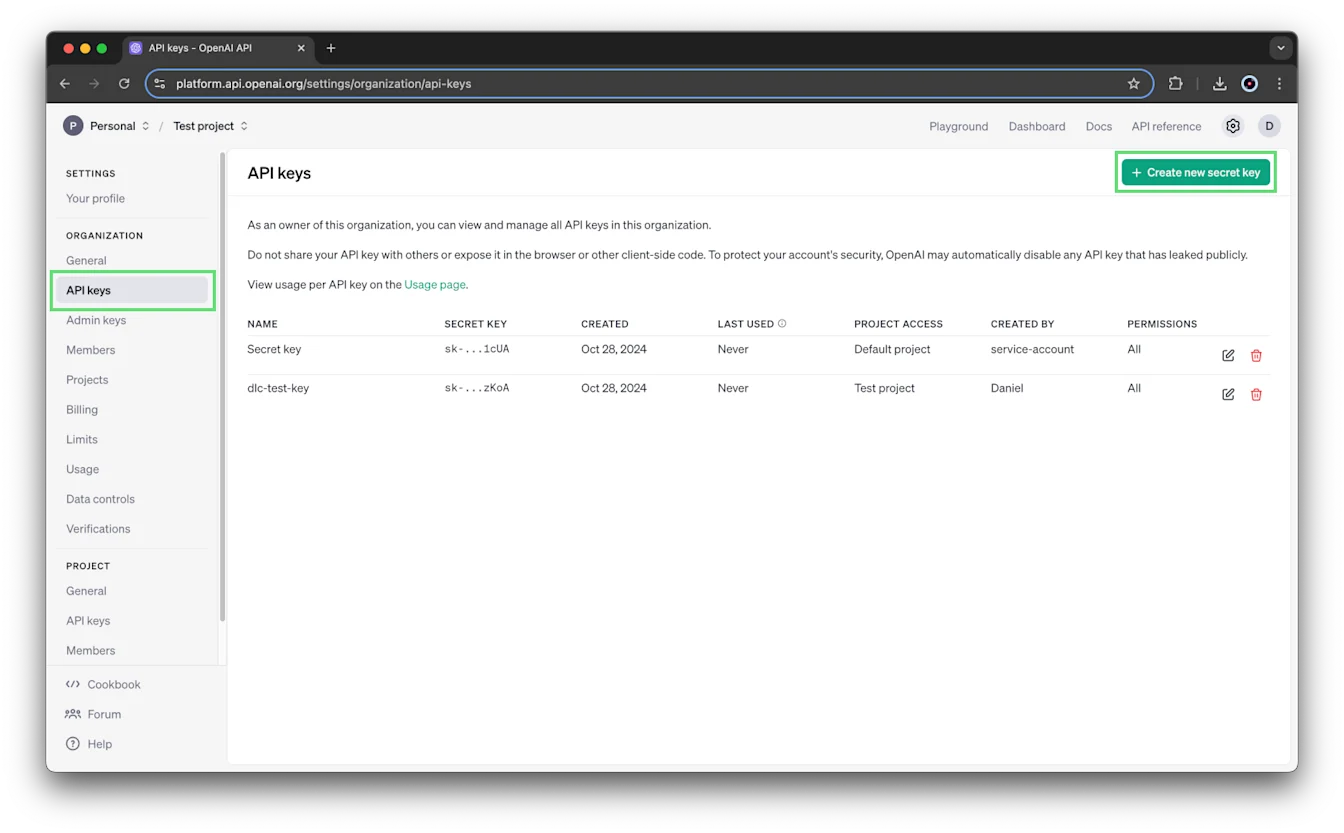
Go to organization settings.
Select the project, then open API Keys.
Select + Create new secret key to create a key, or select the edit icon next to an existing key to change its permissions.
Choose key permissions
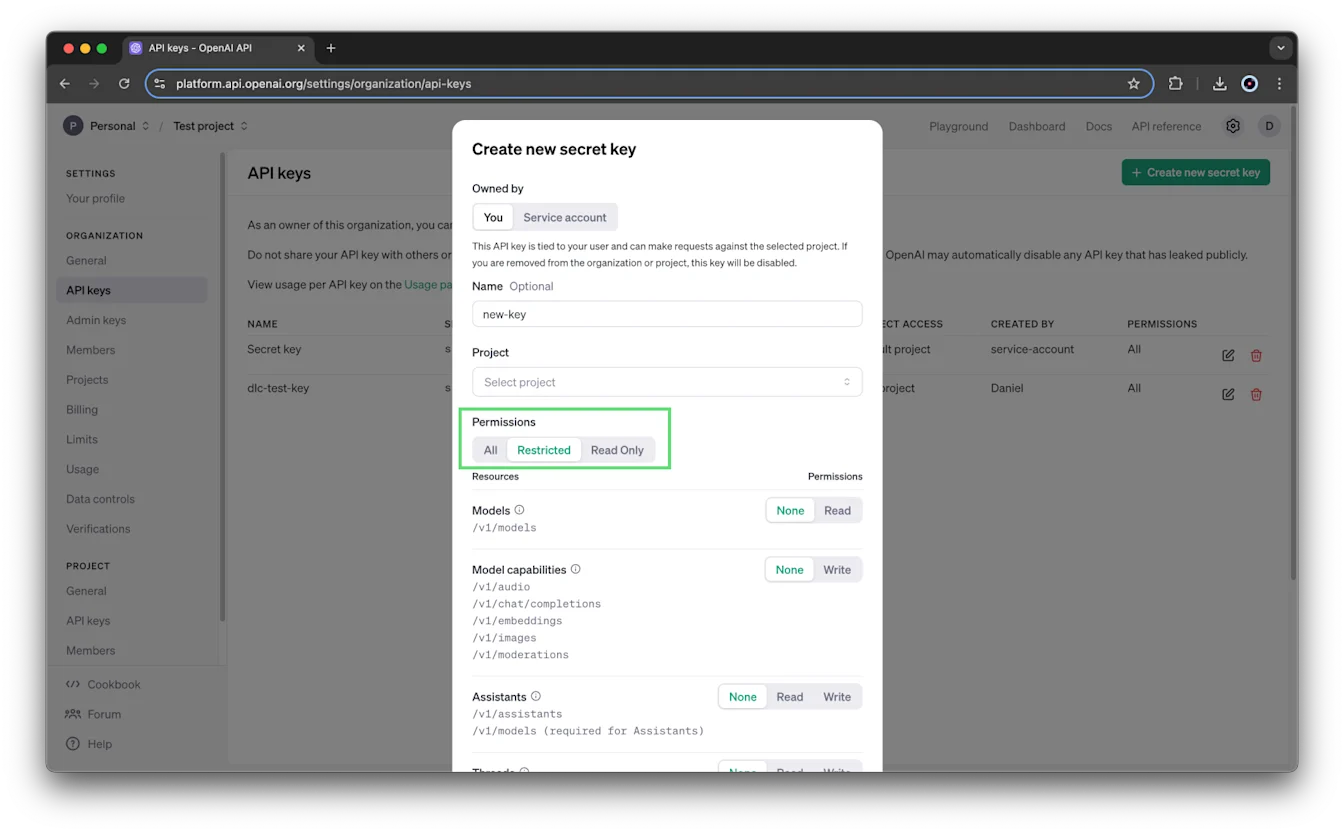
For user-owned keys, you can set permissions when creating a key or edit them later:
All: Full permissions. This is the default.
Restricted: Choose scopes for specific resources or endpoints. The available options depend on the resource and can include None, Read, Write, or request-specific permissions.
Read Only: Read permissions for all endpoints.
For example, a restricted key can exclude read and write access to the /v1/assistants endpoint.
Creating service account keys requires service-account management permissions. If you don’t see that option, ask an organization or project owner to create the service account key. The key-creation dialog doesn’t show these permission controls for service account keys; change their permissions afterward in the project’s API Keys settings.
Configure model access and rate limits
Managing project rate limits requires administrative permissions. Organization owners have these permissions, and project owners can also manage project rate limits through the management API.
Go to organization settings.
Select the project, then open Limits.
Use Model usage to choose which models the project can use.
Set a rate limit for each model as needed.
Set spend limits and alerts
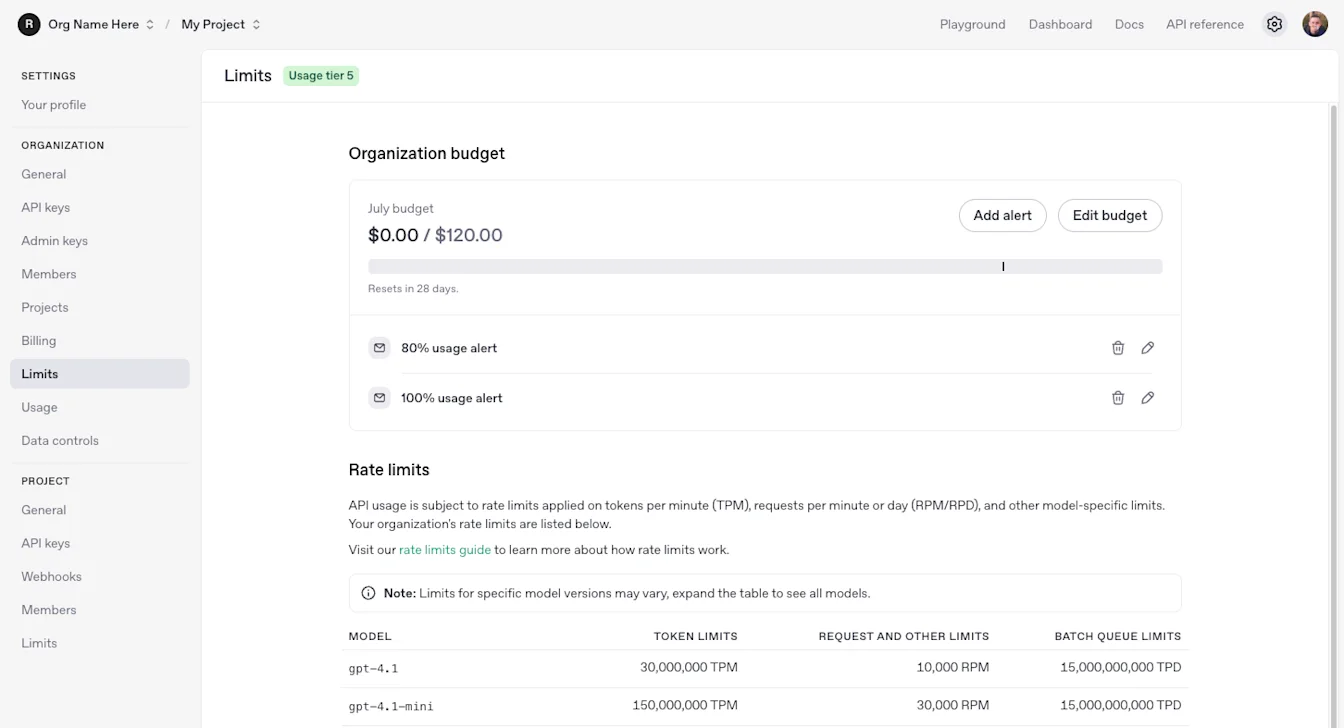
Monthly API spend limits are available at both the organization and project levels. You need permission to manage the applicable organization or project settings before changing a limit.
A spend limit can monitor spending without stopping requests. Turn on Enforce a hard limit if you want API requests to fail after tracked spending reaches the limit. Enforcement isn’t instantaneous, so recorded spending can slightly exceed the configured amount.
Spend alerts notify you when a threshold is reached; they don’t stop requests.
Set an organization spend limit
Go to organization settings.
Open Limits and find Spend.
Set a project spend limit
Go to organization settings.
Select the project, then open Limits.
Set the Monthly spend limit and Alert when spend reaches values.
Turn on Enforce a hard limit if you want to stop API traffic after the tracked limit is reached.
You can also change Model usage on this page.
Manage spend alerts
Creating a project spend limit also creates an alert at 100% of the limit by default. Select Add Alert to add alerts at other thresholds.
Organization and project owners receive project spend alerts. You can add other email recipients in the alert settings.
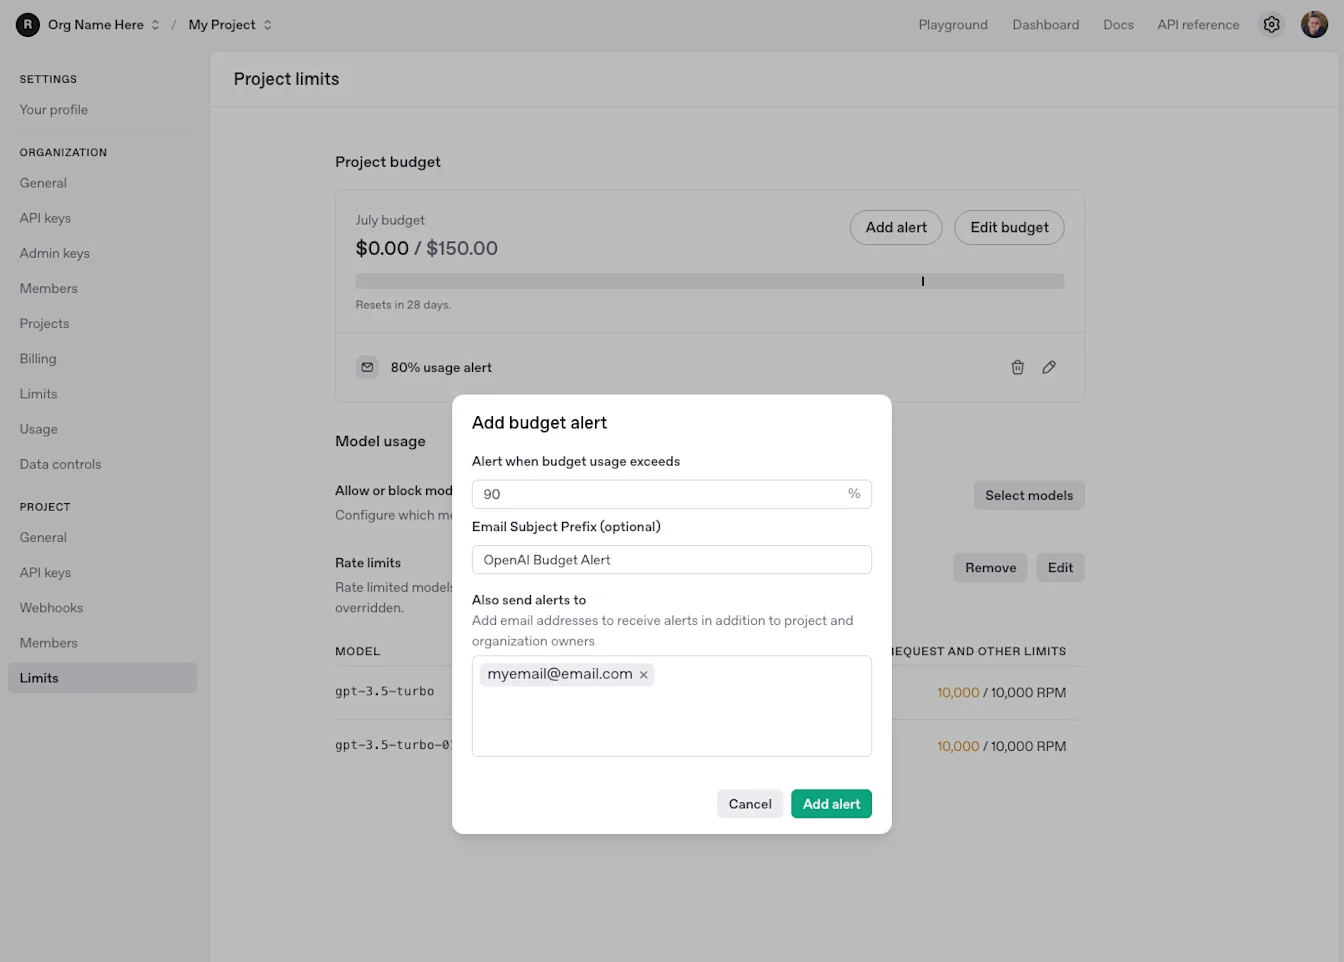
For current configuration steps and enforcement behavior, see the spend limits guide.
View usage and billing
Usage activity can be broken down by project, and you can view billing and set spend limits for individual projects.
Access to a project’s Usage Dashboard depends on your organization role and the Usage Dashboard visibility settings. Being a project owner doesn’t by itself grant access.
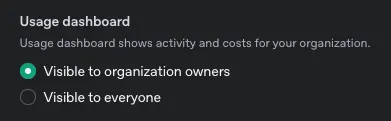
If you can’t see a project’s Usage Dashboard, check whether visibility is set to Visible to organization owners.
Manage file storage
Each project has a file storage quota of 100 GB. If you exceed it, you may see this error:
You have exceeded your file storage quota. Organizations are limited to 100 GB of files. Please reduce the file size or contact support.
Delete unused files to free storage. You can list stored files through the API to identify files you no longer need.
Archive a project
Organization and project owners can archive projects from the Projects page or the individual project’s settings. Enter the project’s name when prompted to confirm.
Archiving is permanent: an archived project can’t be restored.
To view archived projects, open the Archived tab on the Projects page.
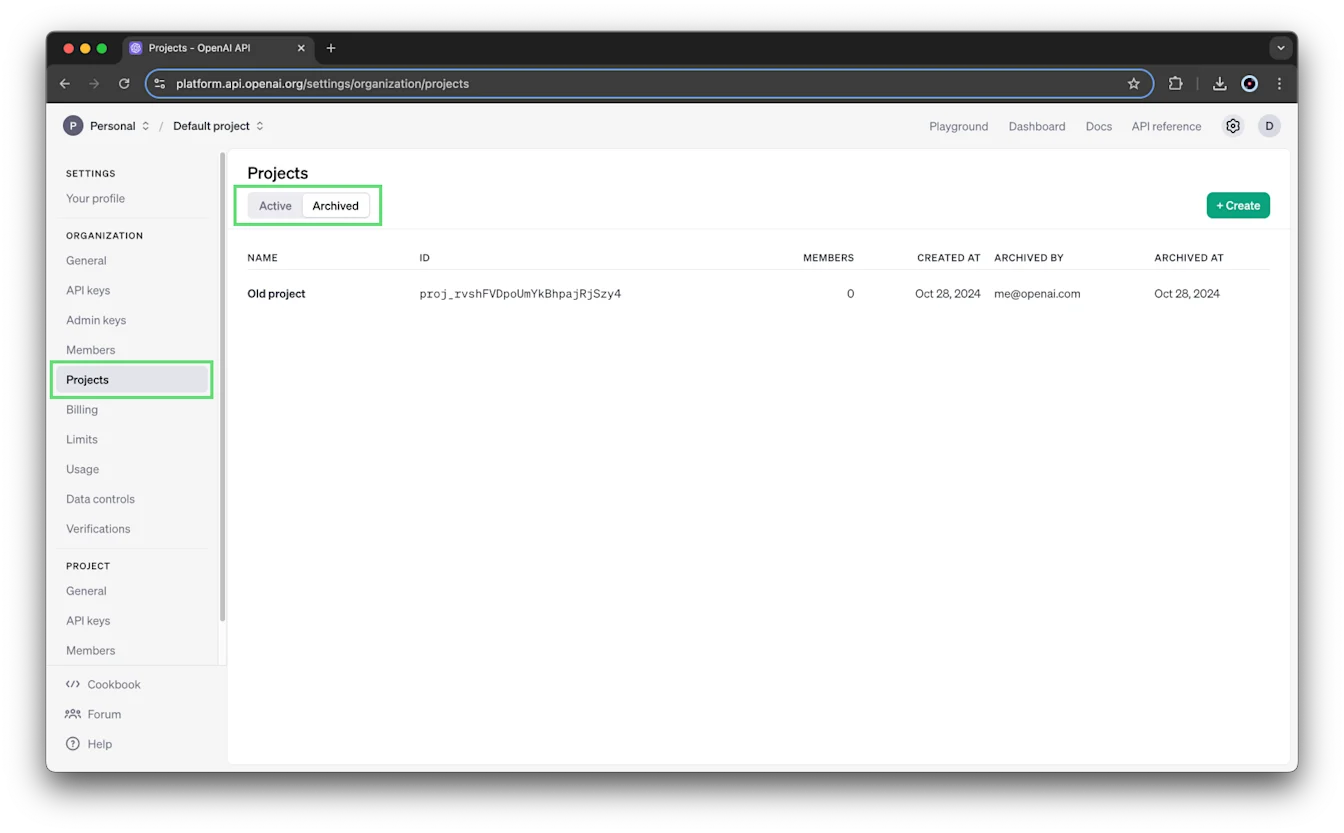
Projects can’t be deleted. OpenAI keeps their history for usage and billing tracking.