
Upang ikonekta ang iyong Google Workspace sa ChatGPT gamit ang admin-managed setup, iko-configure mo muna ang access sa mga admin console ng Google:
Gumawa ng service account na may read-only access sa Google Drive, mga user, at mga group.
Mahigpit na inirerekomenda na likhain ang service account na ito sa ilalim ng kaparehong Google account na nauugnay sa iyong ChatGPT Workspace. Kung ang mga account sa ChatGPT workspace ay may ibang email domain kaysa sa ginagamit sa Google Workspace, may mga karagdagang hakbang na kailangan mong sundin upang ma-enable ang connector na ito para sa iyong mga user.
Gumawa ng admin account na pagkikilosan ng service account.
Pagkatapos, tapusin ang setup sa ChatGPT admin console:
I-upload ang private key ng service account (isang JSON file mula sa Google)
Tukuyin ang admin account (walang credentials na kailangan).
Piliin kung aling mga file ang isi-sync at piliin ang mga user na magkakaroon ng access sa koneksyon.
Gagabayan ka ng gabay na ito sa bawat isa sa 6 na hakbang na ito.
Pag-set up ng Service Account
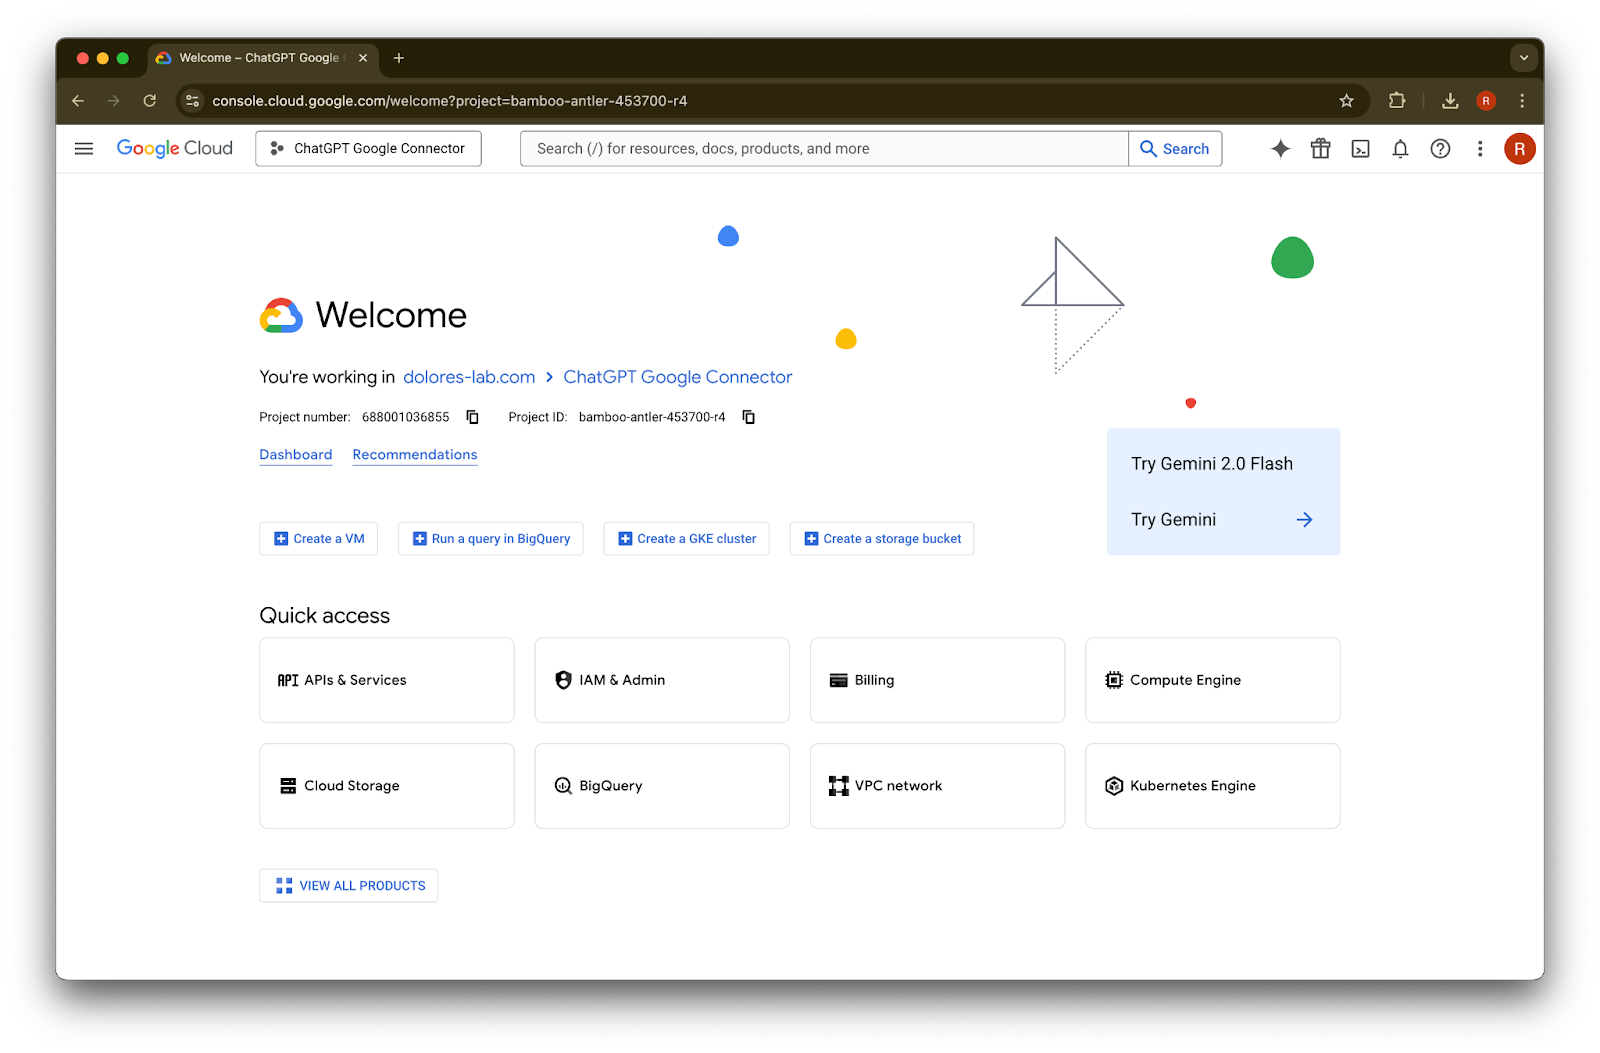
Pumunta sa console.cloud.google.com.
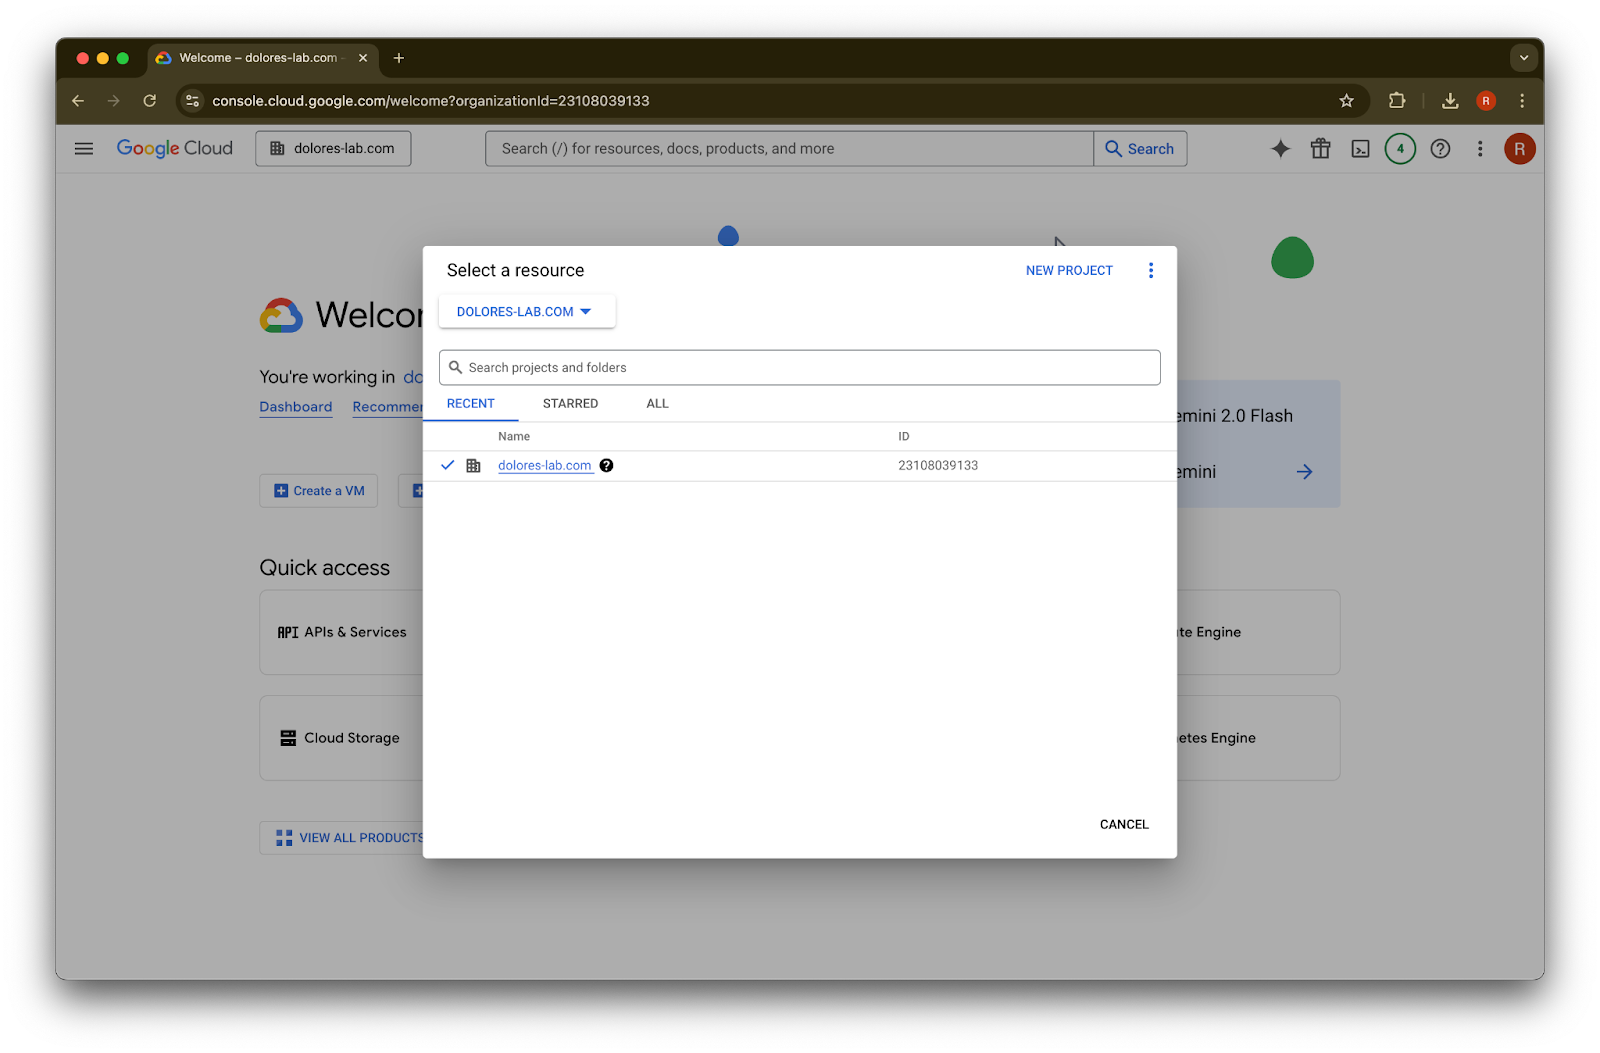
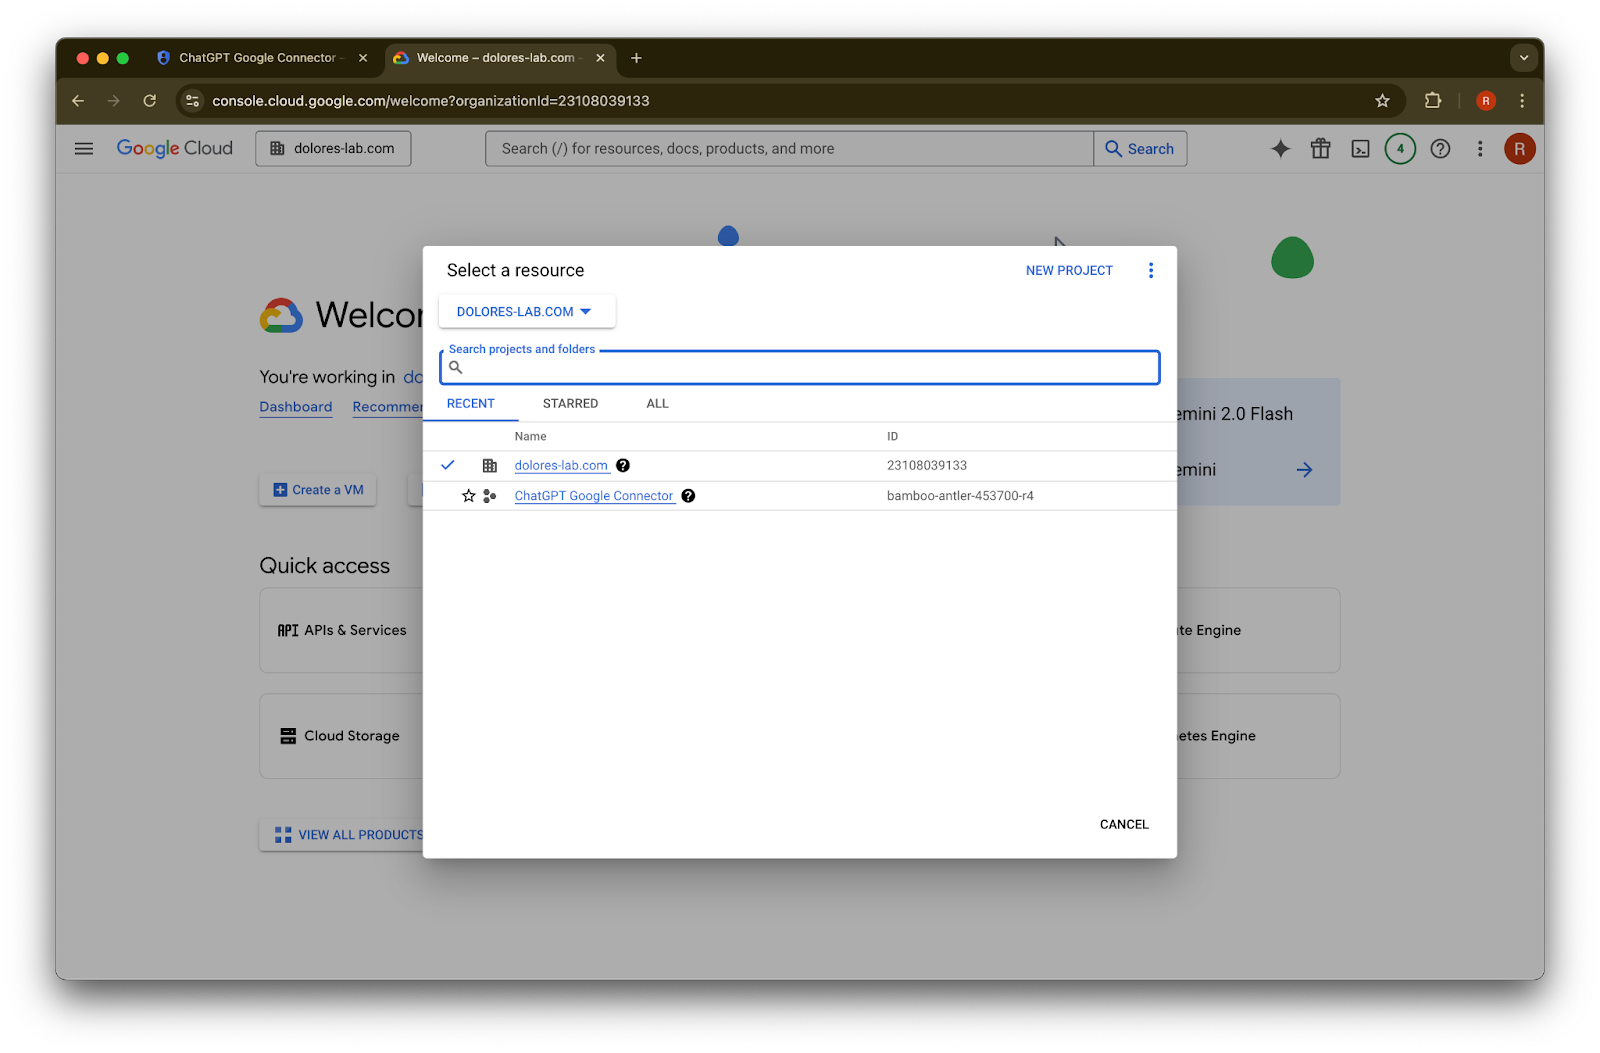
I-click ang dropdown ng projects.LarawanTiyaking naka-log in ka sa parehong Google workspace na nauugnay sa iyong ChatGPT workspace (kung wala kang Google workspace na nauugnay sa iyong ChatGPT workspace at magkaiba ang mga email sa dalawa, kailangan mong sumunod sa mga karagdagang hakbang, kung hindi ay maaaring hindi magamit ng iyong mga user ang Google Drive synced connectors).
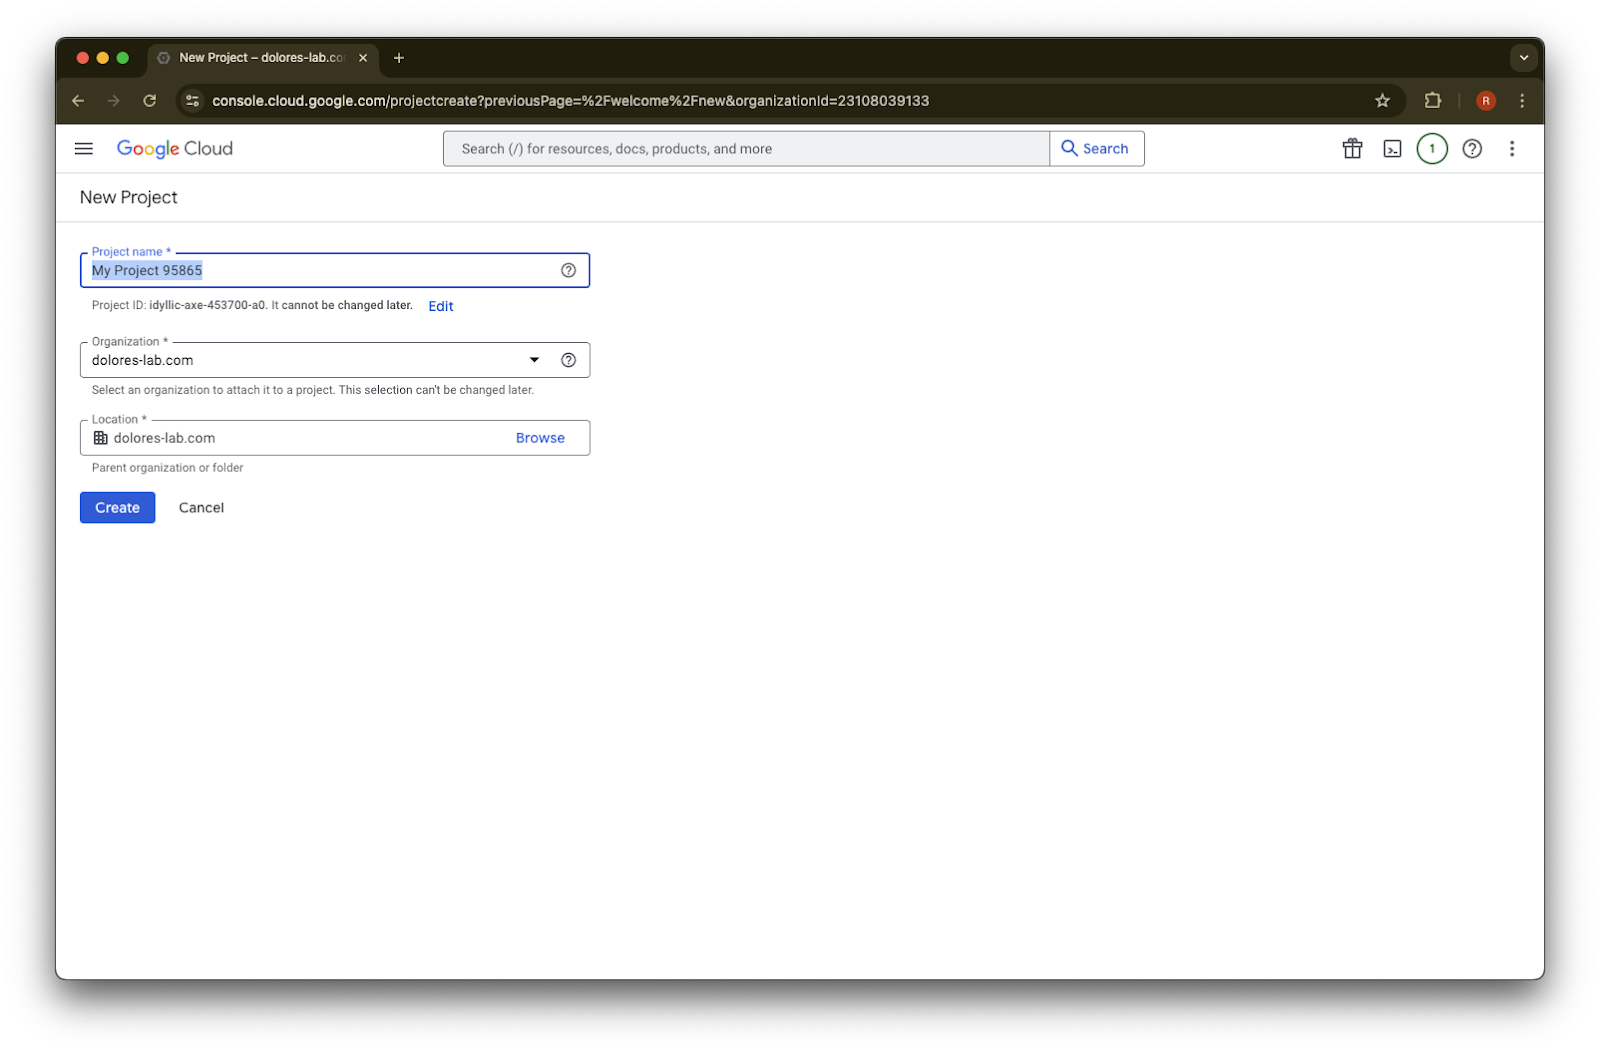
Piliin ang New Project
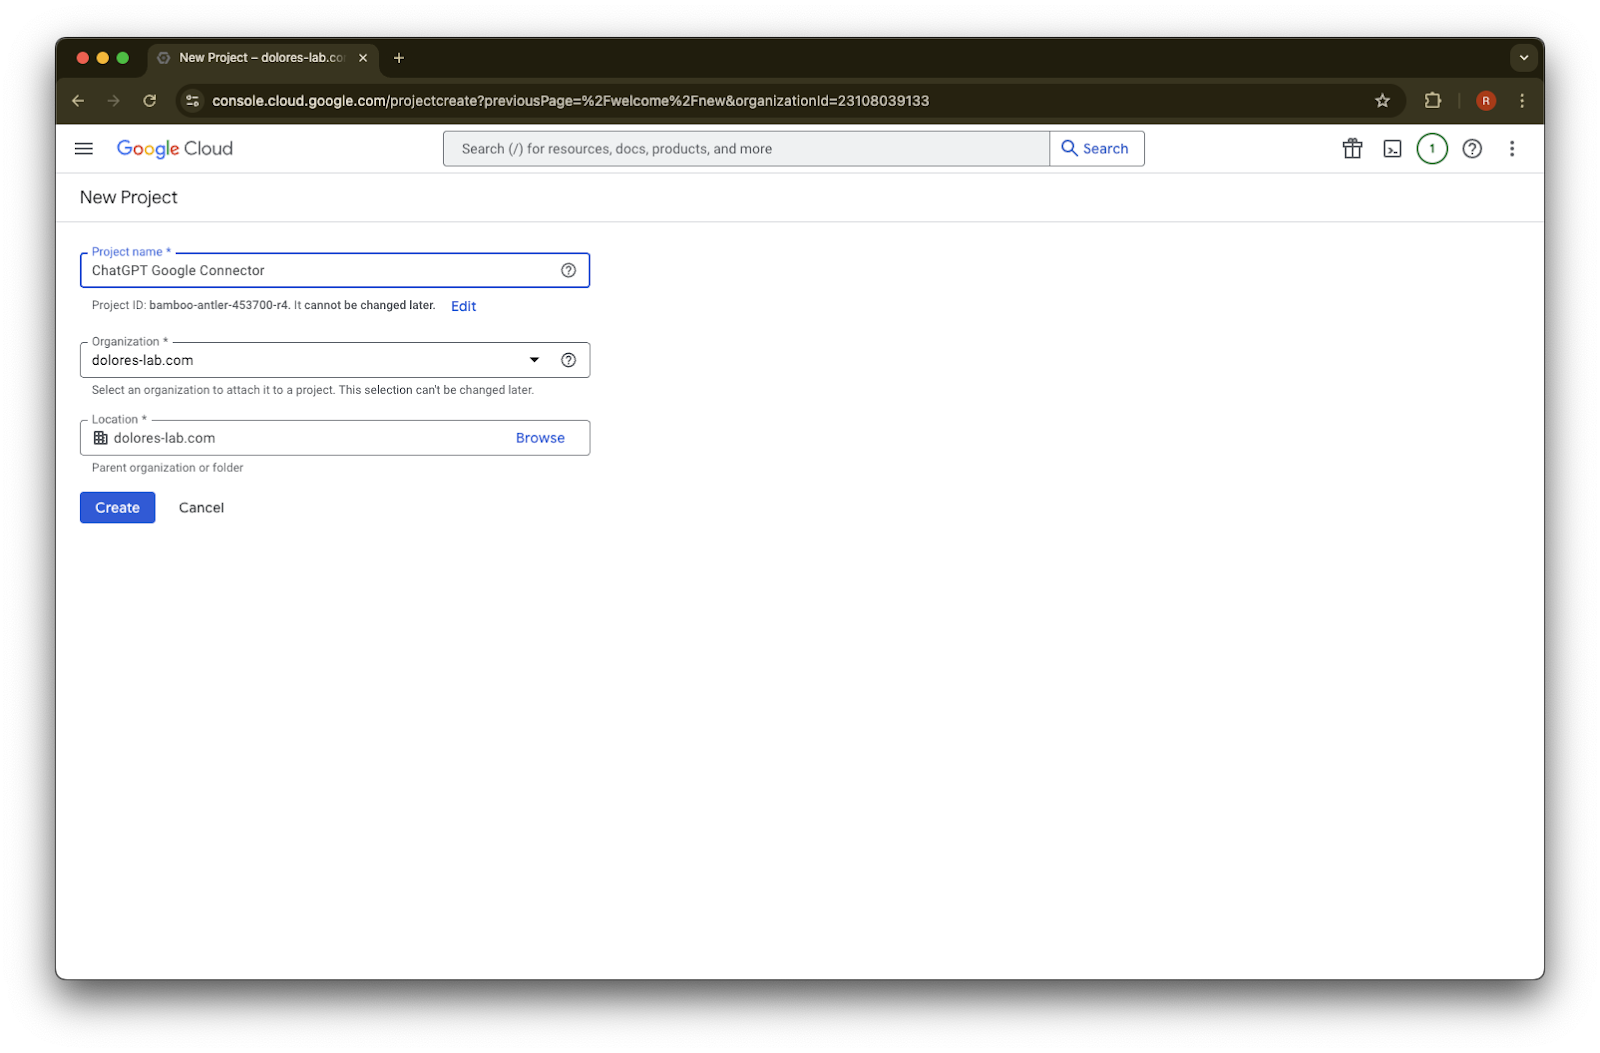
Maglagay ng Project Name
Likhain ang project
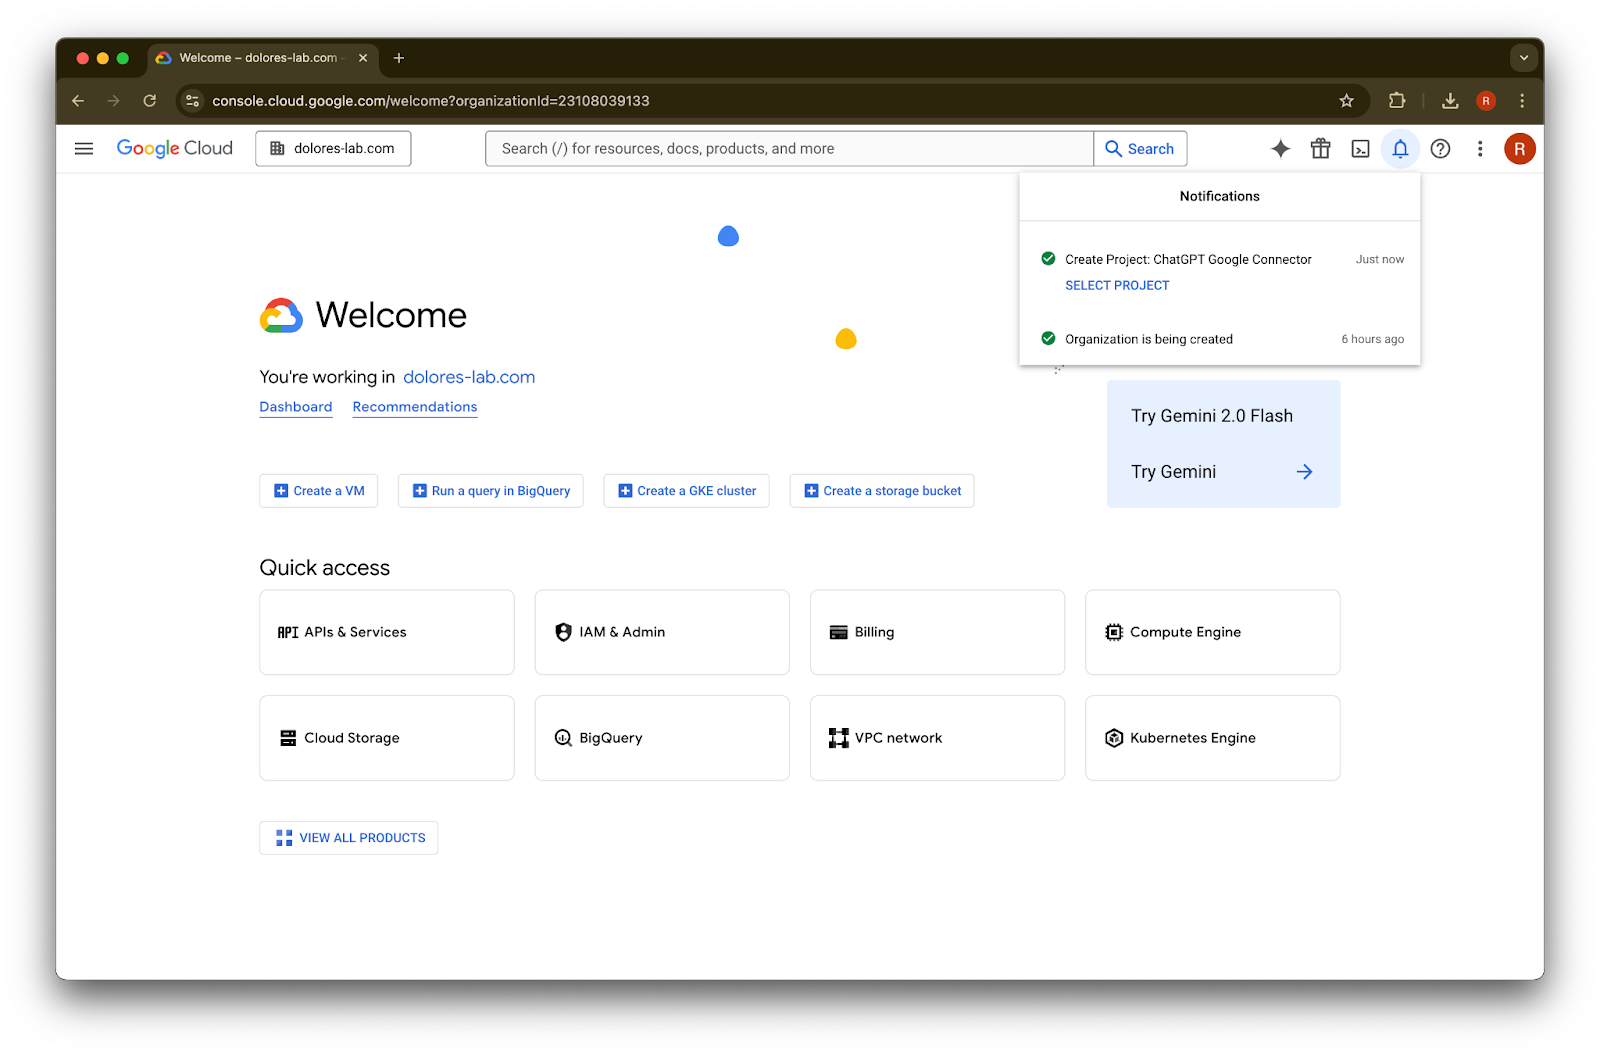
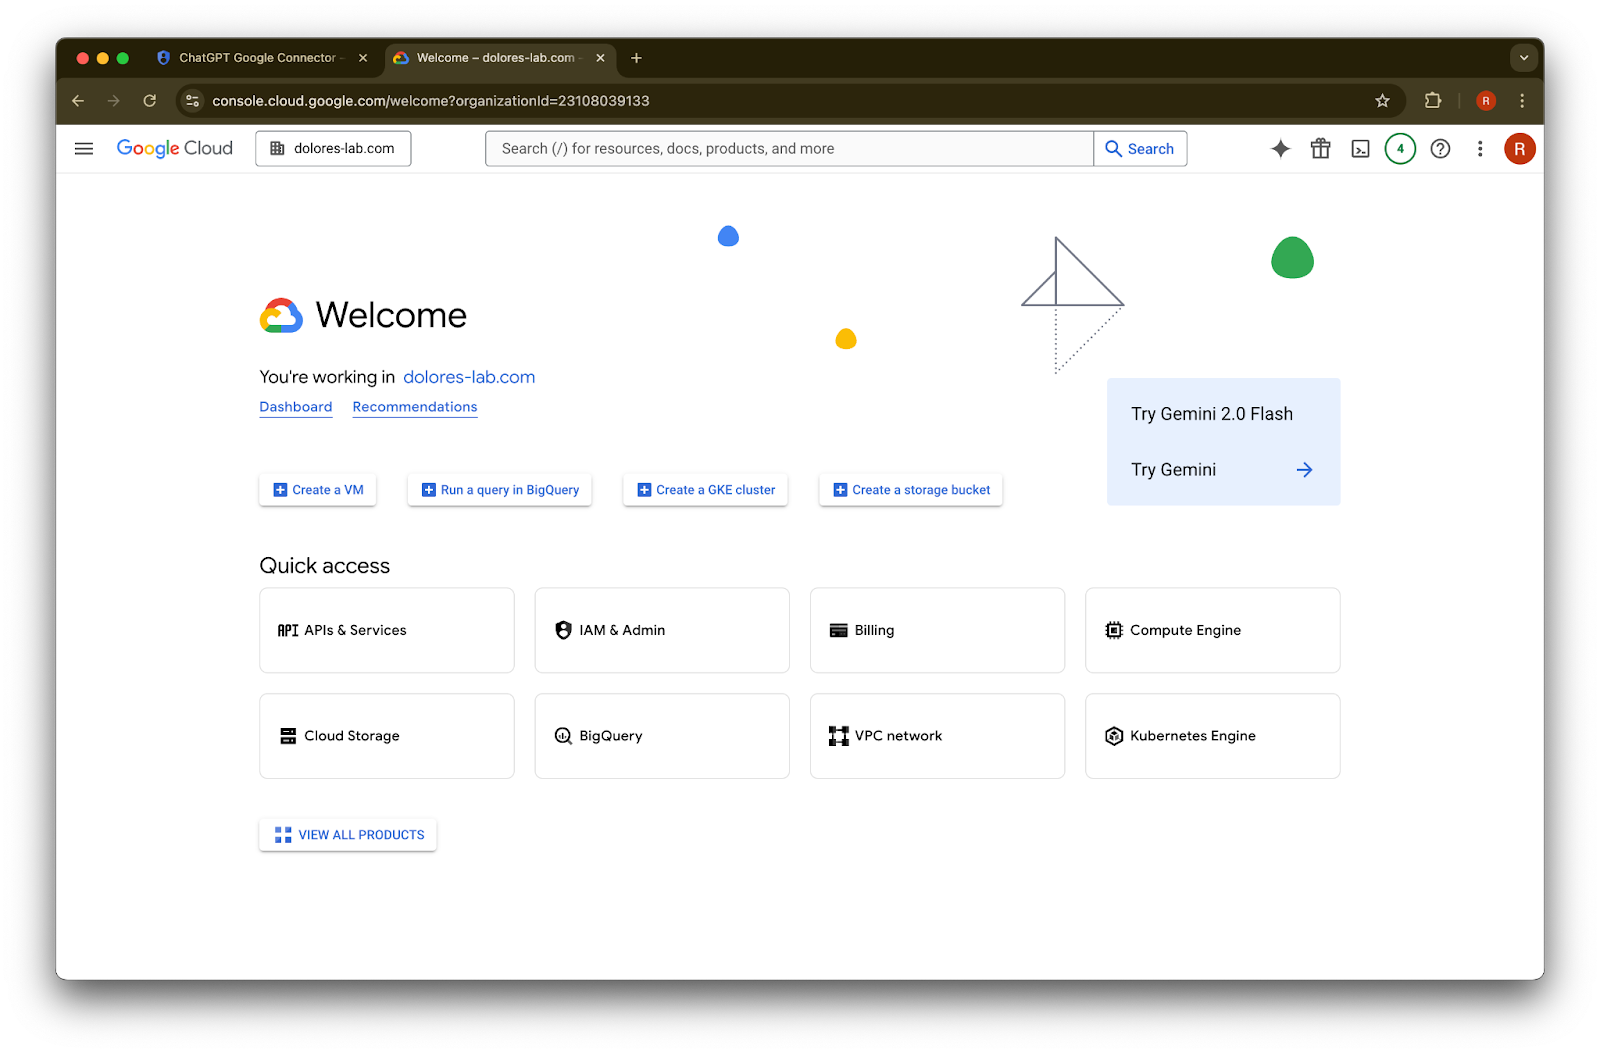
Maghintay hanggang malikha ang project, pagkatapos ay i-click ang Select Project
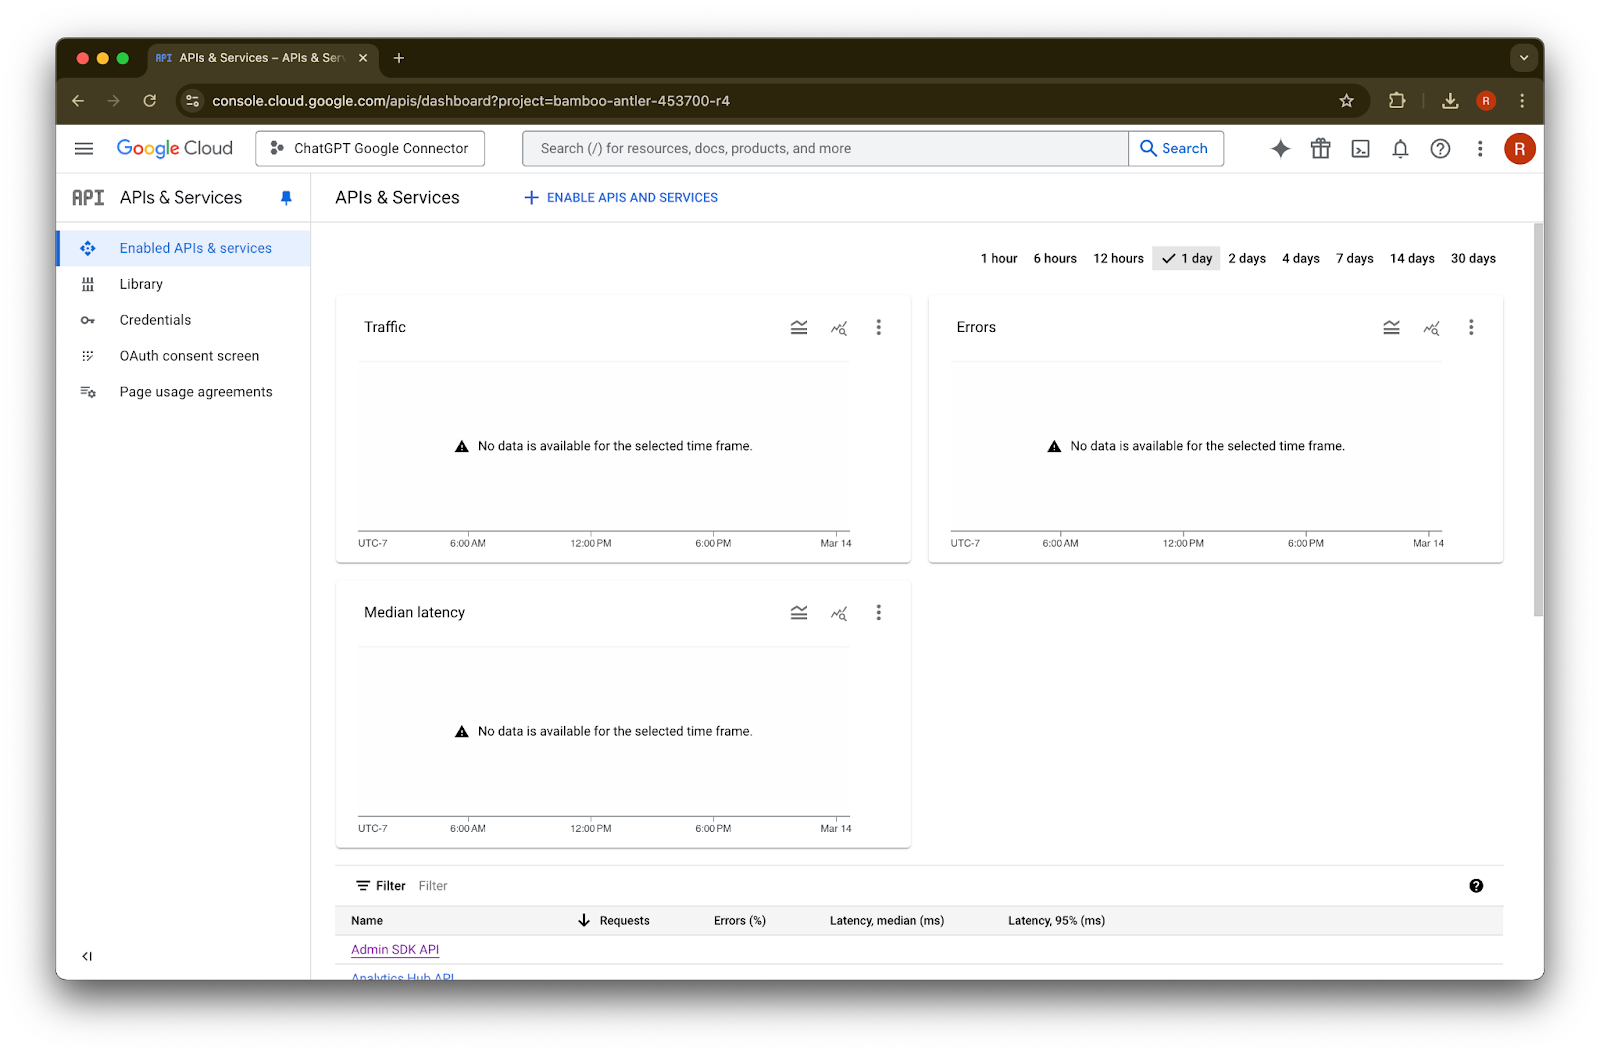
I-click ang APIs & Services
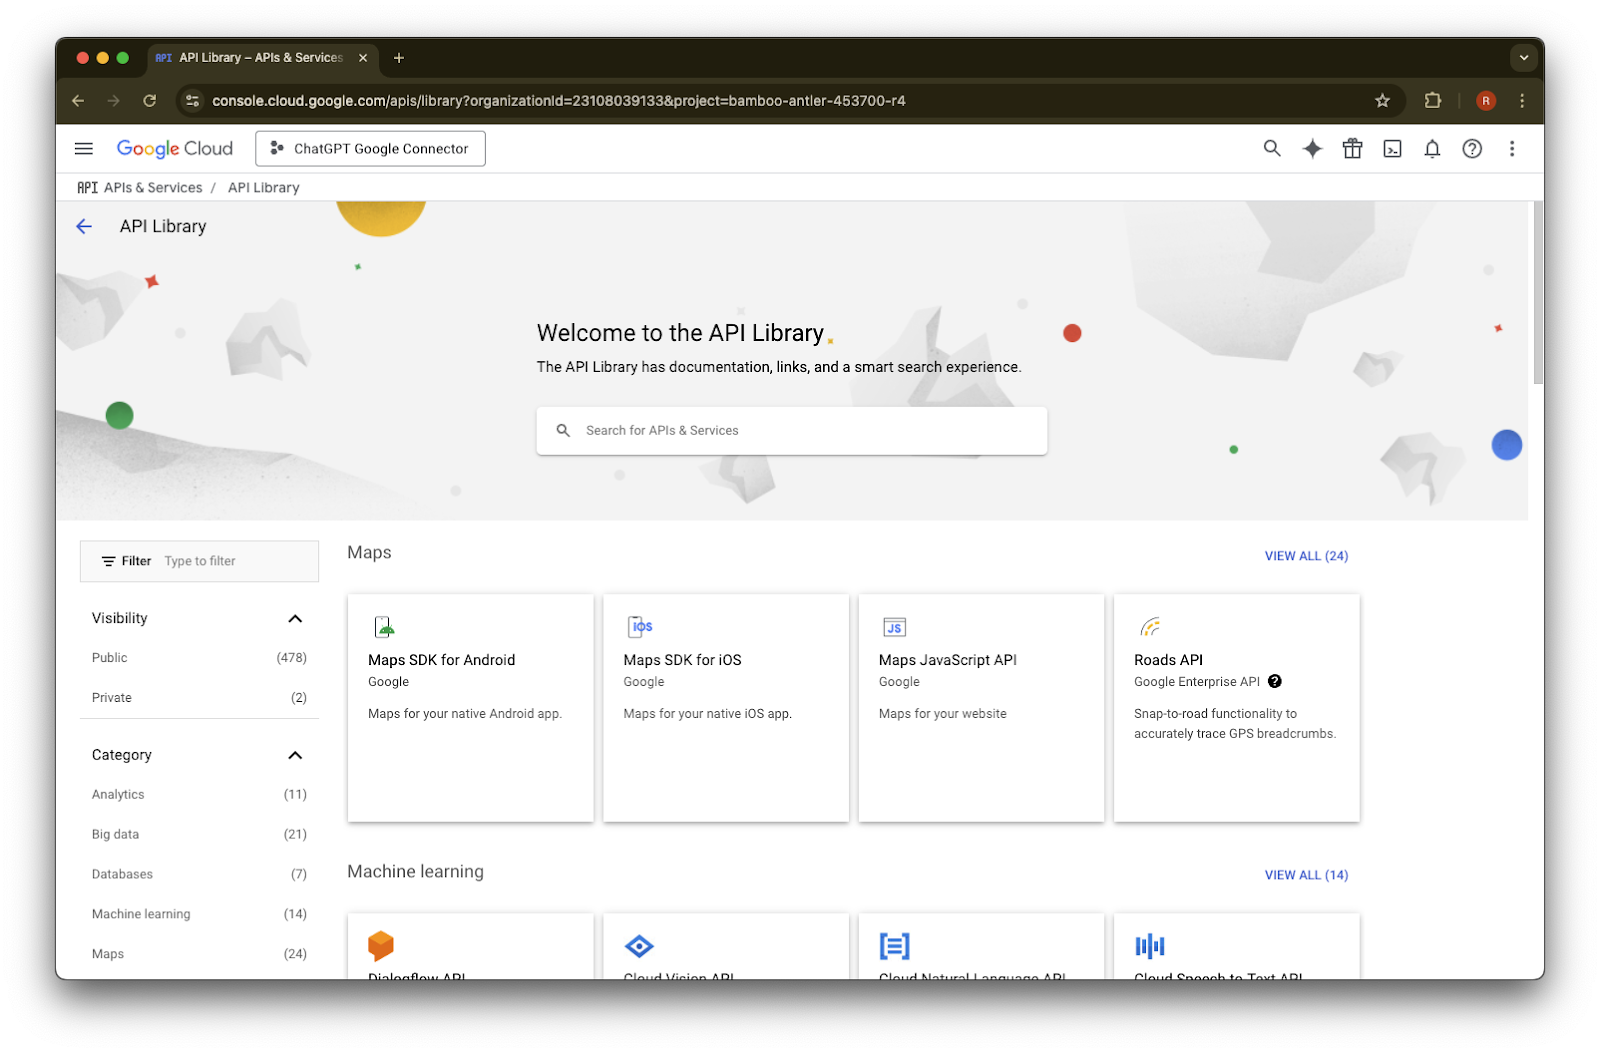
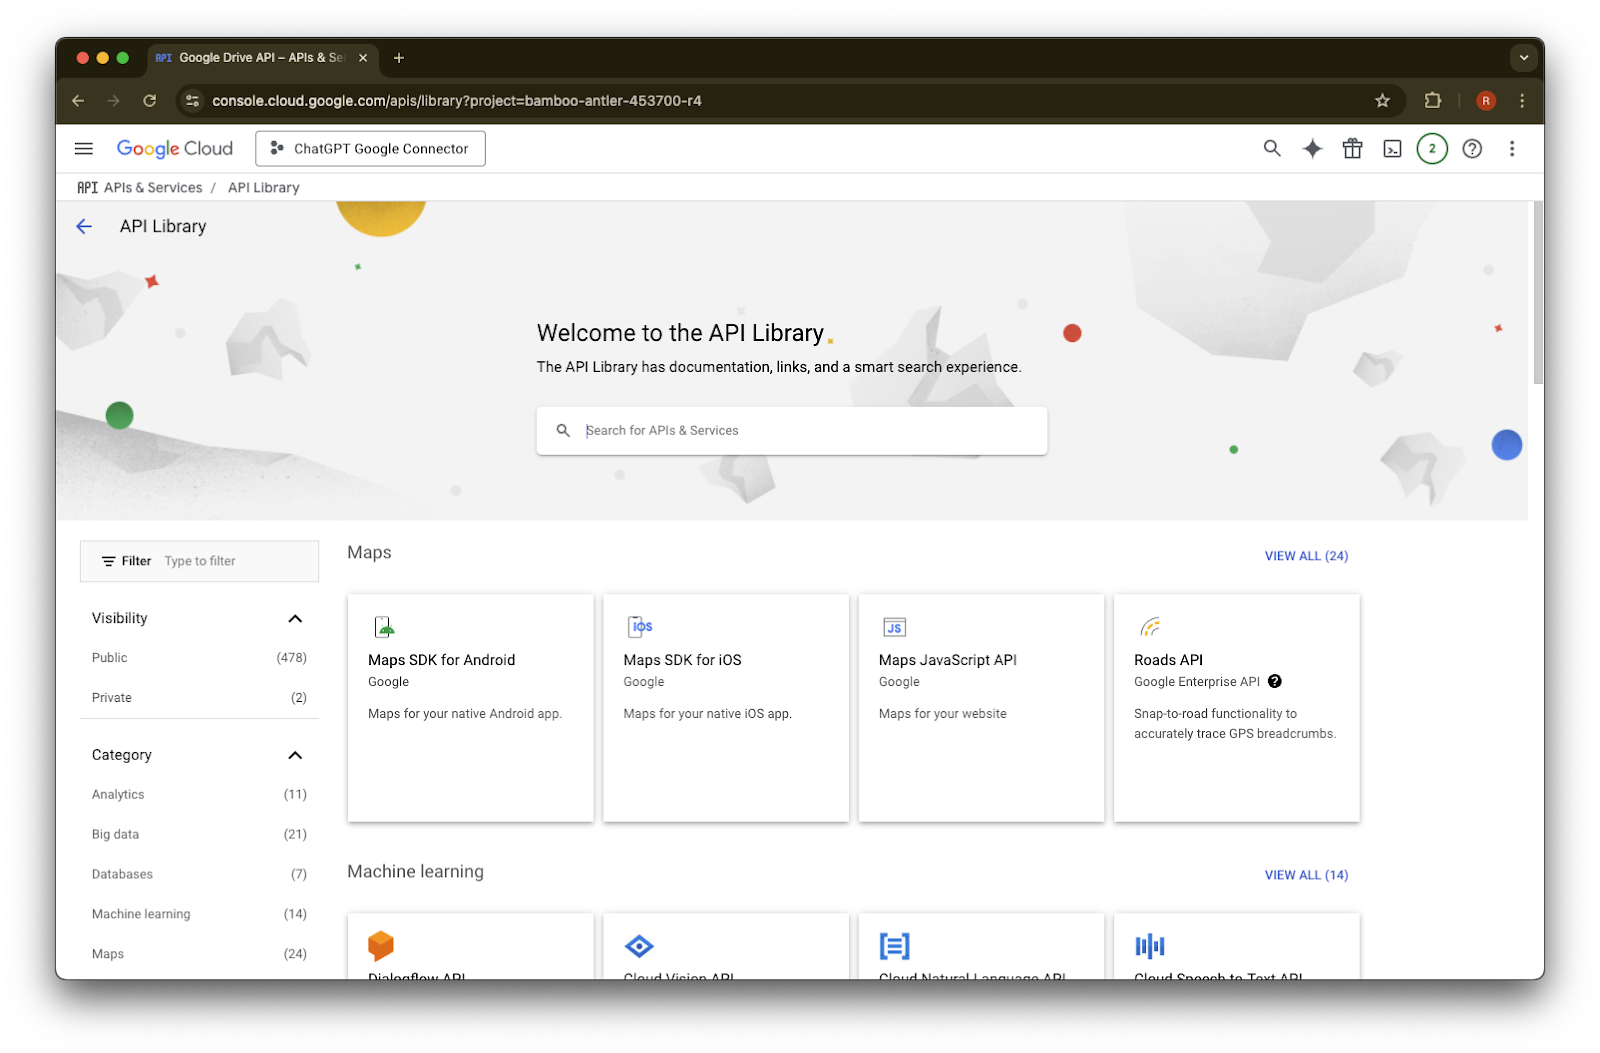
I-click ang Library
Magdaragdag na tayo ngayon ng tatlong API, gamit ang search box upang mahanap ang mga ito
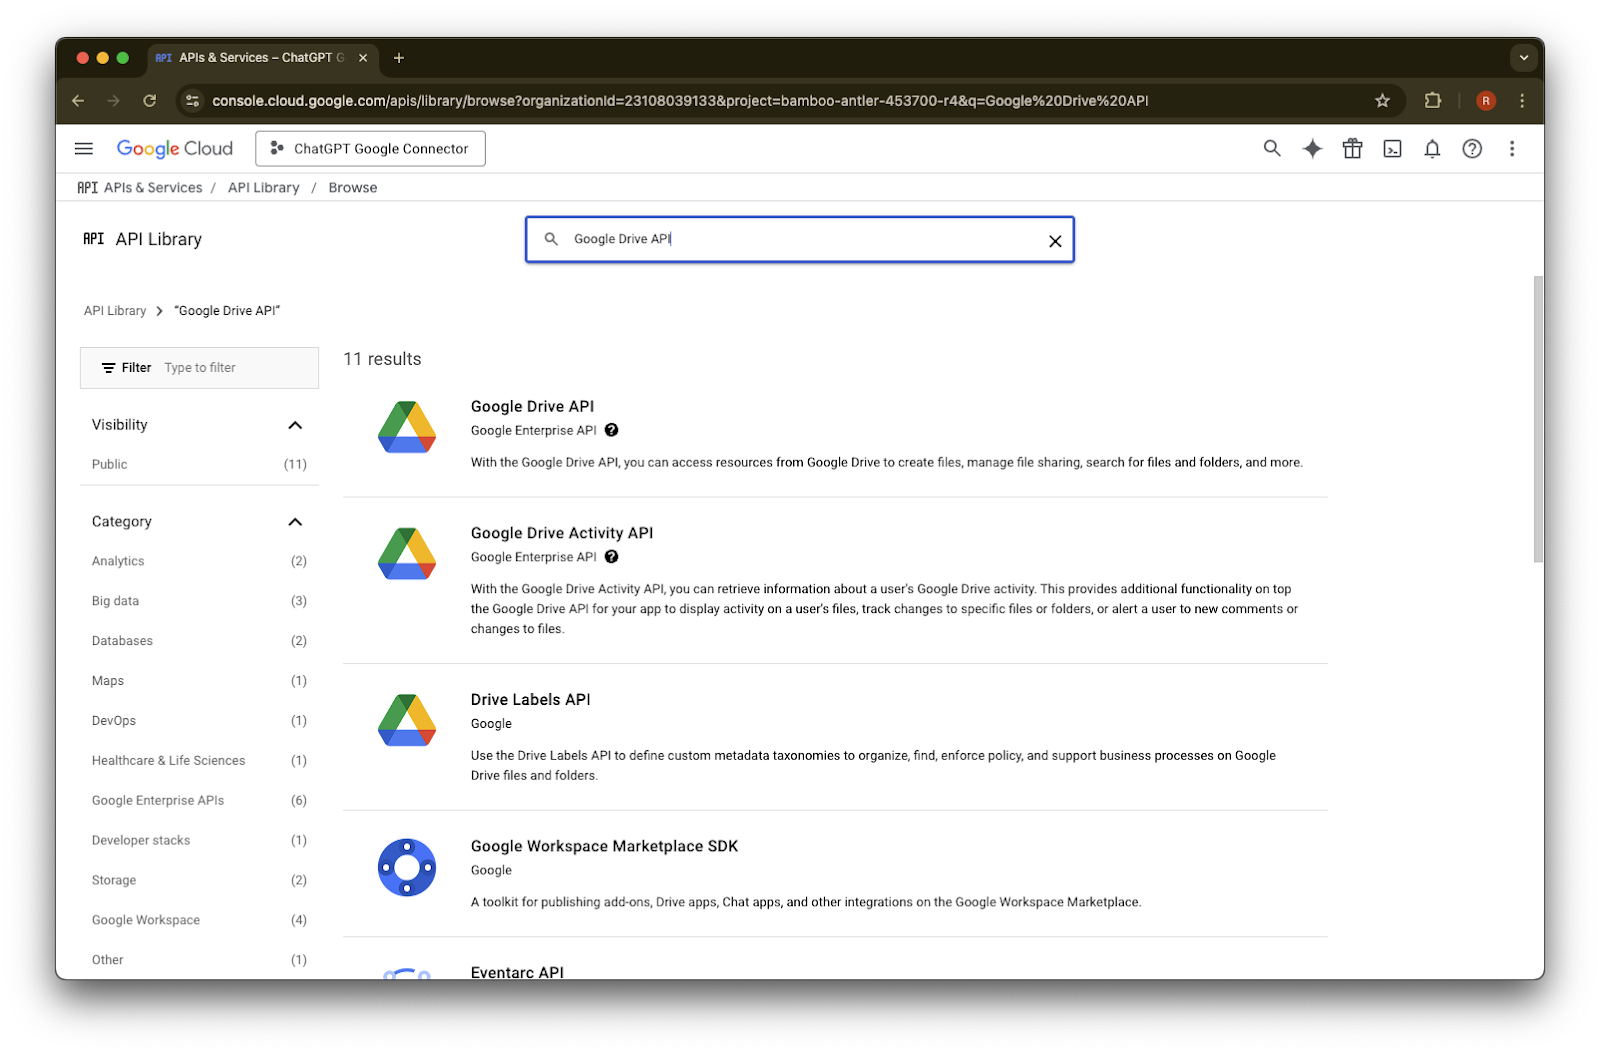
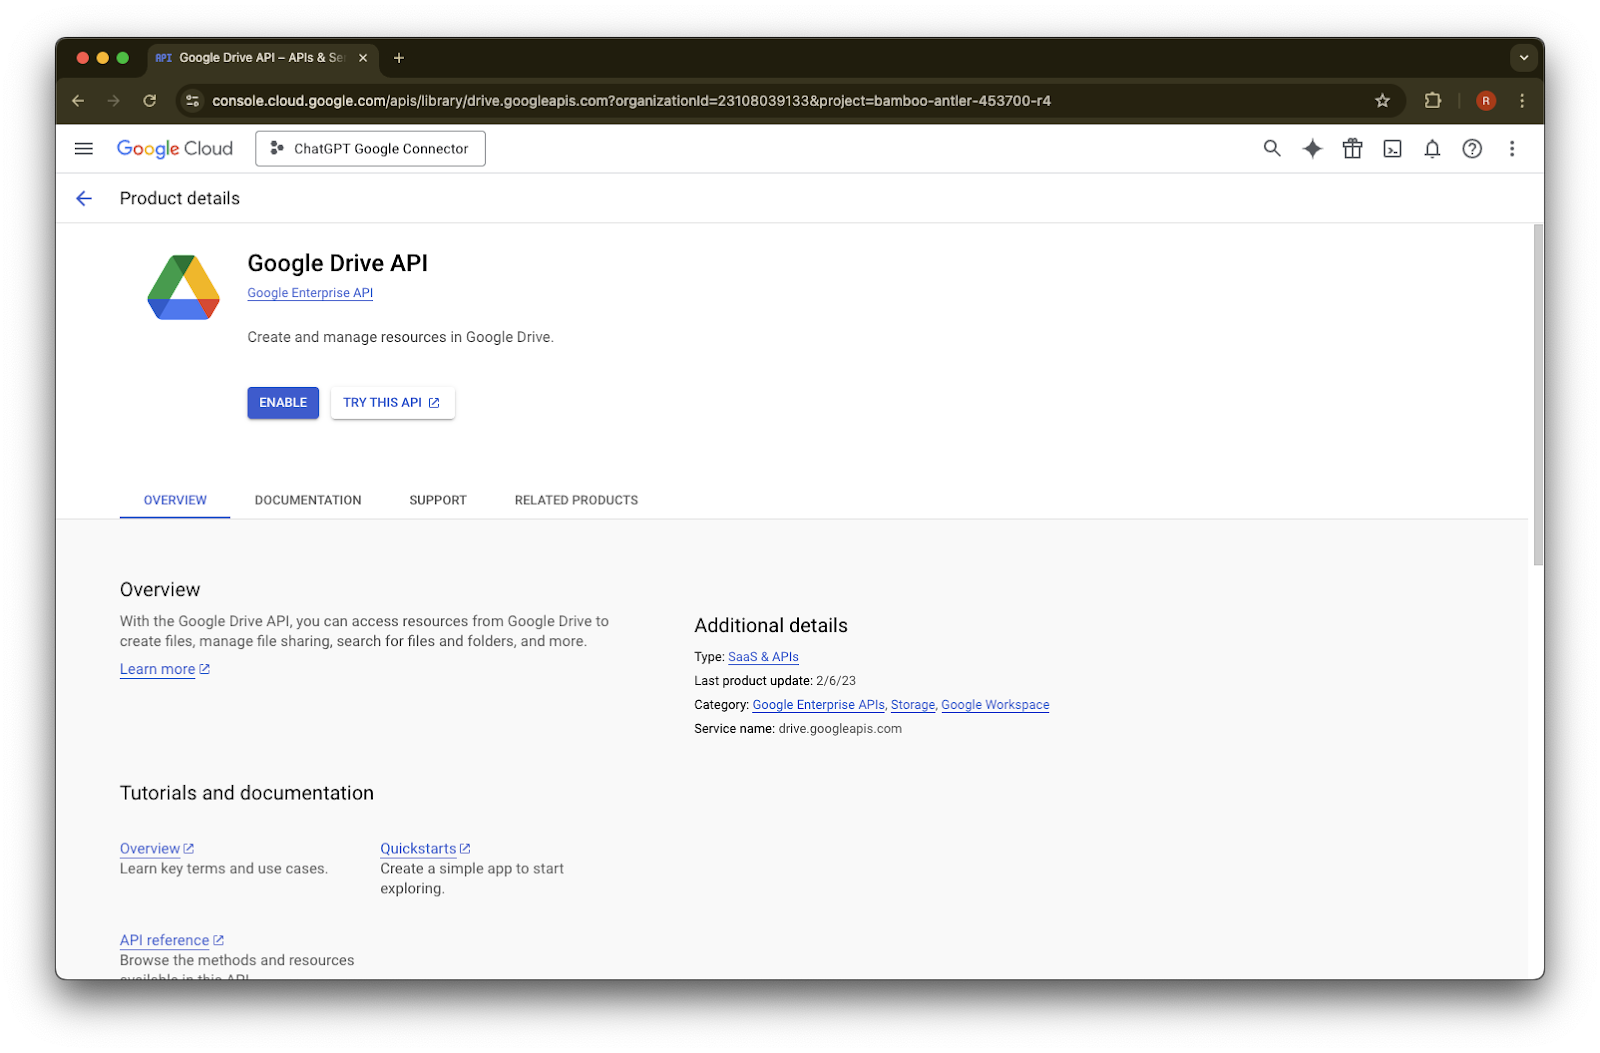
Hanapin at piliin ang Google Drive API
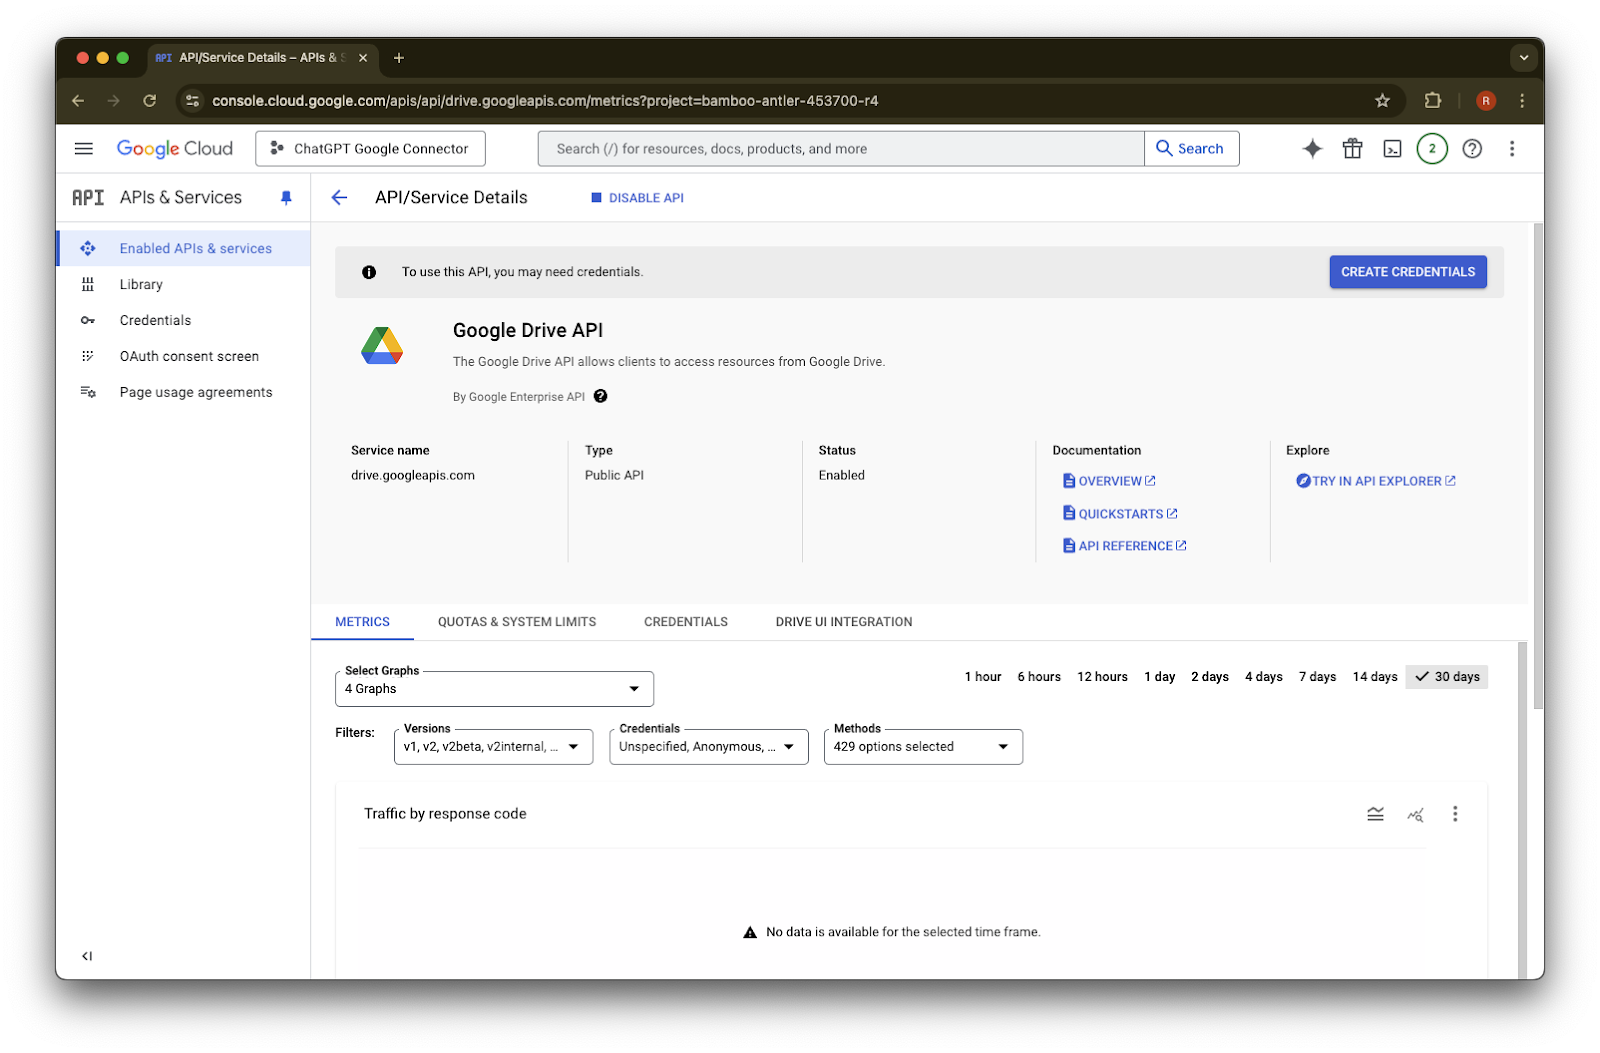
I-click ang Enable
I-click ang Library
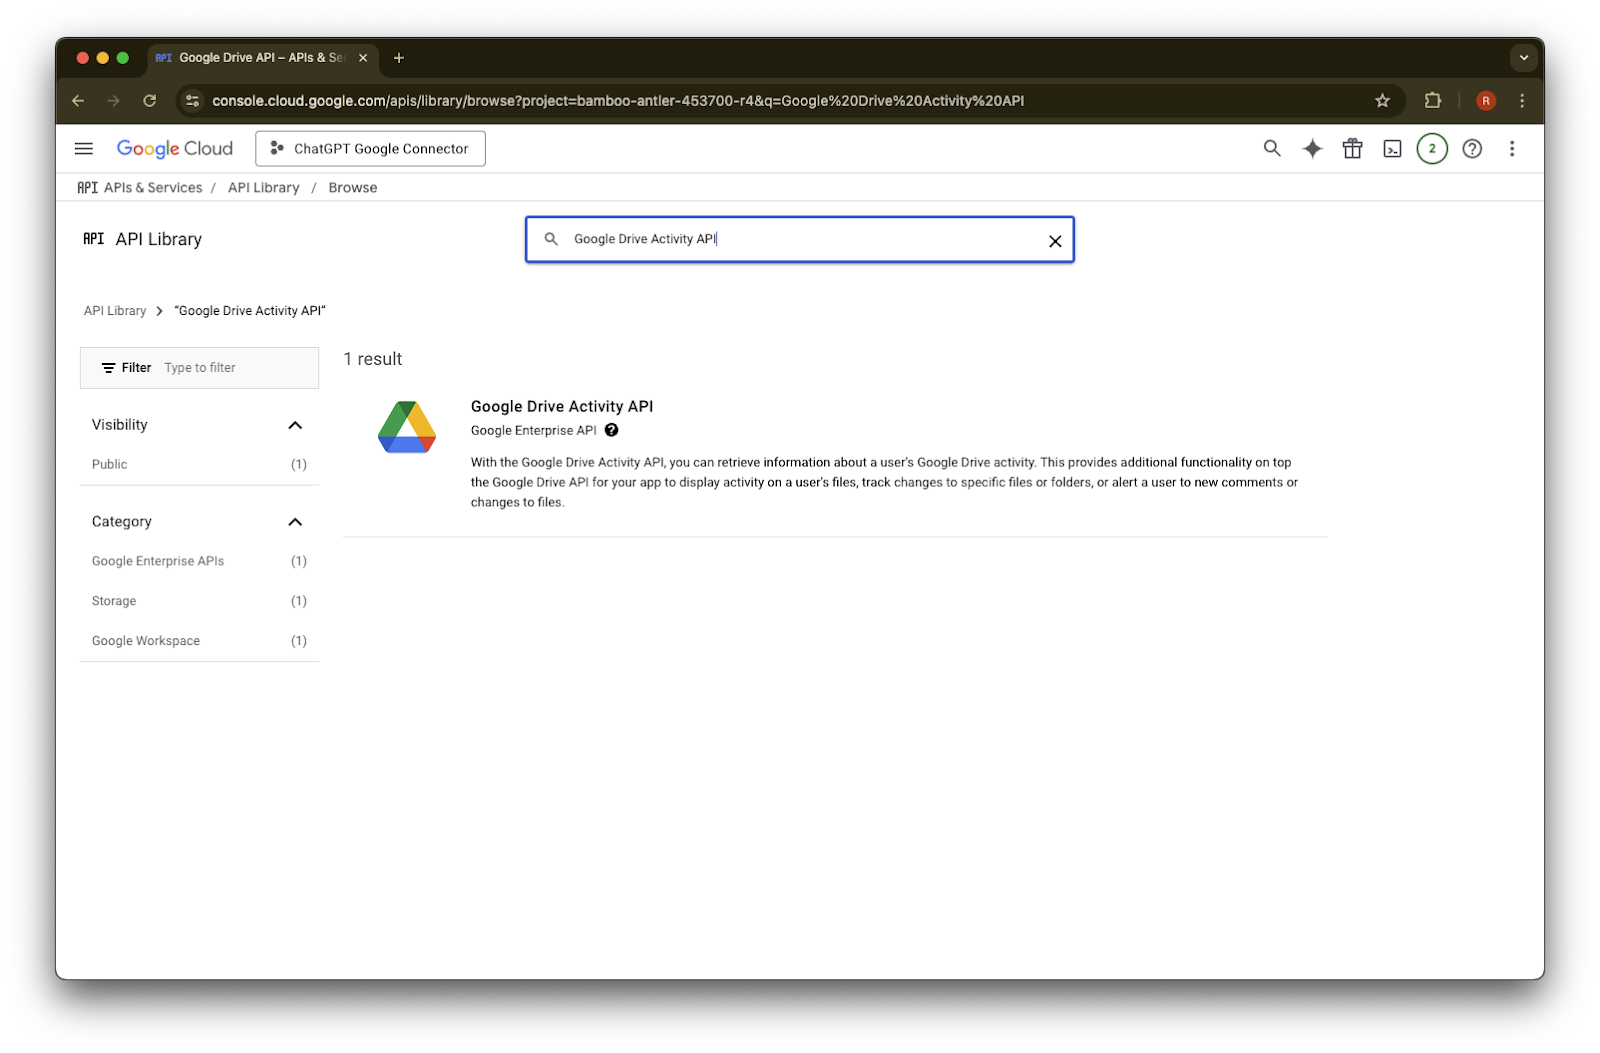
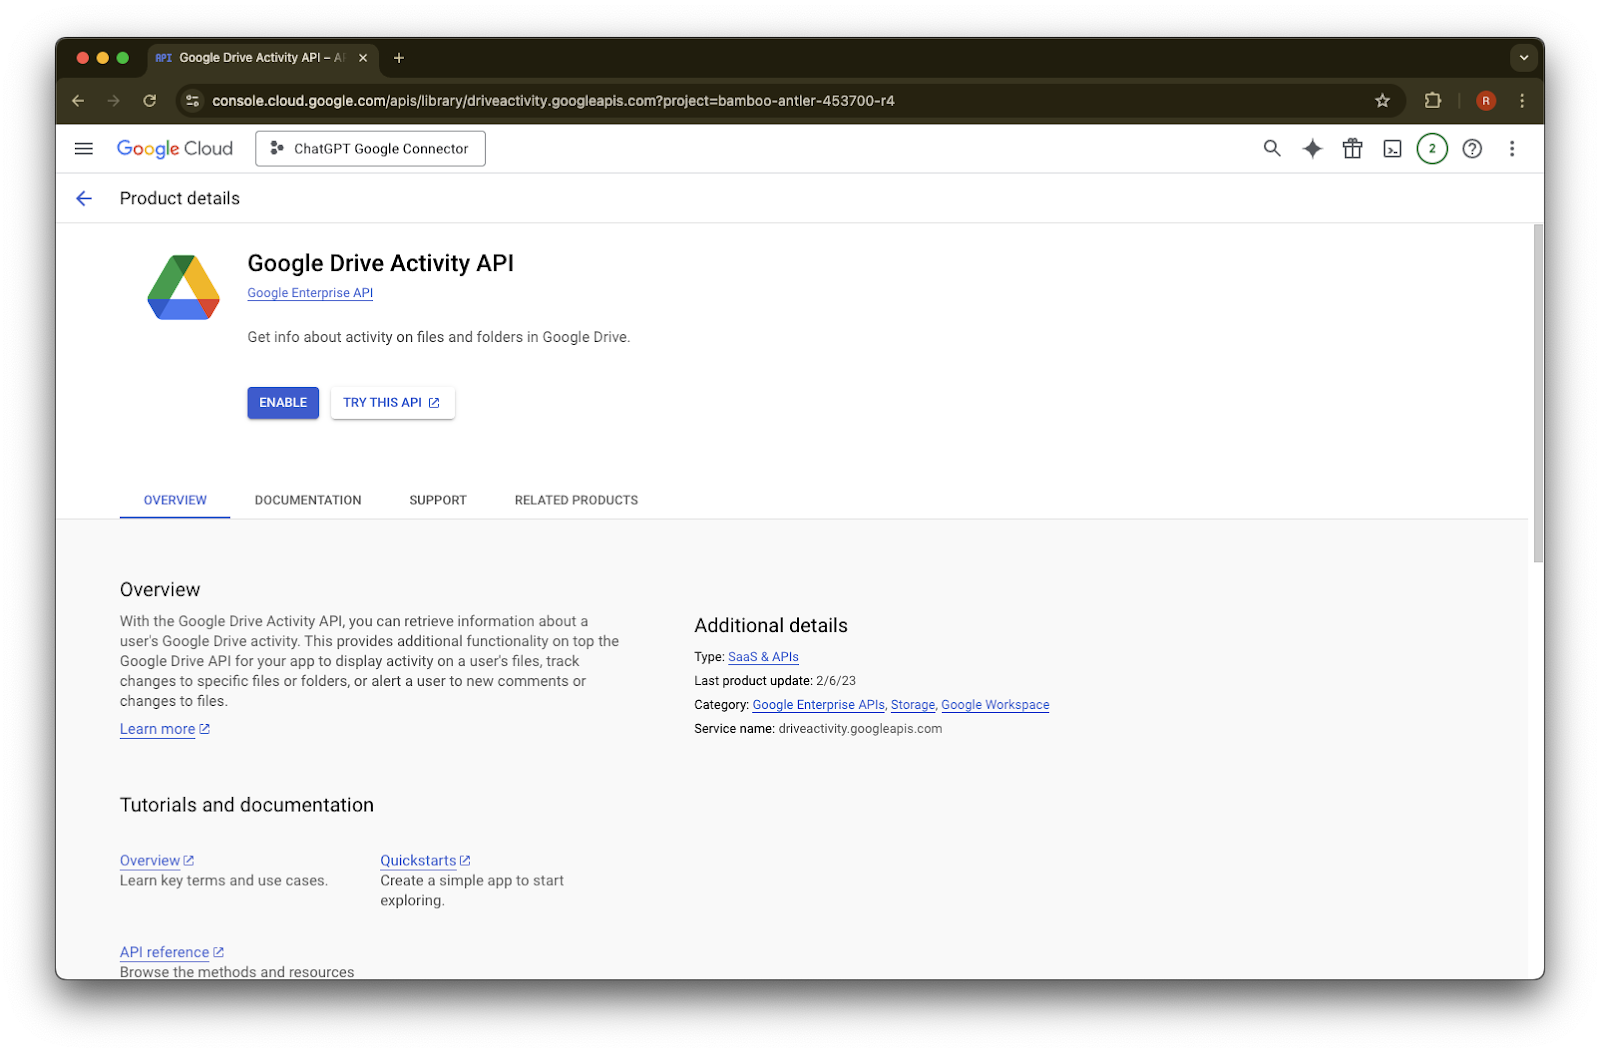
Hanapin ang Google Drive Activity
Piliin ang Google Drive Activity API
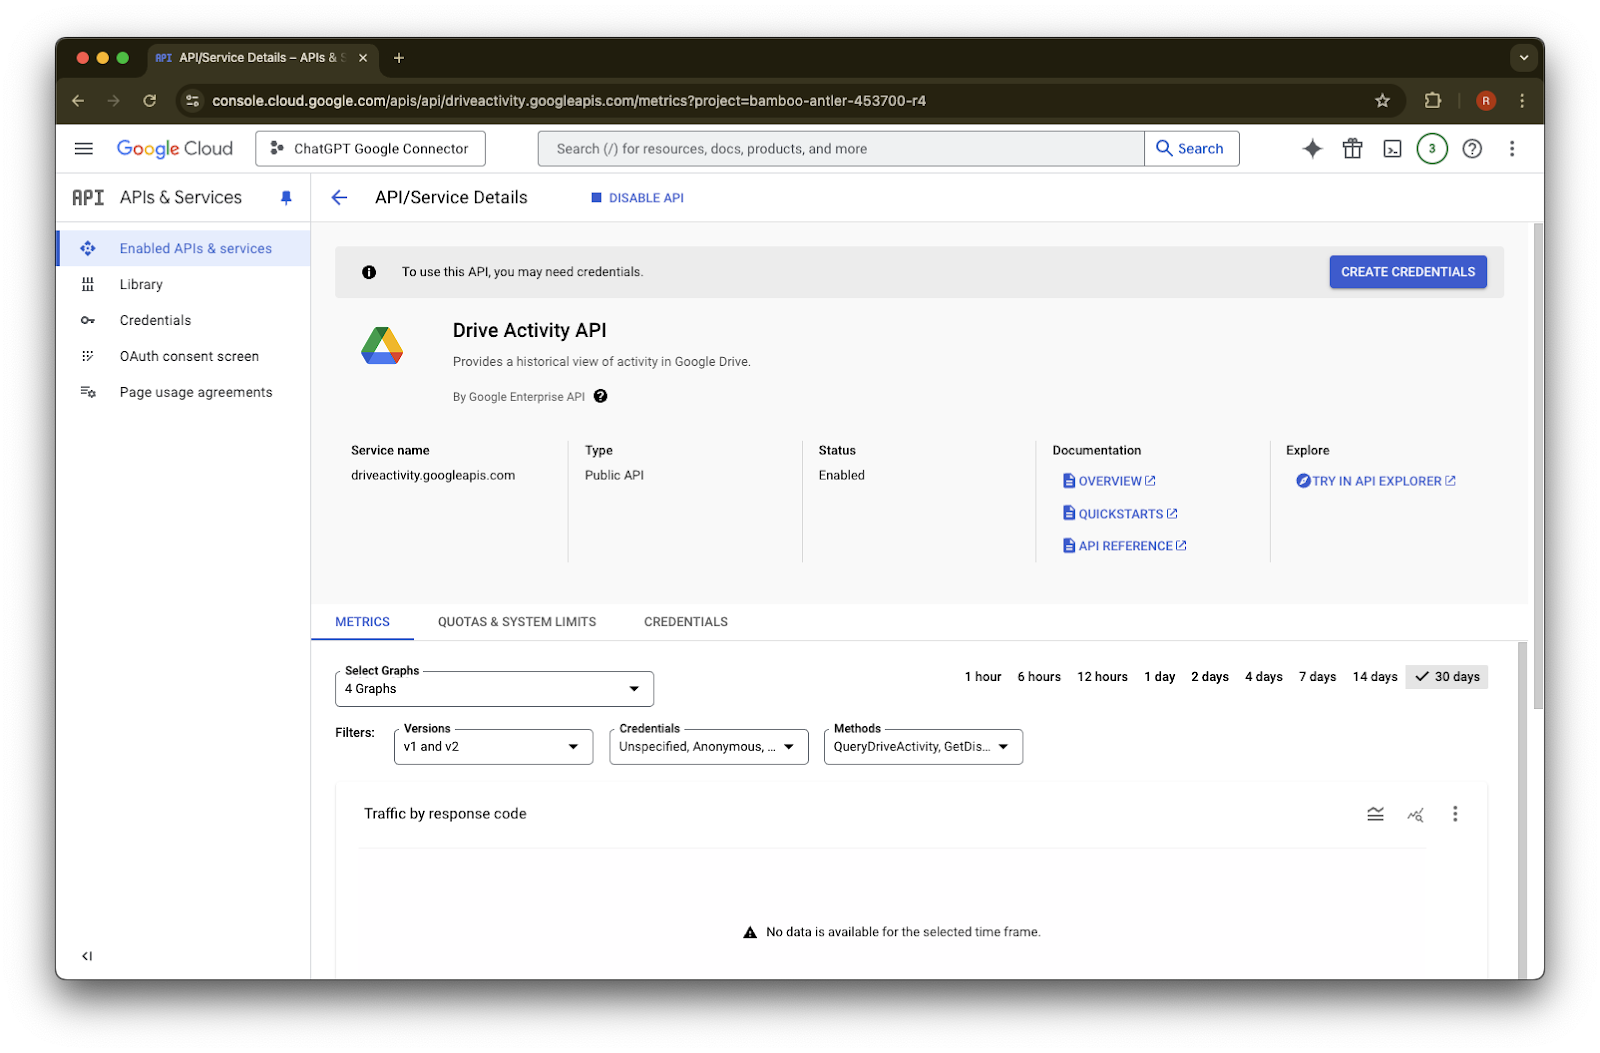
I-click ang Enable
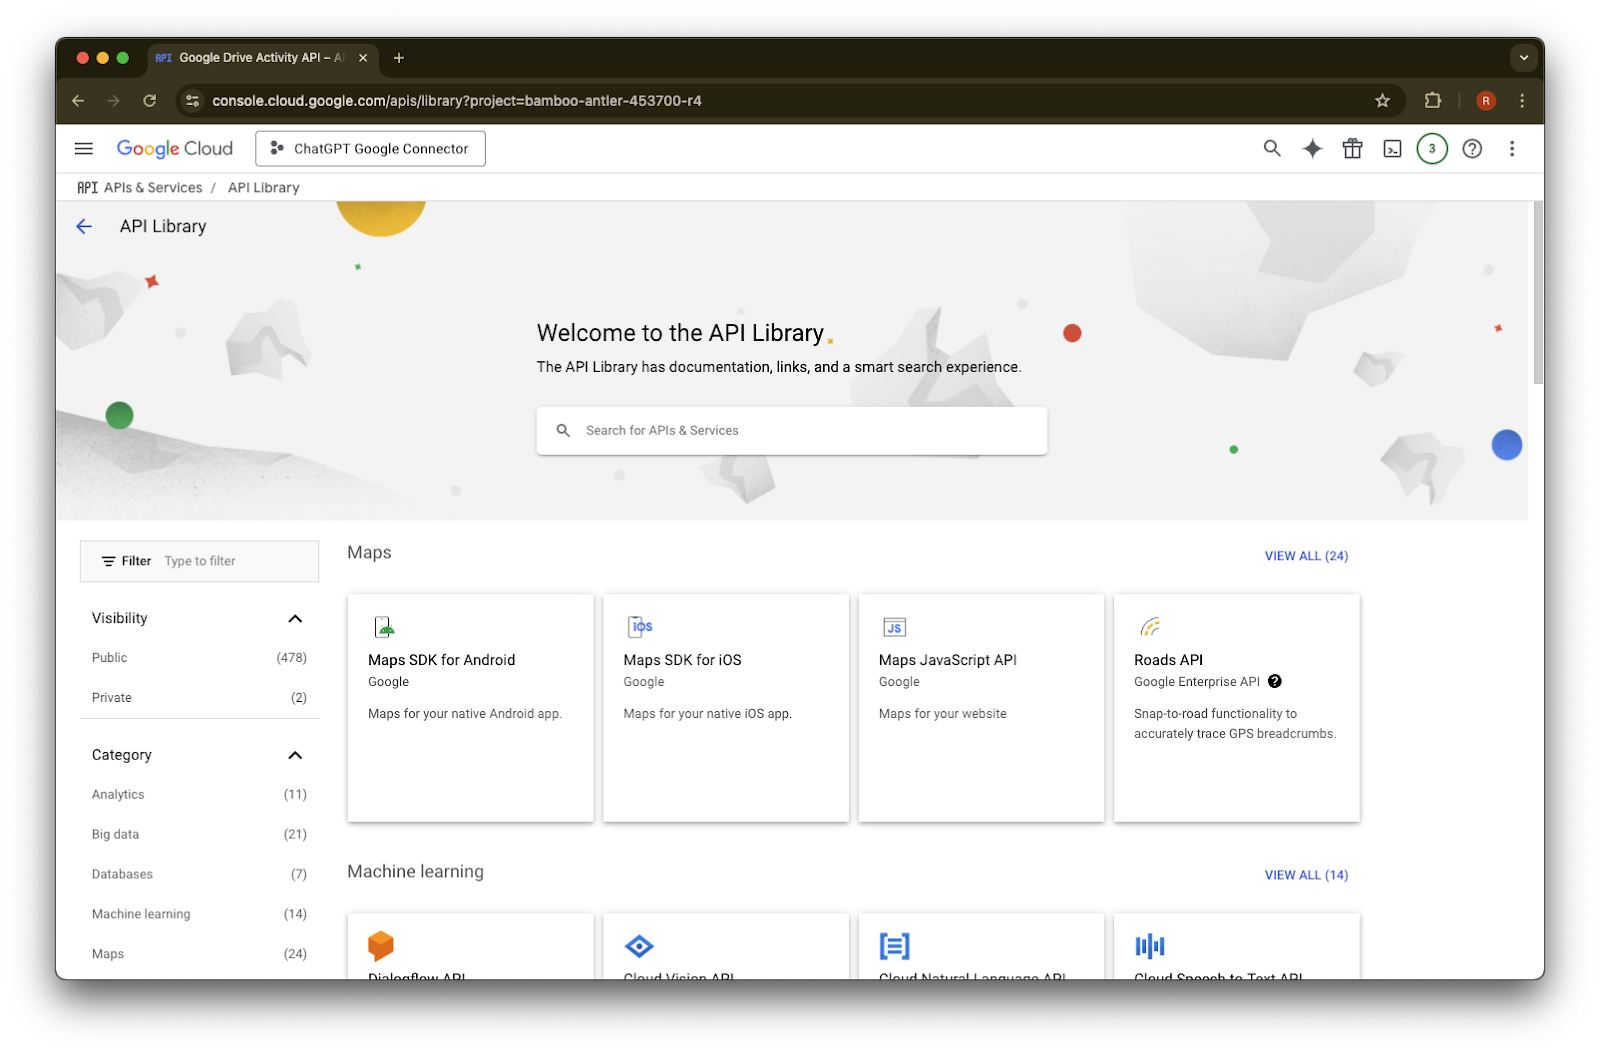
I-click ang Library
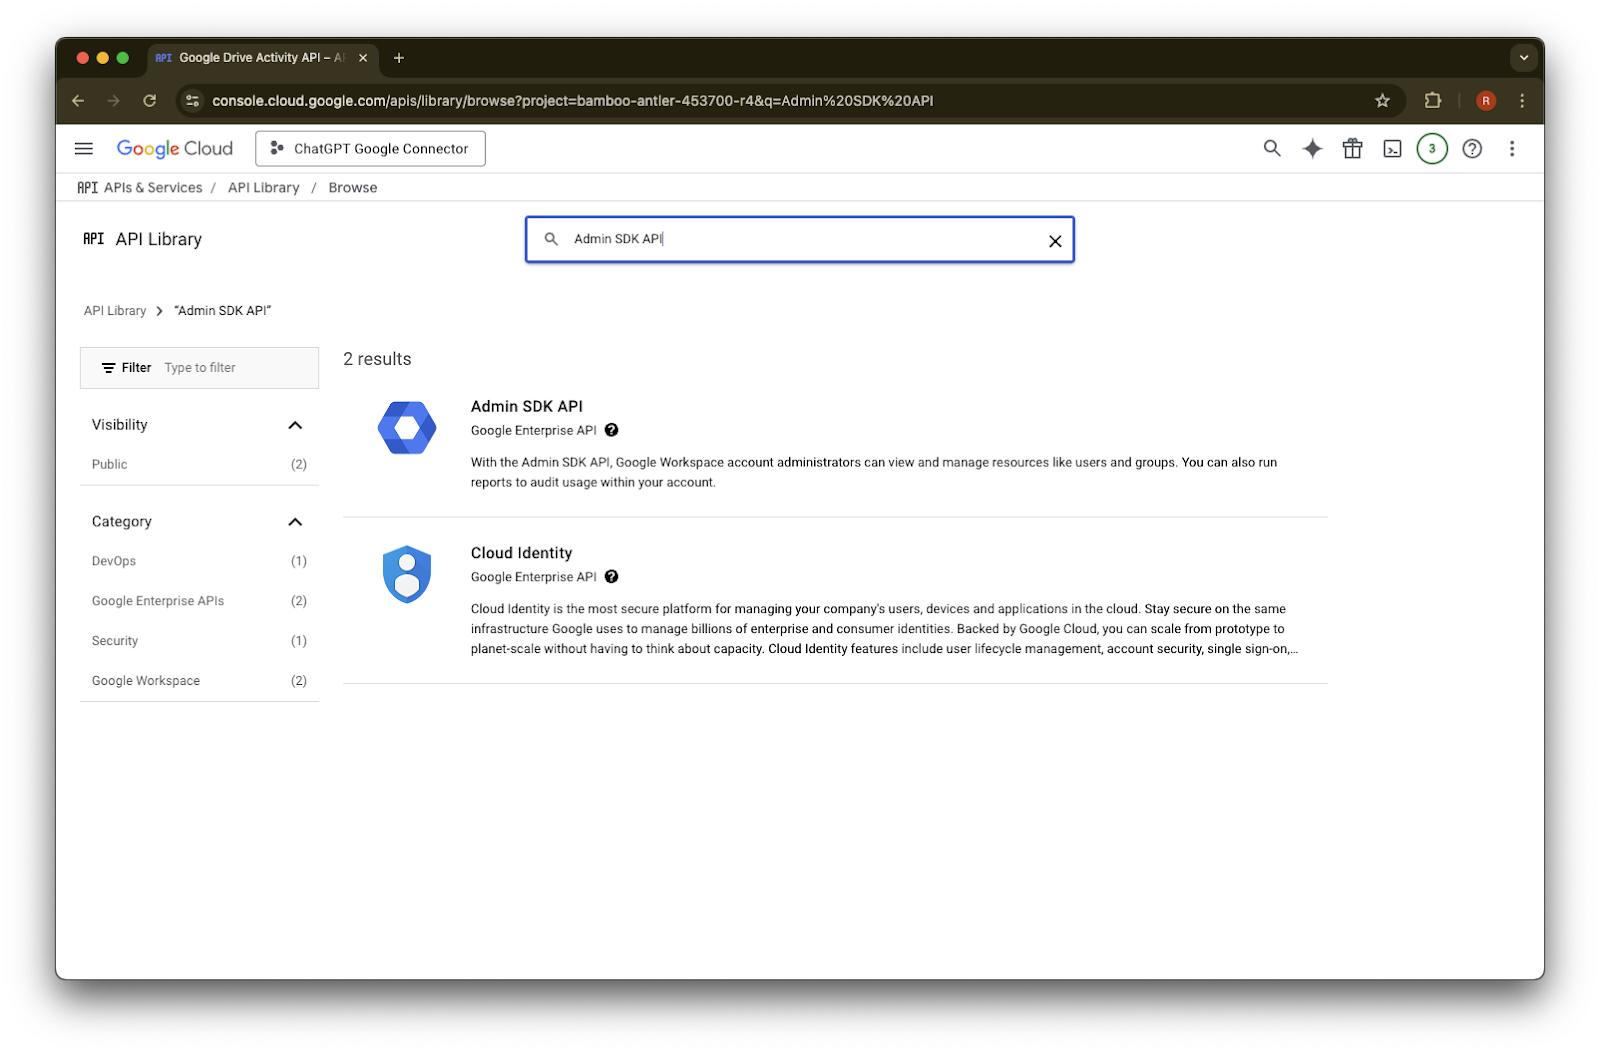
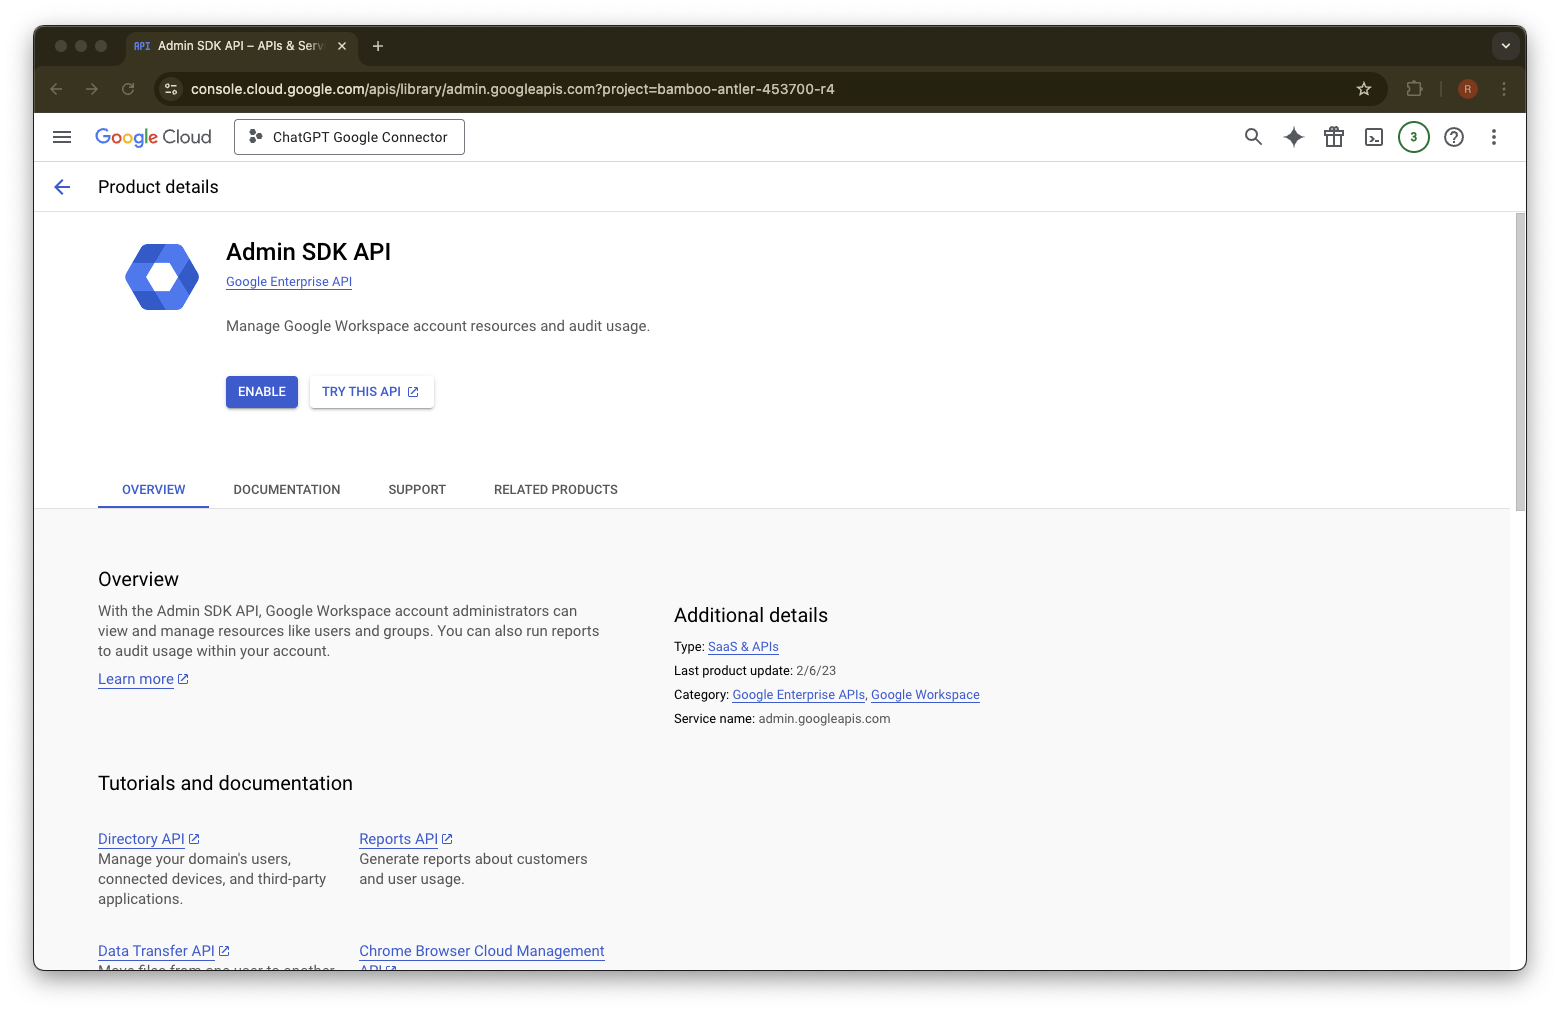
Hanapin ang Admin SDK API
Piliin ang Admin SDK API
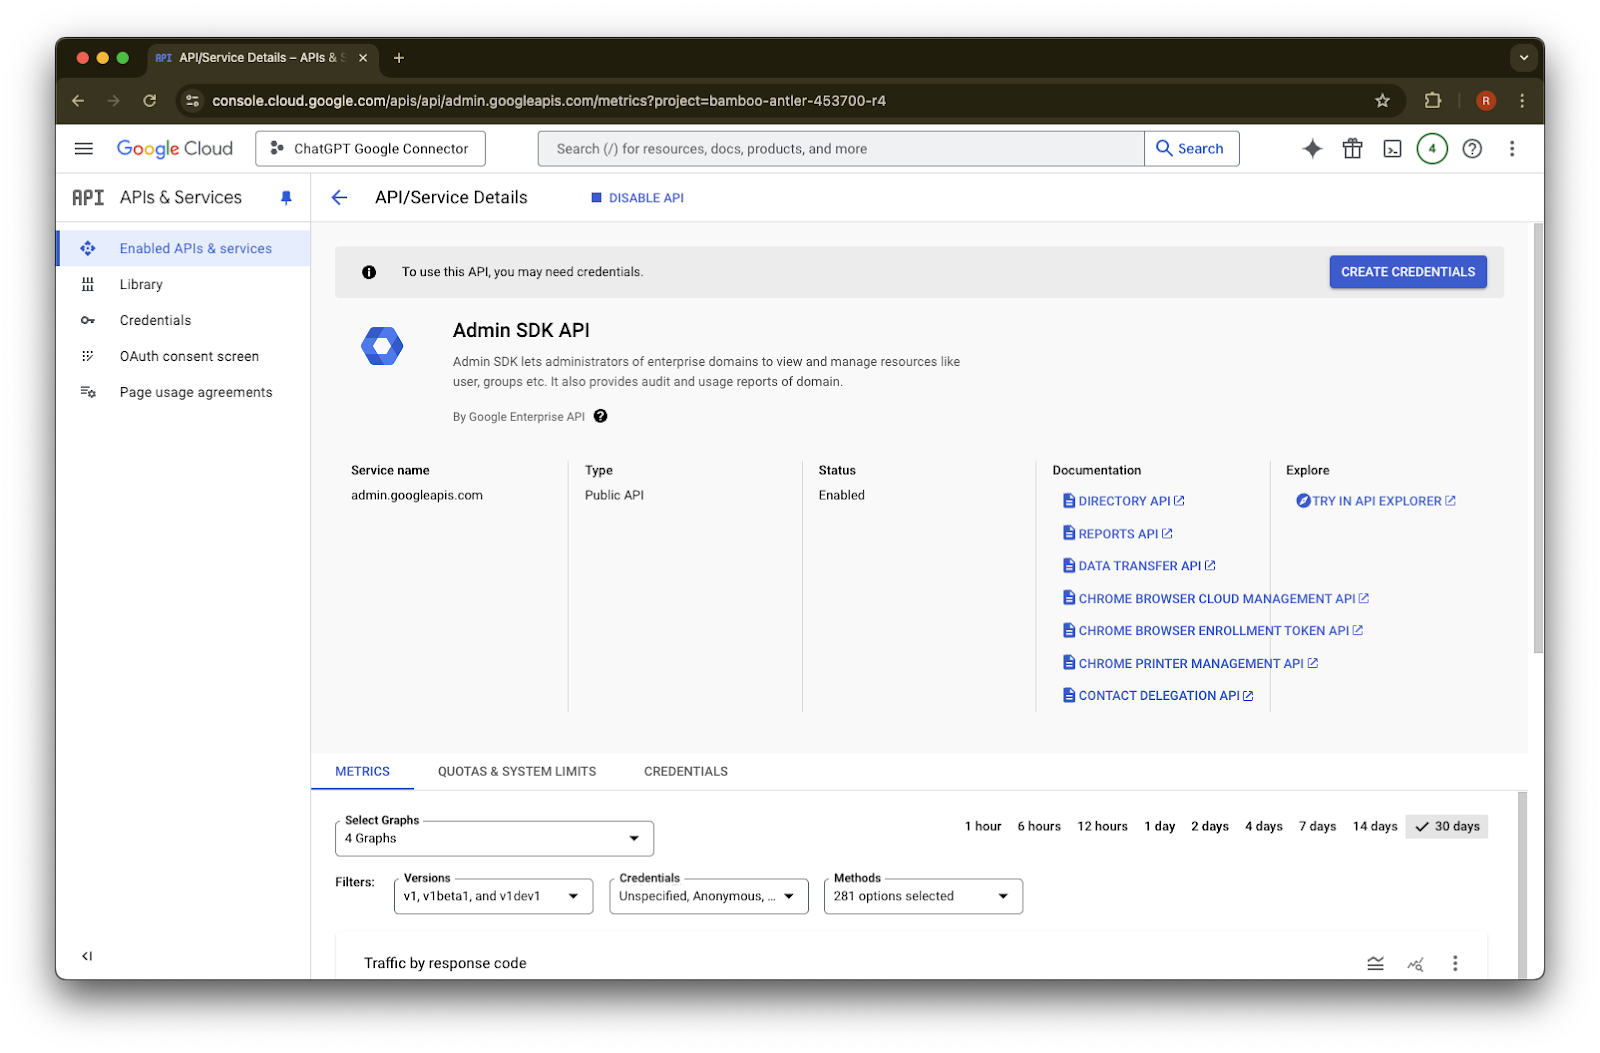
I-click ang Enable
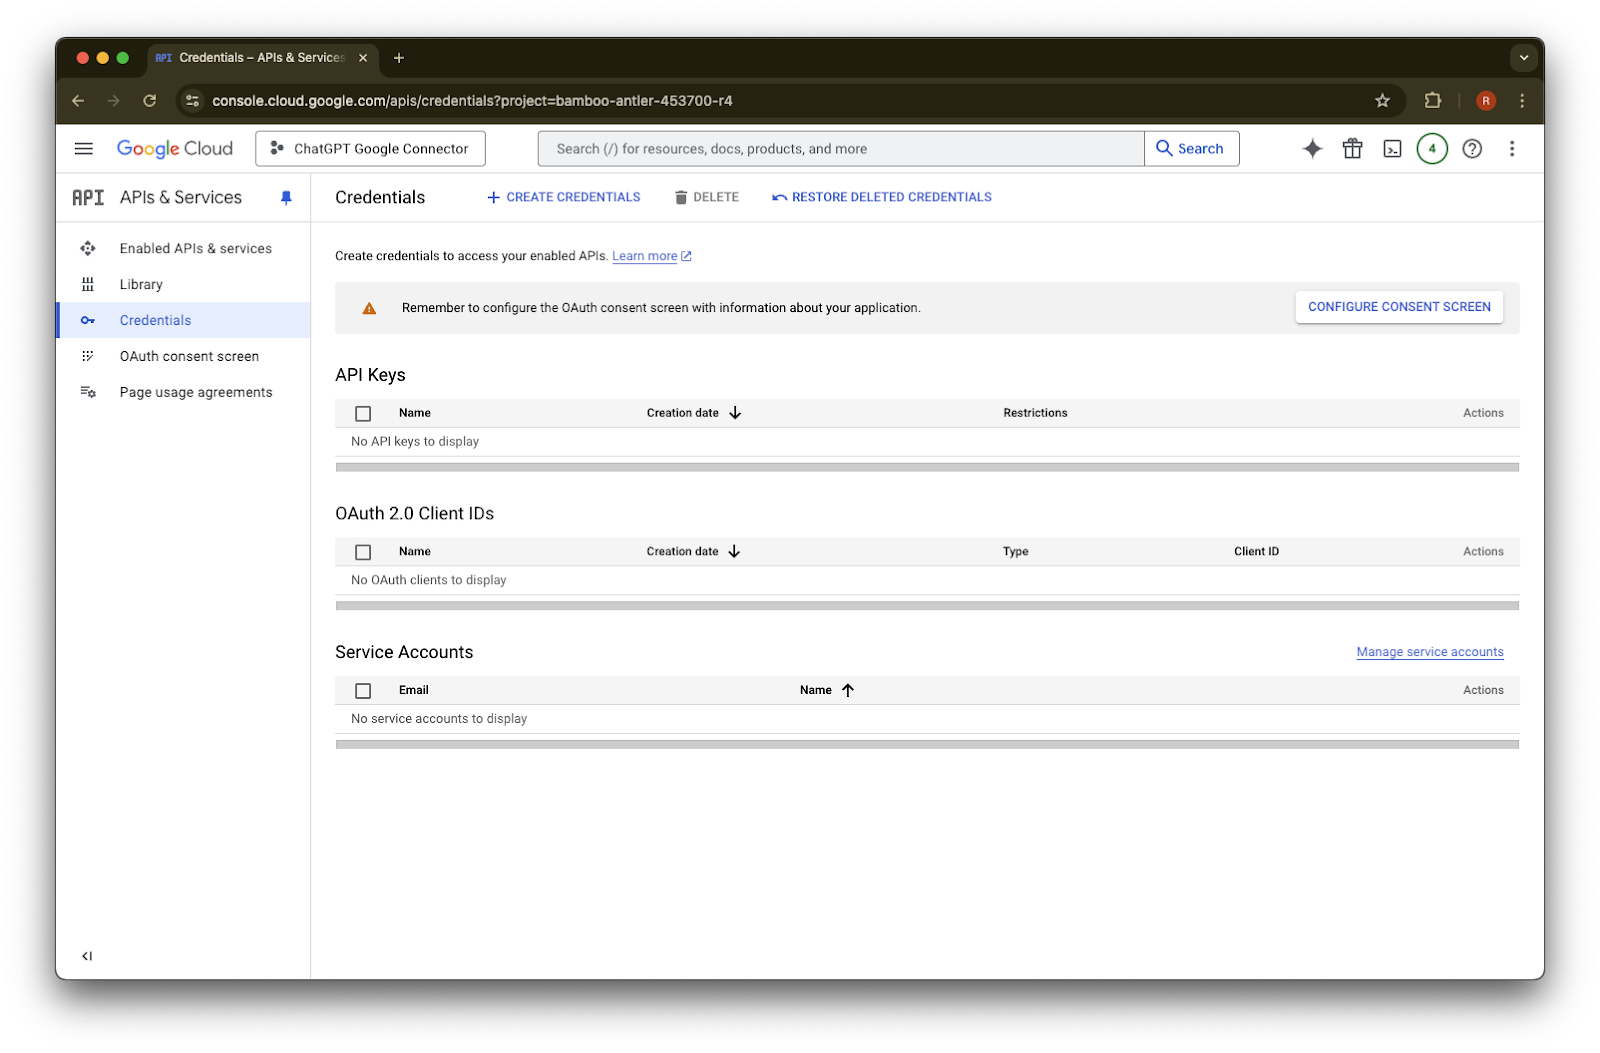
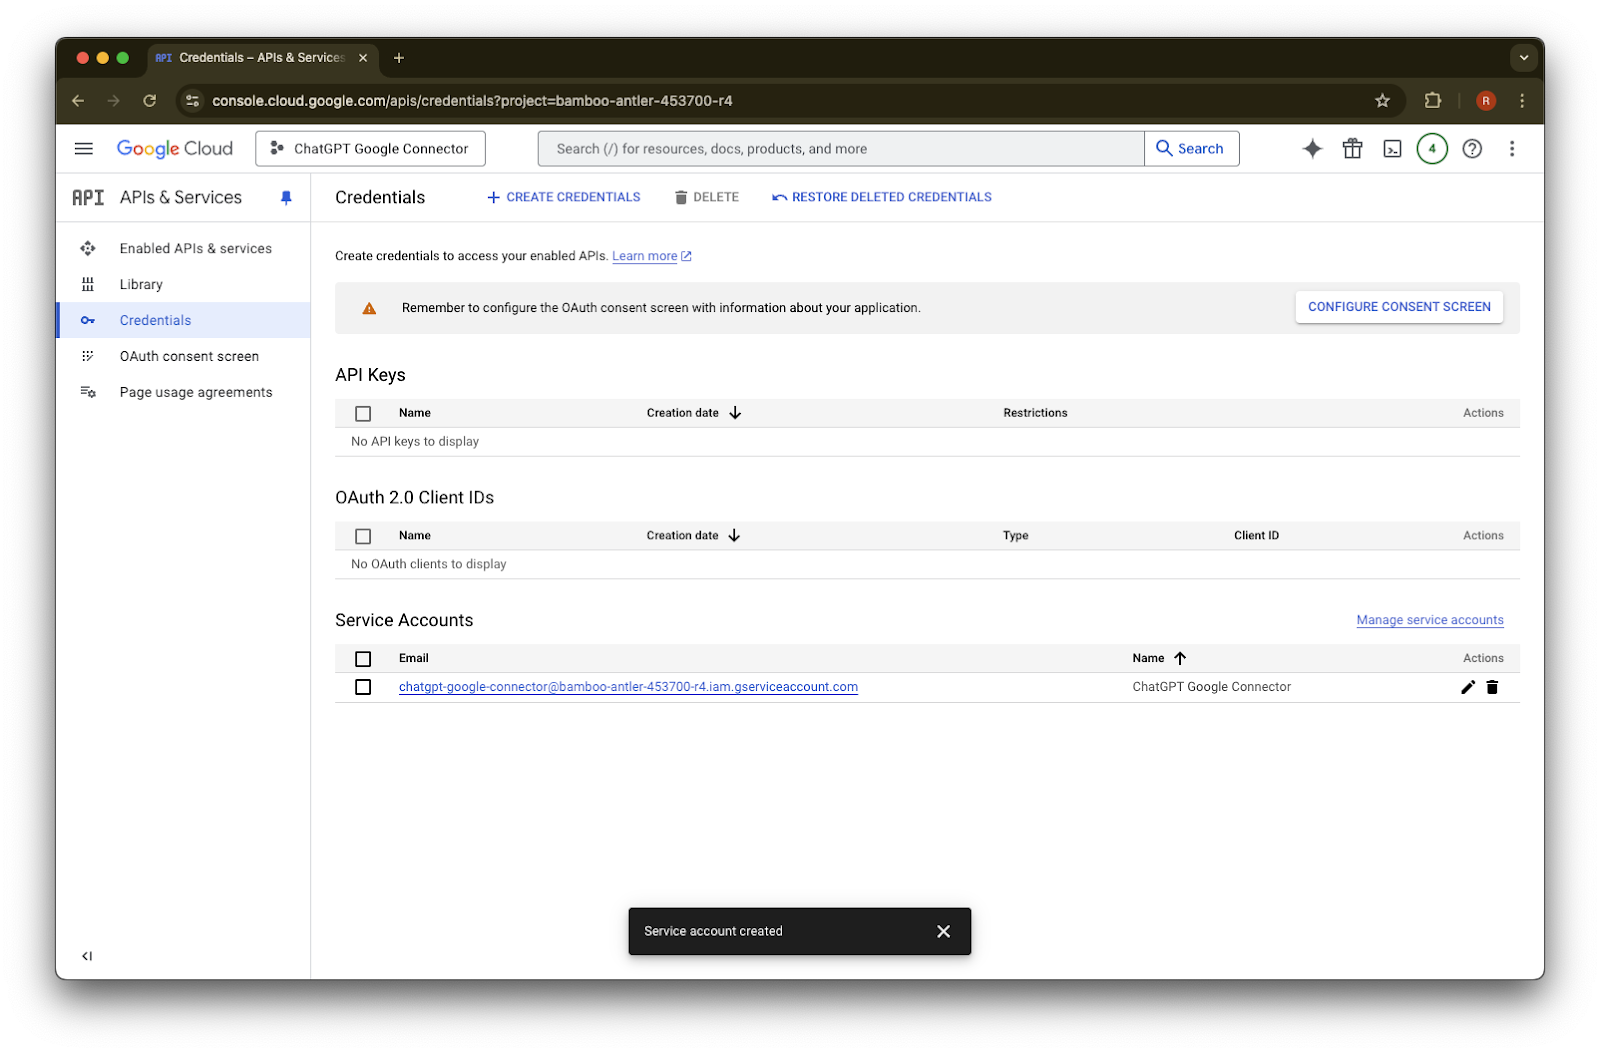
I-click ang Credentials
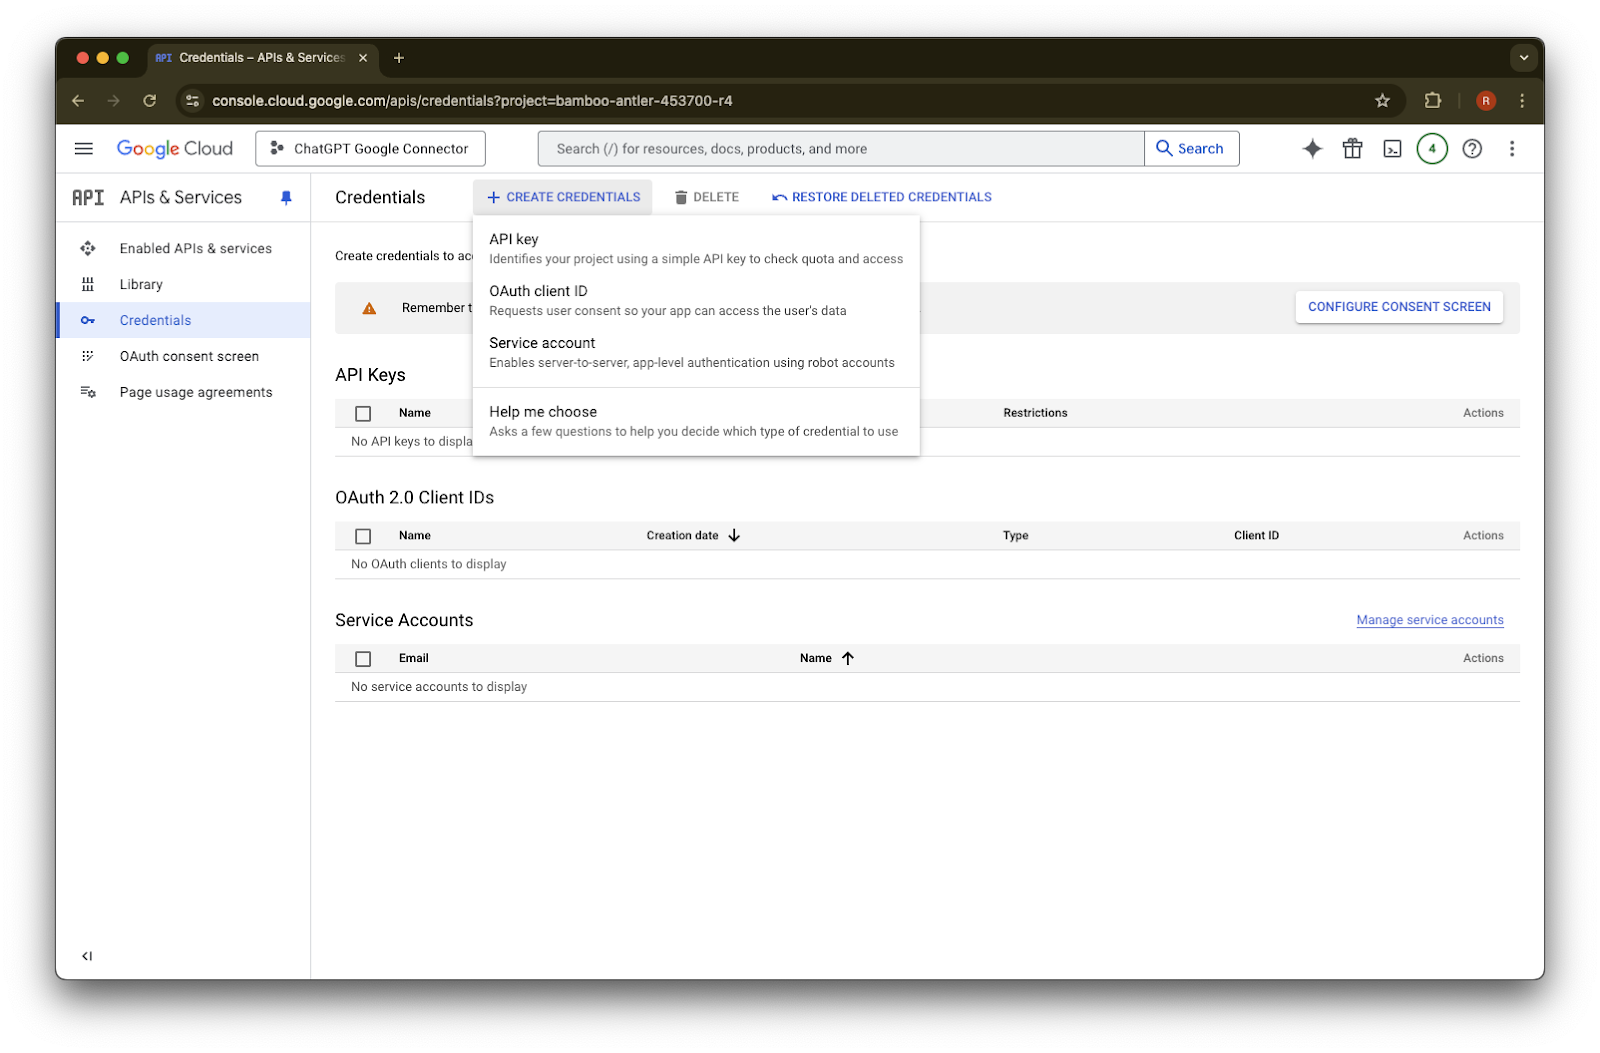
I-click ang Create Credentials
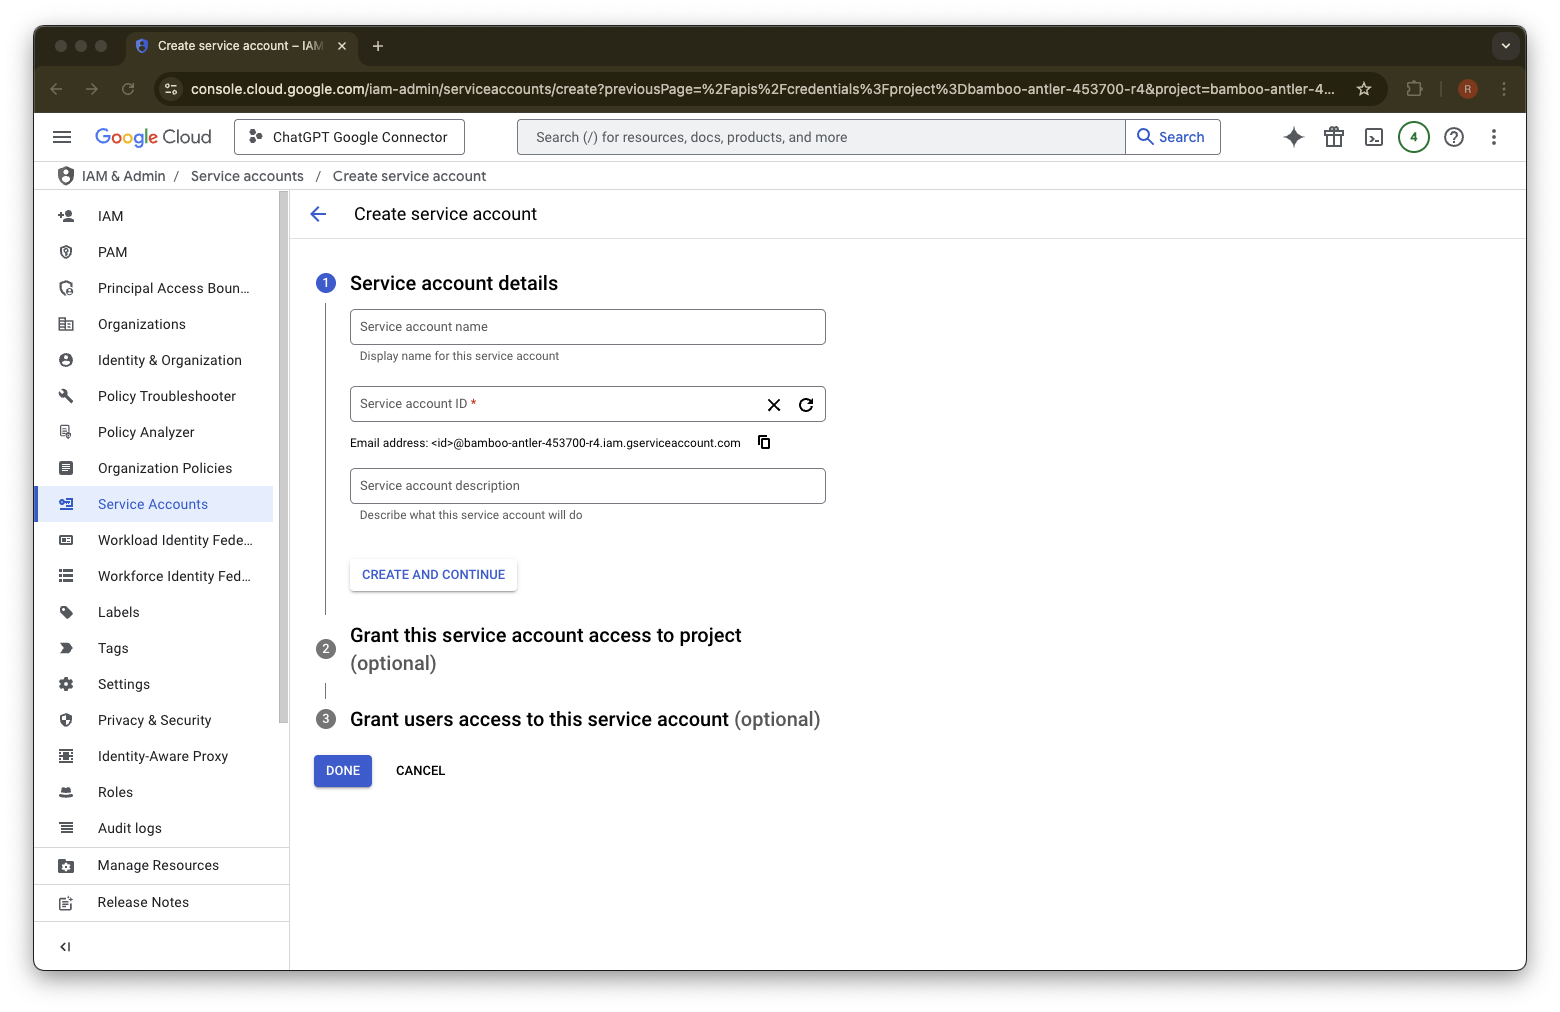
I-click ang Service account
Magbigay ng pangalan at paglalarawan na iyong pipiliin para sa service account na ito
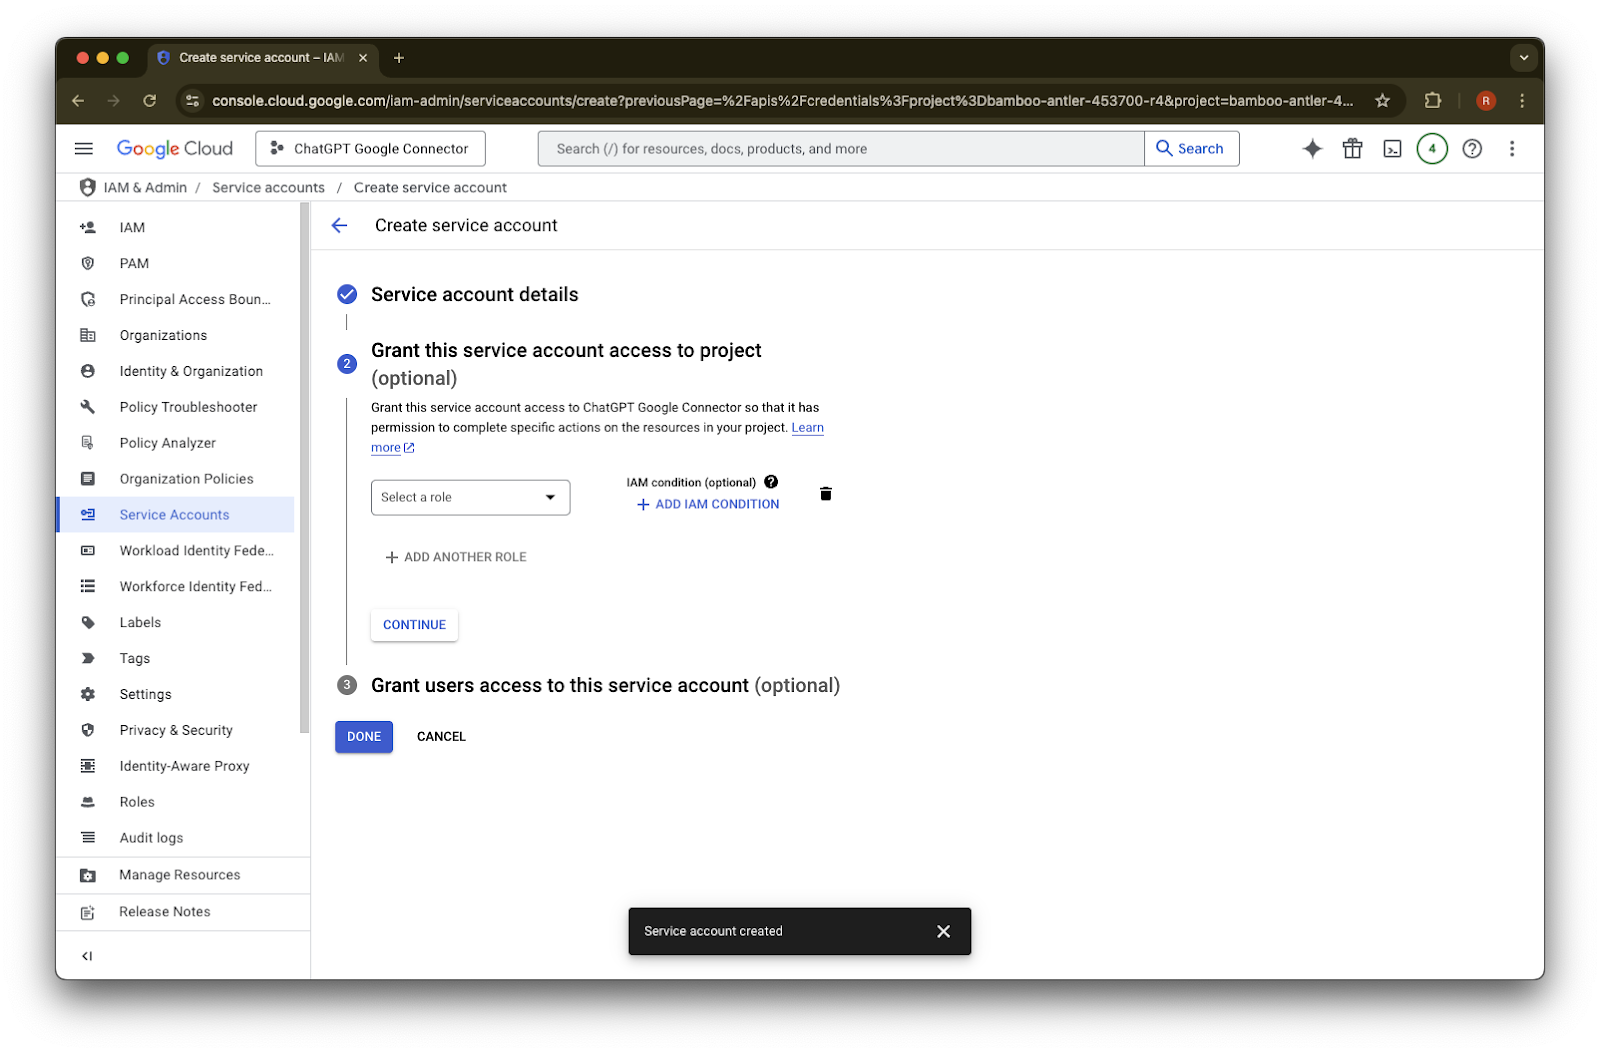
(Opsyonal) Maaari kang magtalaga ng role - hindi ito kailangan ng ChatGPT.
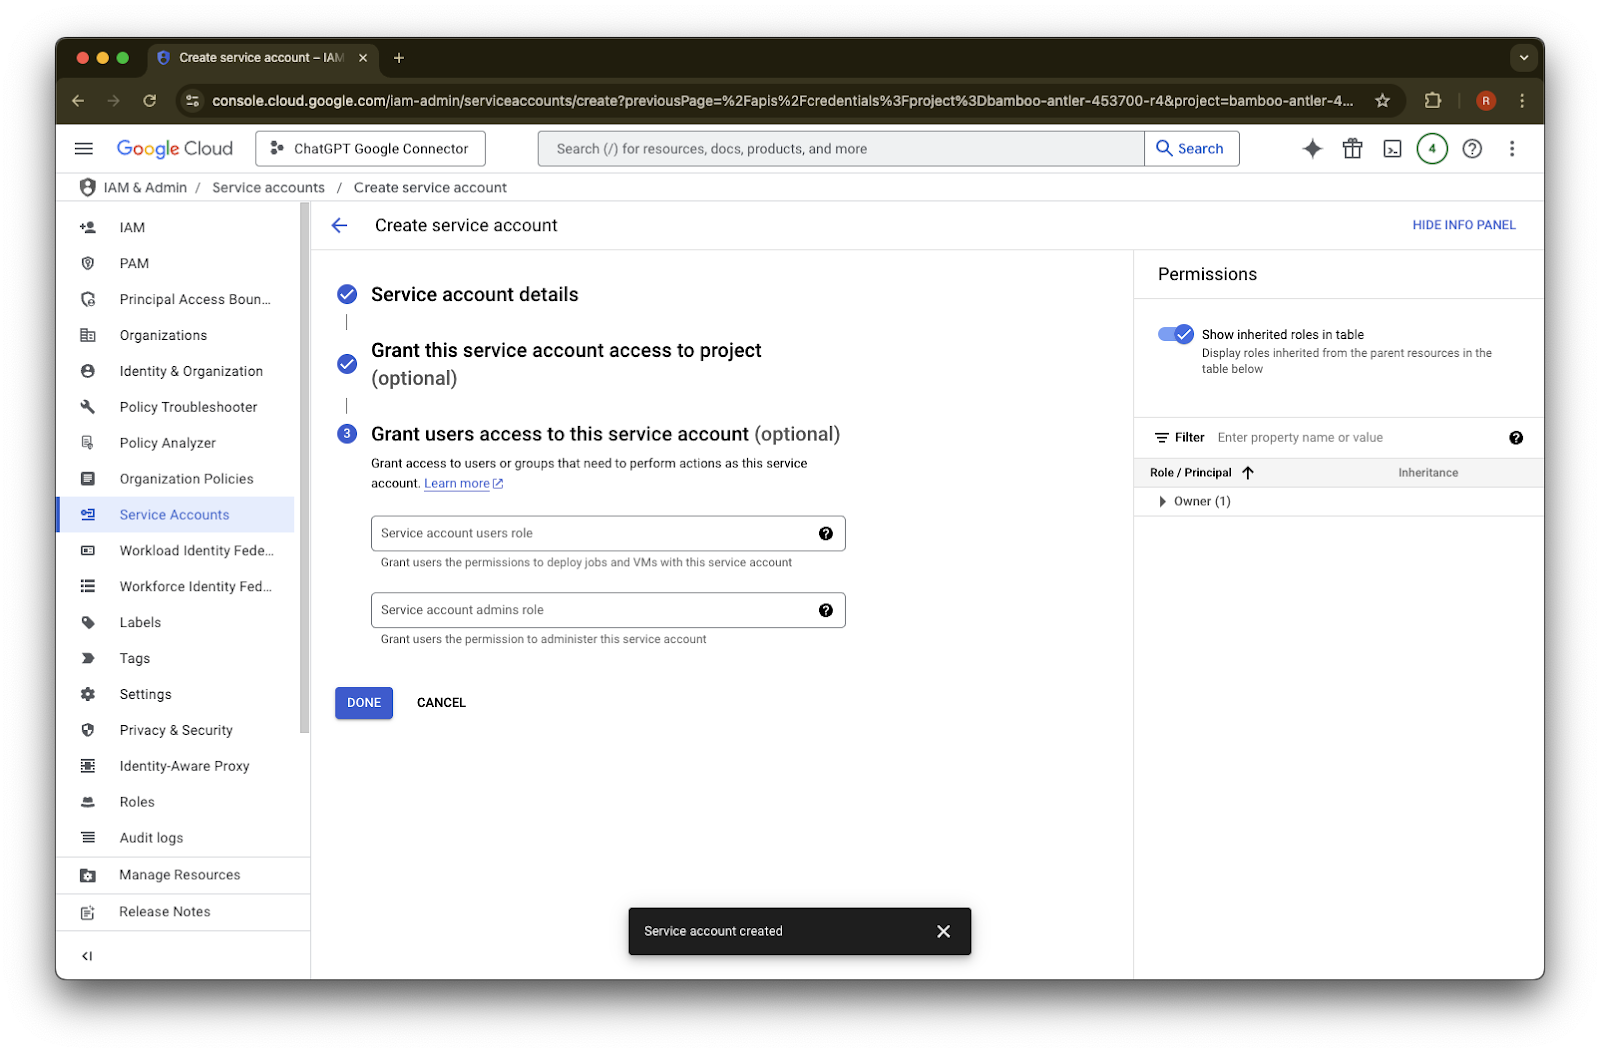
(Opsyonal) Maaari kang magbigay ng access sa service account - hindi ito kailangan ng ChatGPT.
I-click ang Done.
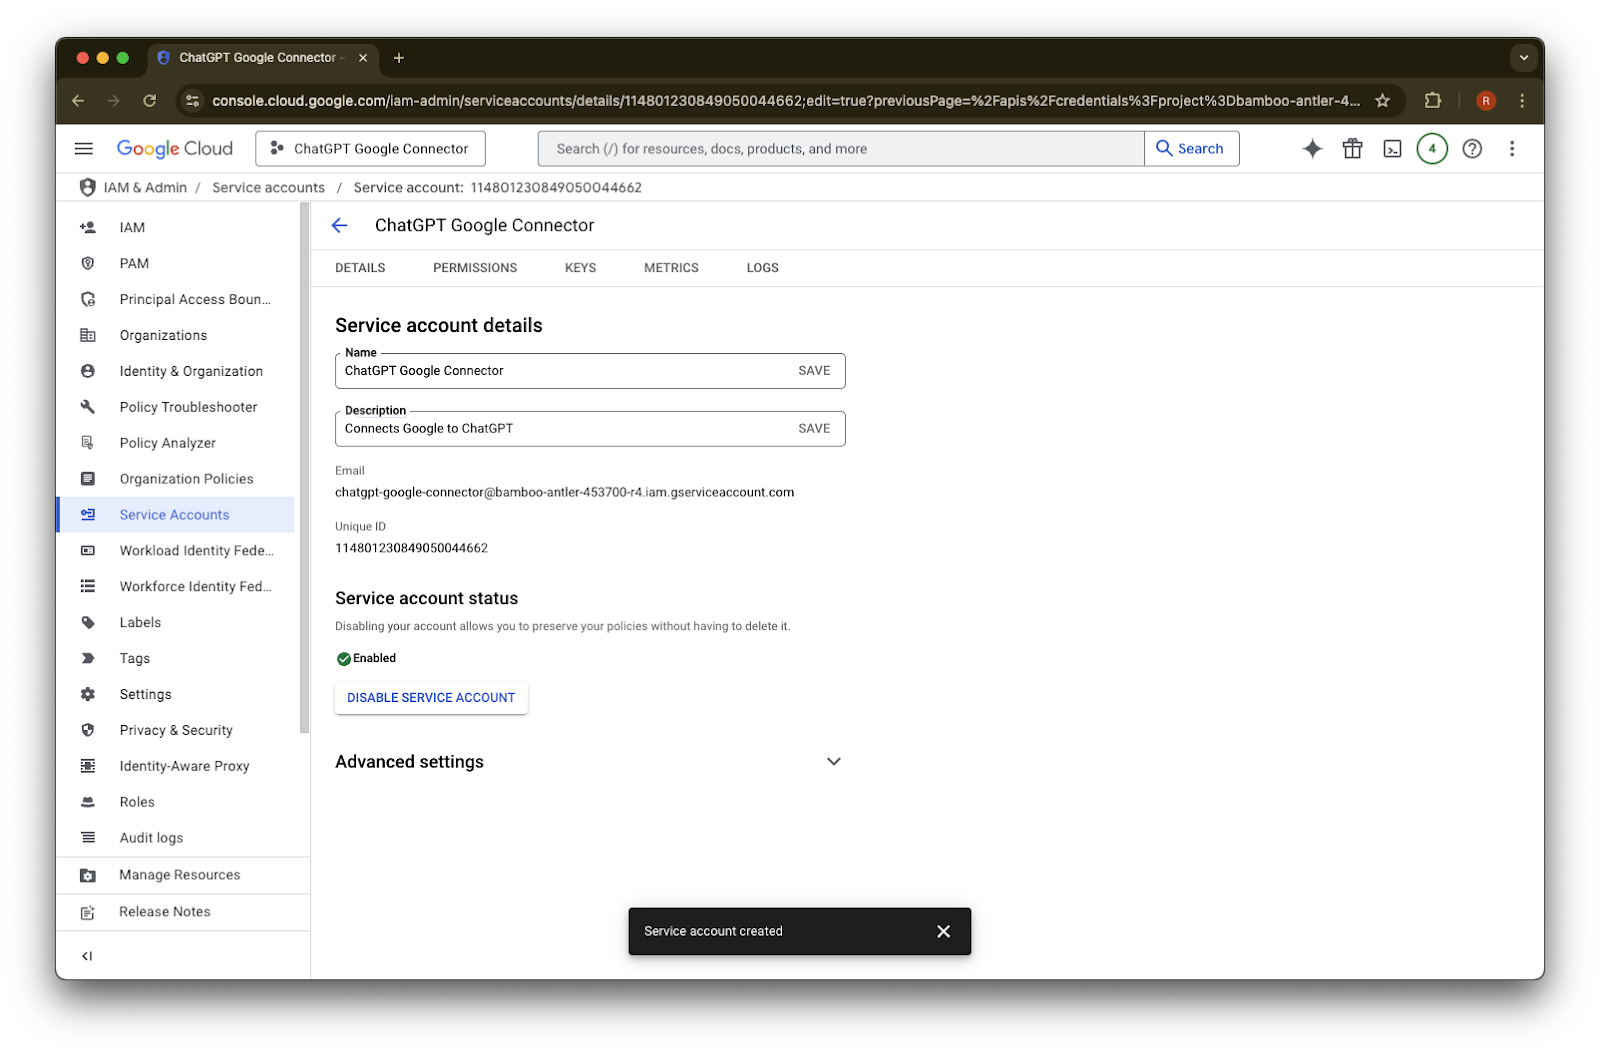
I-click ang service account na nalikha na ngayon.
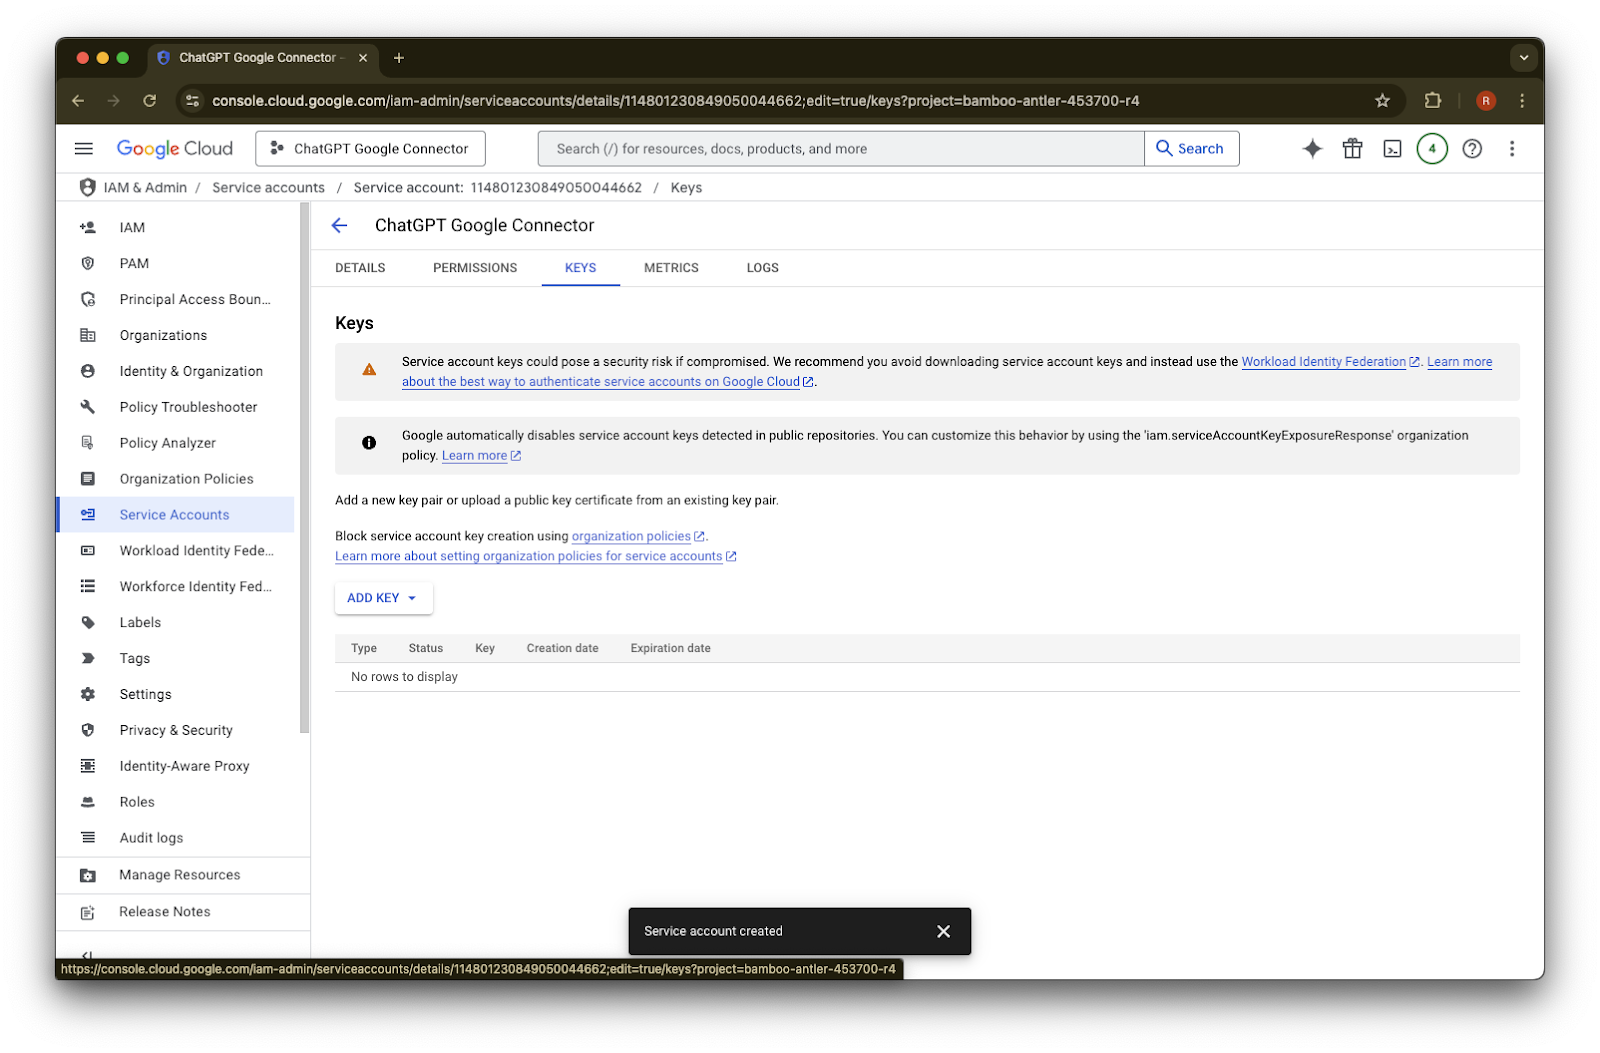
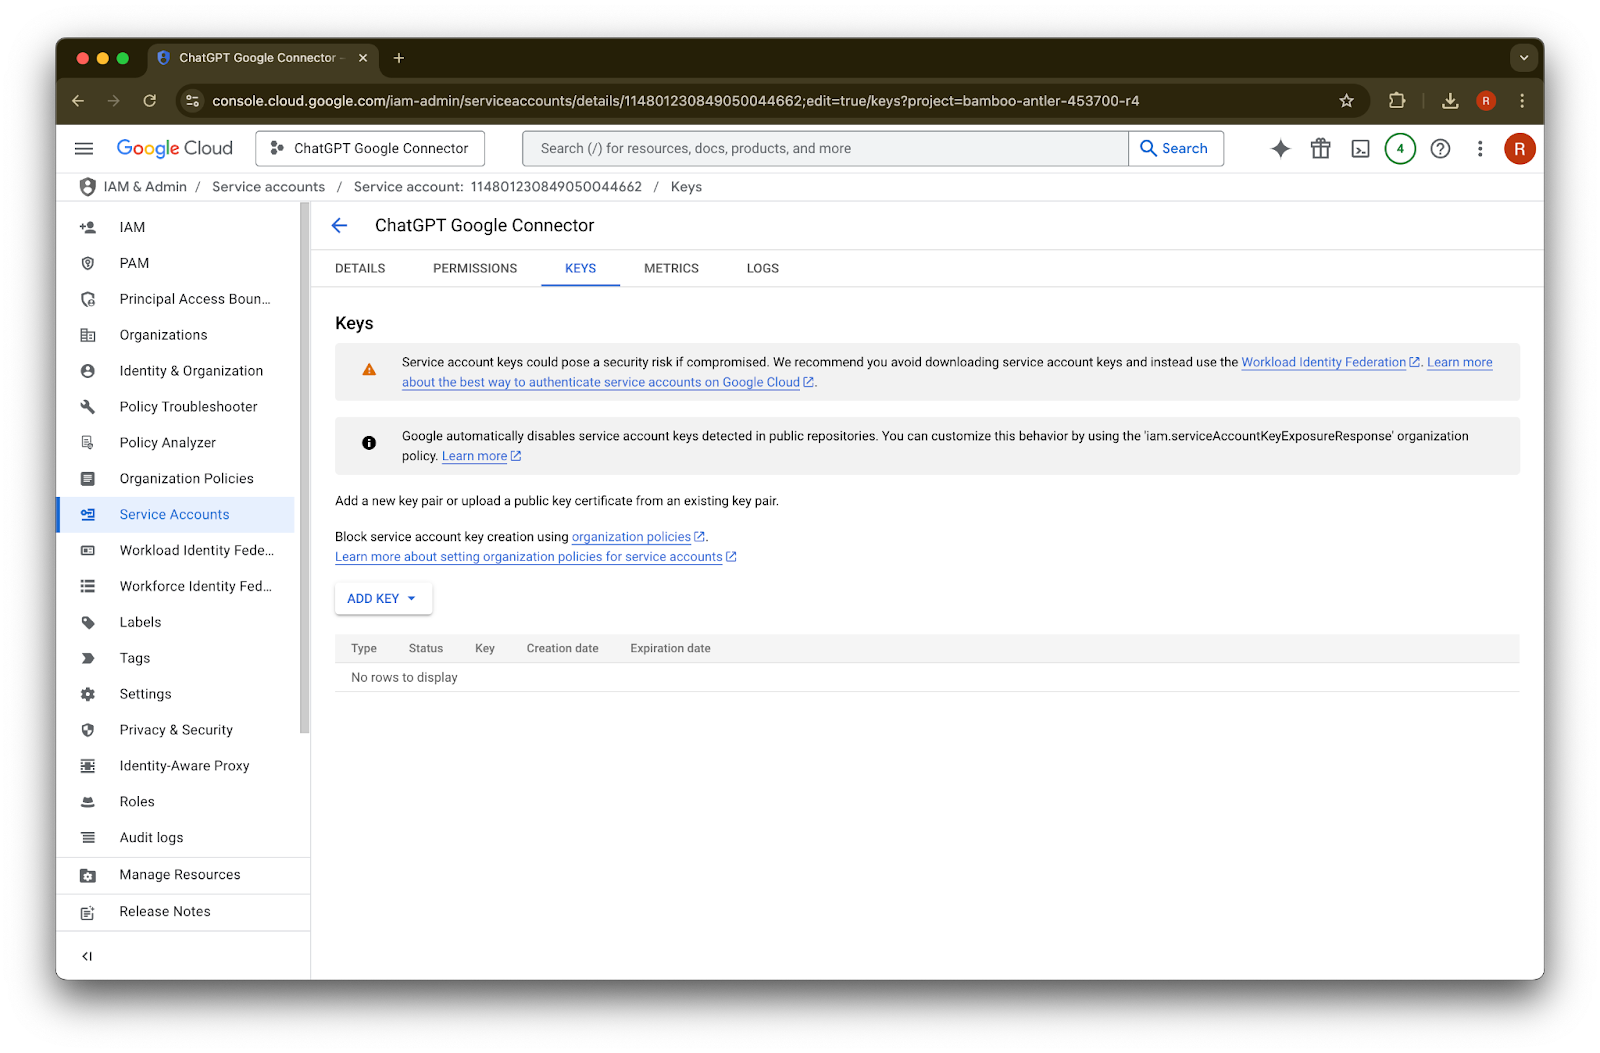
I-click ang keys.
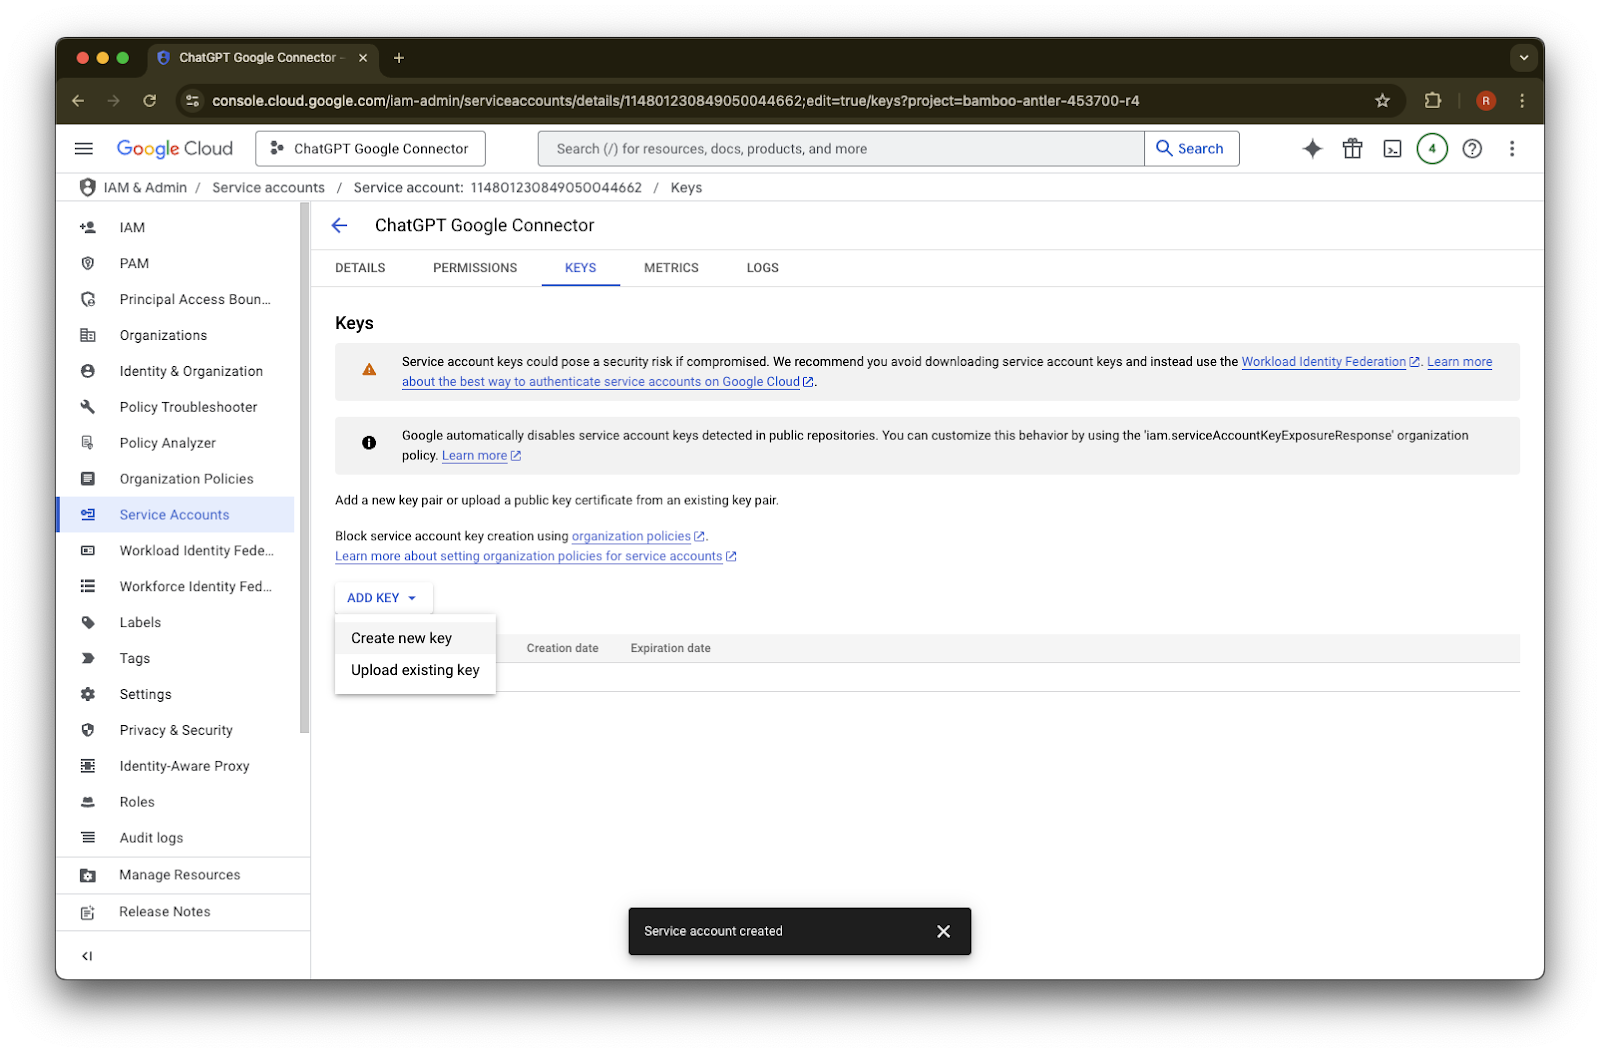
I-click ang Add Key
I-click ang Create new key
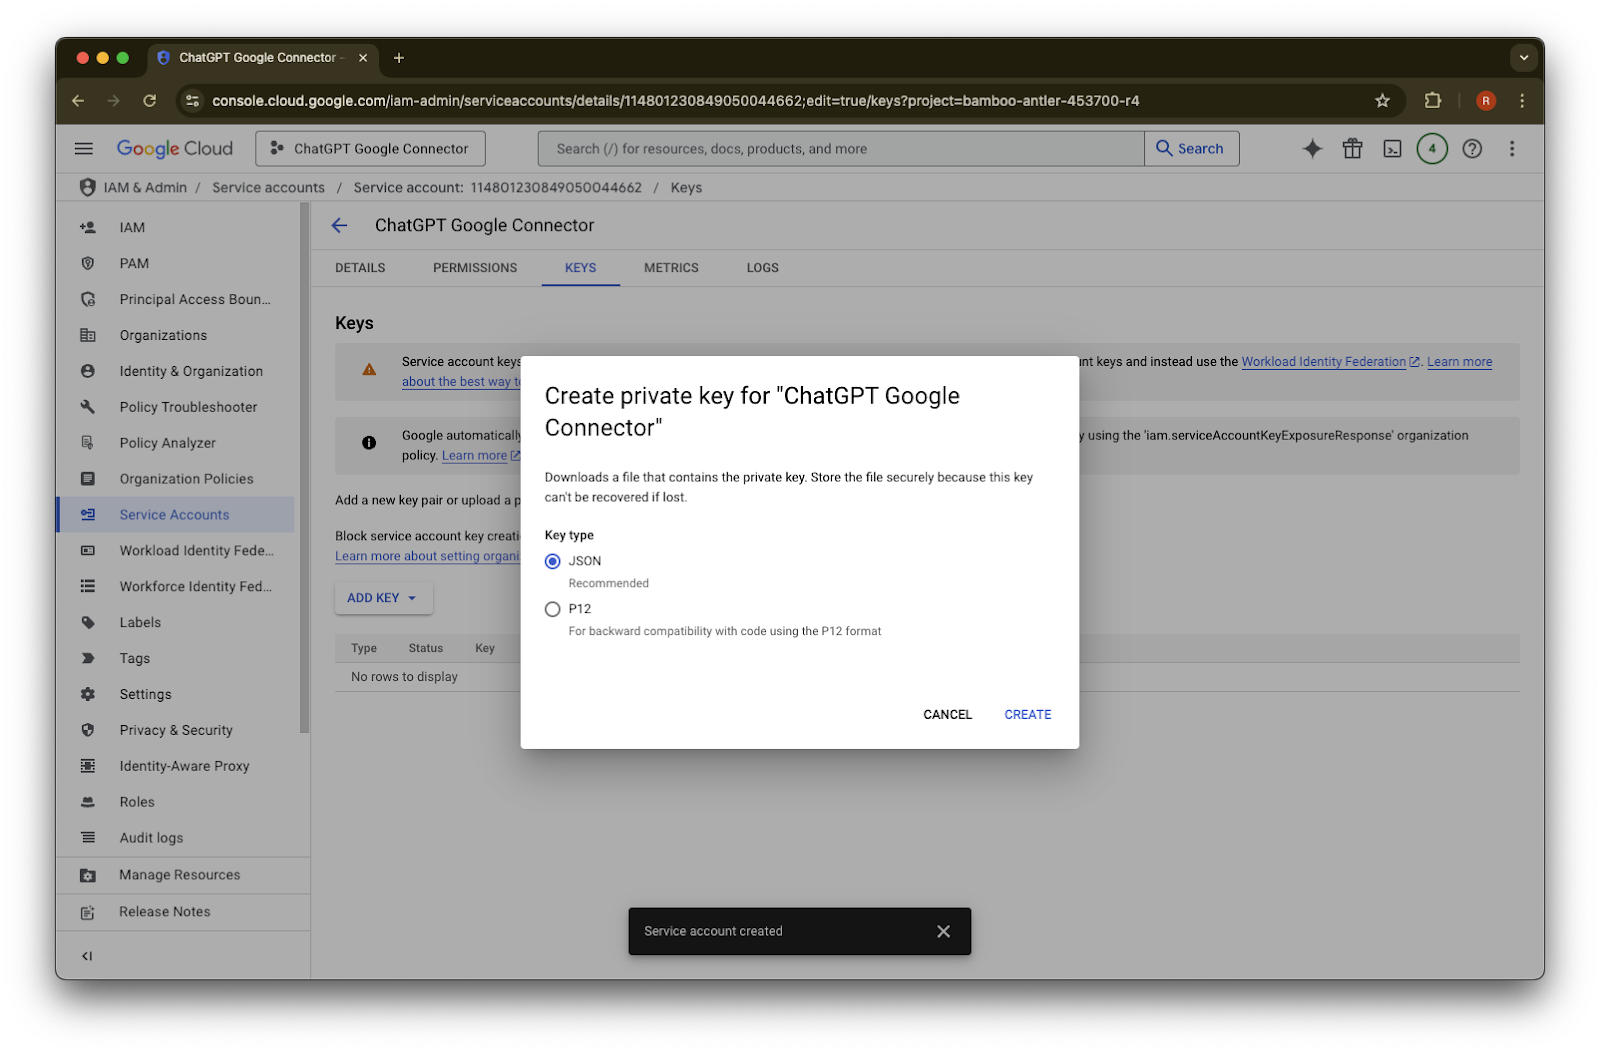
Panatilihin ang default na JSON key type at i-click ang Create
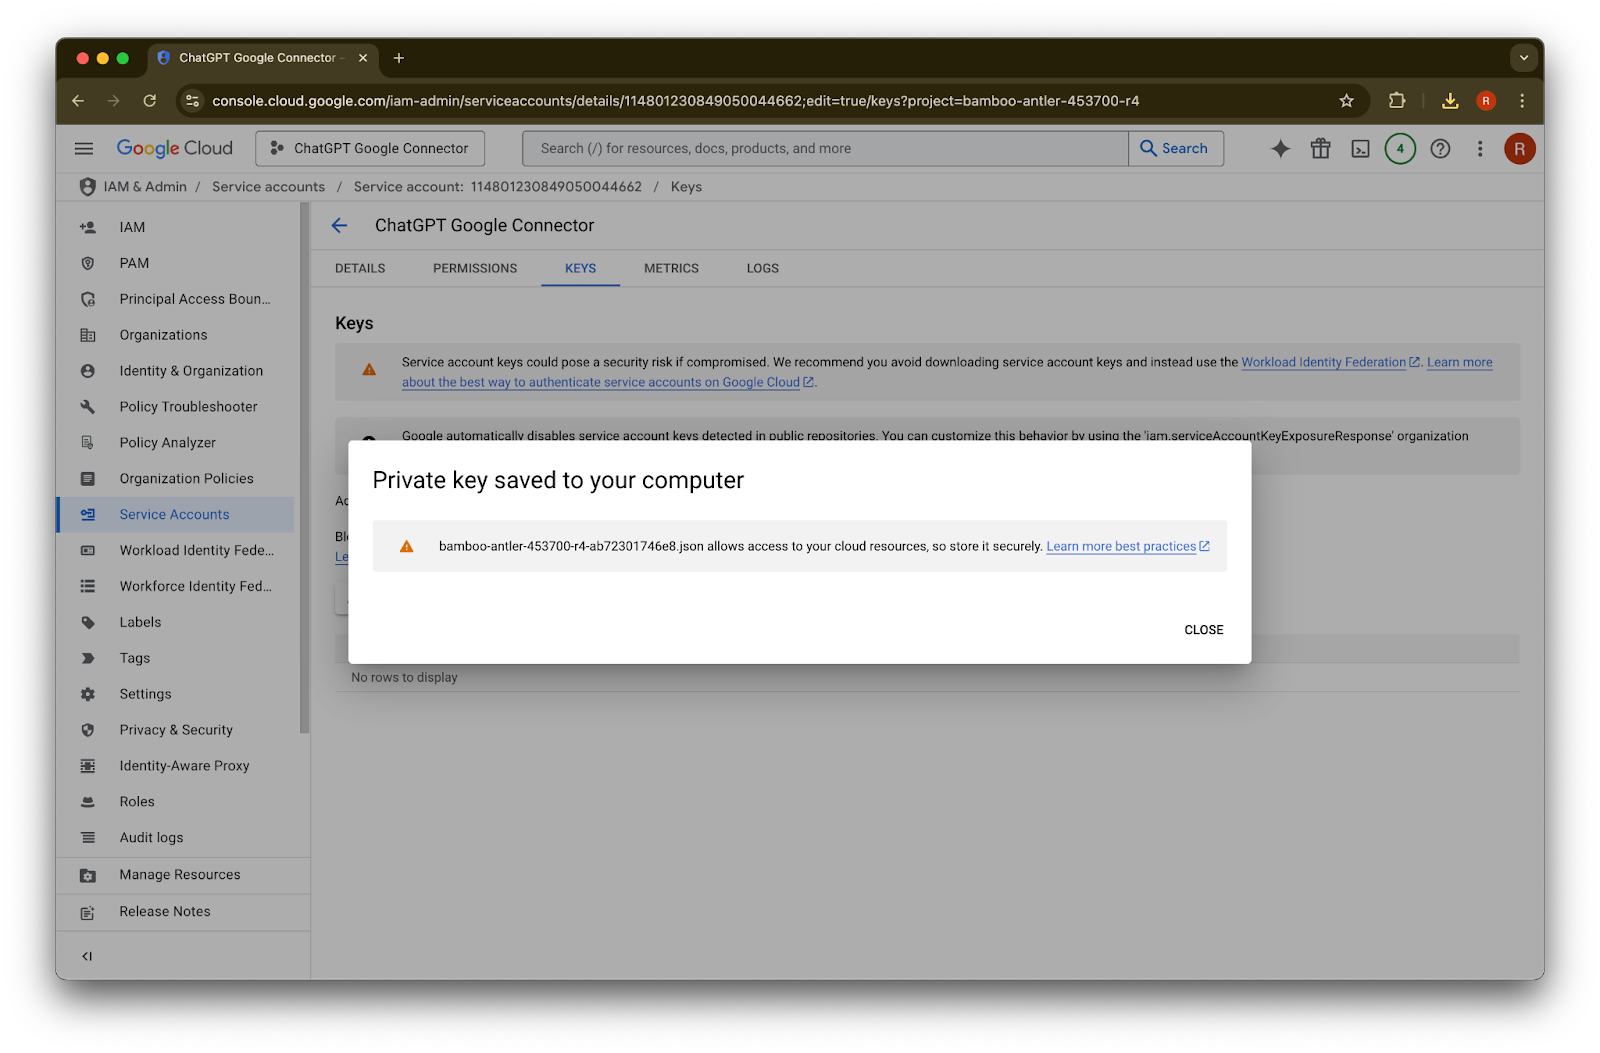
Kung makakita ka ng mensahe ng error na nagsasabing “Service account key creation is disabled” sundin ang mga hakbang na ito upang i-enable ang paglikha.I-click ang Close. Na-download na ngayon ang key sa iyong computer. Ia-upload mo ito mamaya sa ChatGPT admin console.
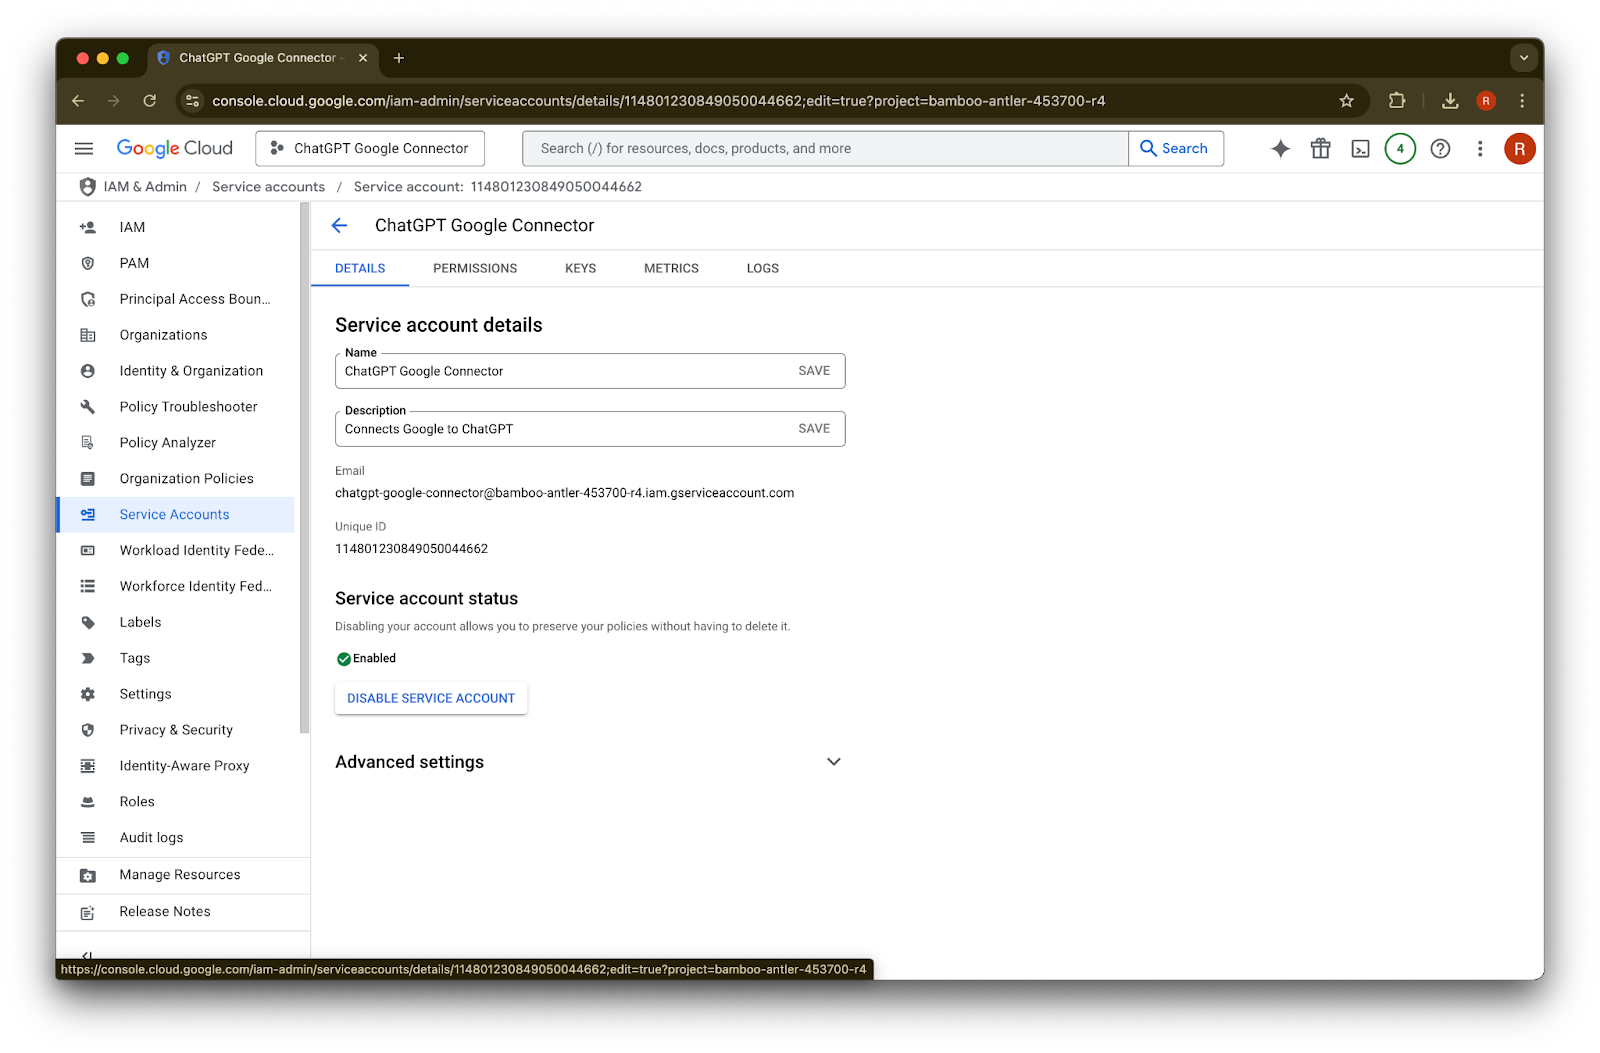
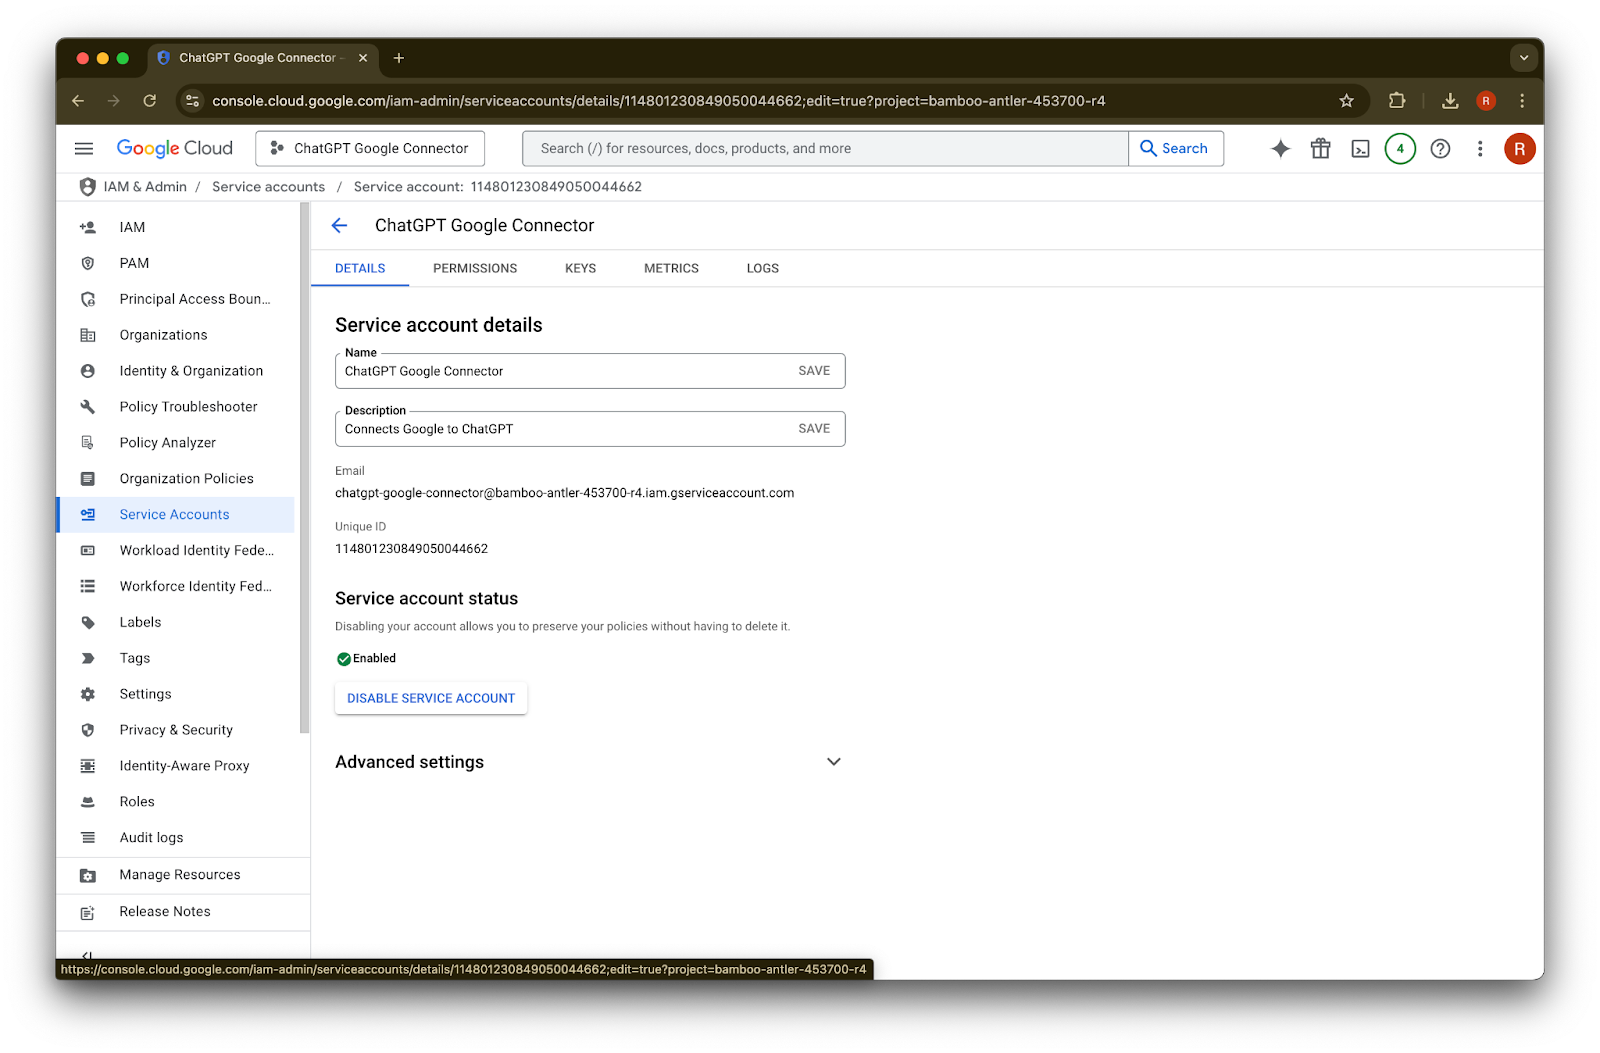
I-click ang details
Tandaan ang Unique ID. Kakailanganin ito sa Hakbang 42.
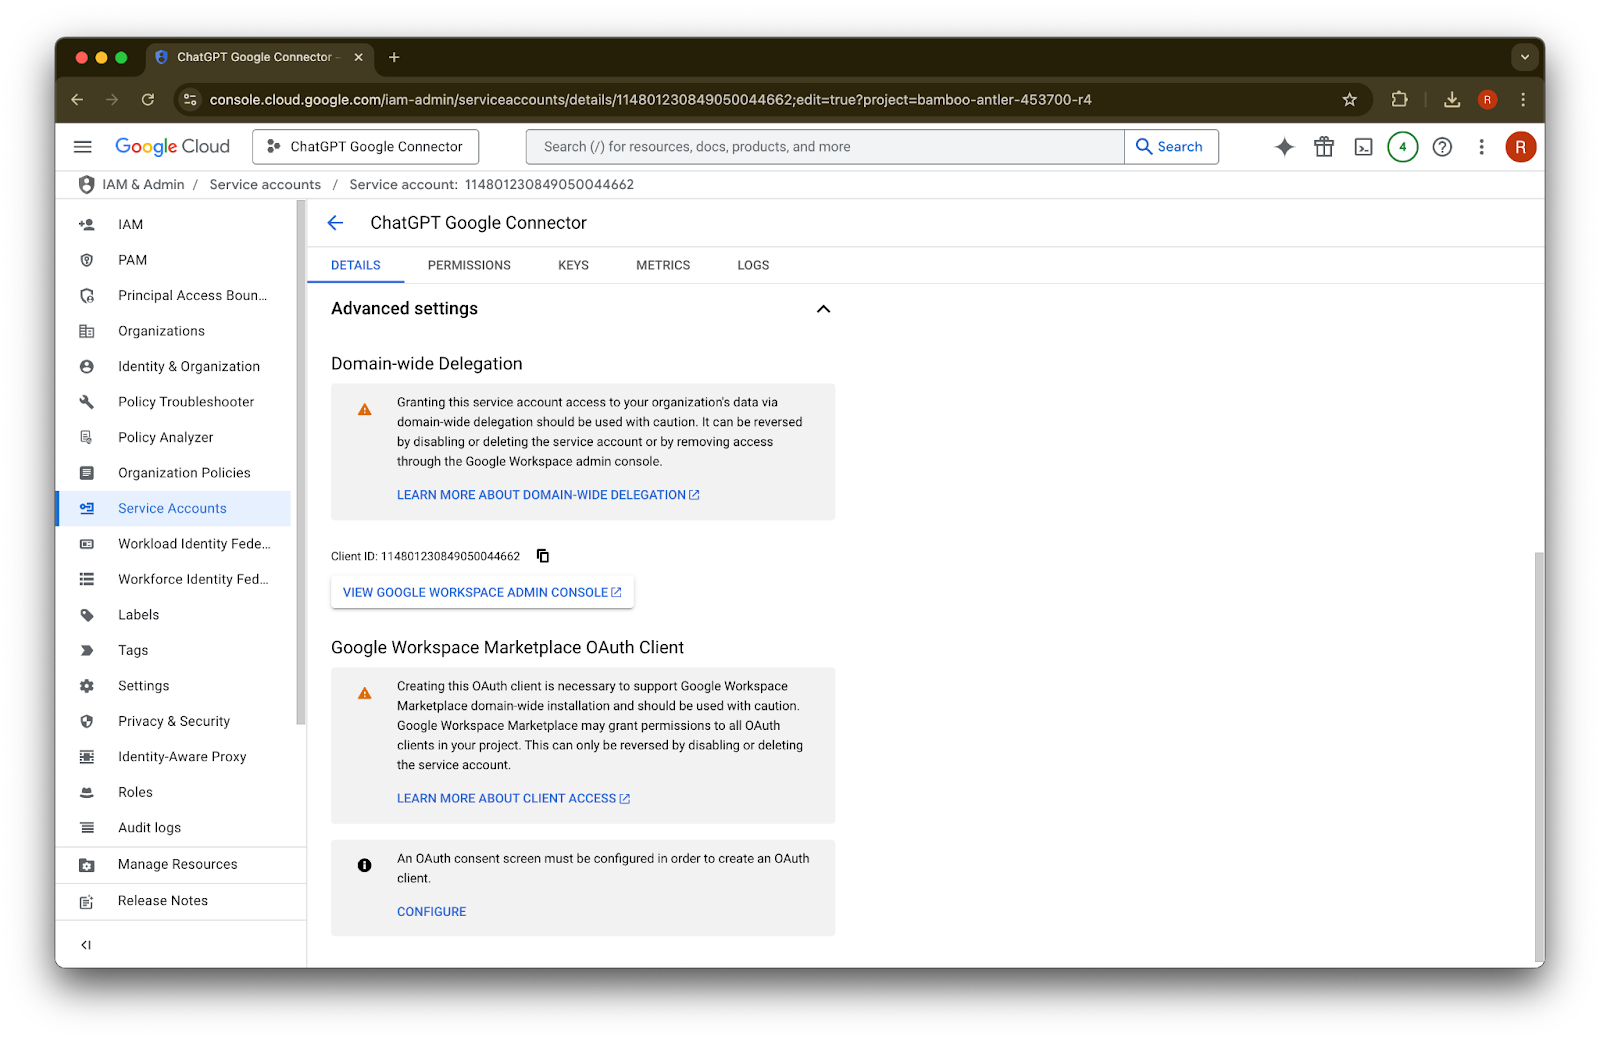
Palawakin ang Advanced settings
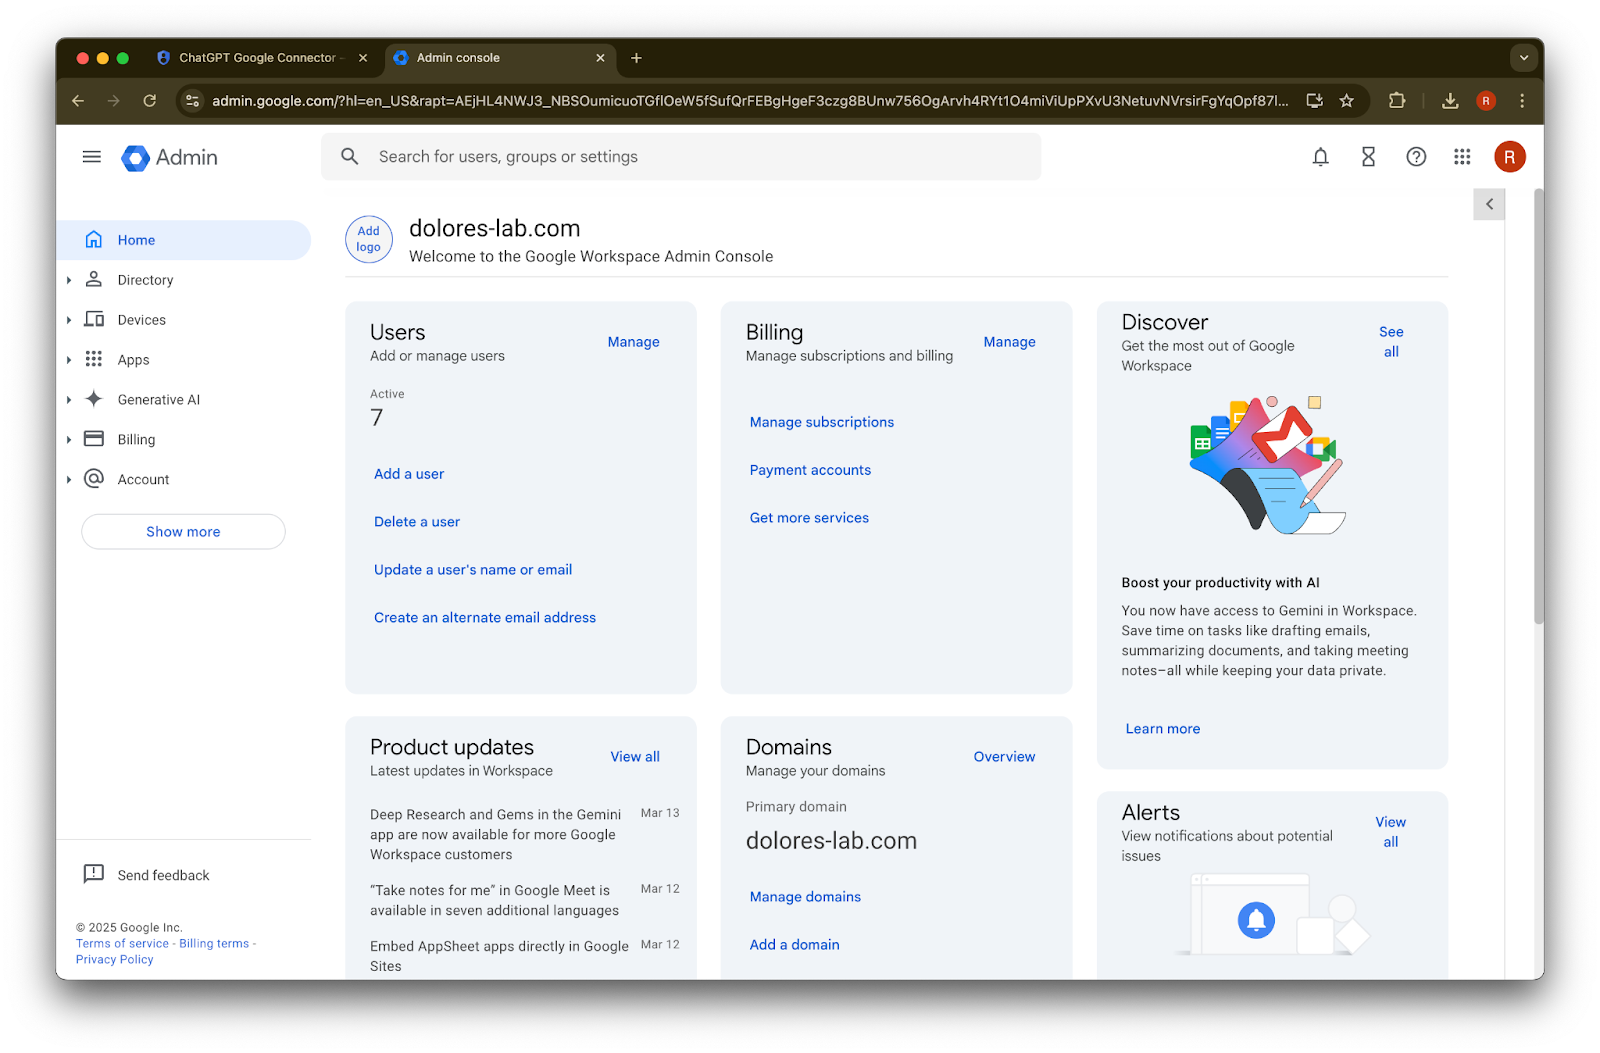
Mag-scroll pababa at i-click ang View Google Workspace Admin Console. Magbubukas ang Google Workspace console sa bagong tab.
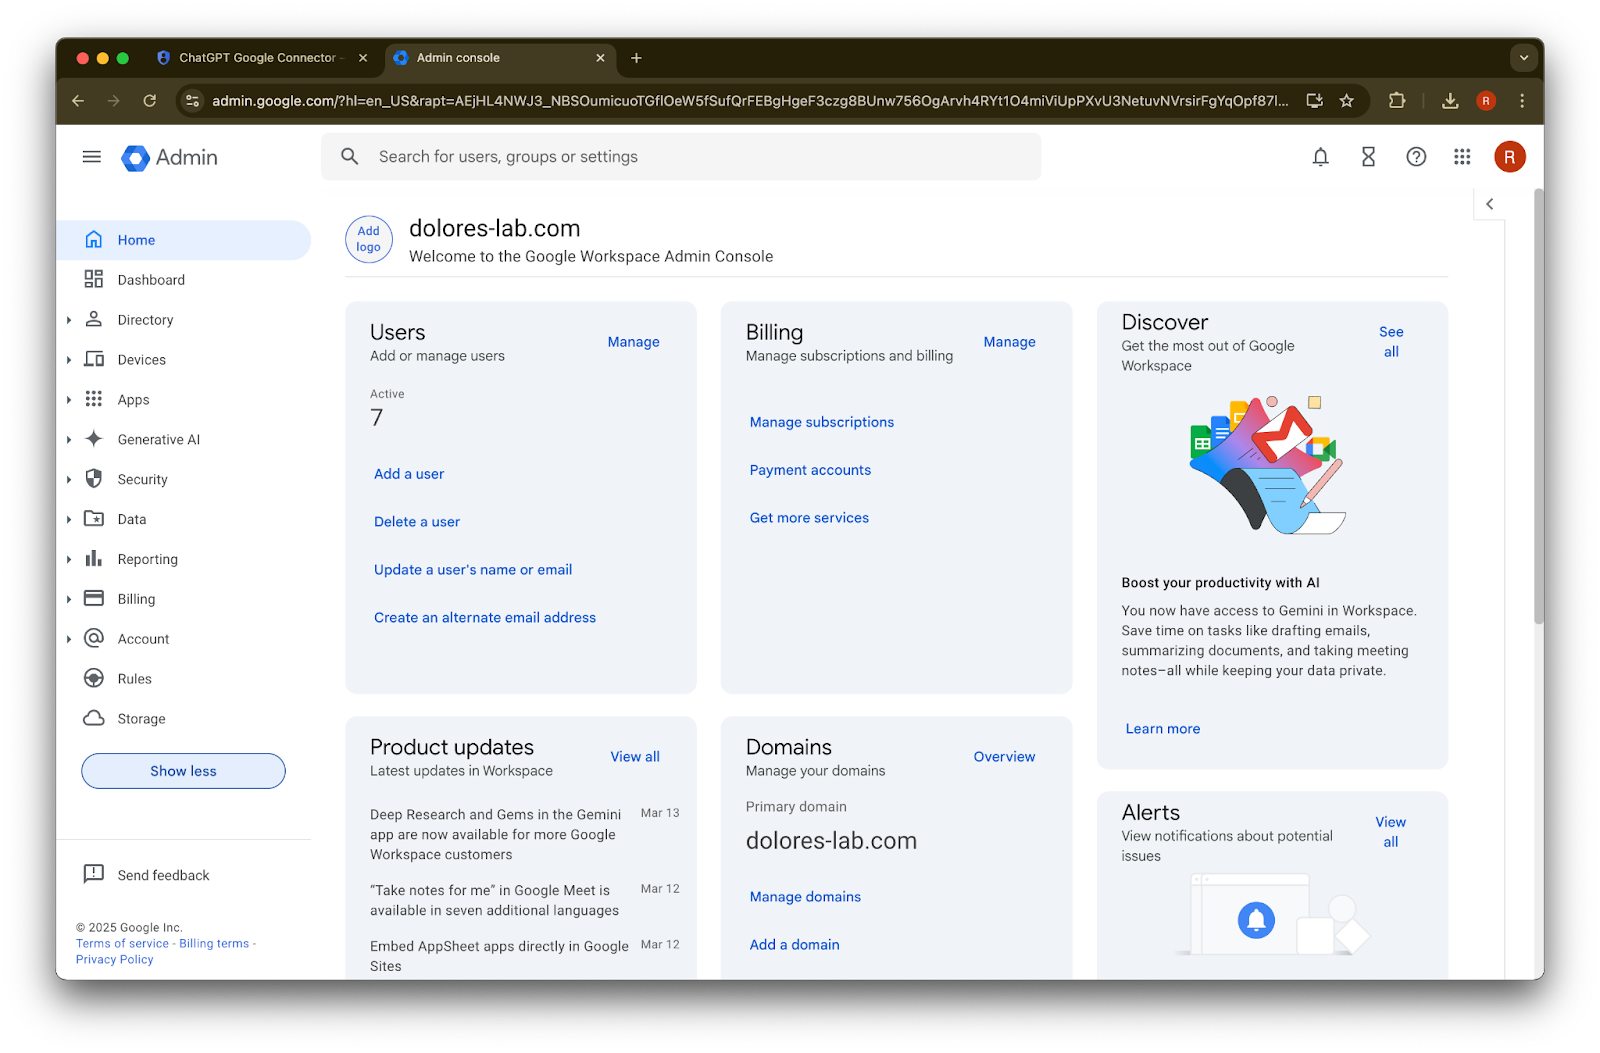
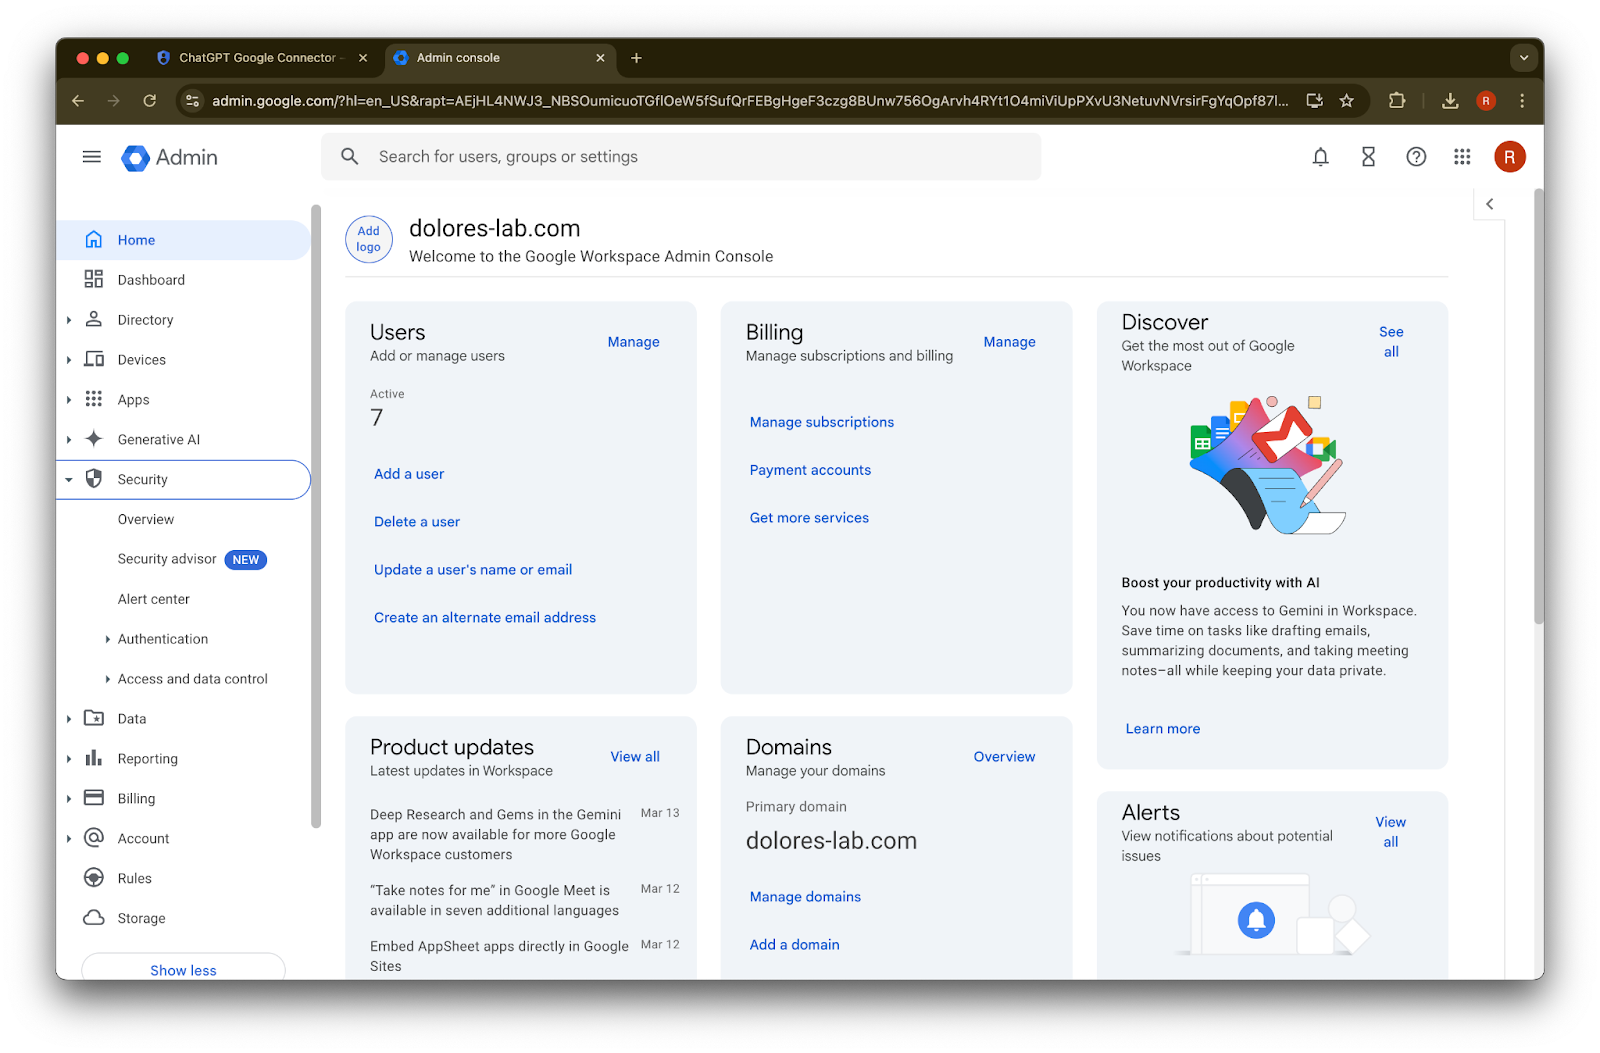
I-click ang Show more
Palawakin ang seksyong Security
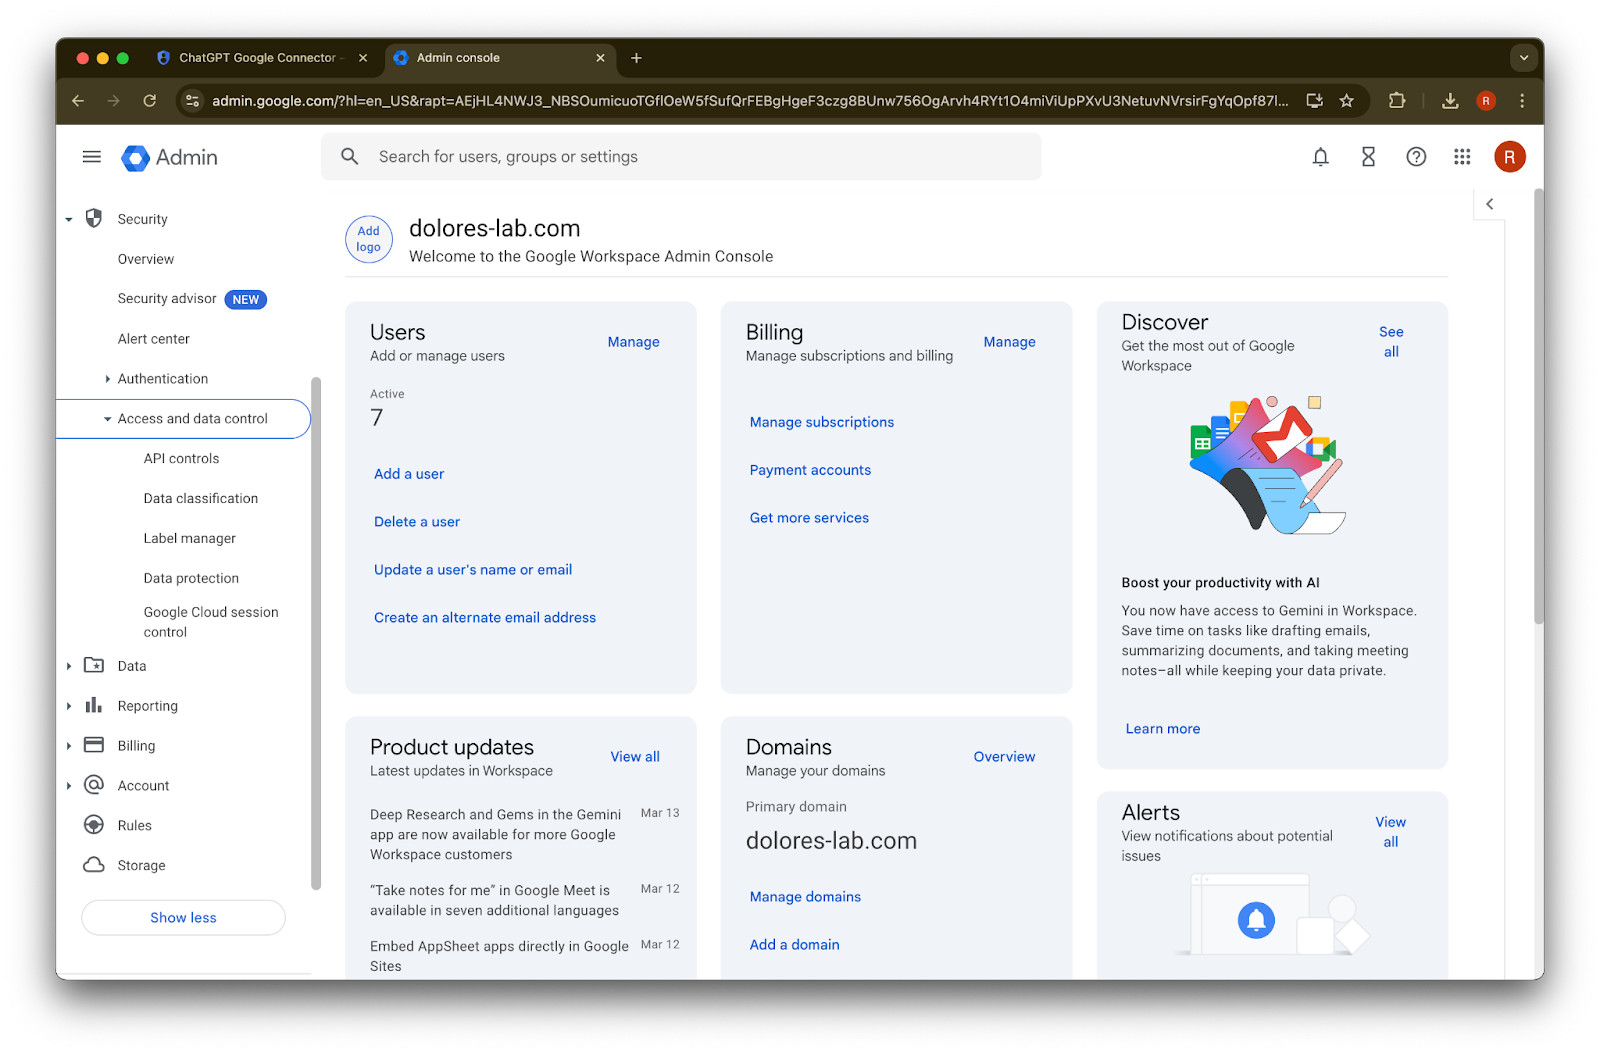
Palawakin ang seksyong Access and data controls
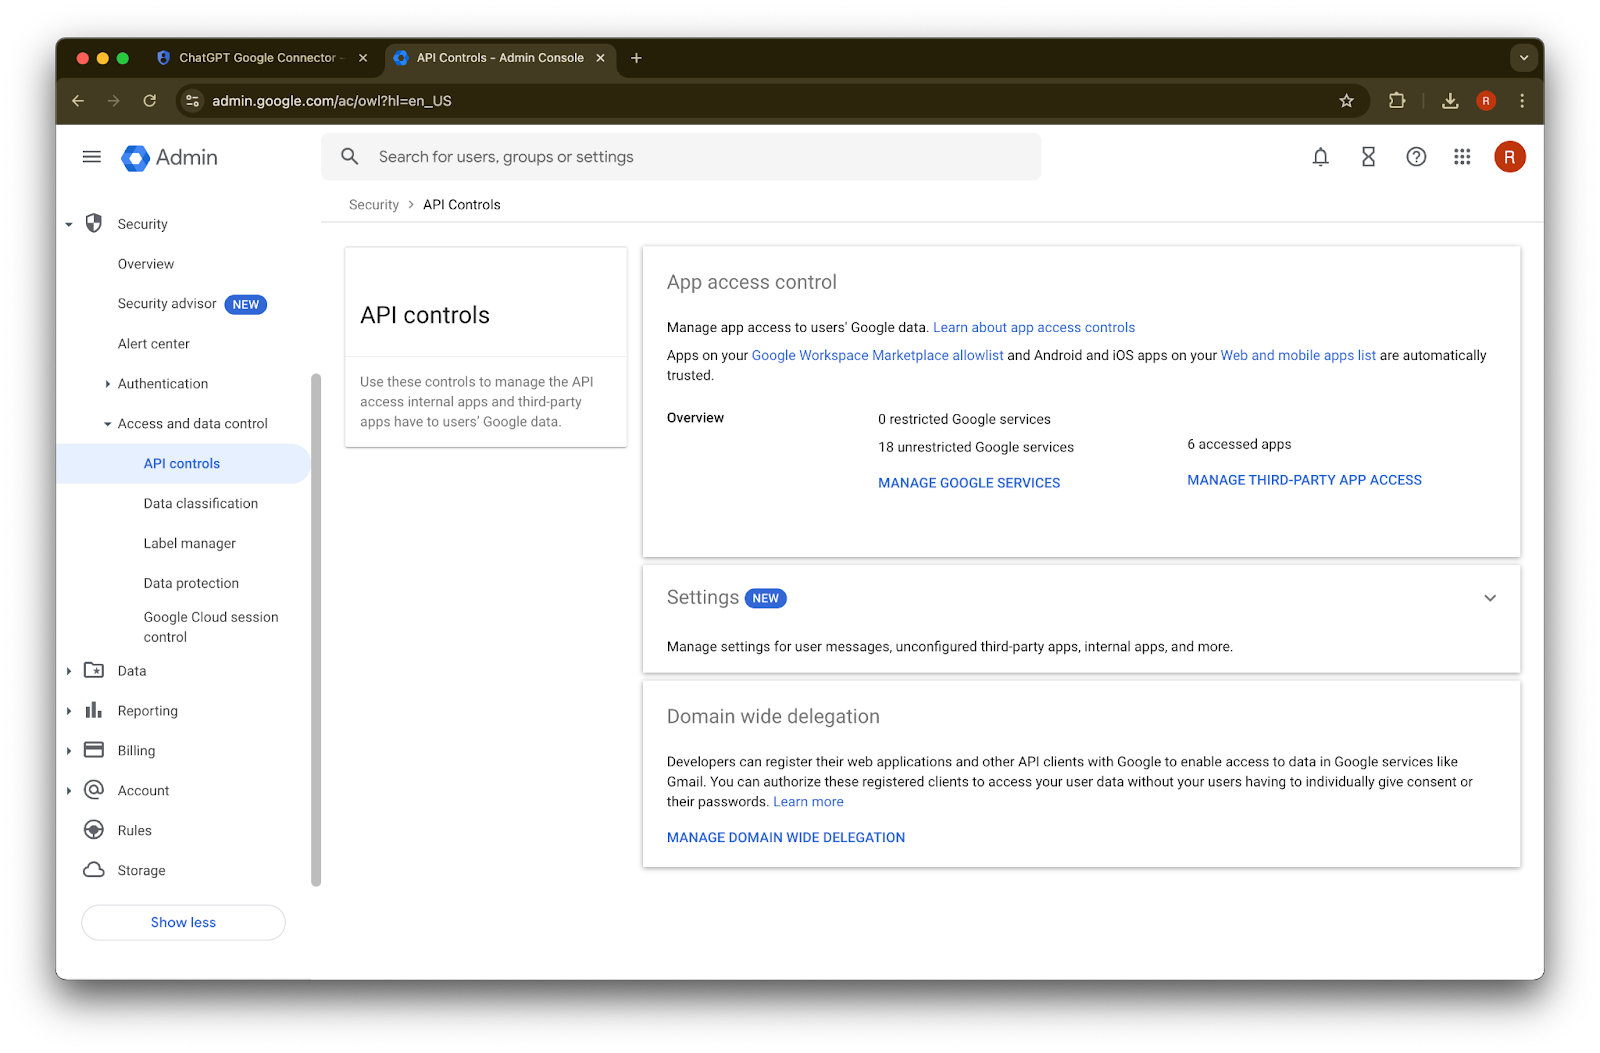
I-click ang seksyong API controls
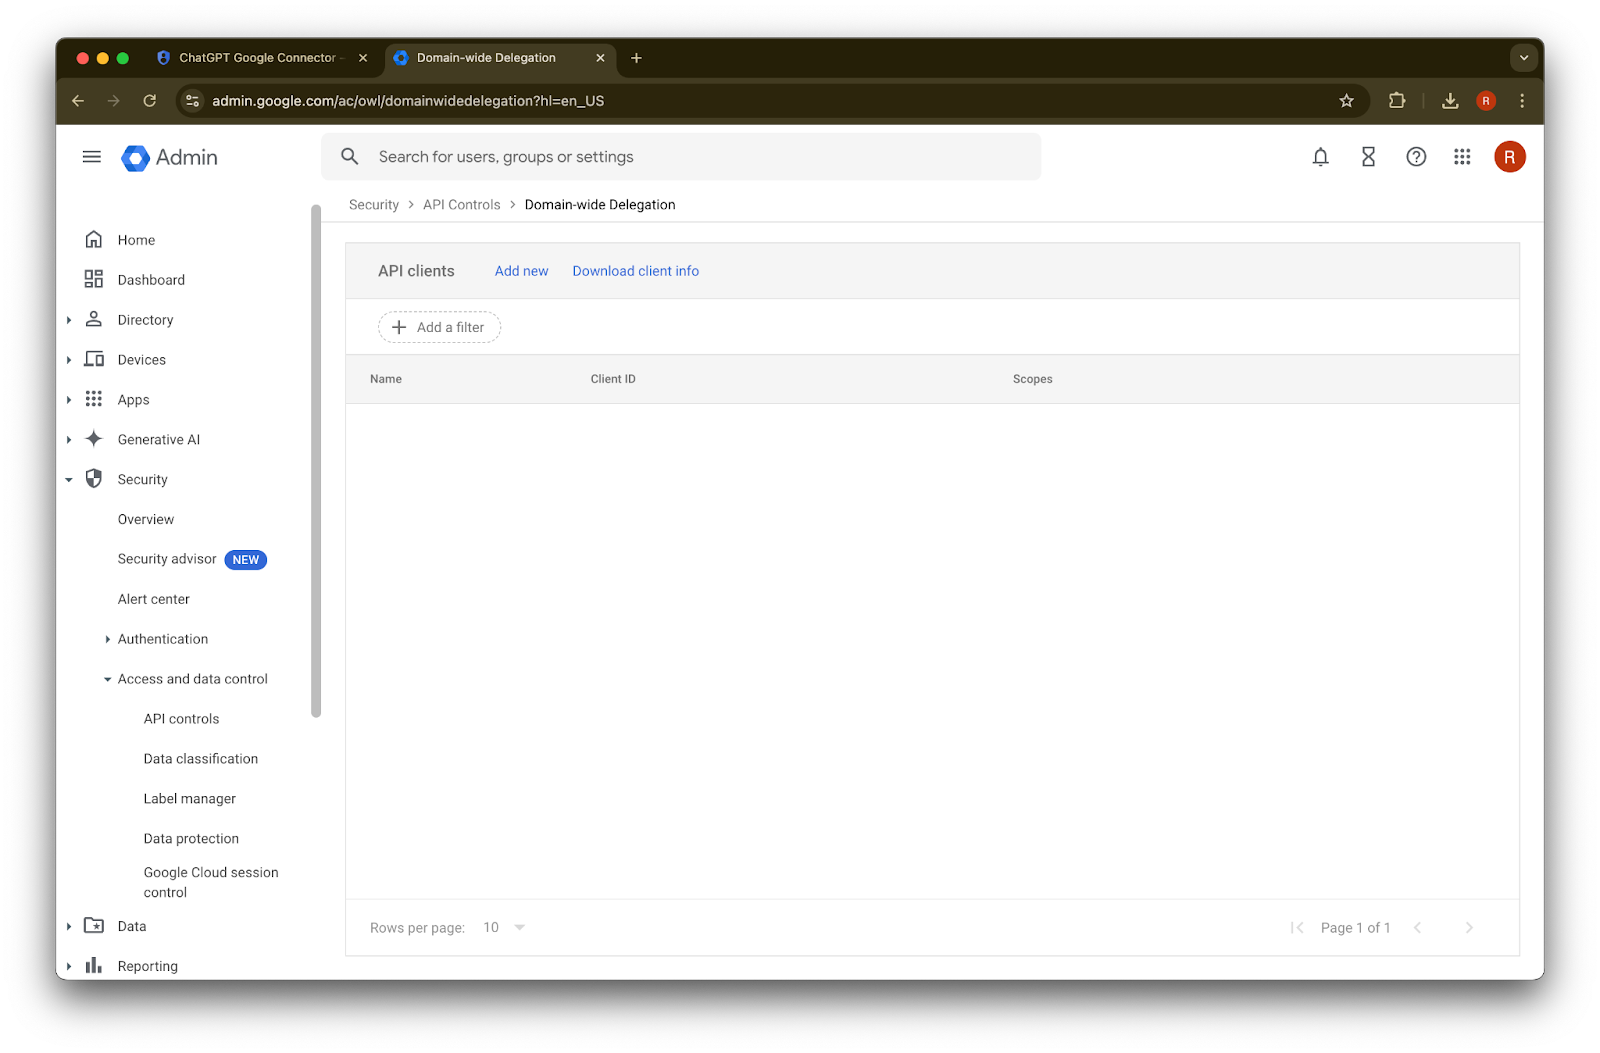
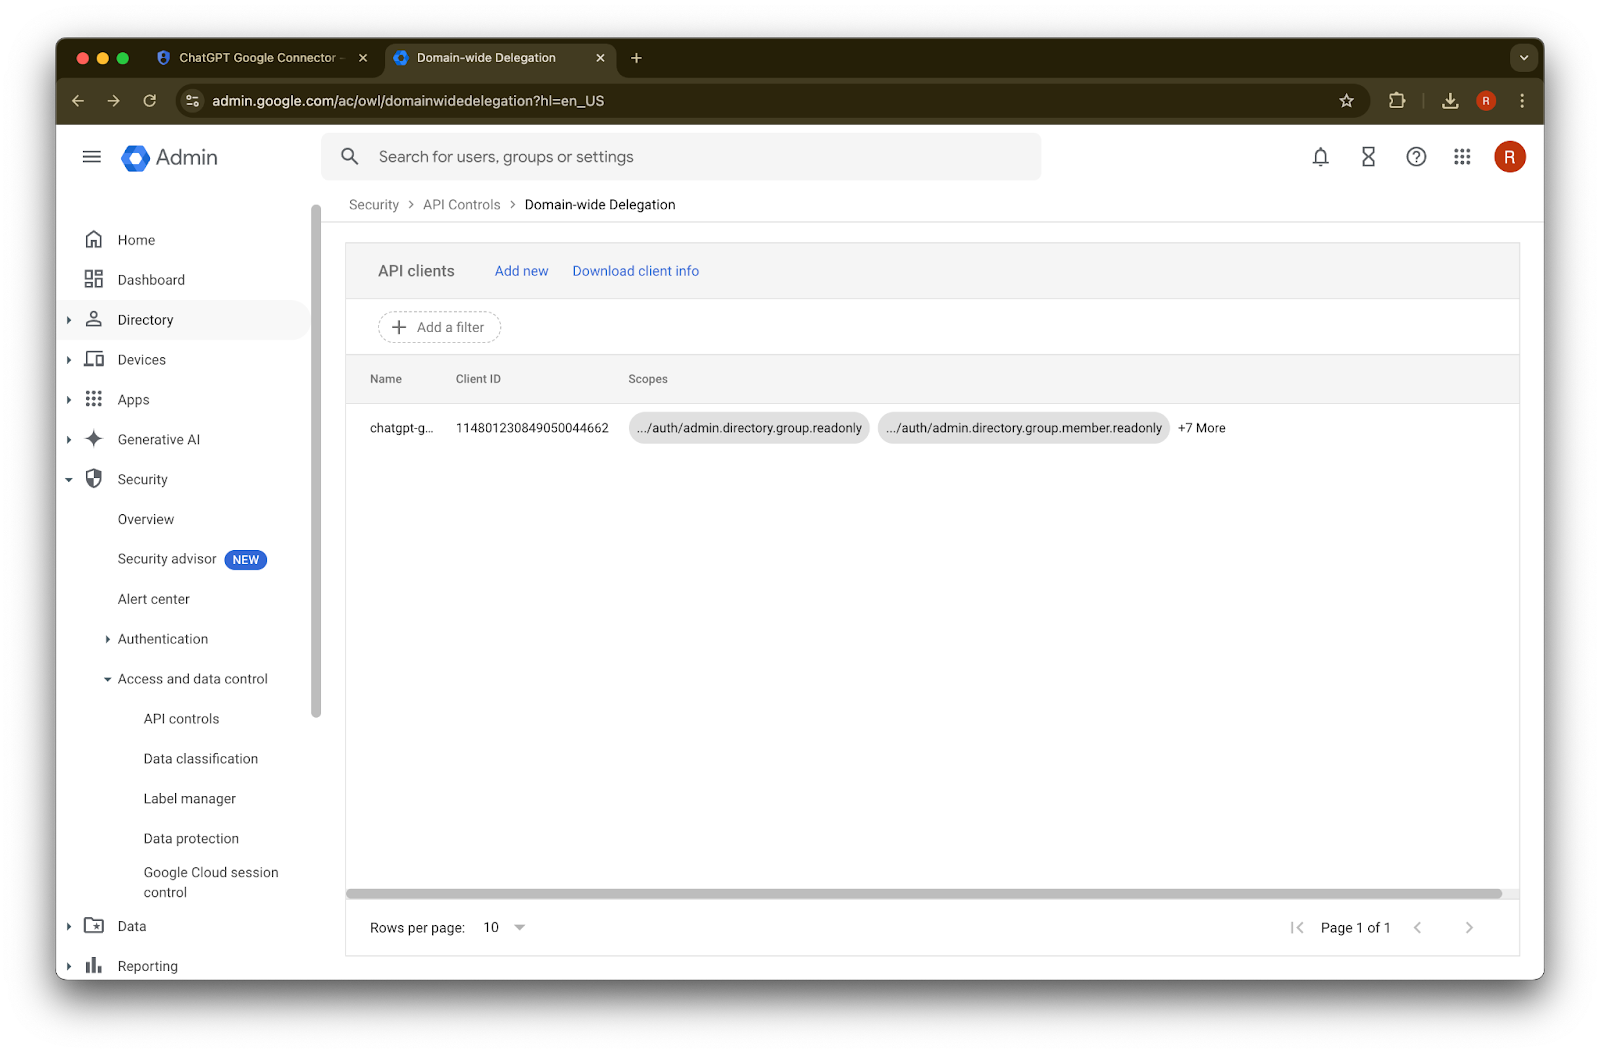
I-click ang Manage Domain Wide Delegation
I-click ang Add new
Gamitin ang Unique ID na naunang itinala bilang value para sa Client ID na ito
Para sa mga OAuth scopes, tingnan ang sumusunod na mga comma-delimited na auth scope value na kailangan mong kopyahin at i-paste:
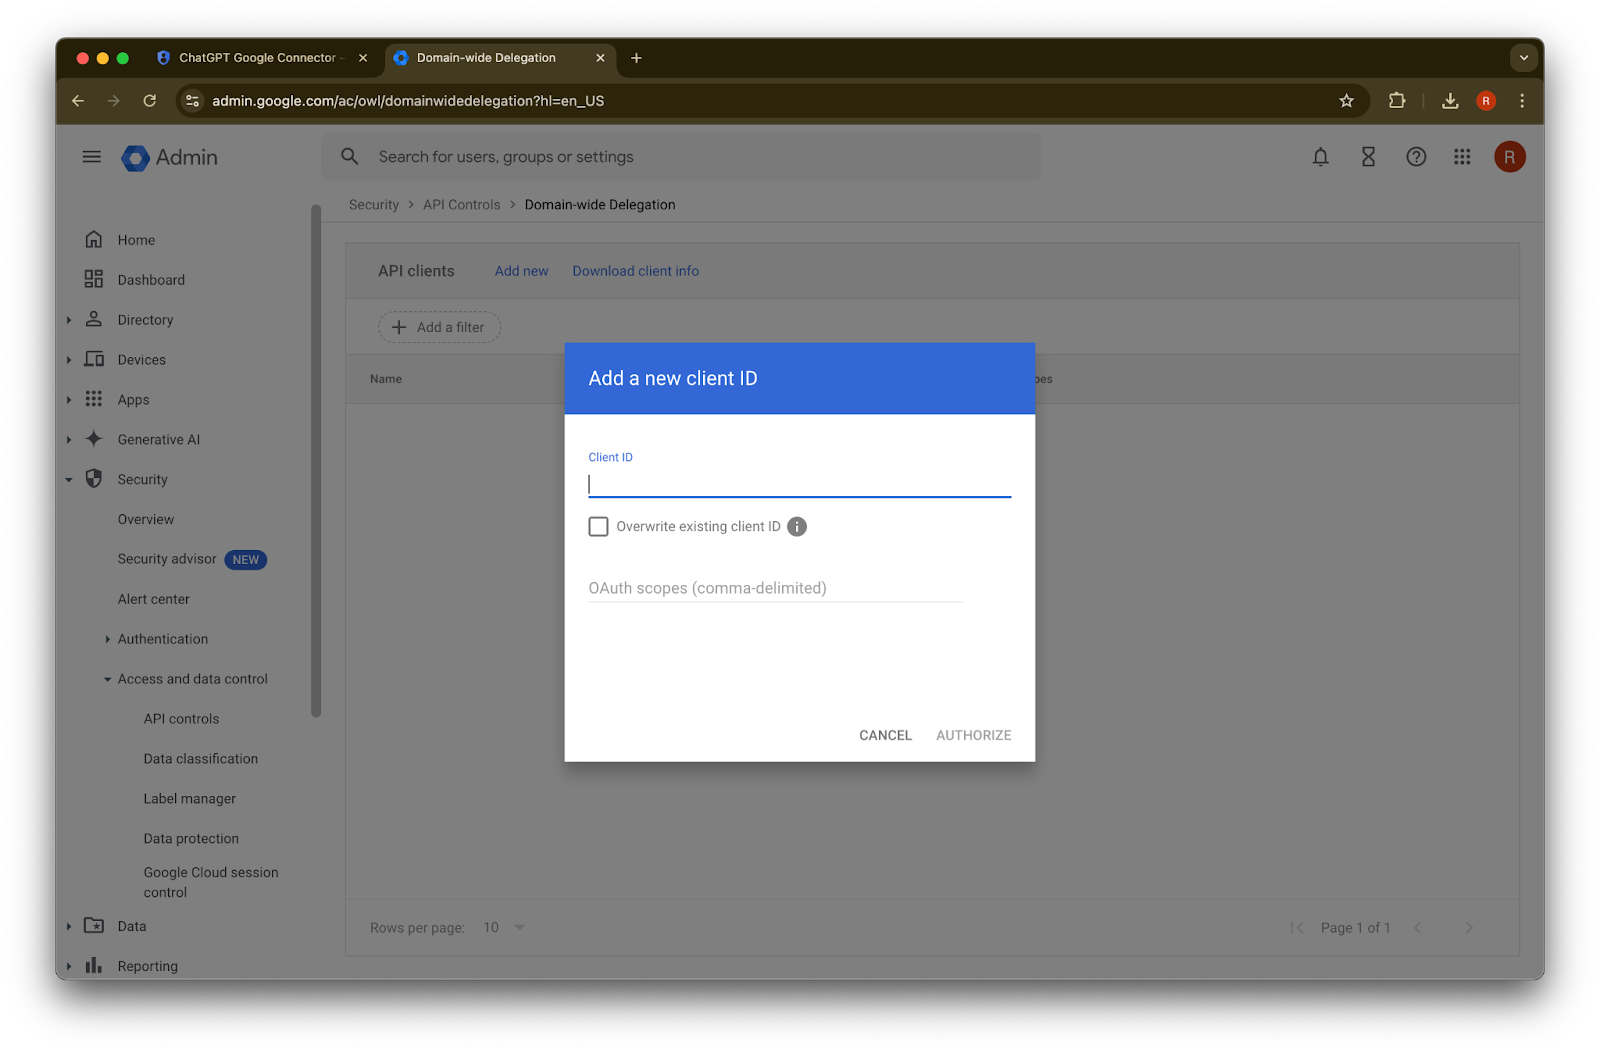
https://www.googleapis.com/auth/admin.directory.group.readonly, https://www.googleapis.com/auth/admin.directory.group.member.readonly, https://www.googleapis.com/auth/admin.directory.user.readonly, https://www.googleapis.com/auth/admin.directory.user.alias.readonly, https://www.googleapis.com/auth/drive.activity.readonly, https://www.googleapis.com/auth/drive.metadata.readonly, https://www.googleapis.com/auth/drive.readonly, https://www.googleapis.com/auth/userinfo.profile, https://www.googleapis.com/auth/userinfo.email| Scope | Pangangatwiran |
| admin.directory.group.readonly | ipatupad ang mga pahintulot na batay sa group |
| admin.directory.group.member.readonly | ipatupad ang mga pahintulot na batay sa group |
| admin.directory.user.alias.readonly | pangasiwaan ang mga kaso kung saan nabibigyan ng pahintulot ang user sa pamamagitan ng alias |
| drive.activity.readonly | upang maabisuhan kapag may mga pagbabagong nangyari sa mga file |
| drive.metadata.readonly | i-sync ang nilalaman ng file at kaugnay na metadata (hal. petsa ng huling pagbabago) |
| drive.readonly | i-sync ang nilalaman ng file at kaugnay na metadata (hal. petsa ng huling pagbabago) |
| userinfo.profile | tukuyin ang mga user na sini-sync-an namin ng mga file |
| userinfo.email | tukuyin ang mga user na sini-sync-an namin ng mga file |
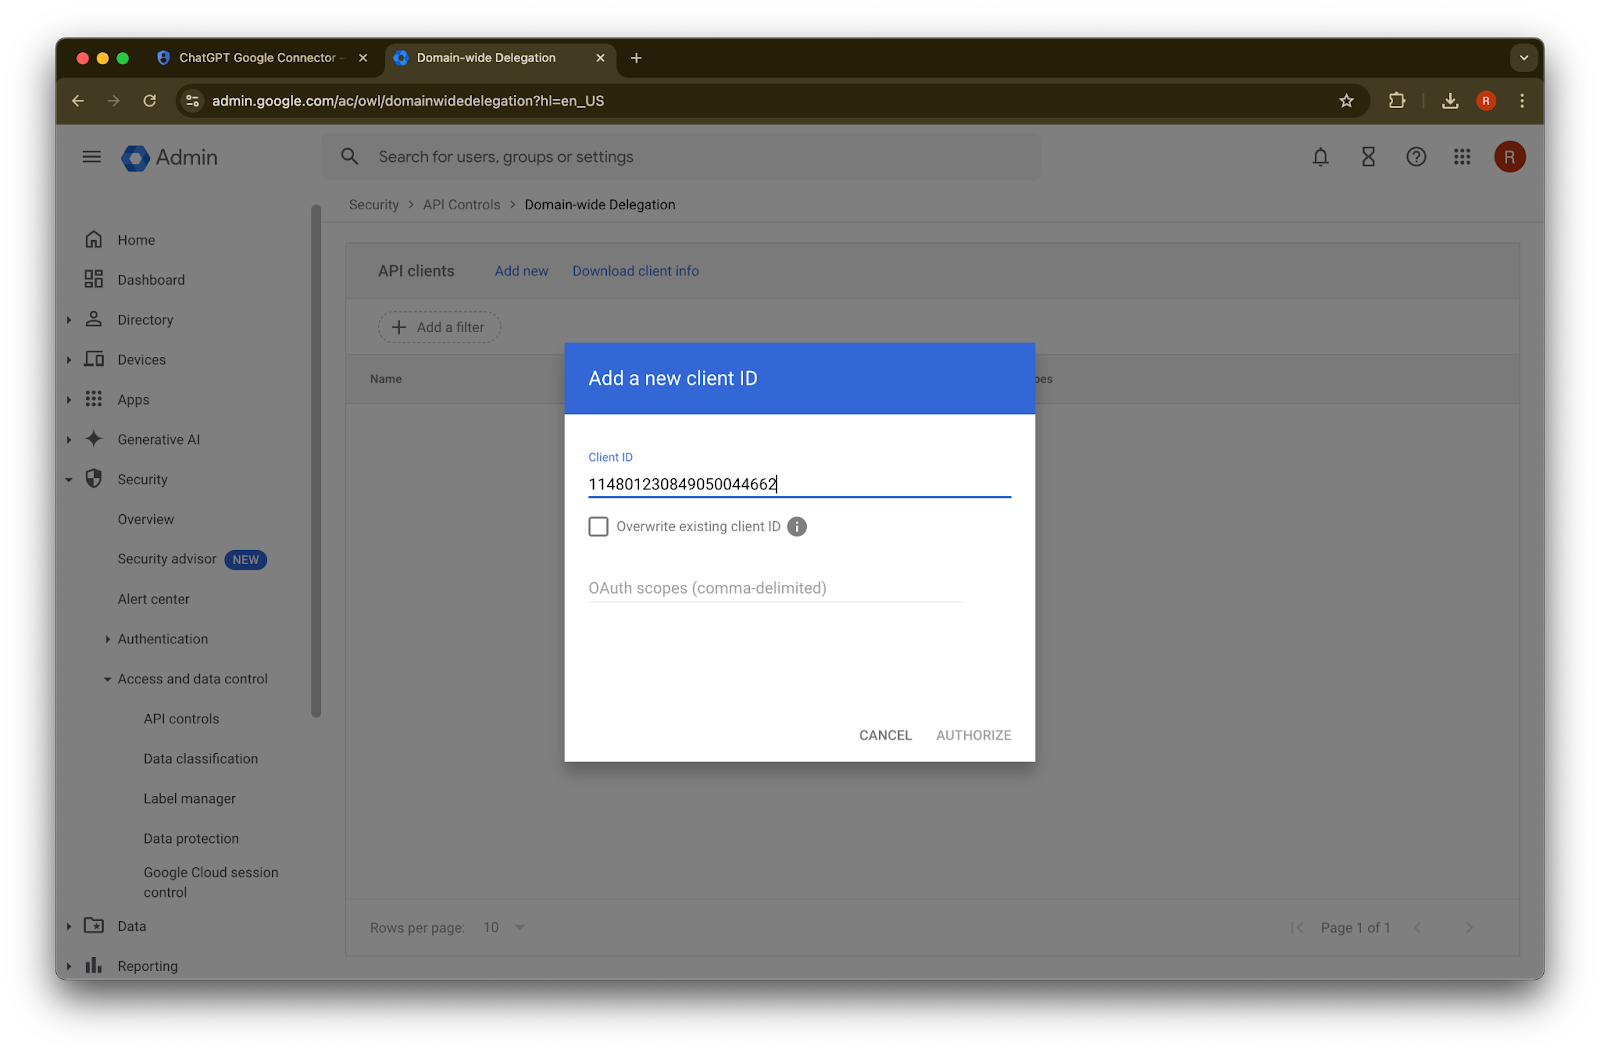
45. I-click ang Authorize
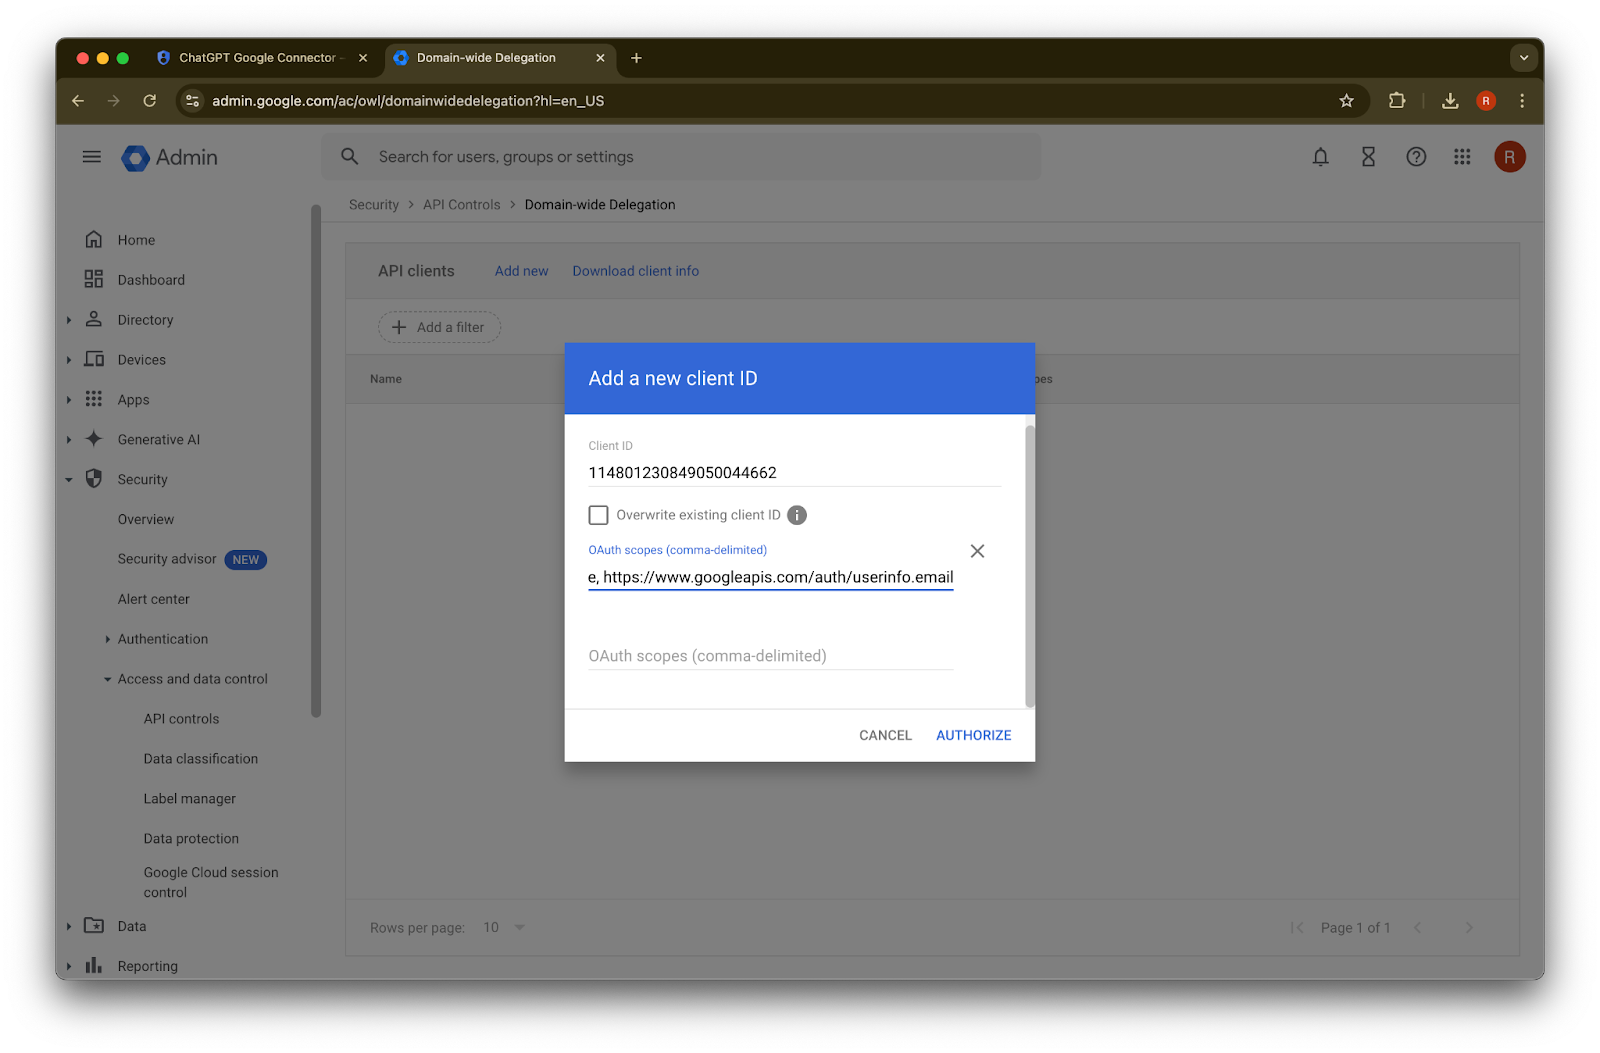
46. Tagumpay!
Pag-set up ng Admin Account
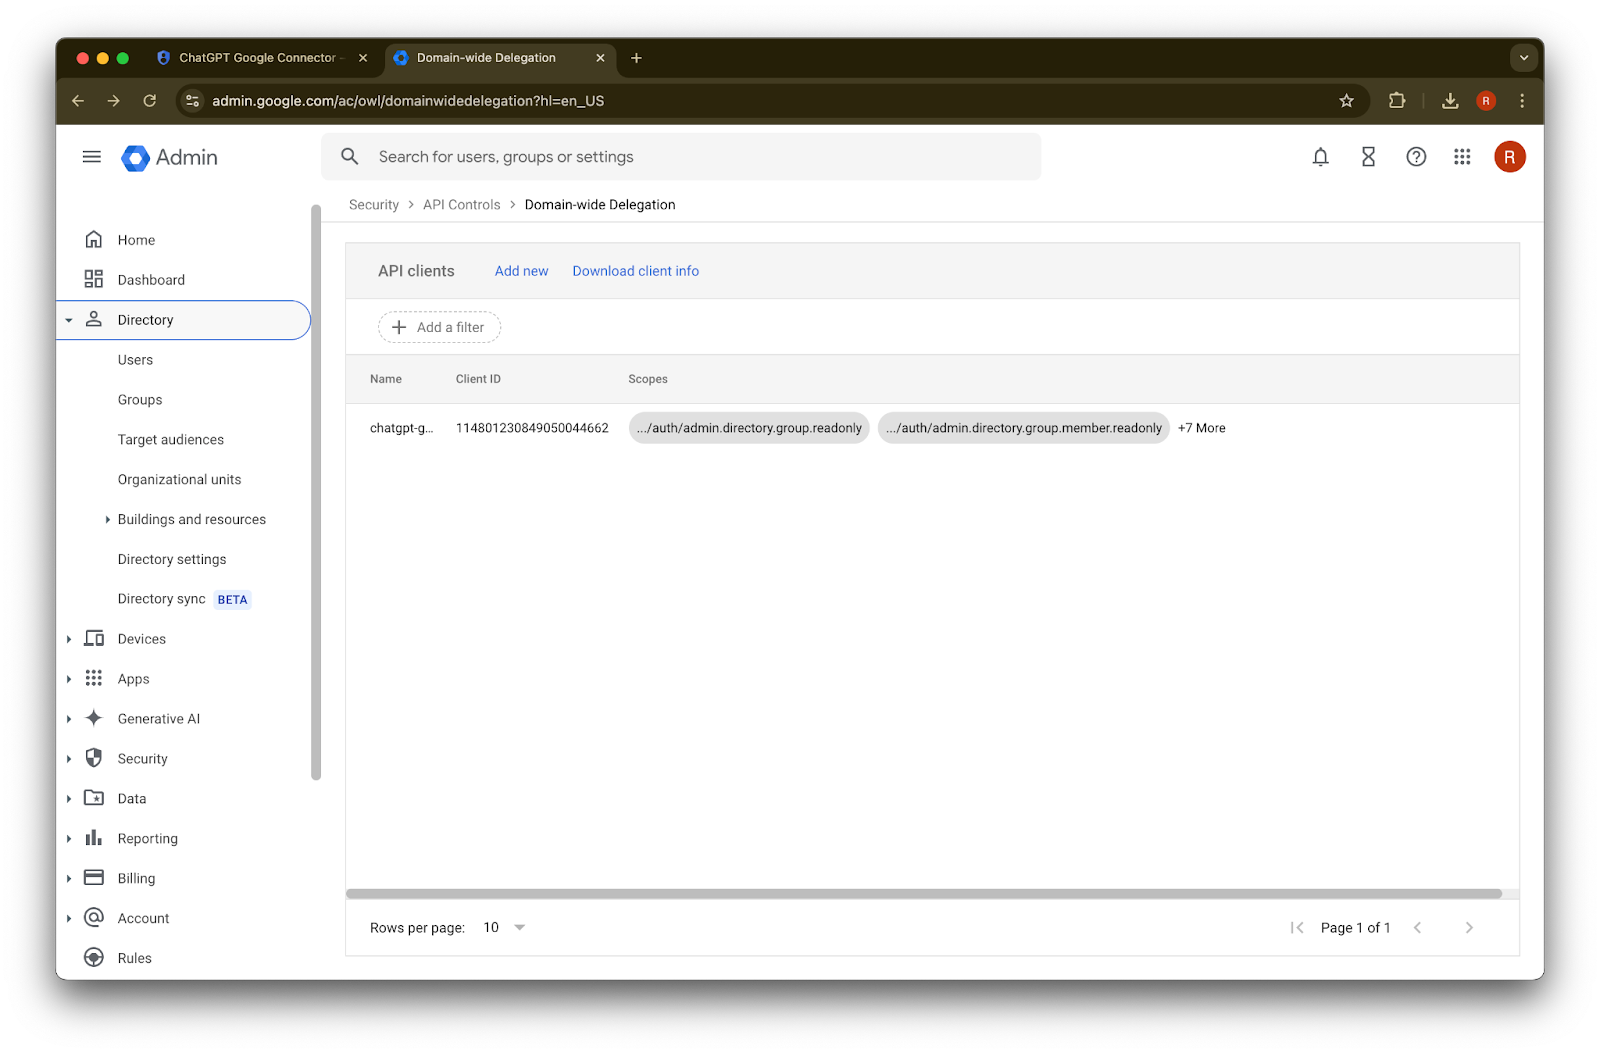
Palawakin ang Directory
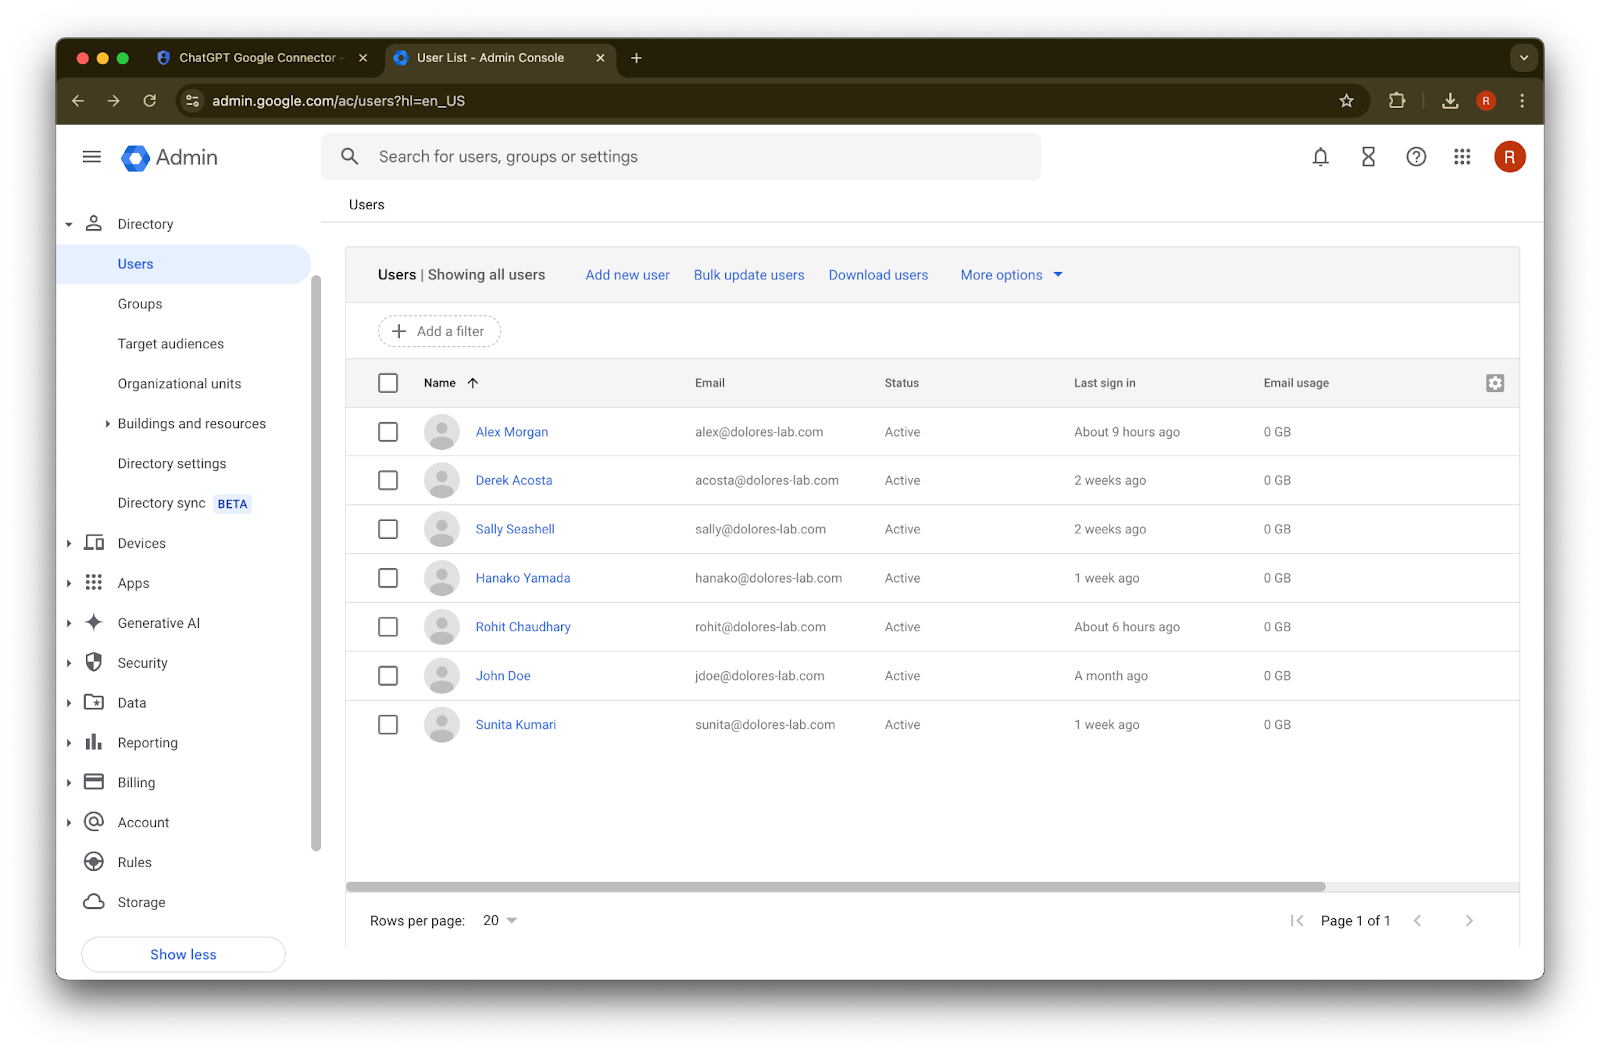
I-click ang Users
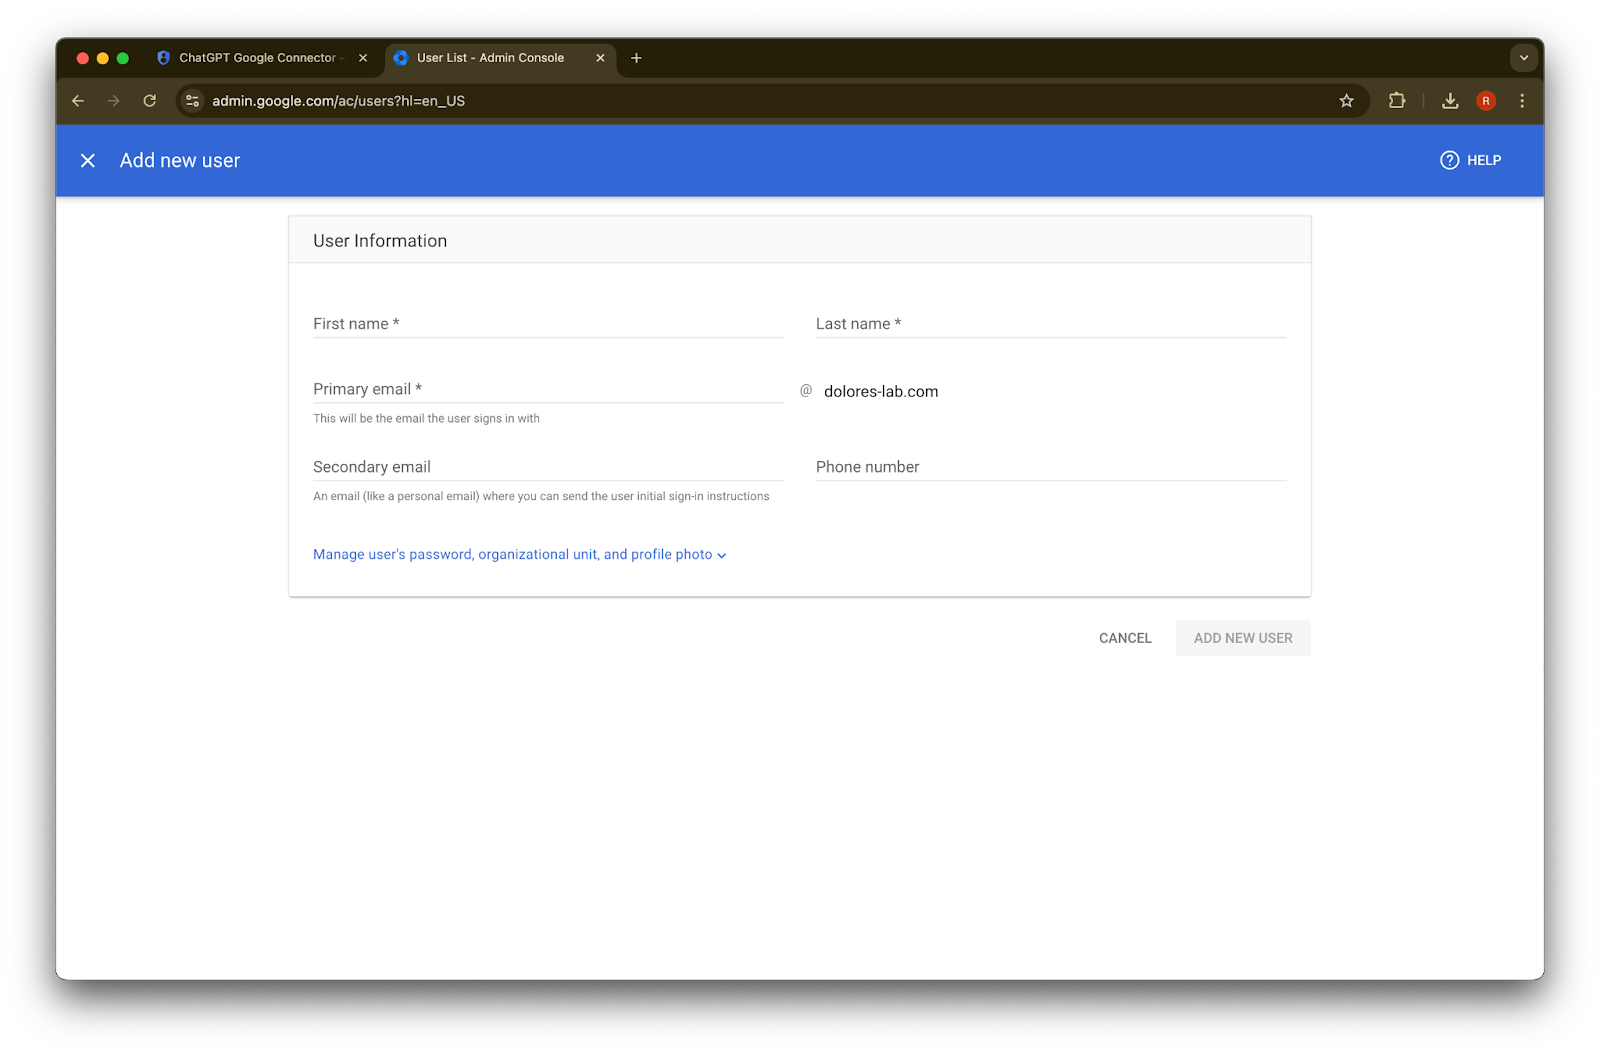
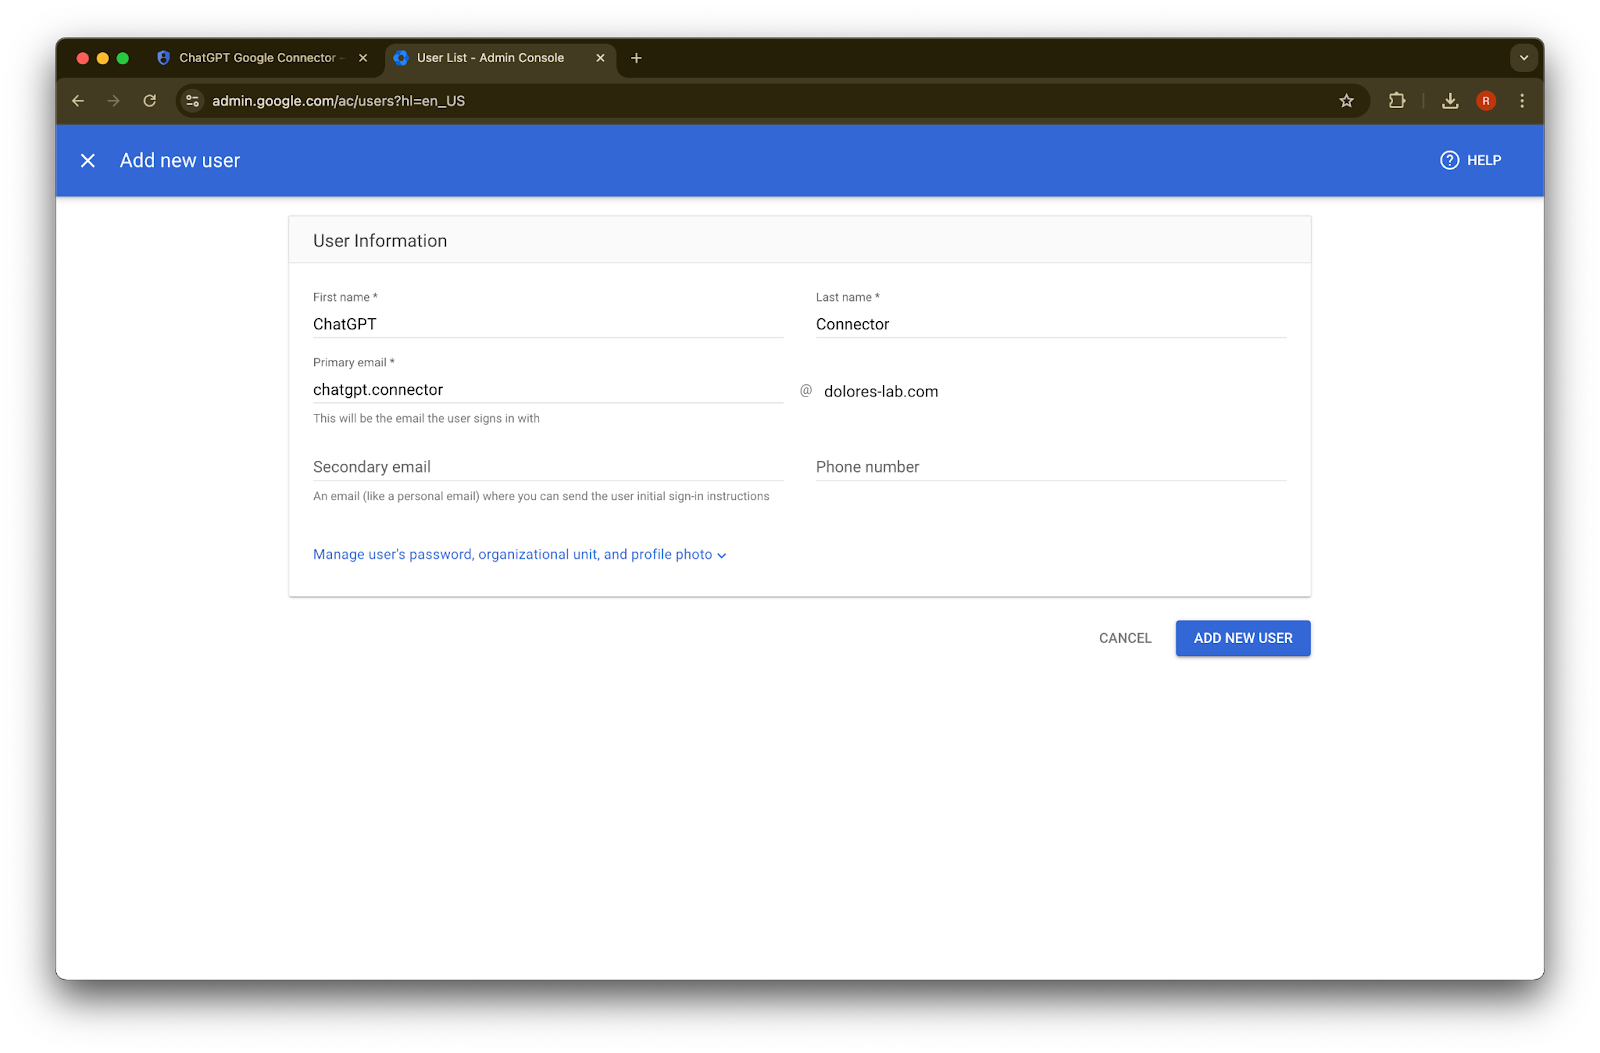
Magbigay ng first name, last name, at primary email address na iyong pipiliin
I-click ang Add new user
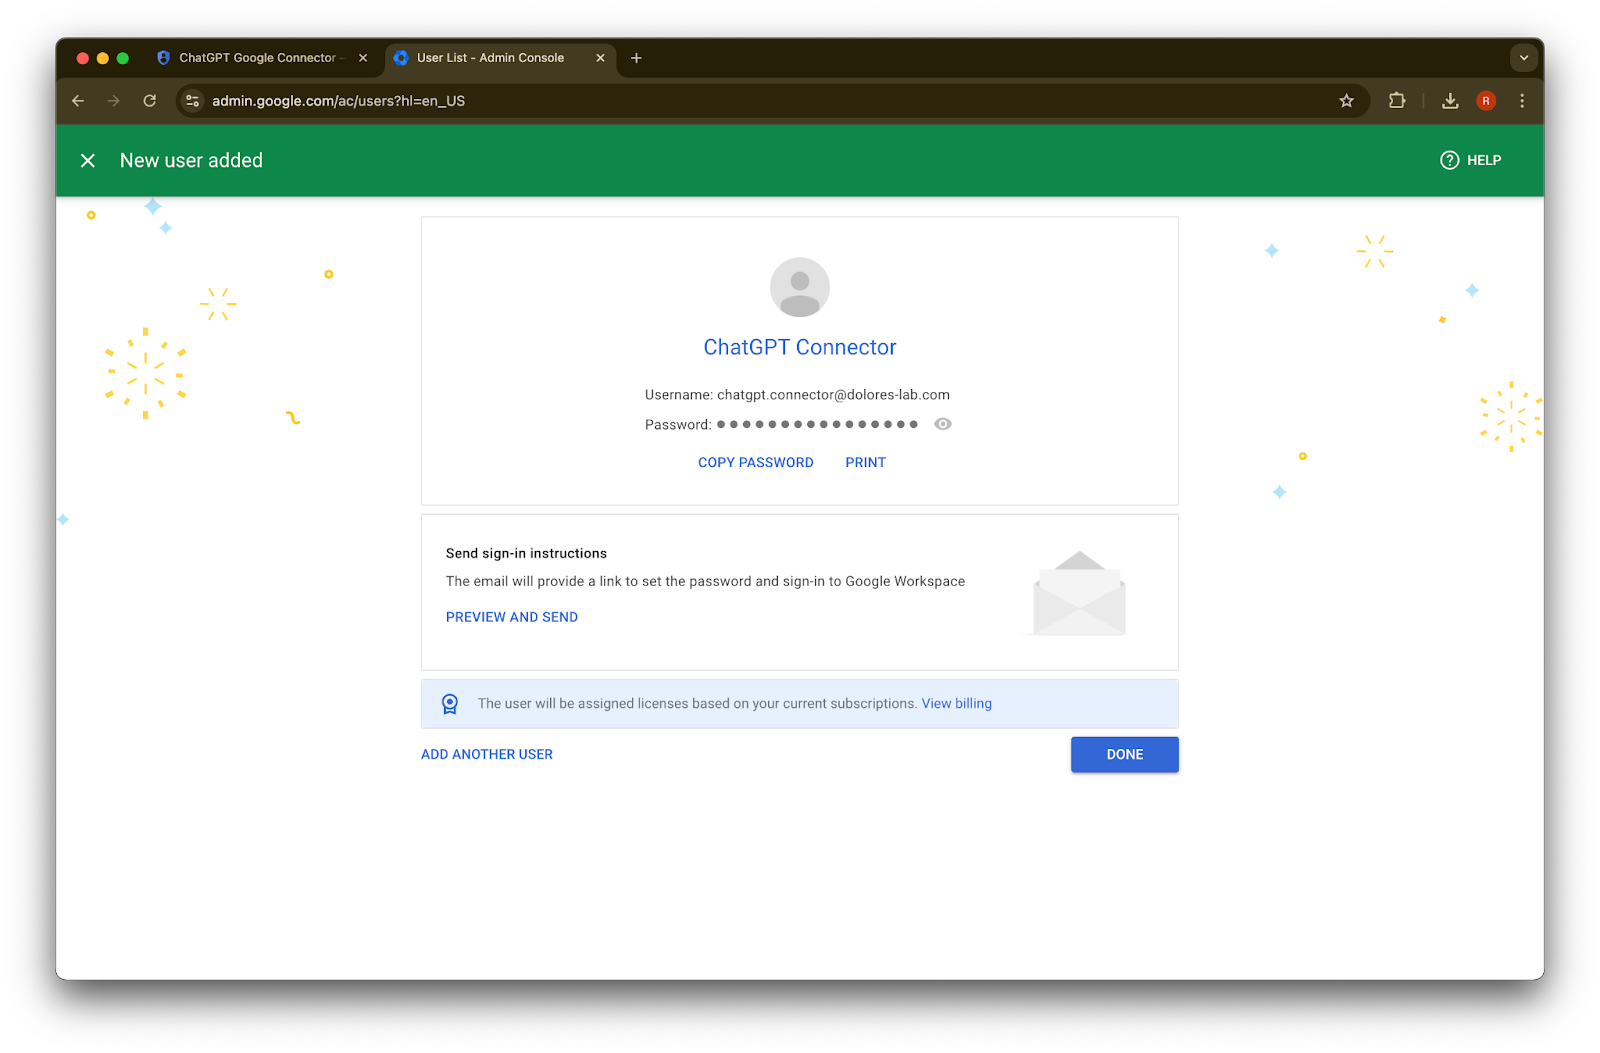
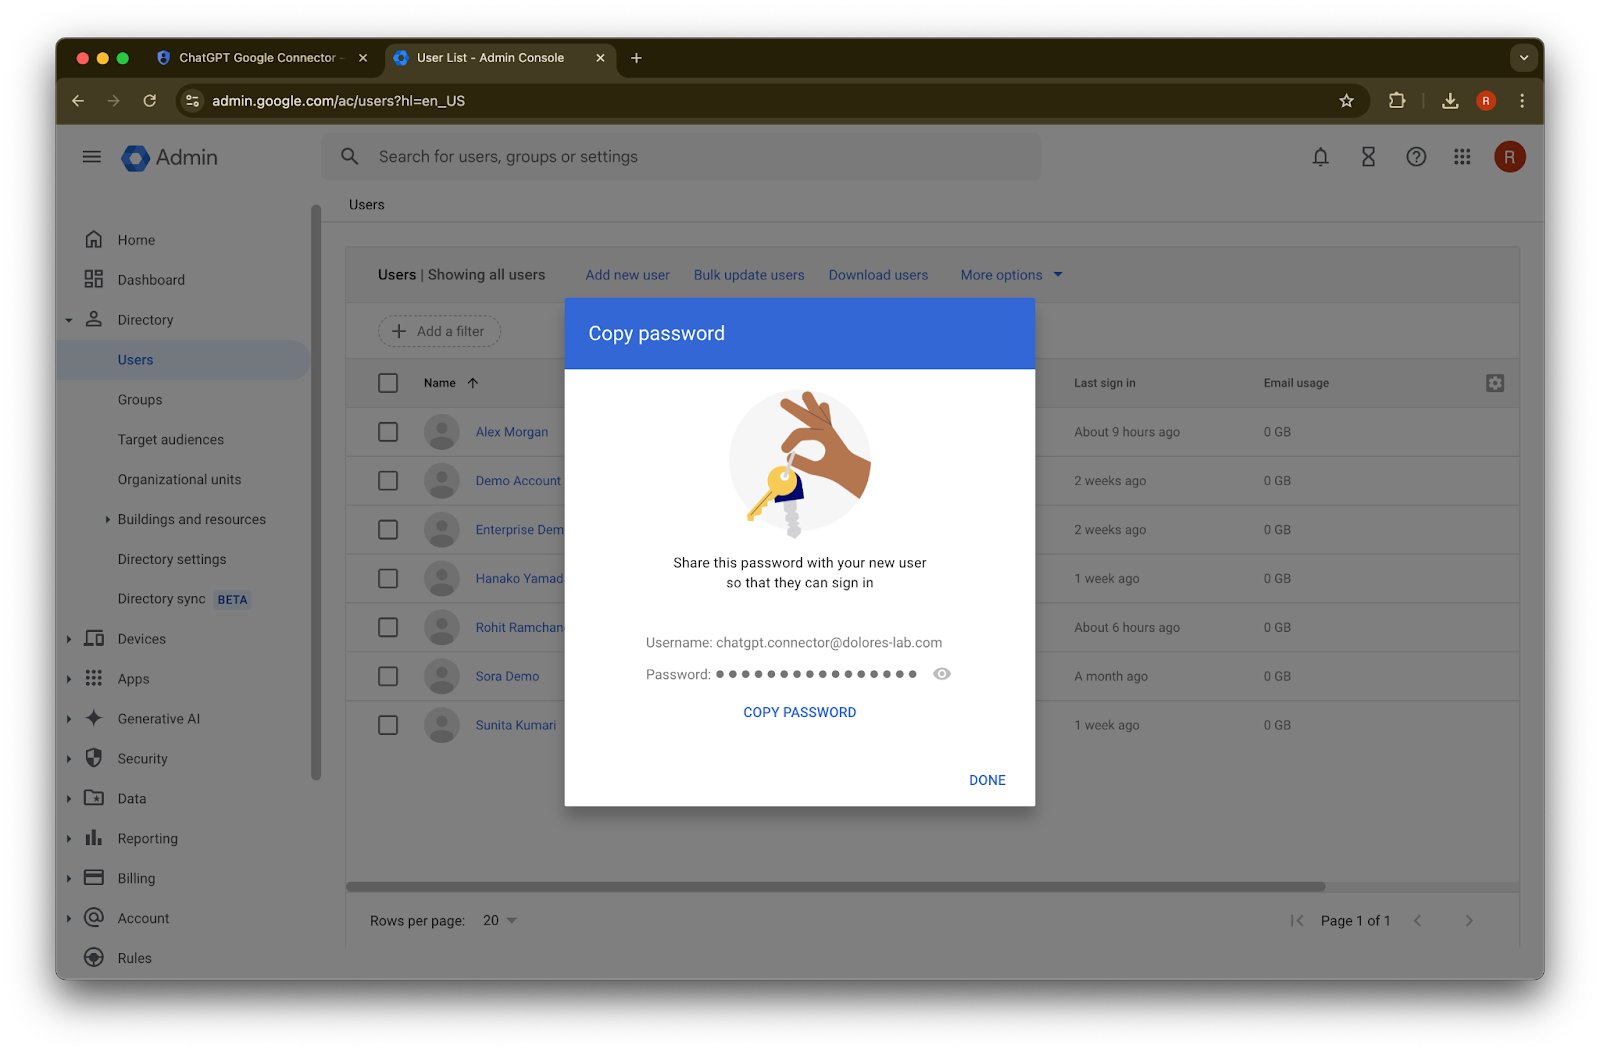
(Opsyonal) Itala ang mga credential na ito. Hindi kailangan ng ChatGPT ang mga credential na ito.
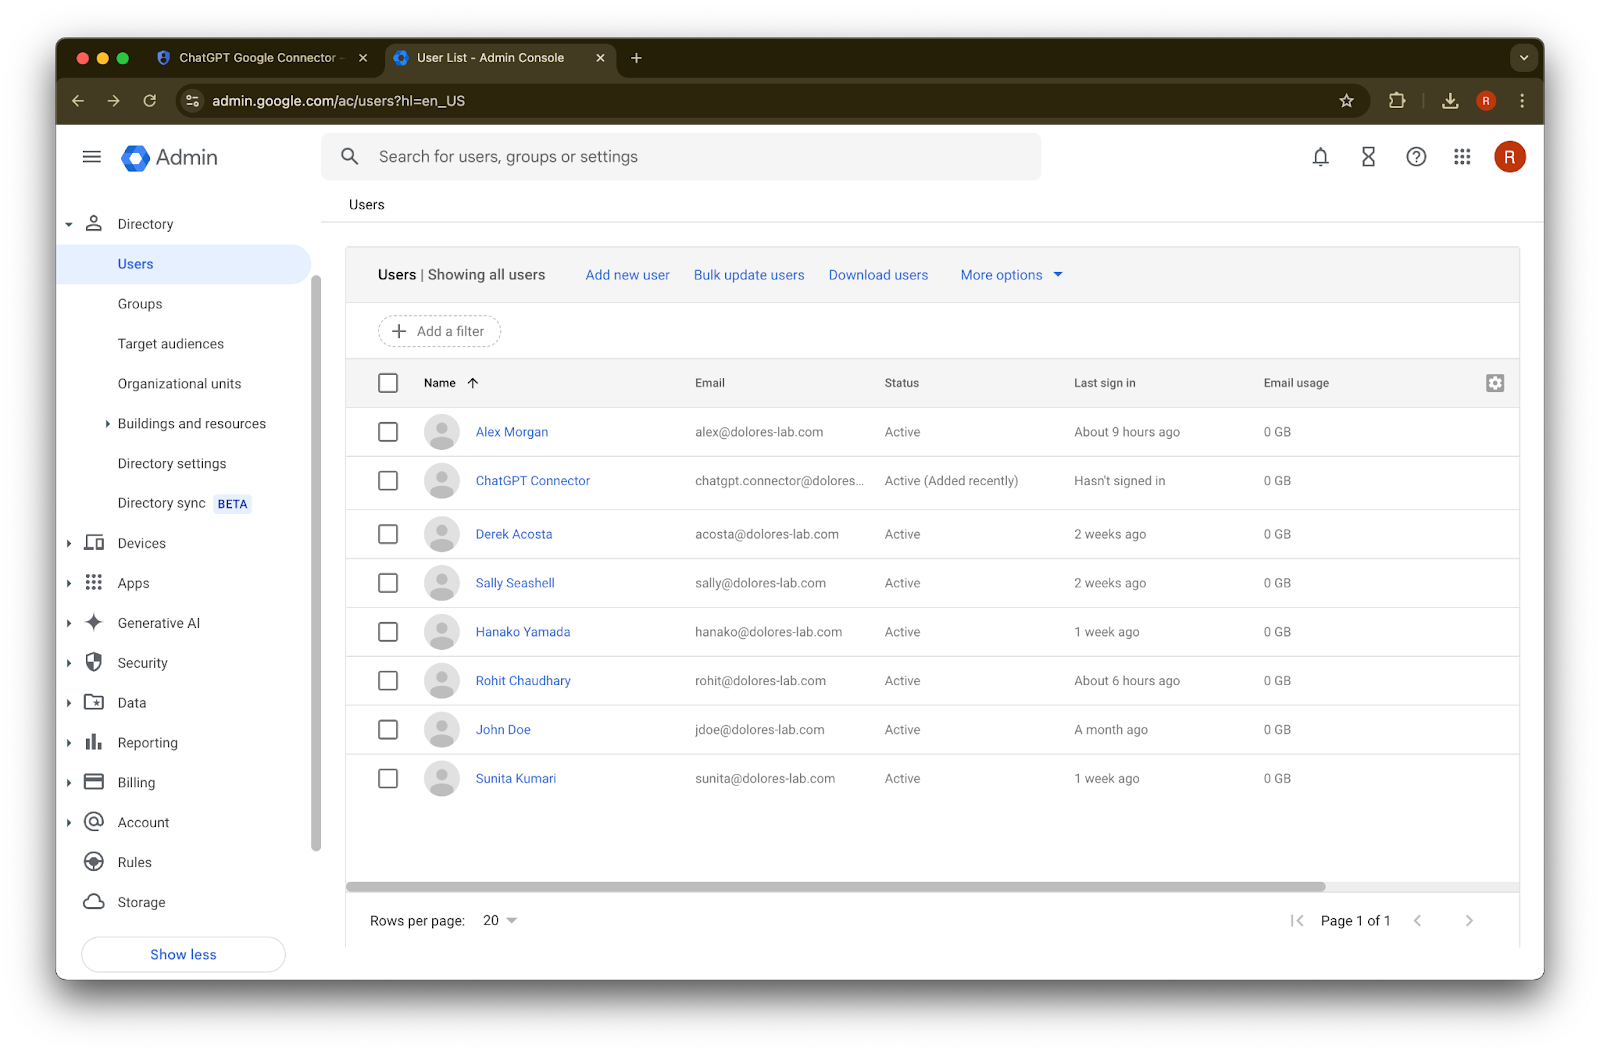
I-click ang Done.
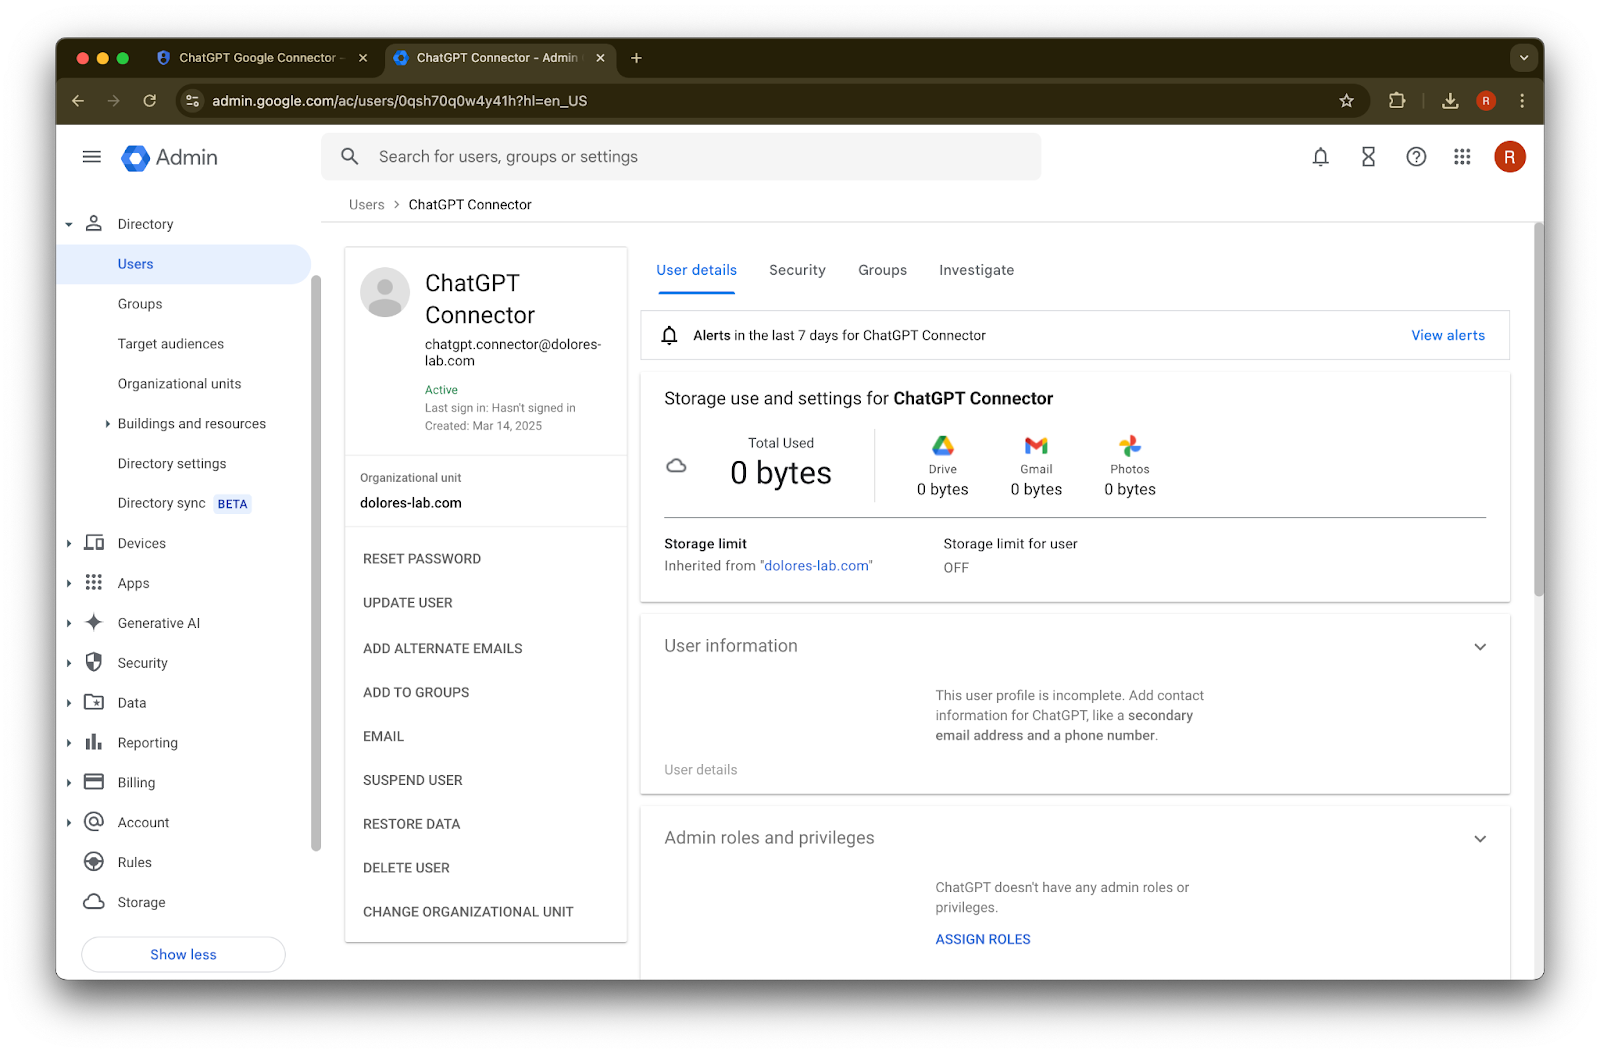
I-click ang account na kakagawa mo lang. Kung hindi ito lumabas sa listahan, i-refresh ang pahina o i-clear ang iyong cache at cookies at subukan muli.
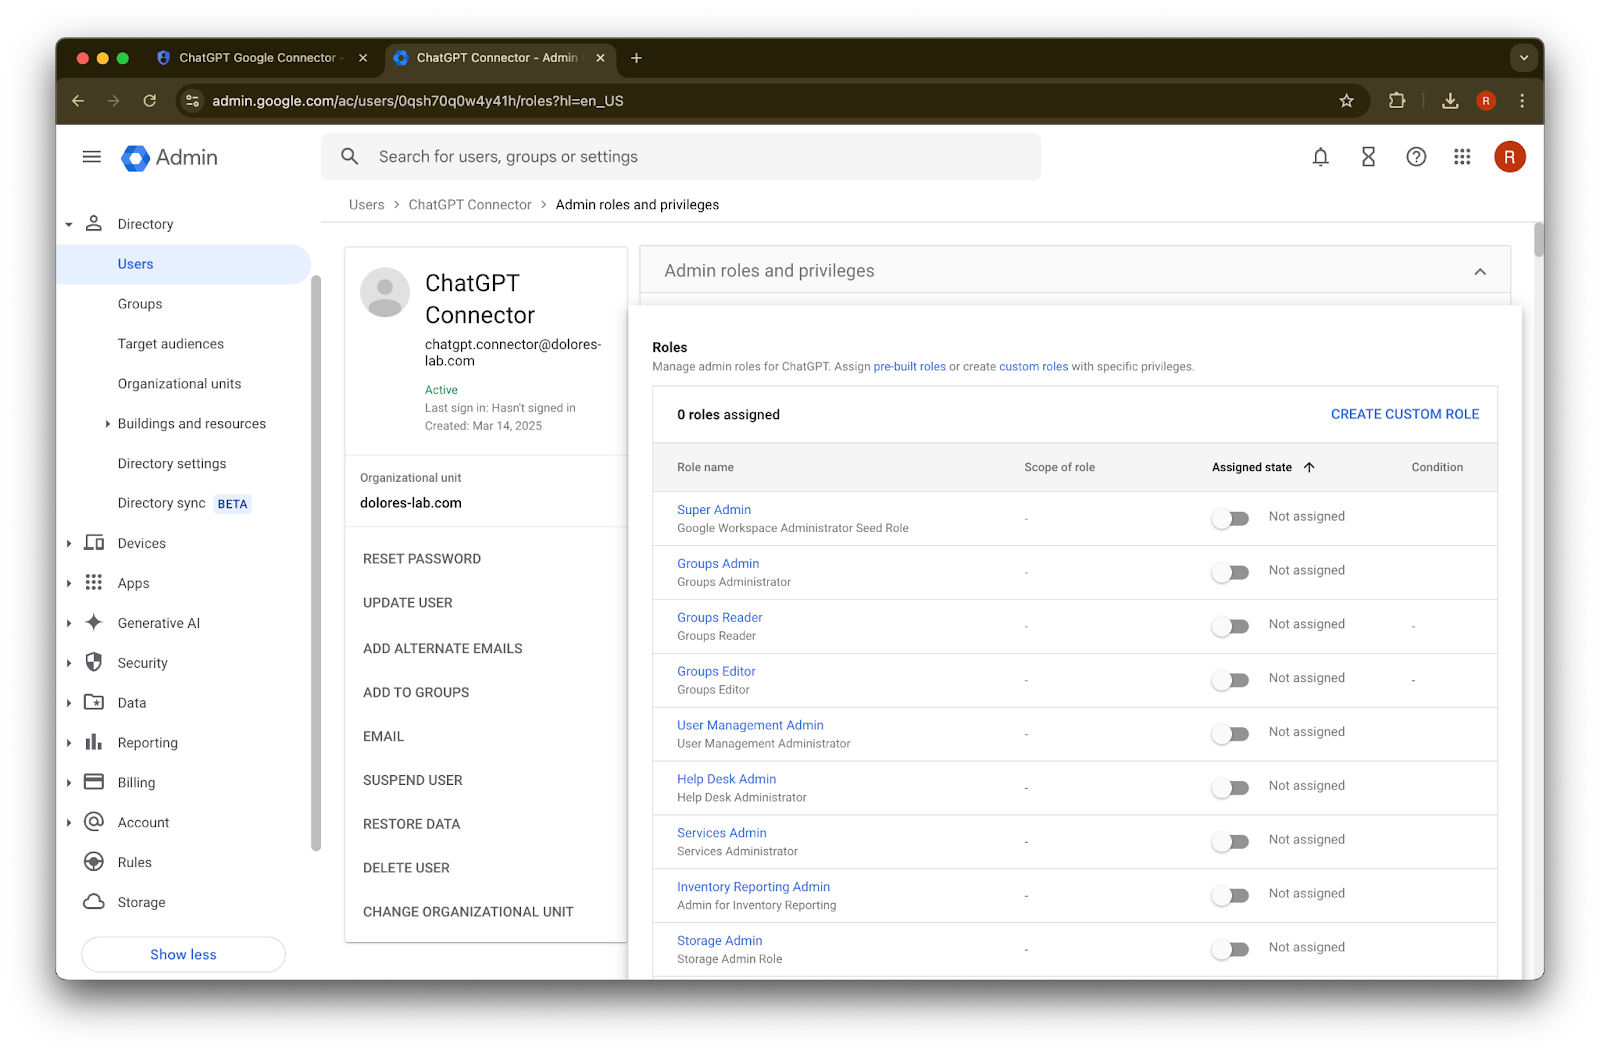
I-click ang assign roles.
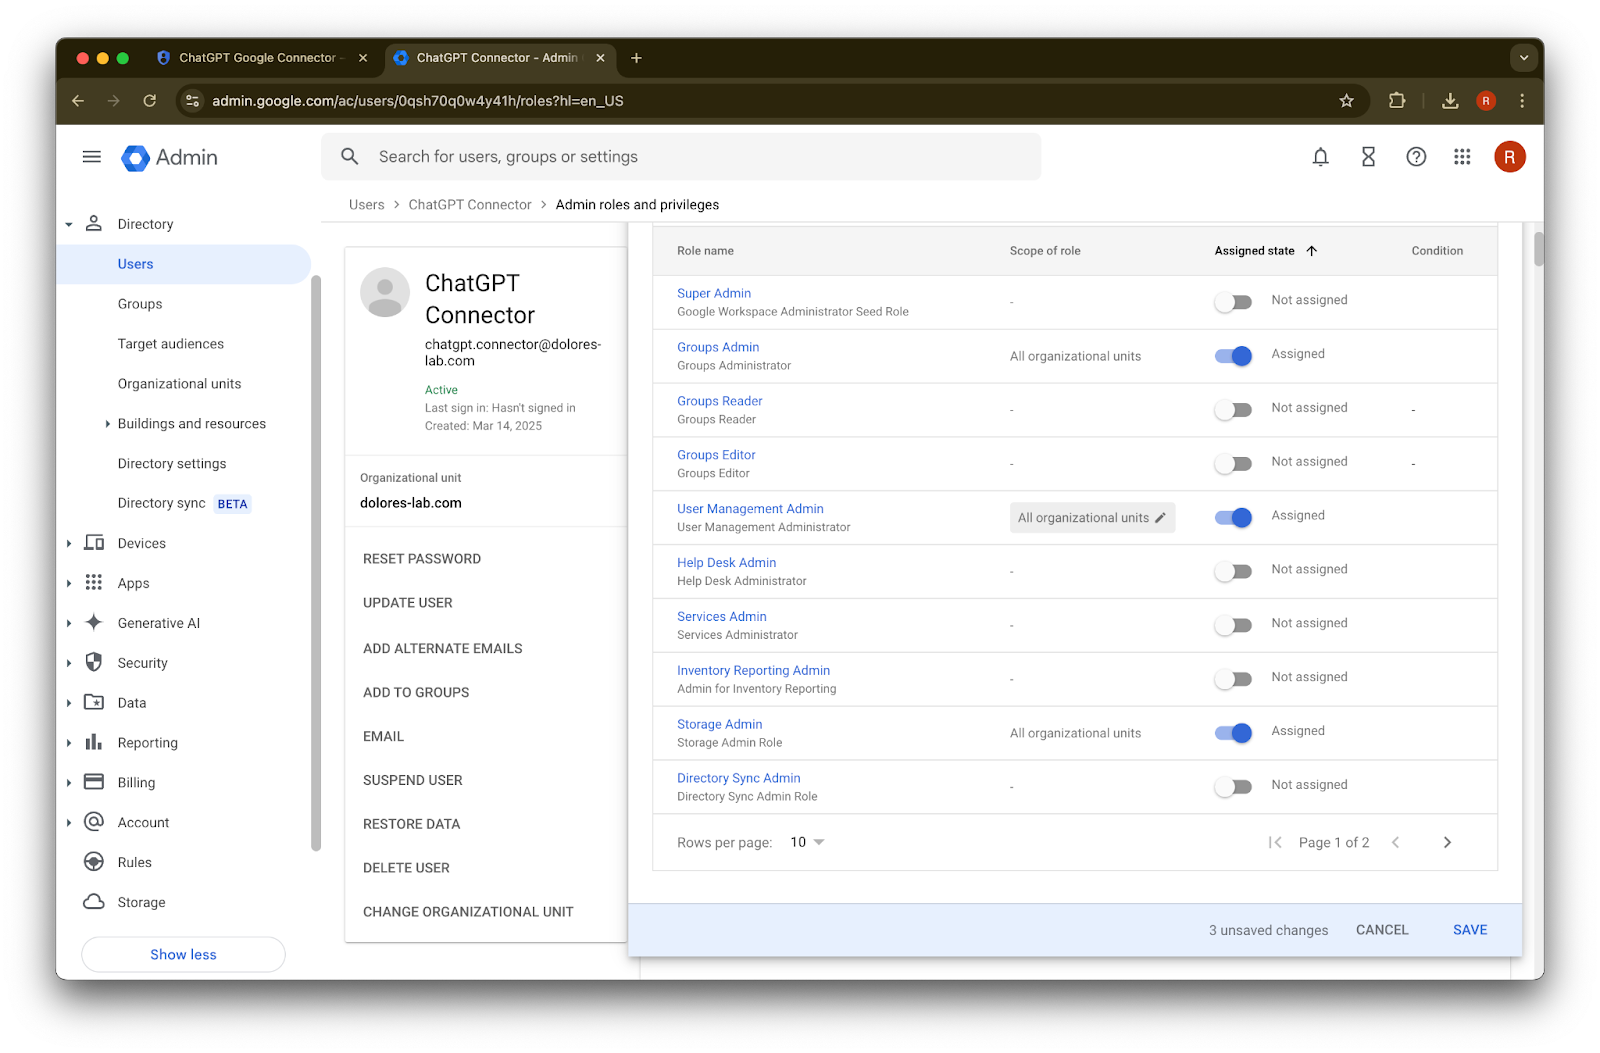
I-toggle on ang mga role na Groups Reader, User Management Admin, at Storage Admin.
Mag-scroll pababa at i-click ang Save. Matagumpay nang nalikha at na-configure ang admin account.
Pagtatapos ng setup sa ChatGPT Admin Console
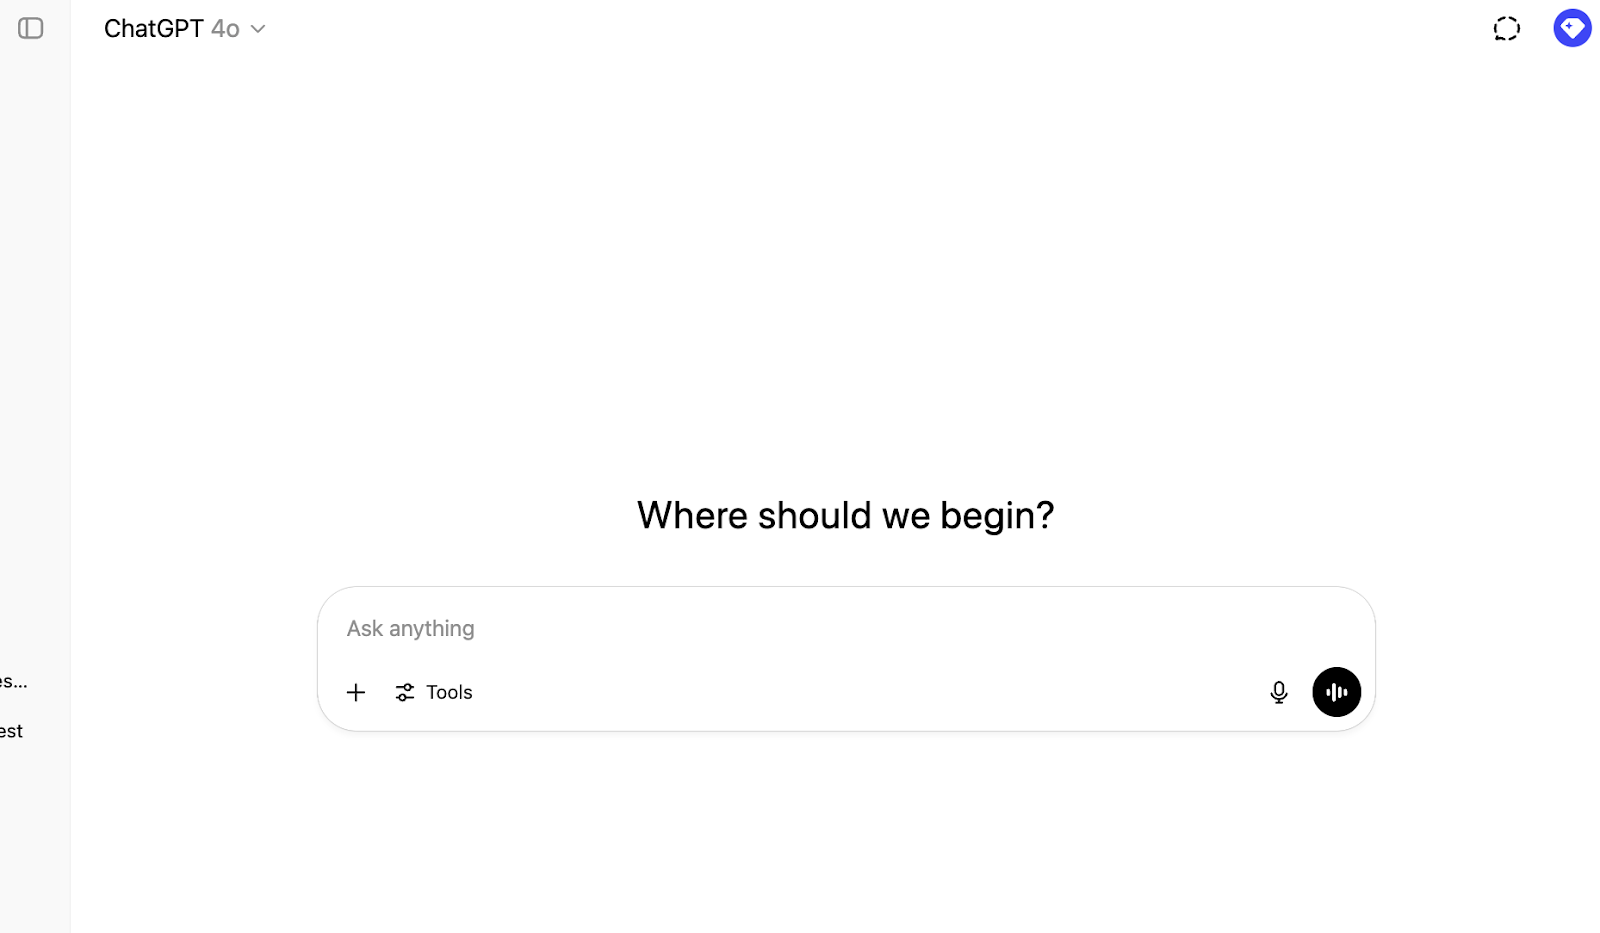
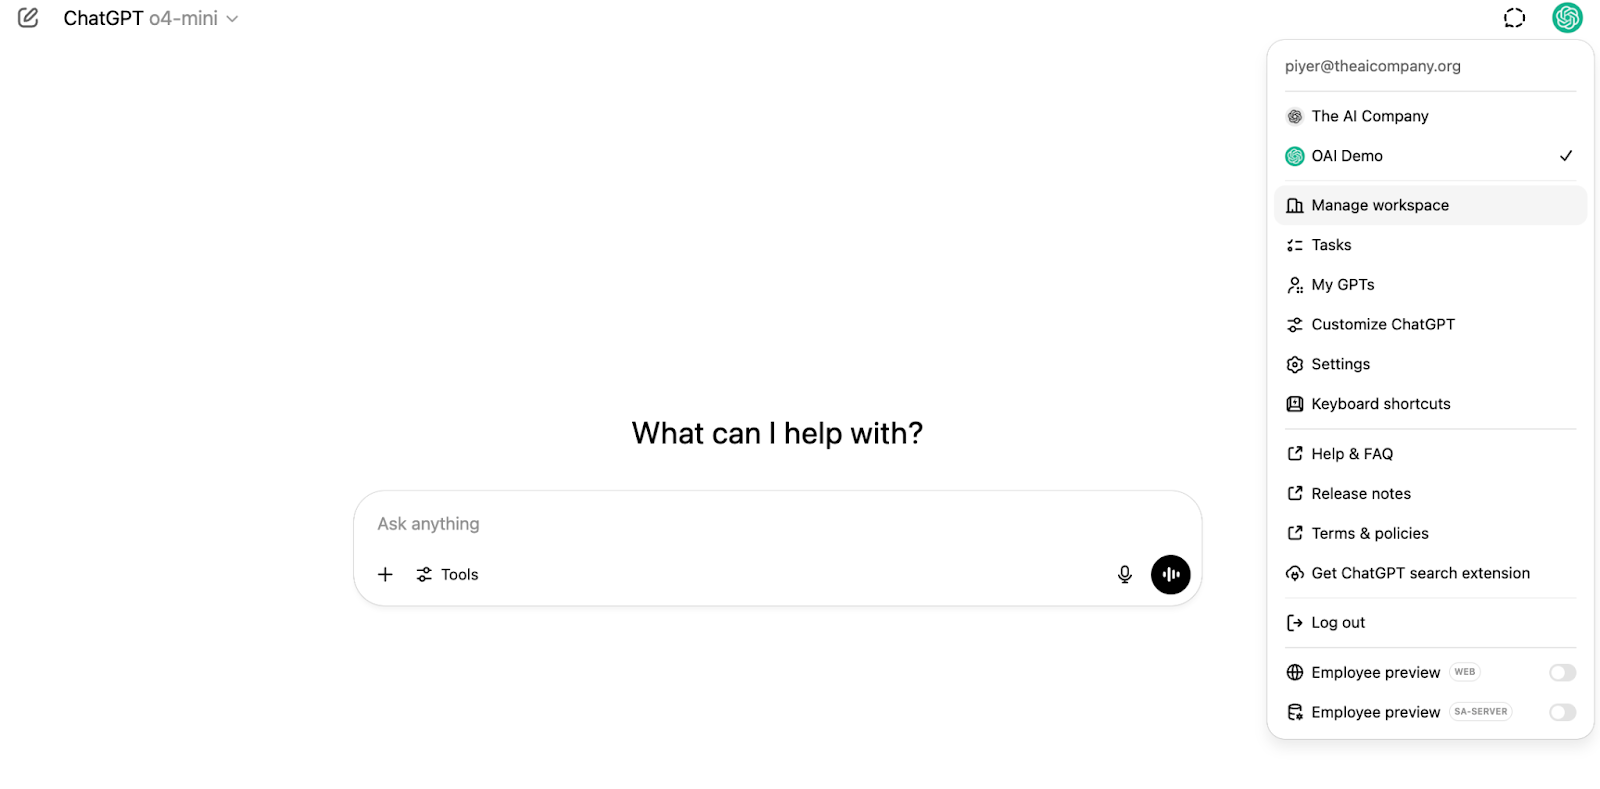
Pumunta sa ChatGPT at i-click ang icon ng profile sa kanang itaas na sulok ng pahina.
I-click ang Manage workspace
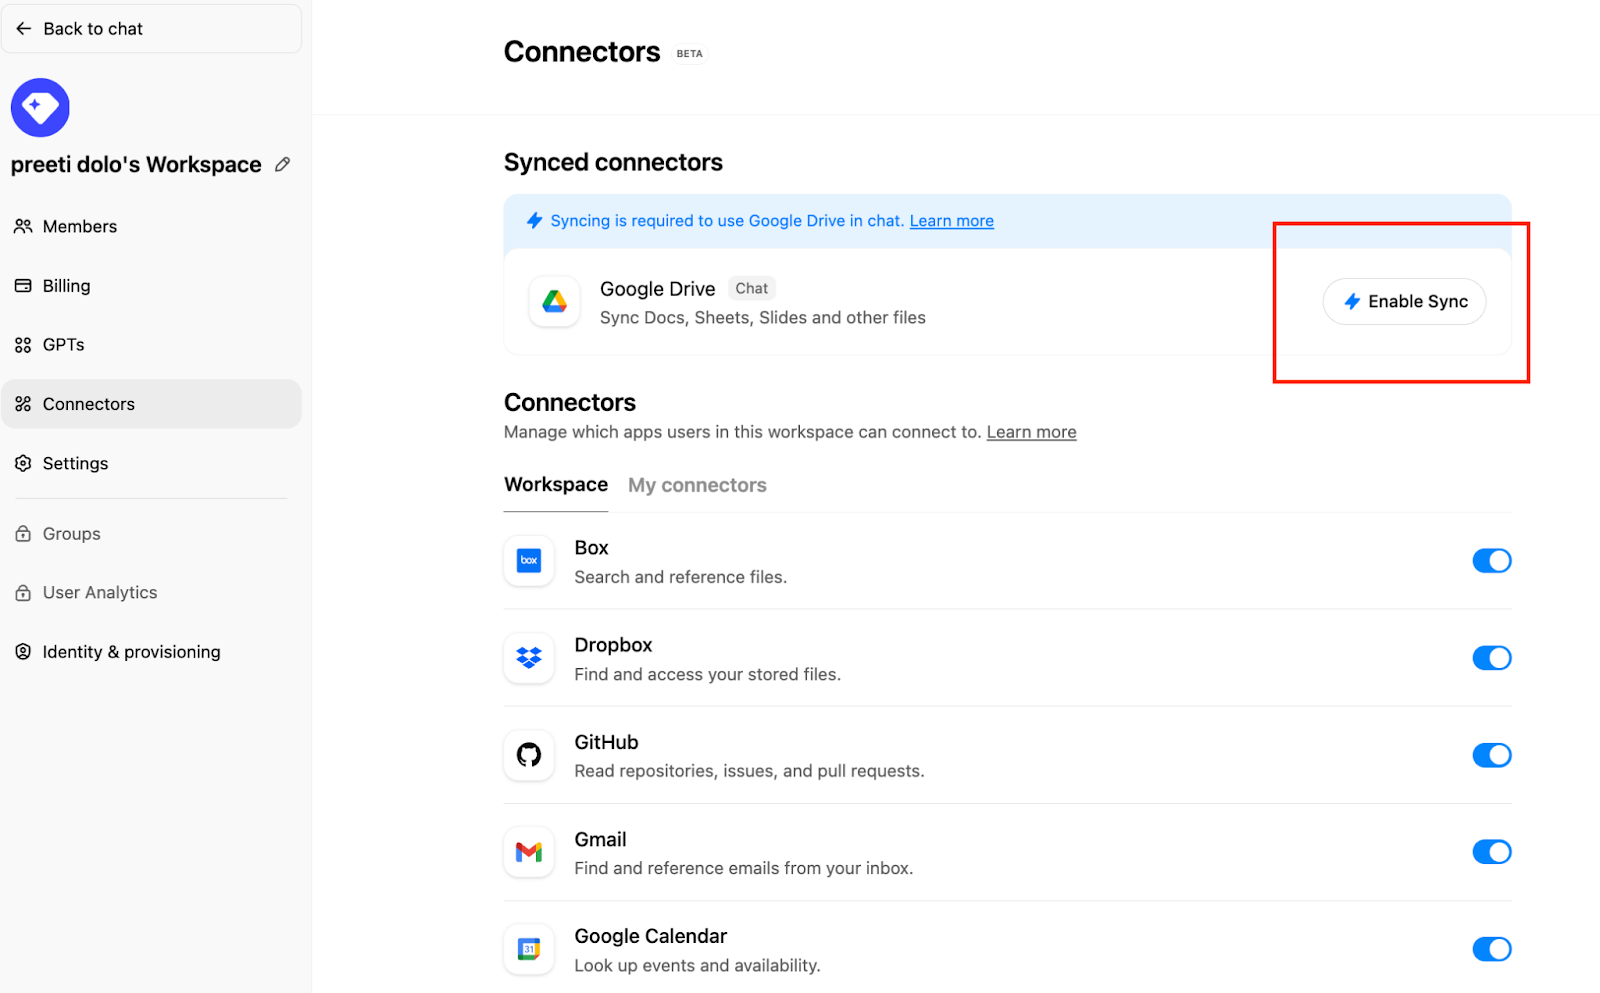
I-click ang Connections at pagkatapos sa ilalim ng ‘Synced connectors’ → Enable Sync
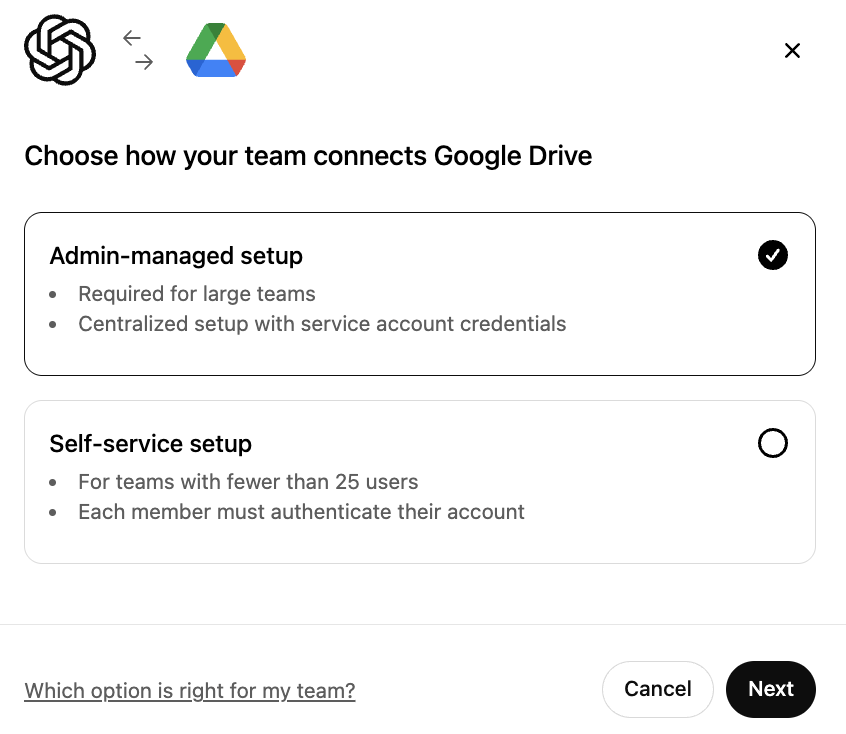
Tiyaking napili ang Admin-managed at i-click ang Next
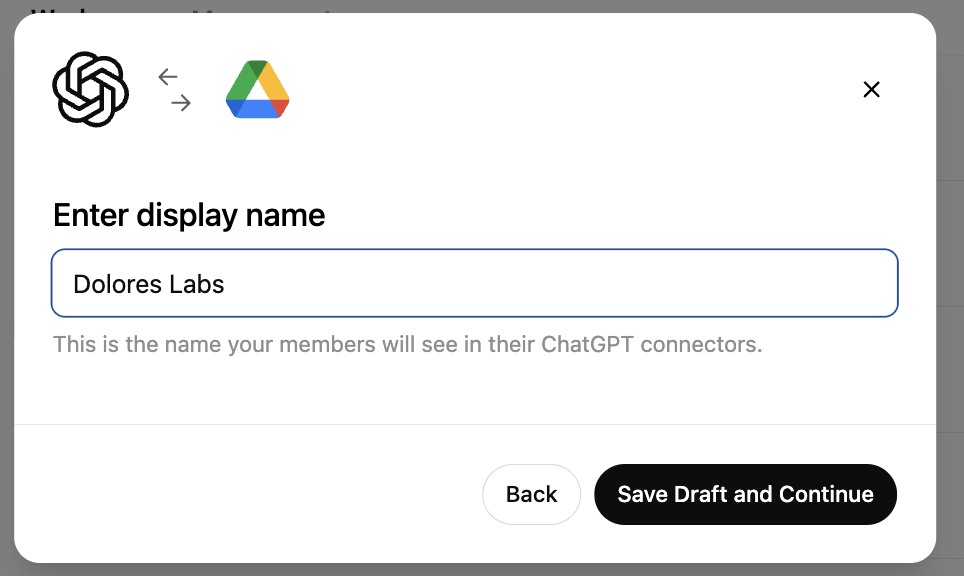
Maglagay ng display name. Inirerekomenda naming gamitin ang pangalan ng iyong Google Workspace.
Pakitandaan na sa kasalukuyan ay hindi namin sinusuportahan ang pagpapalit ng pangalan ng iyong koneksyon.I-click ang Save Draft and Continue
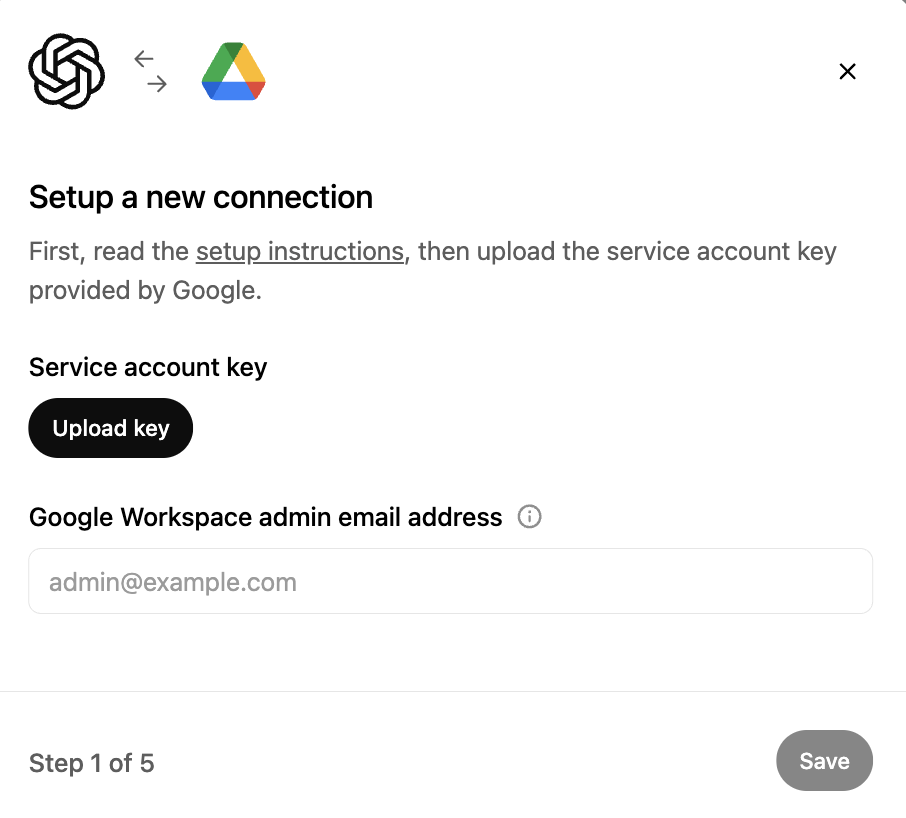
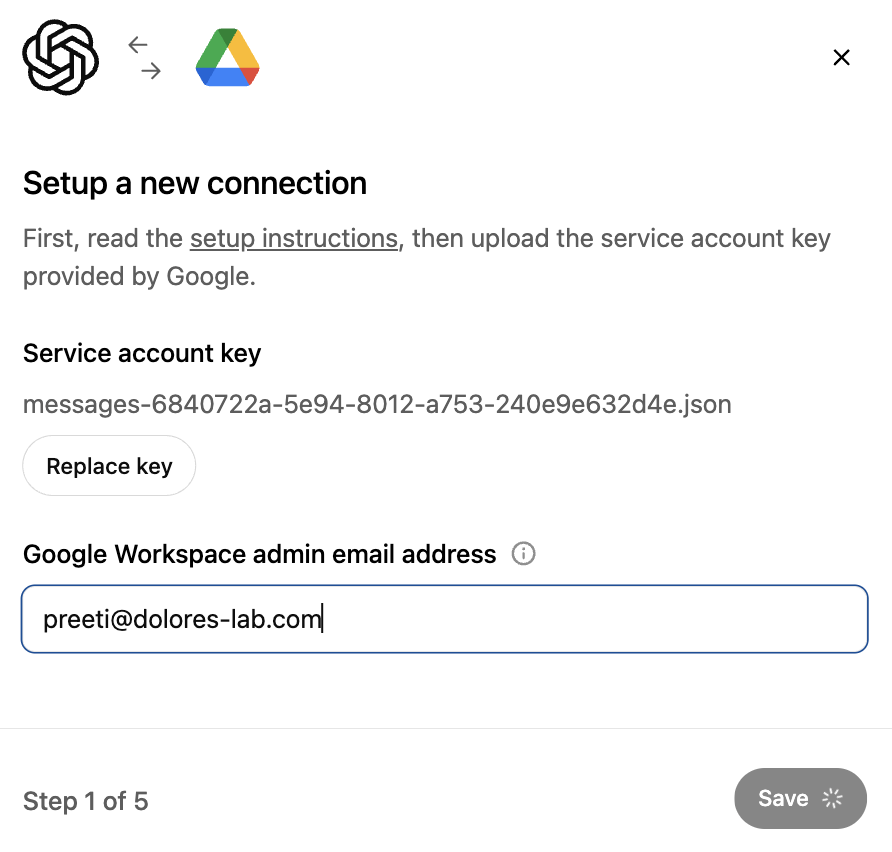
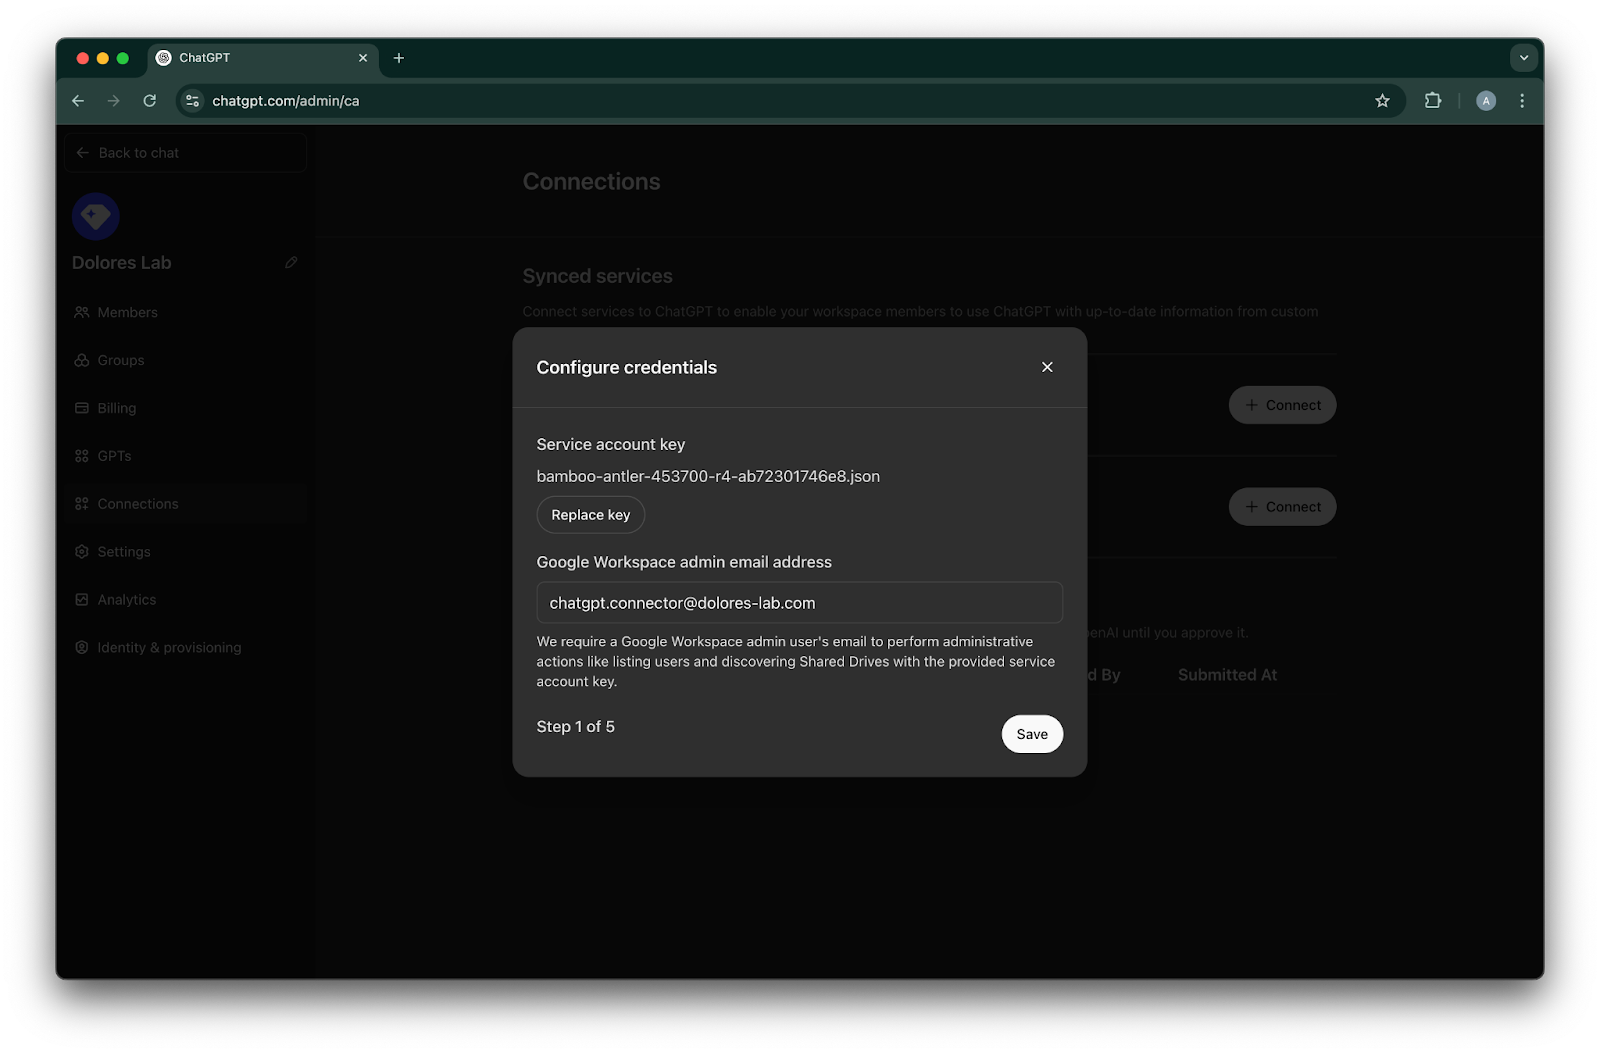
I-click ang Upload key. Piliin ang JSON file, na siyang key na na-download mo bilang bahagi ng pag-set up ng service account sa itaas. Tiyaking tama ang key na ito
Ilagay ang admin email address. Ito ang admin account na ginawa mo kanina.
I-click ang Save.
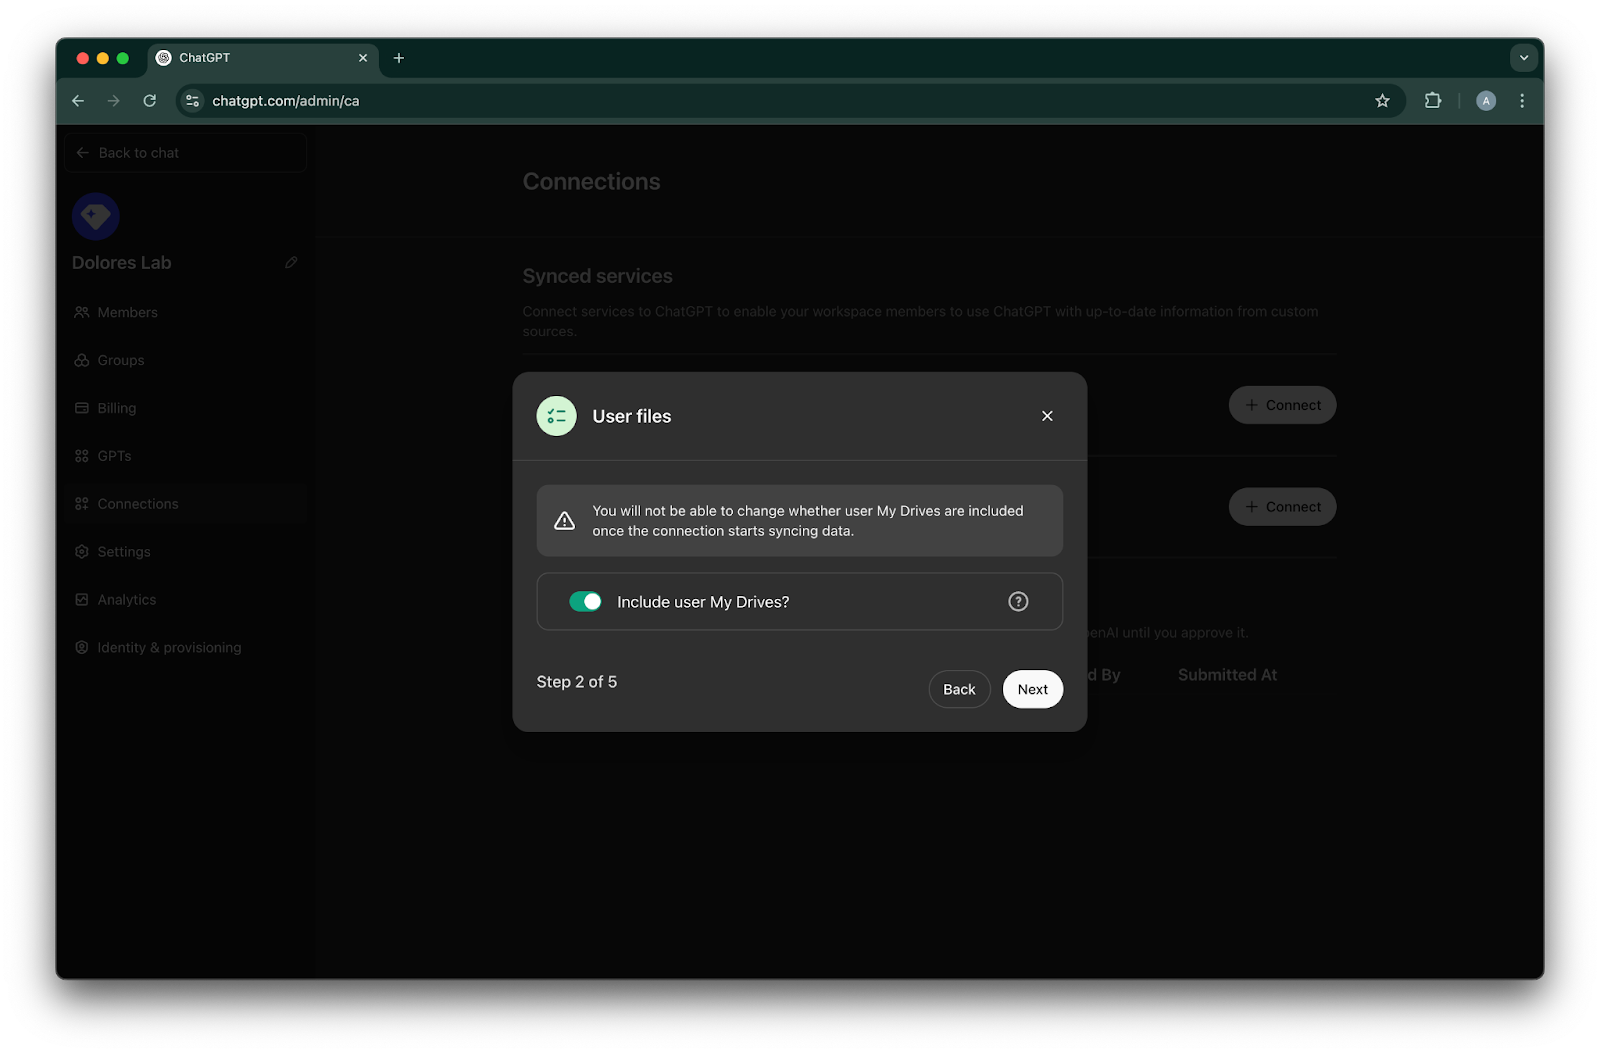
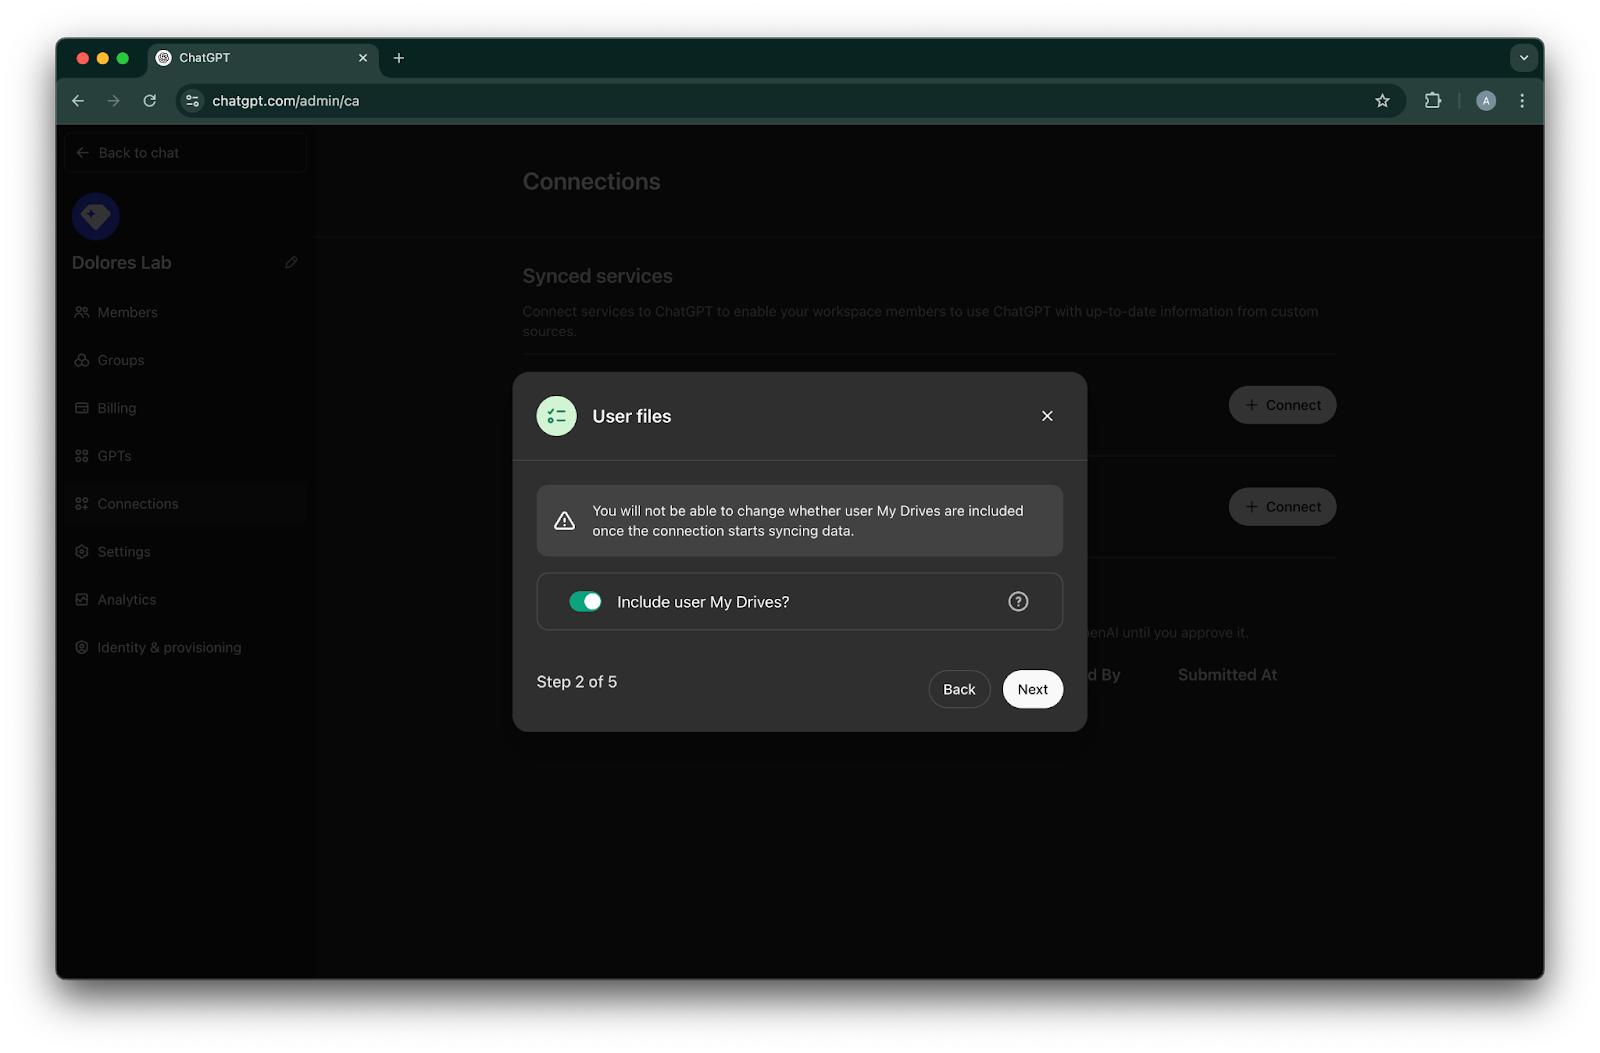
Piliin kung gusto mong isama ang mga file sa lahat ng My Drive ng iyong mga user.
I-click ang Next
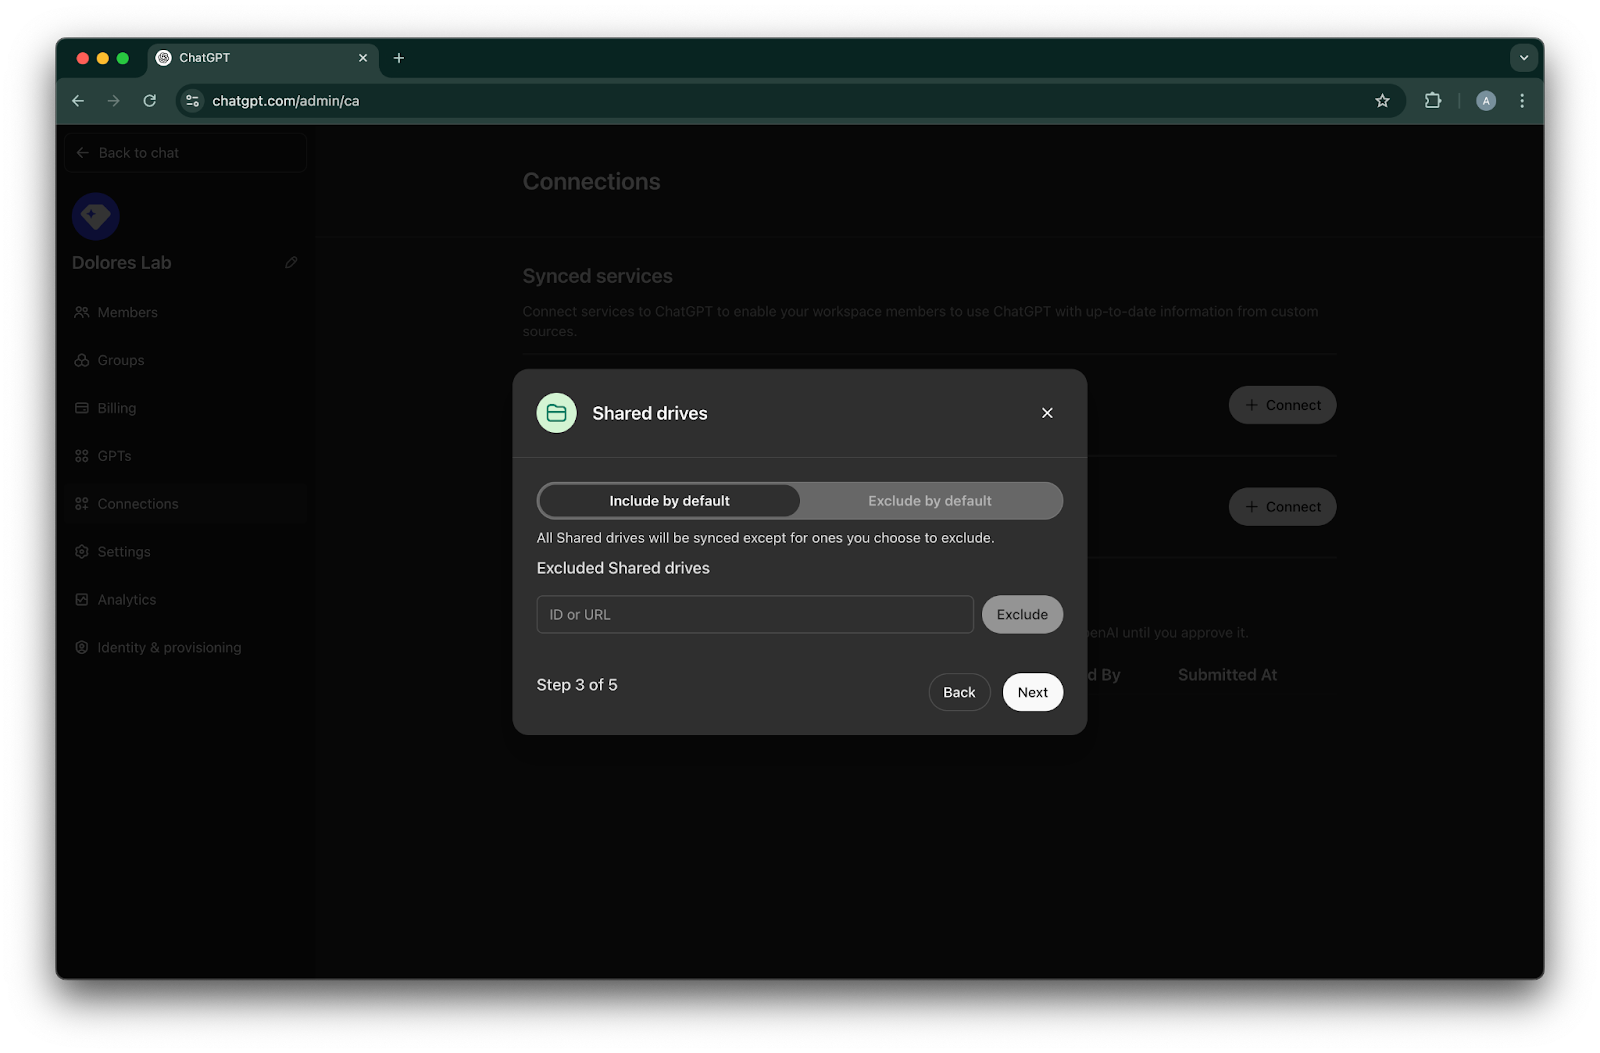
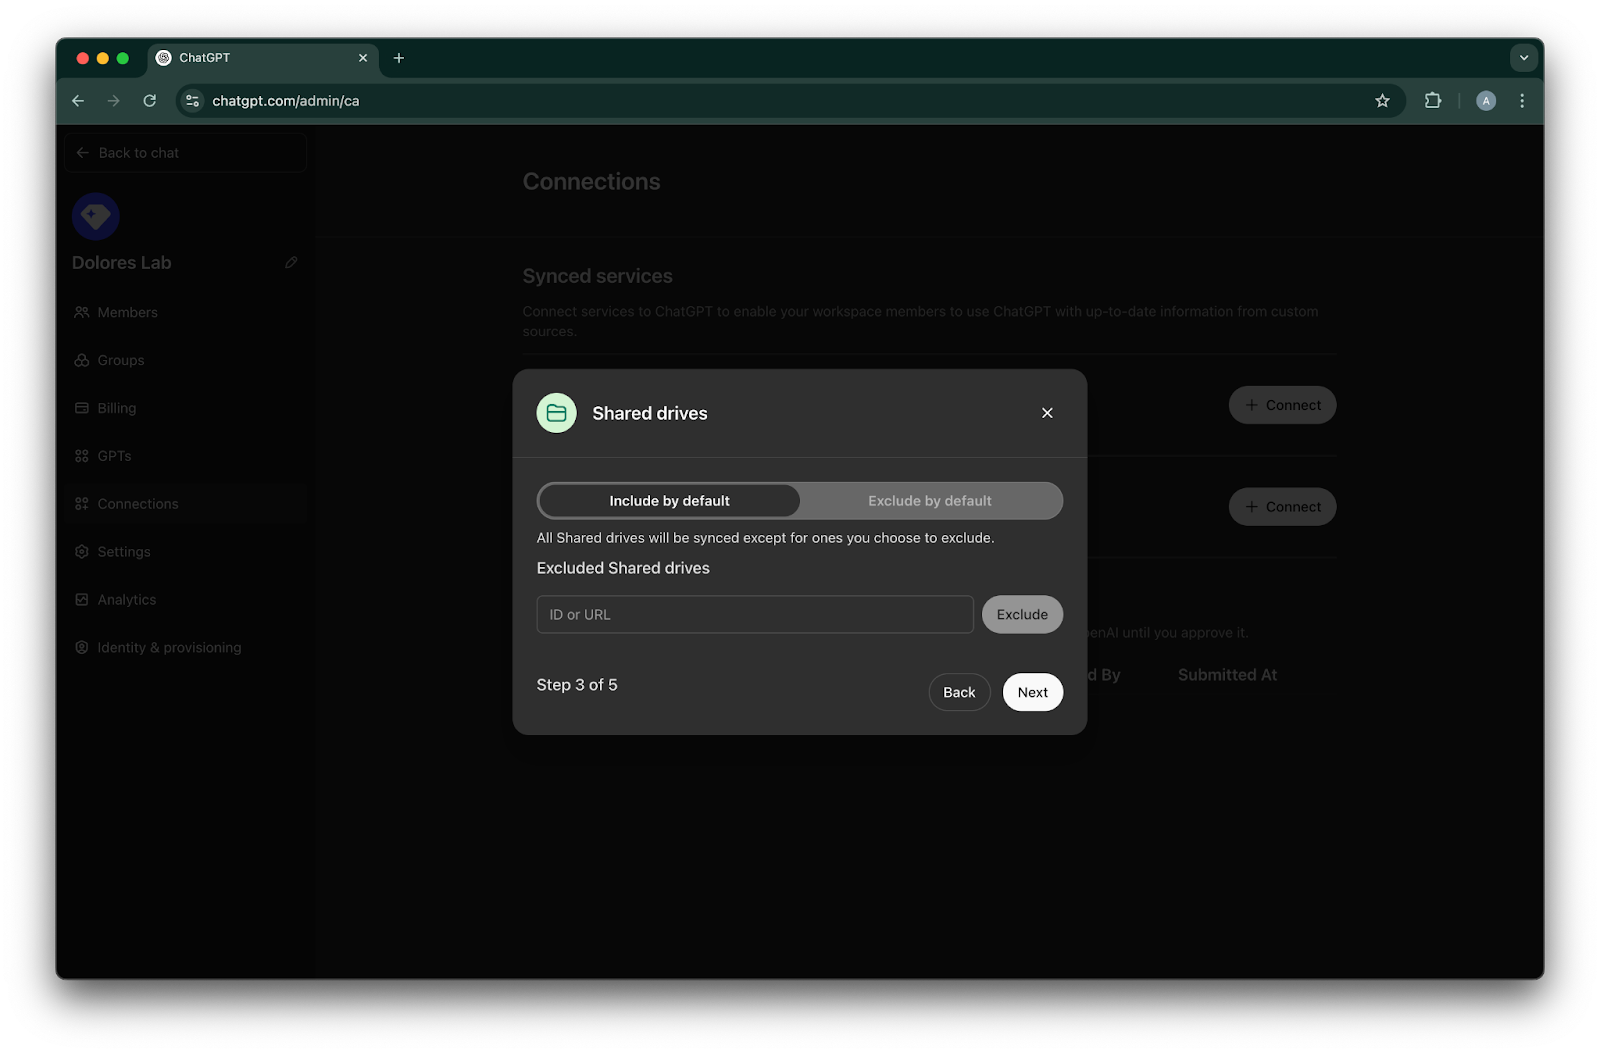
Piliin kung paano pamahalaan ang shared drives. Sinusuportahan namin ang sumusunod na tatlong sitwasyon:
Kung gusto mong isama ang lahat ng shared drives, piliin ang Include by default at huwag magdagdag ng mga shared drive ID na ibubukod
Kung gusto mong isama ang karamihan sa shared drives, piliin ang Include by default at idagdag ang mga ID para sa mga shared drive na gusto mong ibukod
Kung gusto mong ibukod ang karamihan sa shared drives, piliin ang Exclude by default at idagdag ang mga ID para sa mga shared drive na gusto mong isama
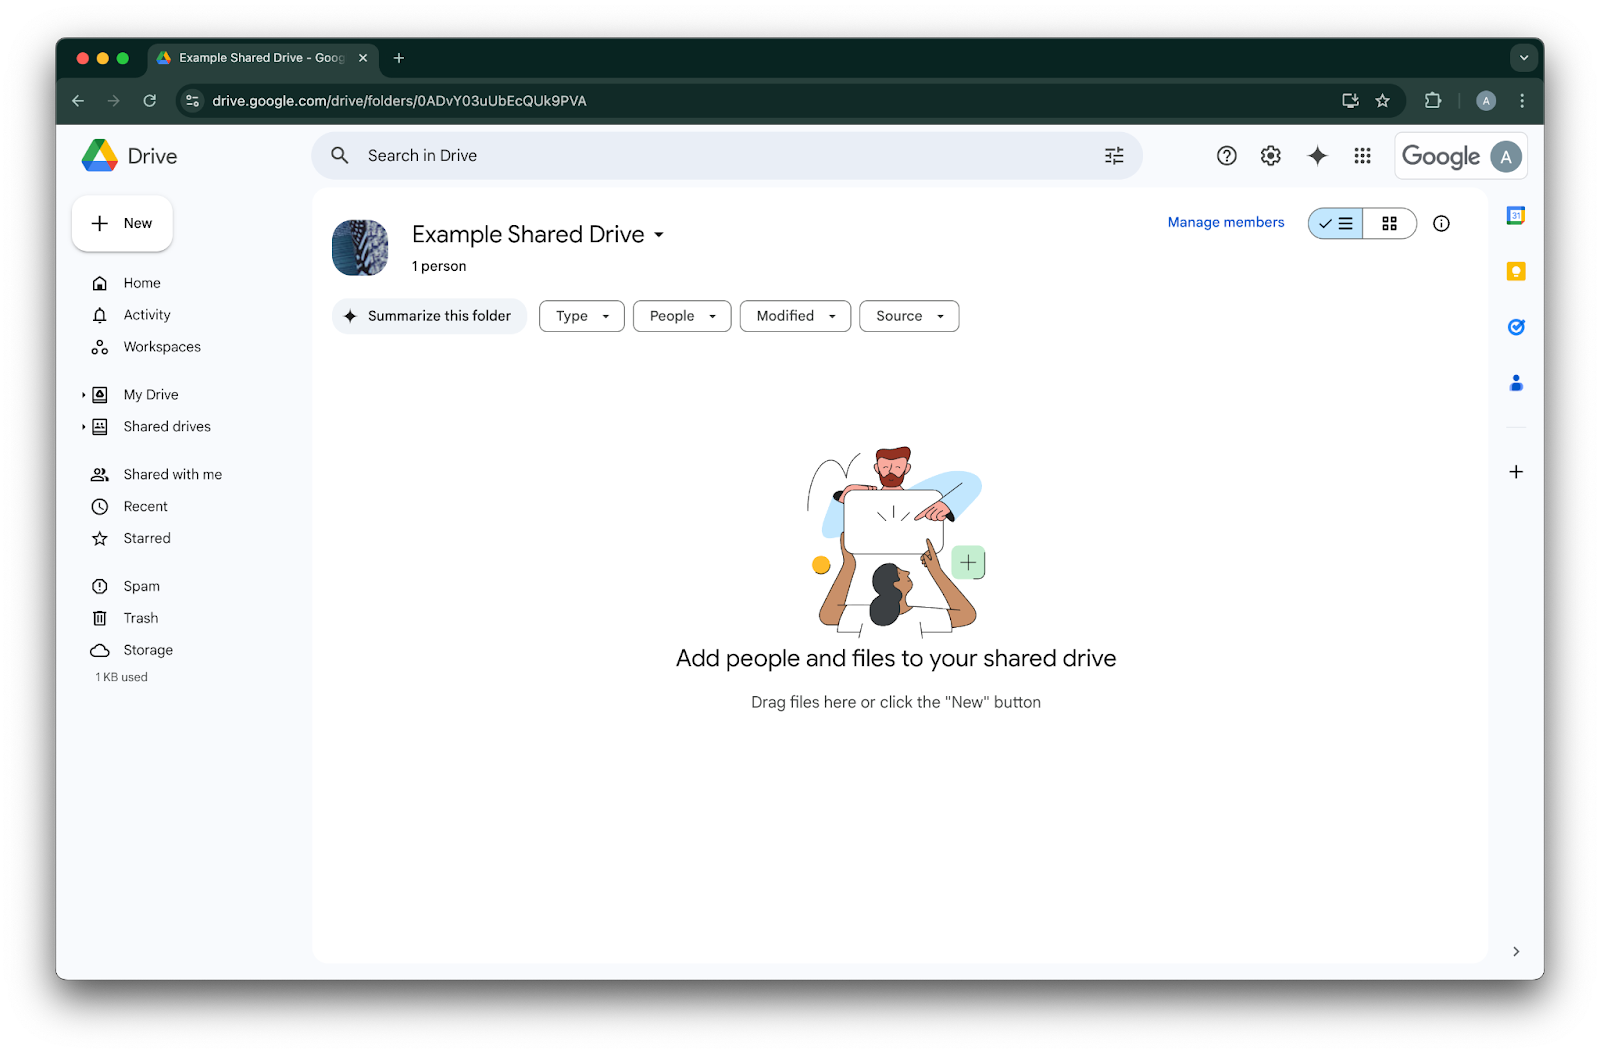
Upang hanapin ang ID para sa isang shared drive, pumunta rito sa isang web browser. Ang huling bahagi ng URL ay ang shared drive ID.
Sa sumusunod na halimbawa, ito ay `0ADvY03uUbEcQUk9PVA`'I-click ang Next
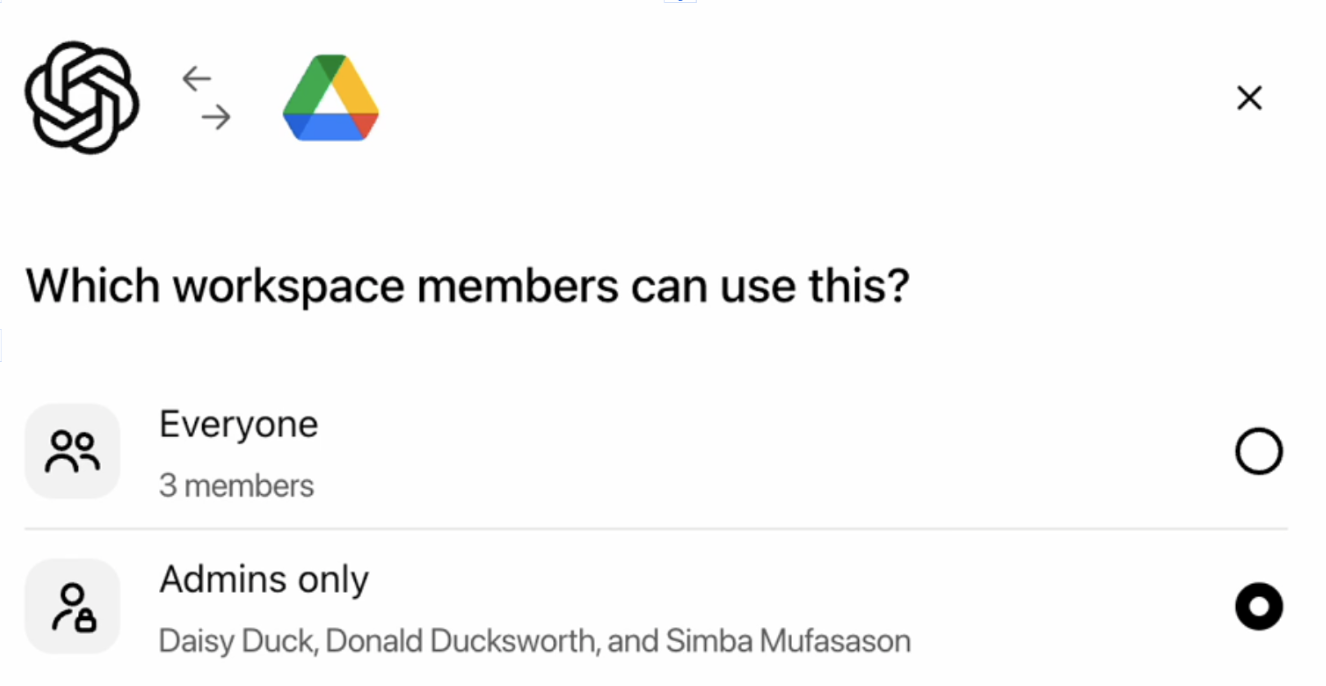
Piliin kung sino ang dapat magkaroon ng access sa koneksyon sa Google Drive. Maaari mong piliin ang mga Admin ng ChatGPT workspace lamang, o i-enable ito para sa lahat. Kung naka-enable para sa lahat, awtomatikong isasama ang mga bagong user na idaragdag sa workspace.
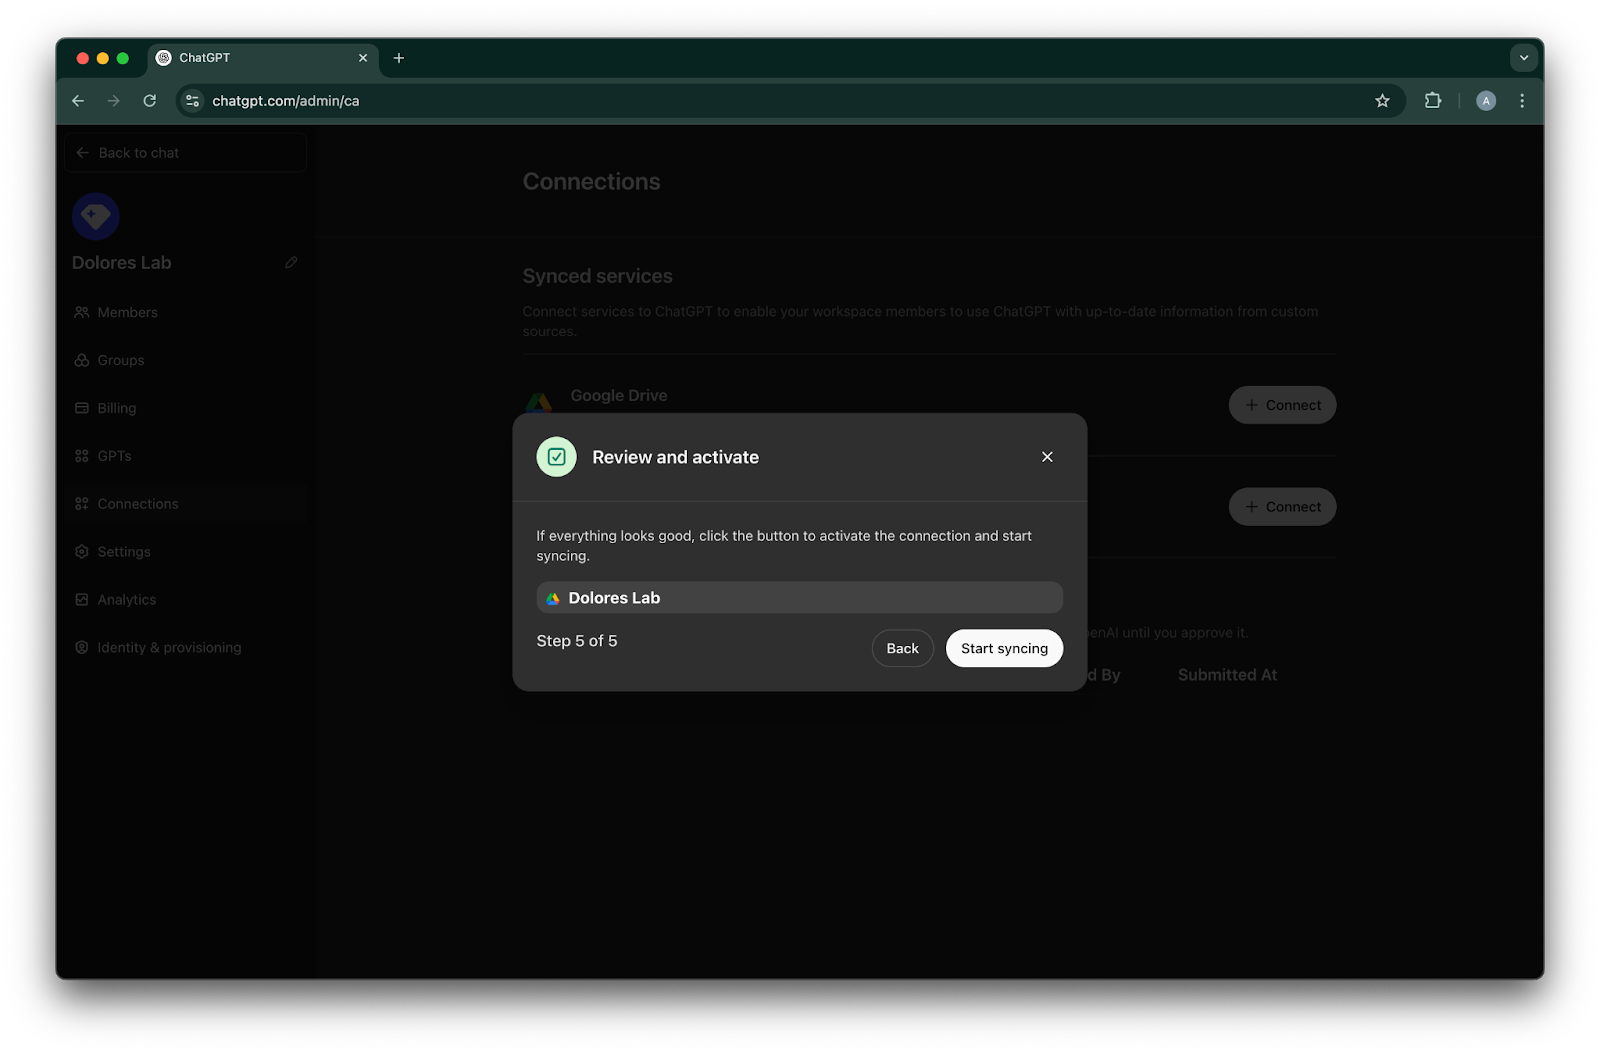
I-click ang Start syncing
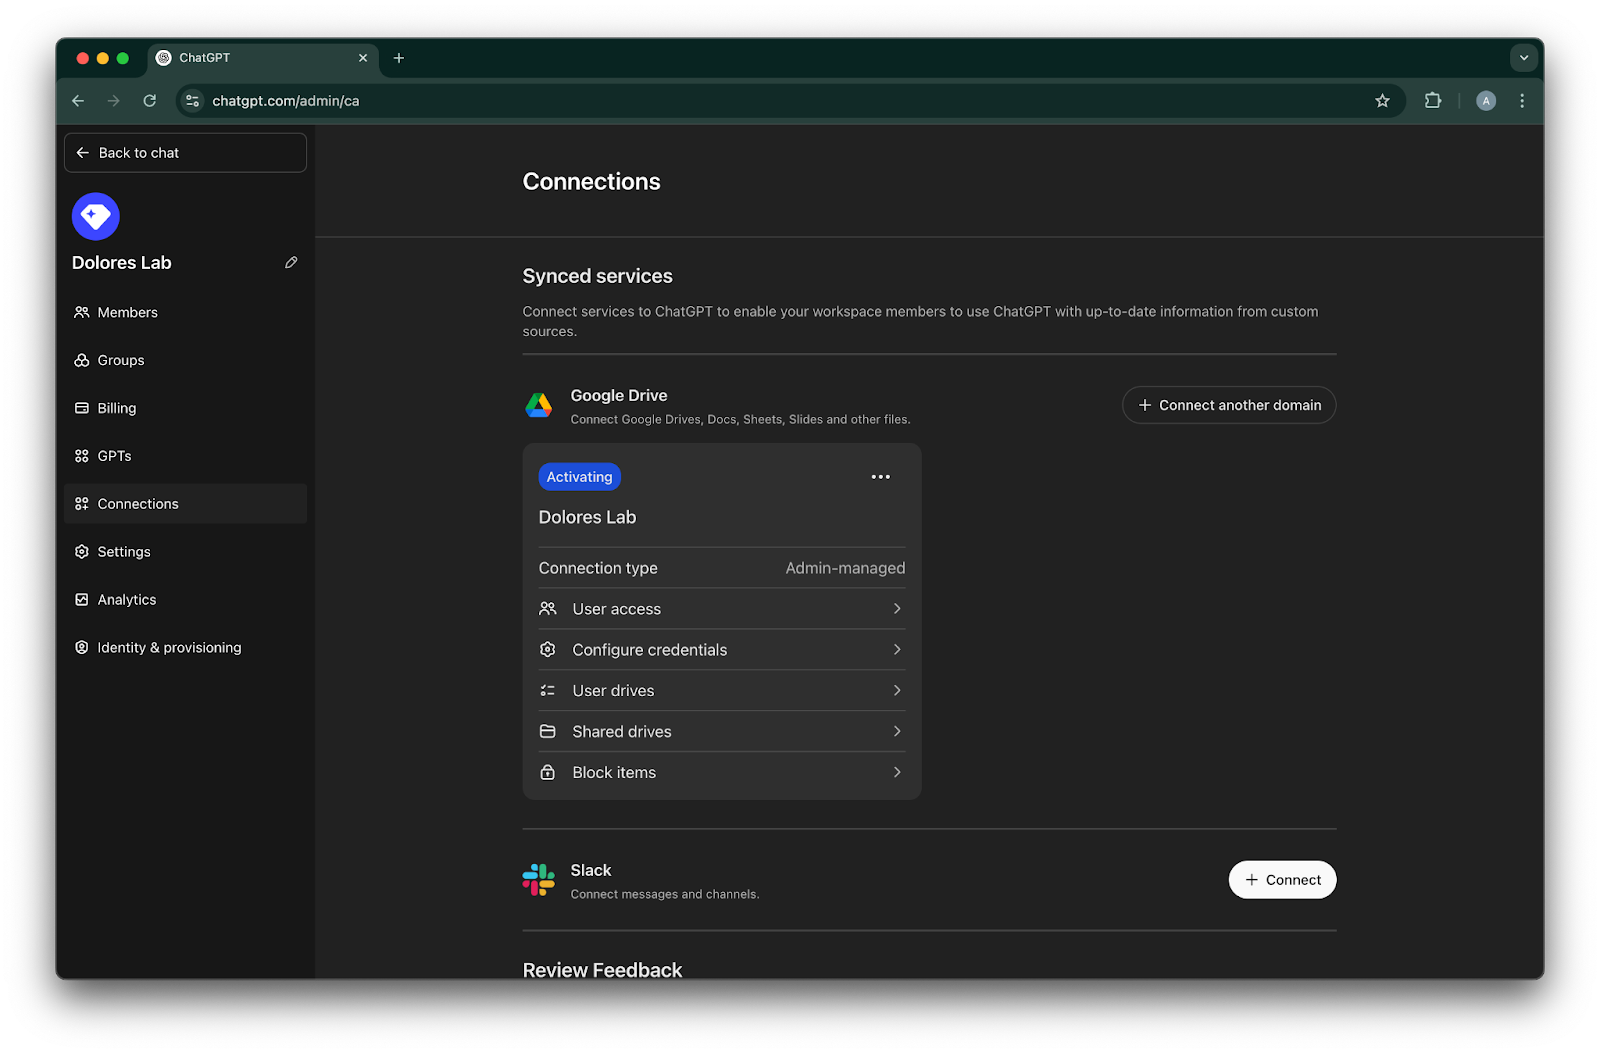
Matagumpay nang nalikha ang iyong koneksyon sa Google Drive!
Pakitandaan na bagama’t agad itong magsisimulang mag-sync, maaari itong umabot ng ilang oras hanggang ilang araw upang makumpleto depende sa dami ng mga file na isinama batay sa iyong mga setting.
Kapag natapos nang mag-sync ang mga file na naidagdag/na-edit sa nakaraang 30 araw, magiging available ang connector sa mga user na pinag-enable-an mo nito.
Pag-enable sa paglikha ng service account key
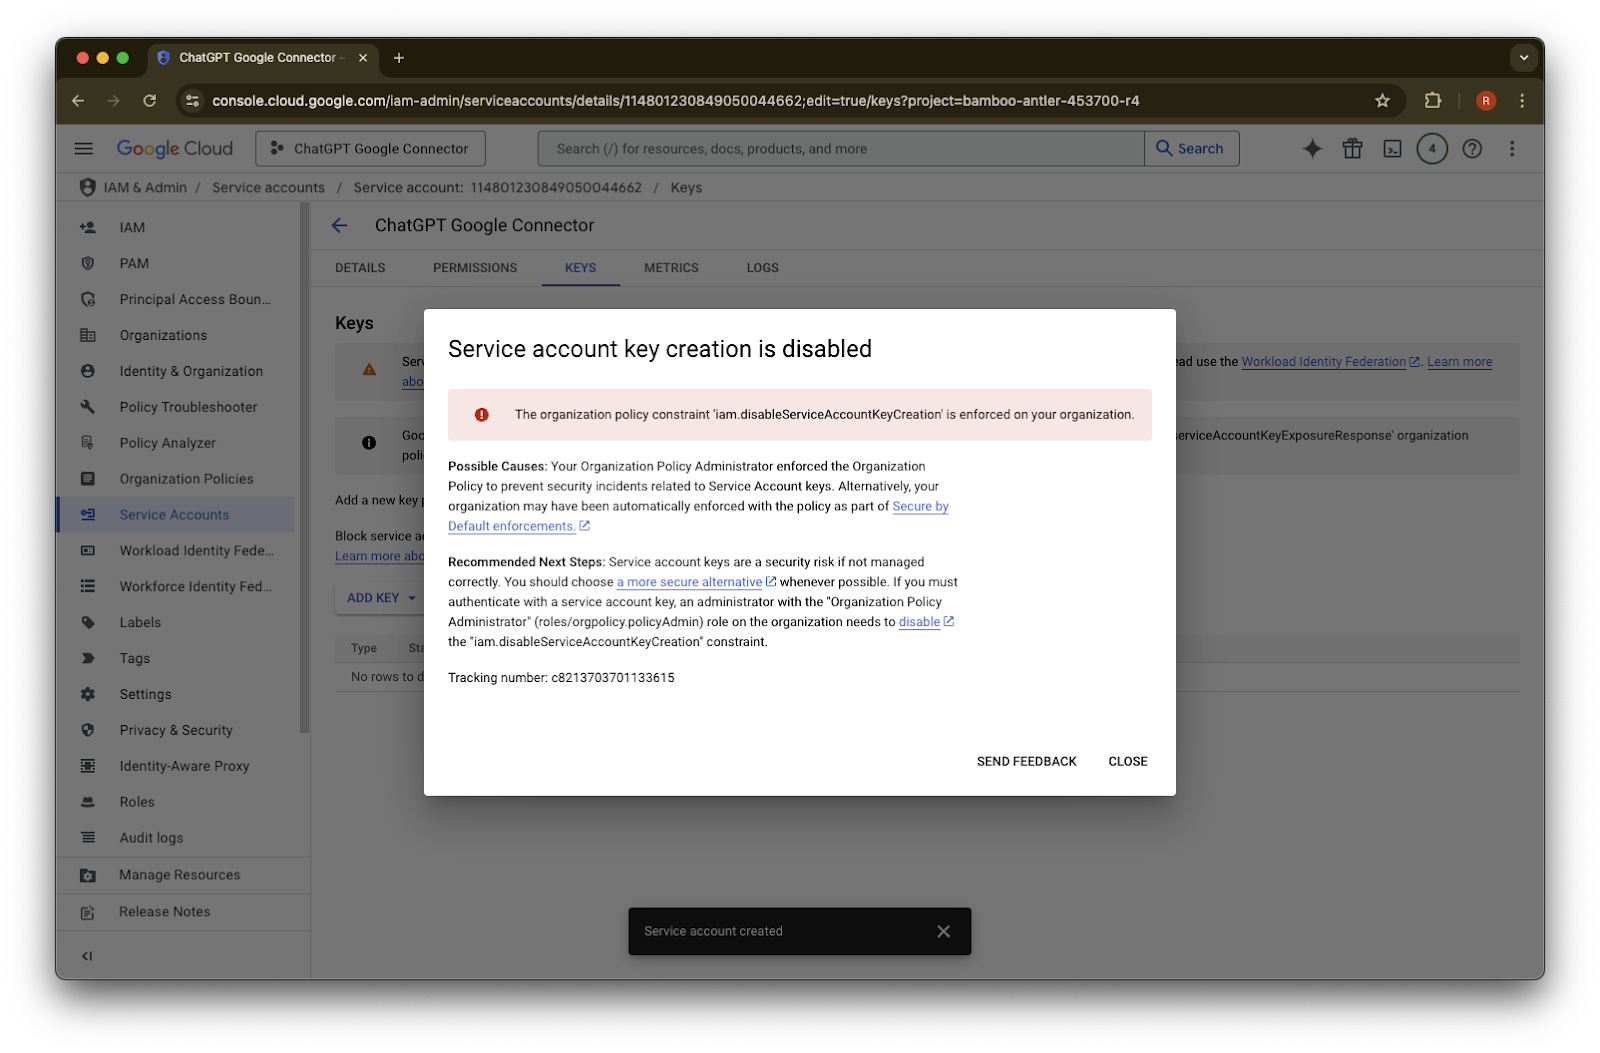
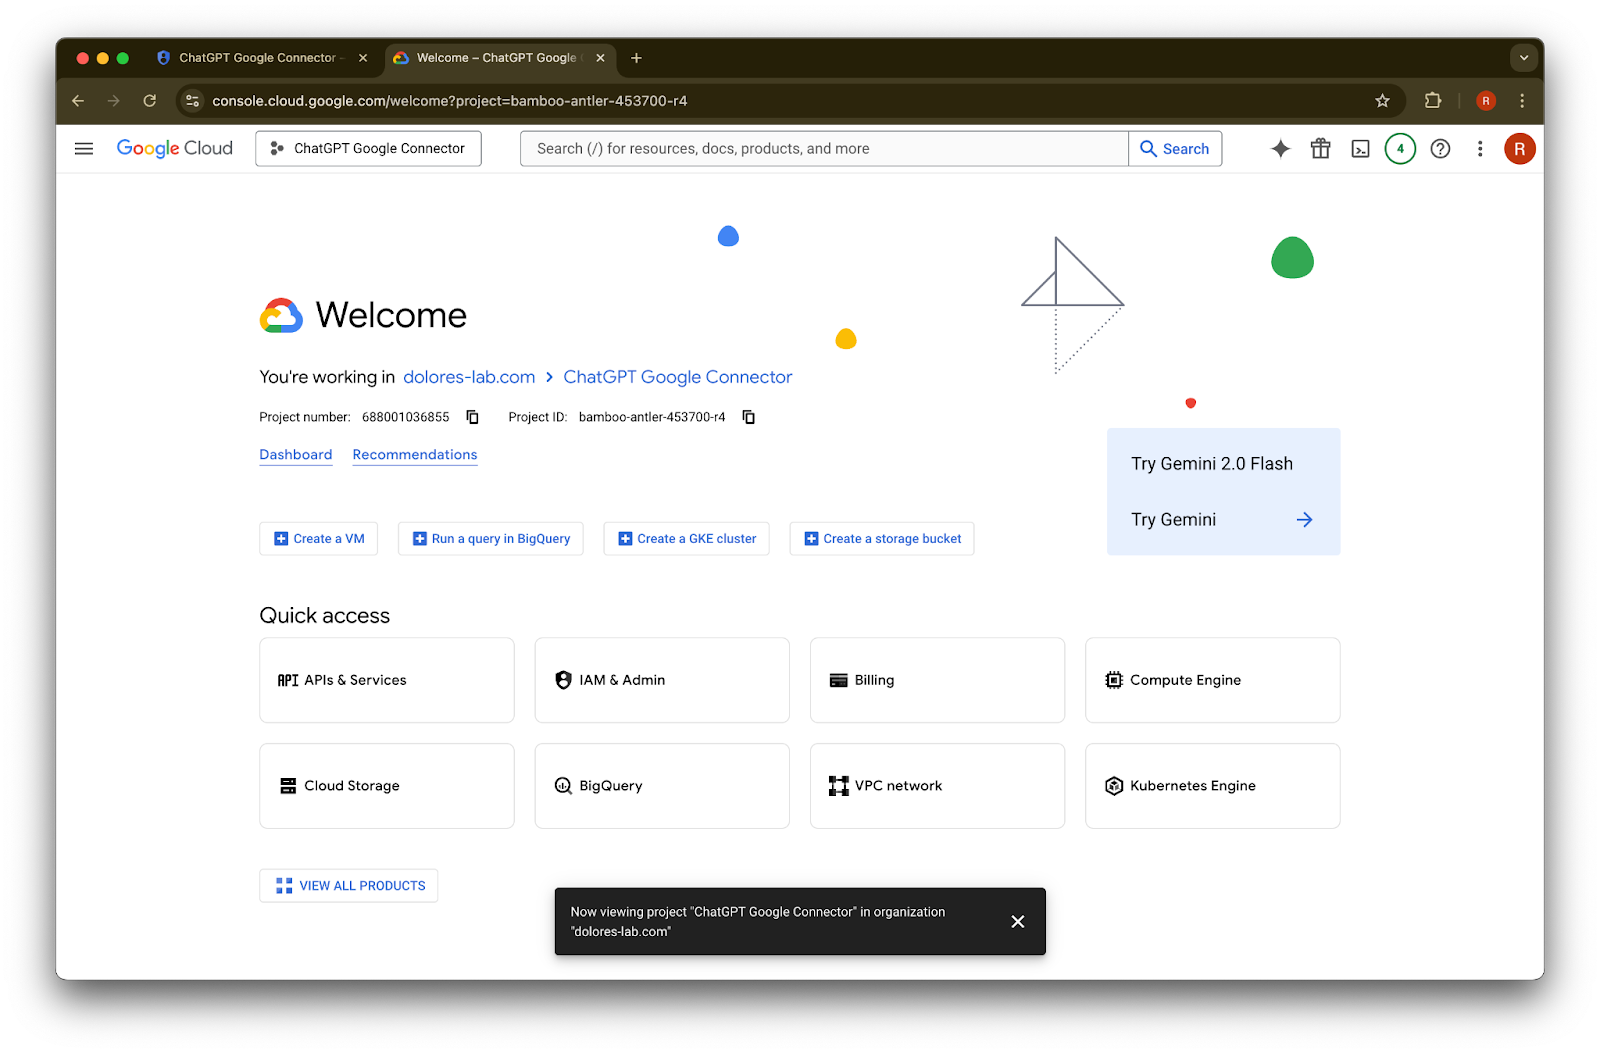
Kung matatanggap mo ang sumusunod na error, kakailanganin mong i-enable ang paglikha ng service account para sa partikular na project na ito:
> Ang constraint ng patakaran ng organisasyon na ‘iam.disableServiceAccountKeyCreation’ ay ipinapatupad sa iyong organisasyon.
Magbukas ng bagong tab at pumunta sa console.cloud.google.com. Tiyaking ang napiling project ay ang nauna mo nang napili.
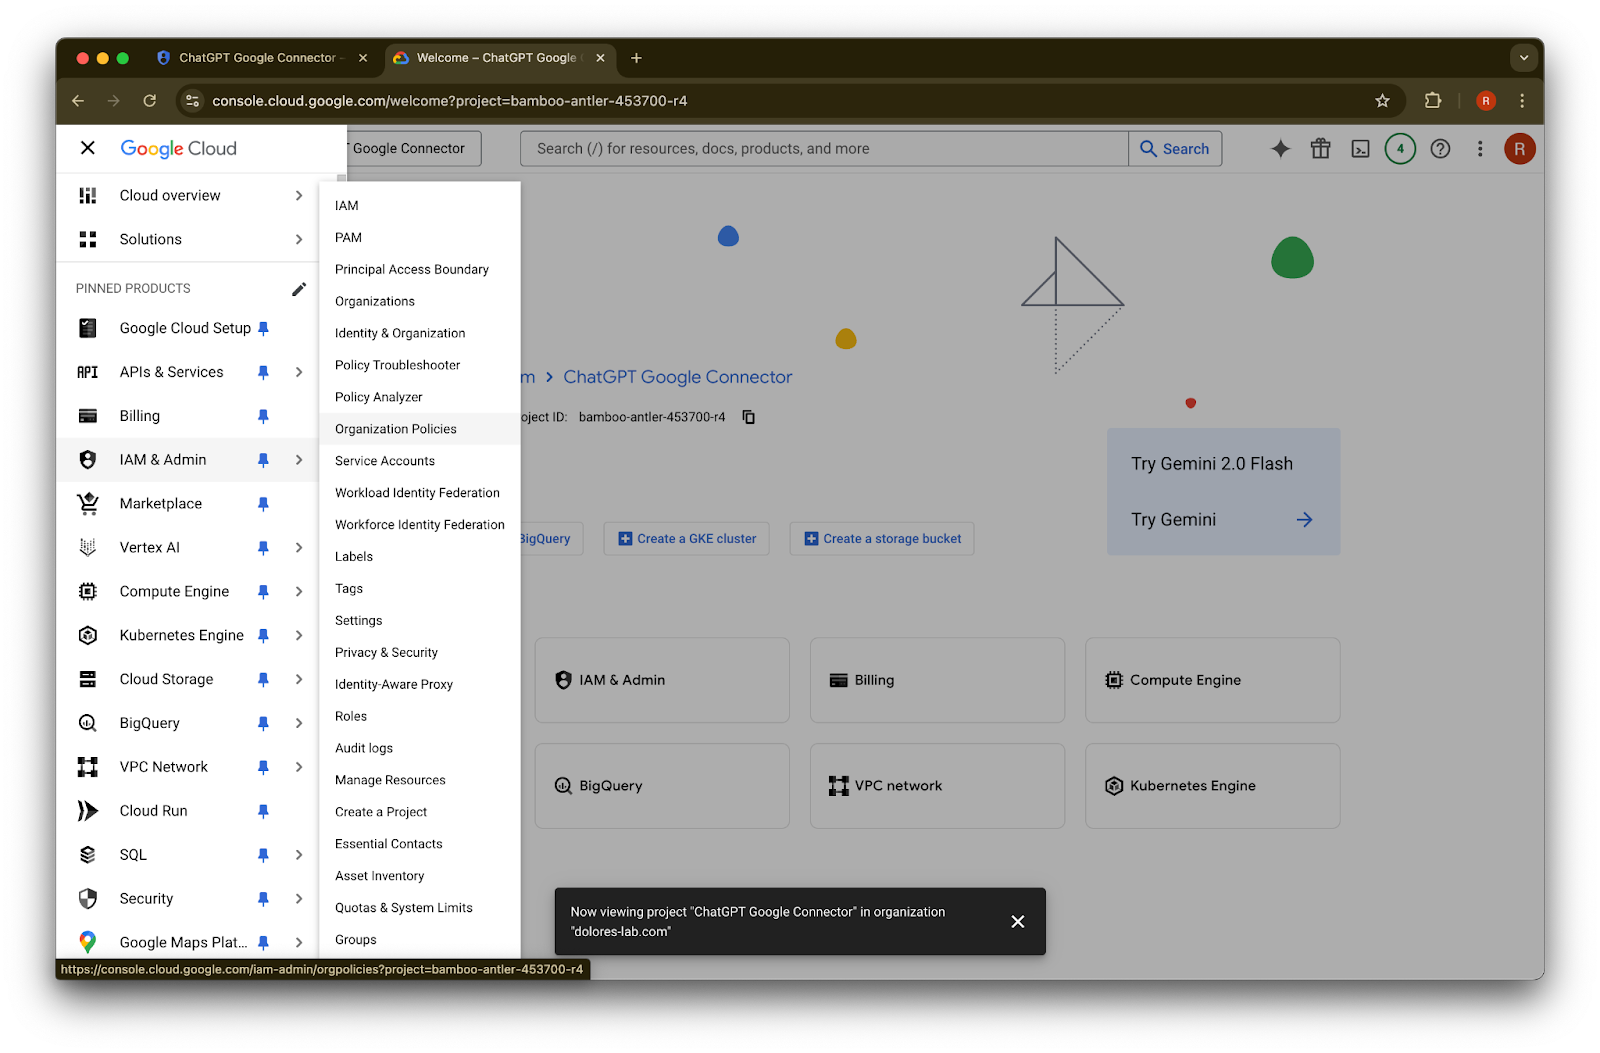
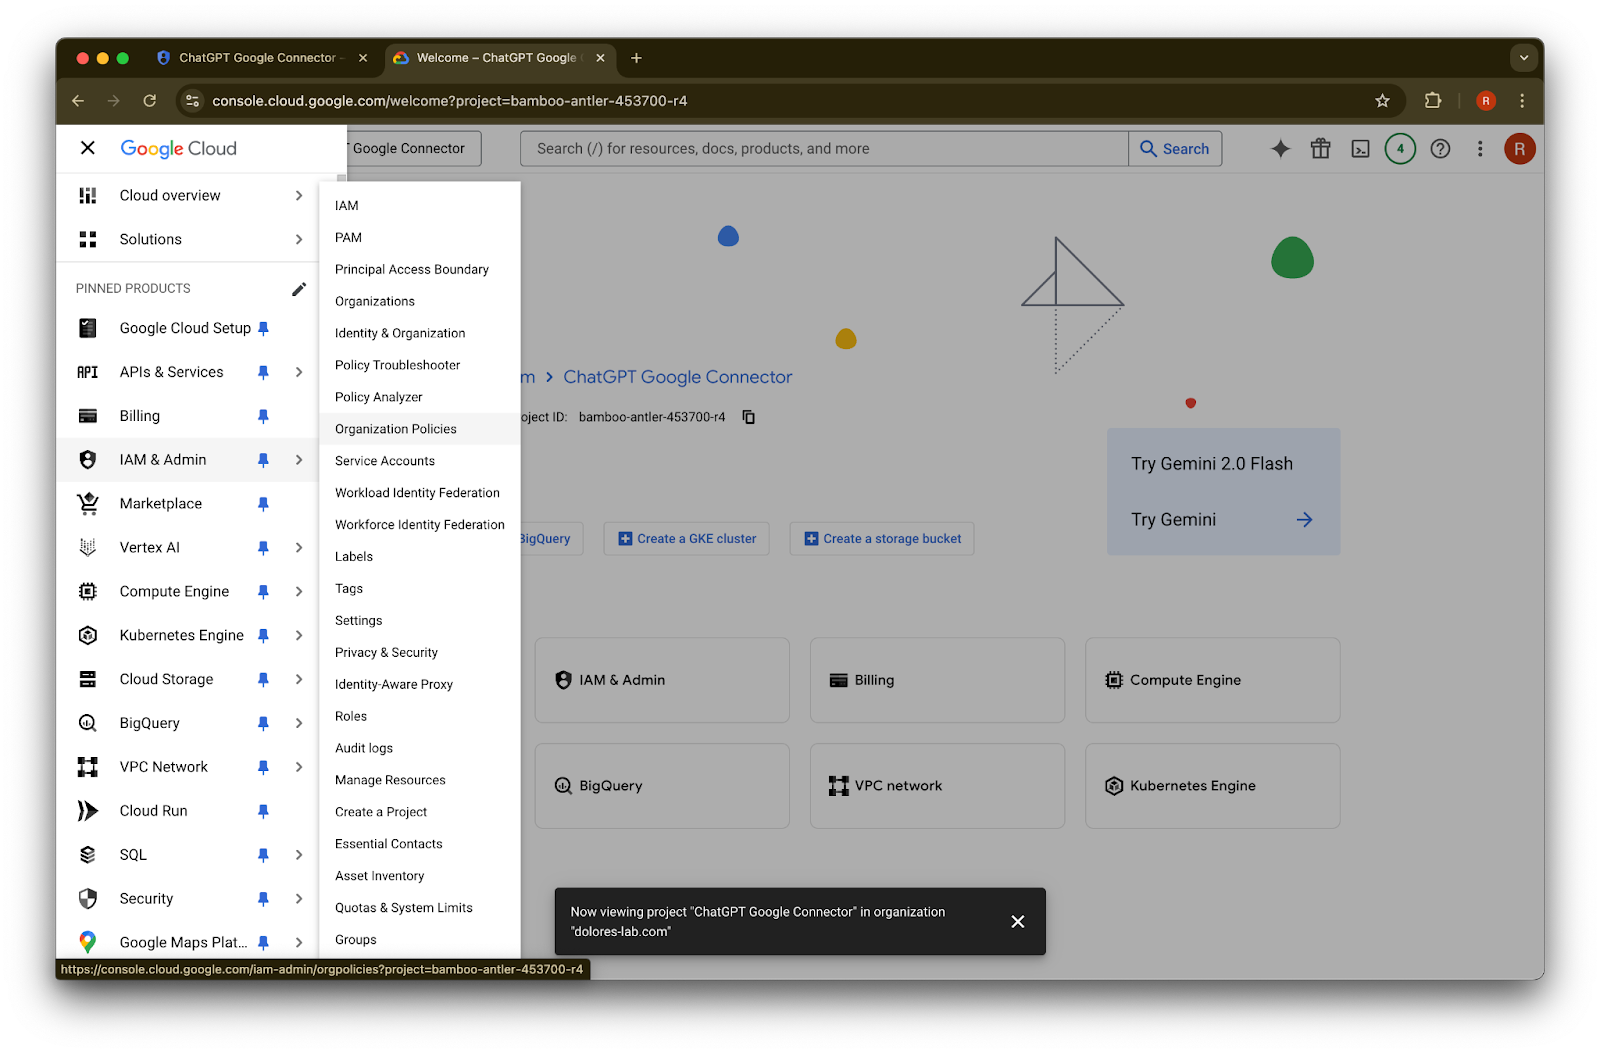
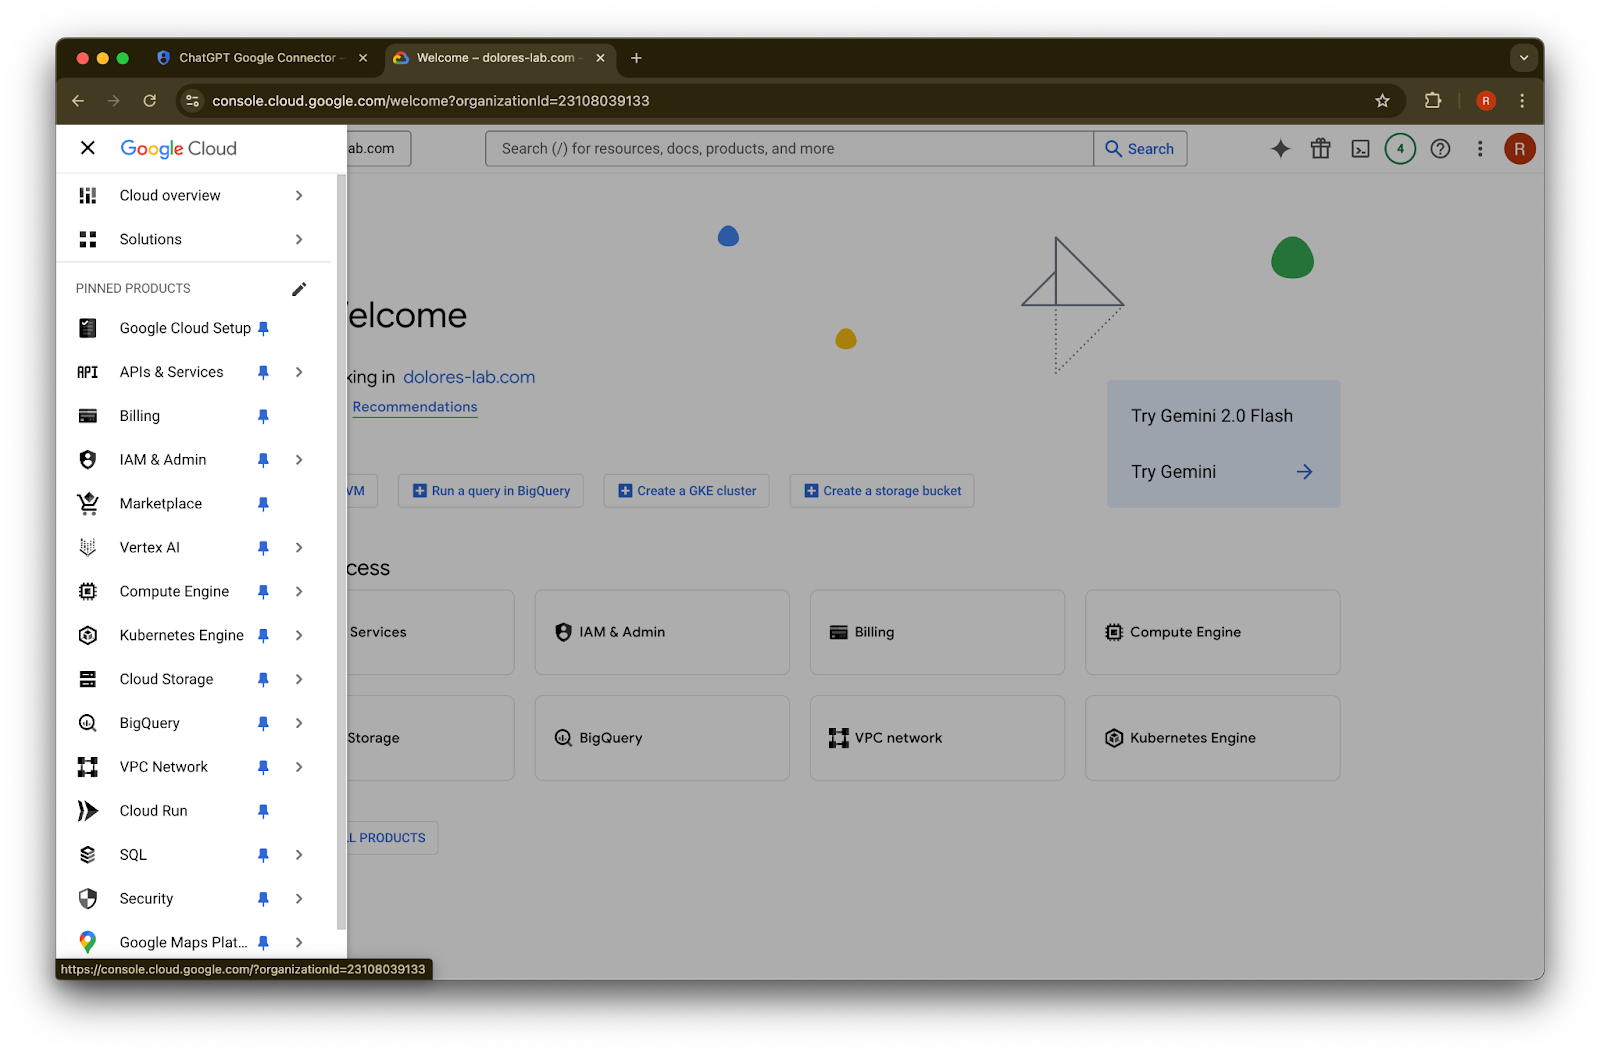
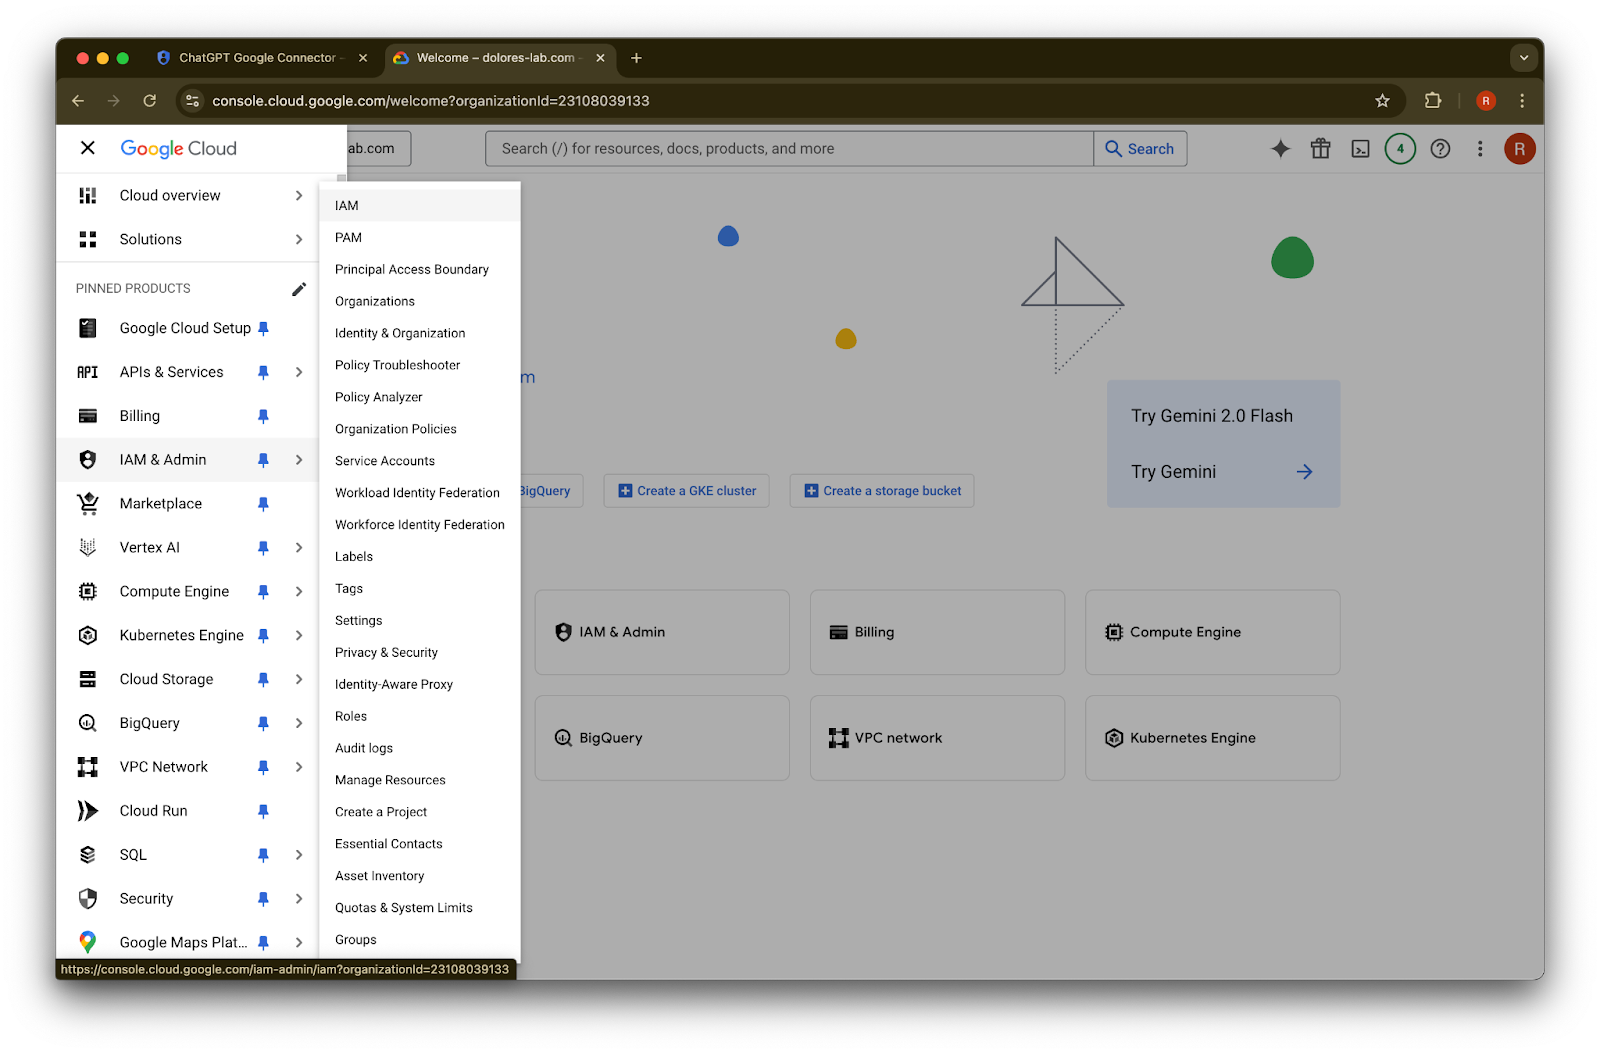
I-click ang menu icon sa kaliwang itaas na sulok.I-hover ang IAM & Admin
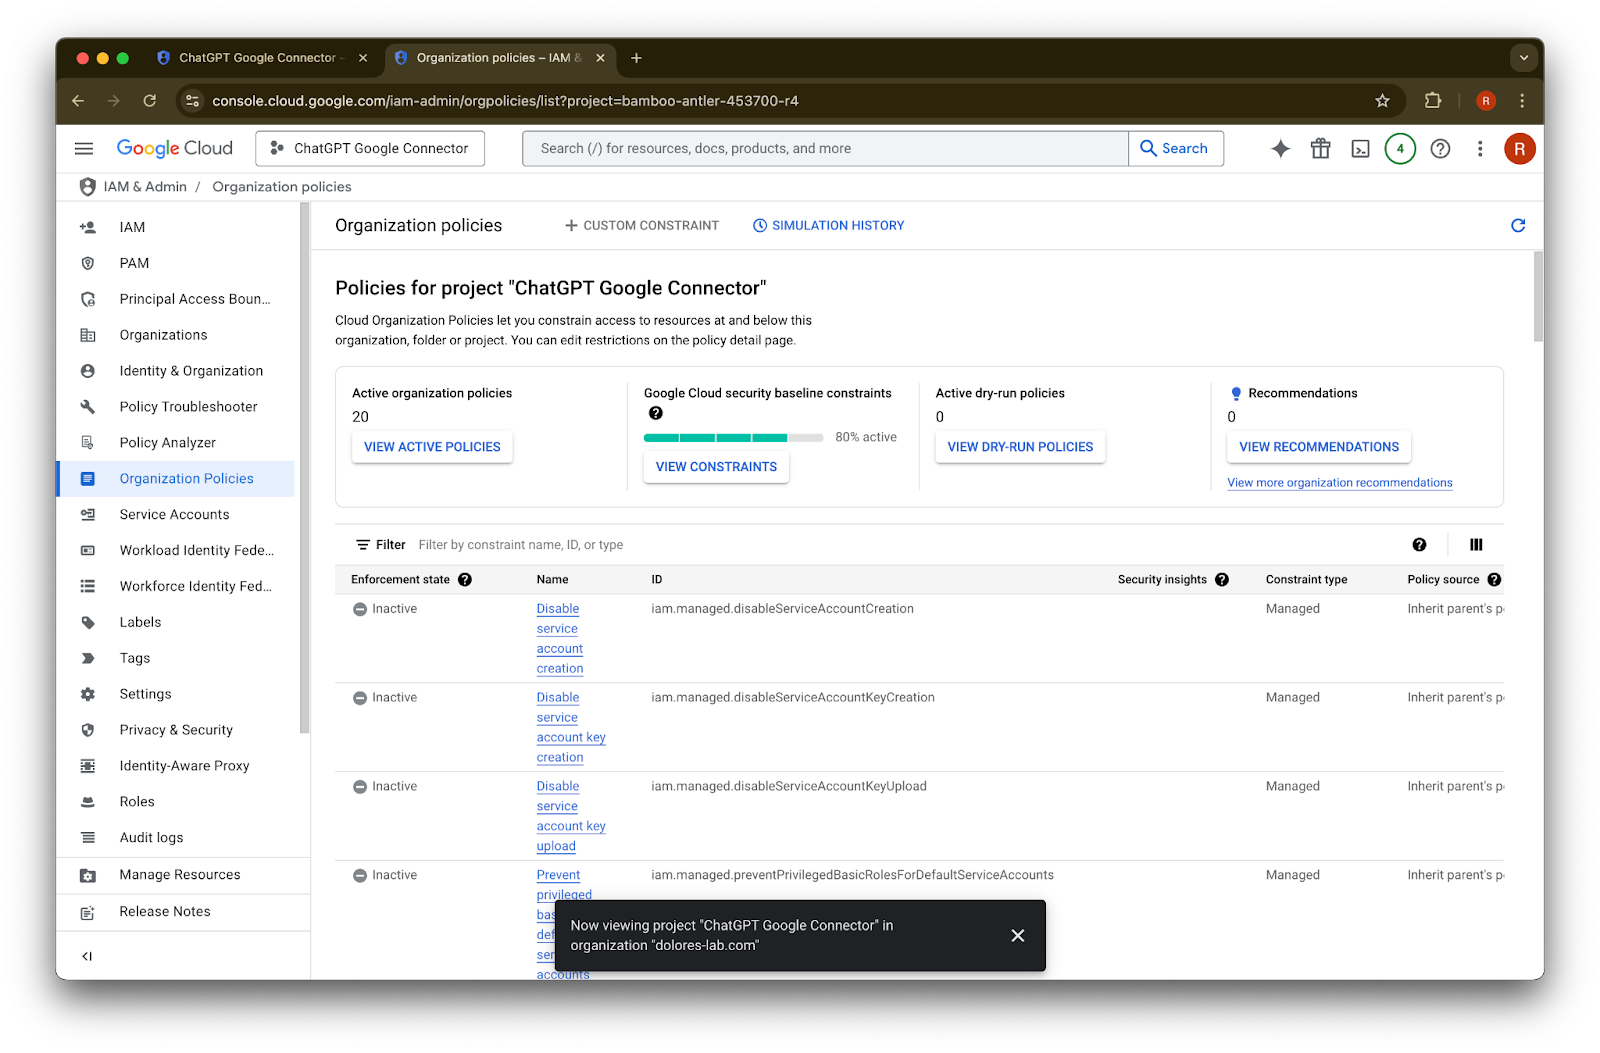
I-click ang Organizational Policies
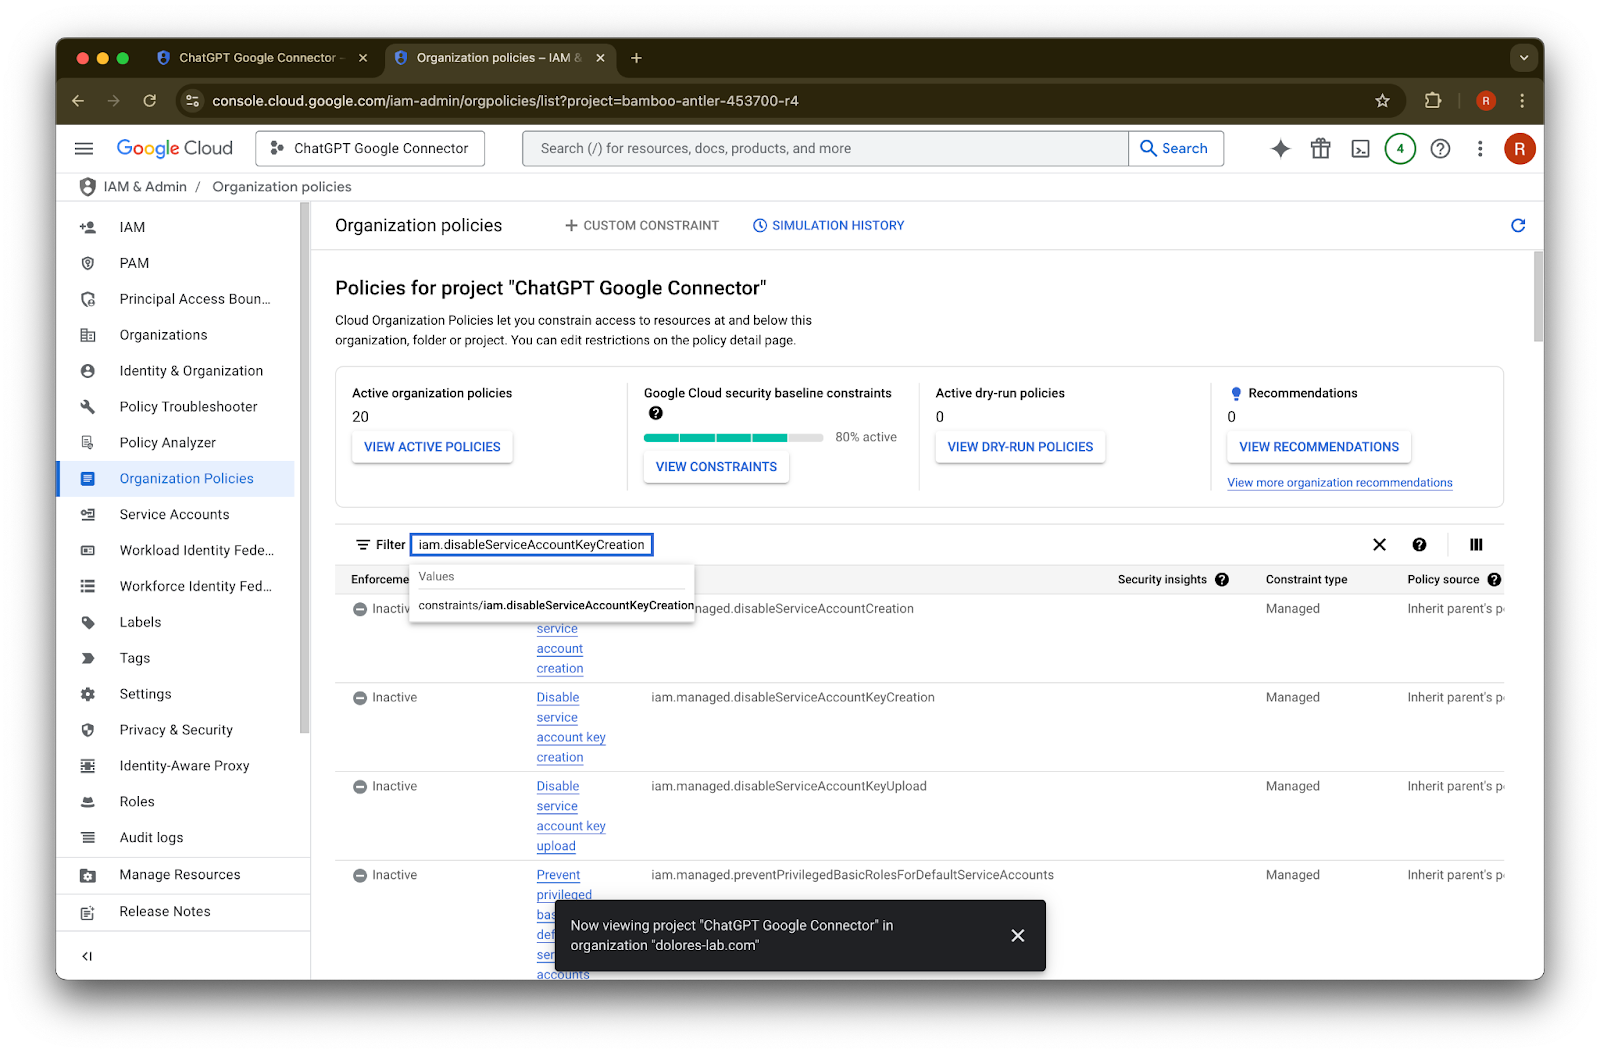
Hanapin ang iam.disableServiceAccountKeyCreation
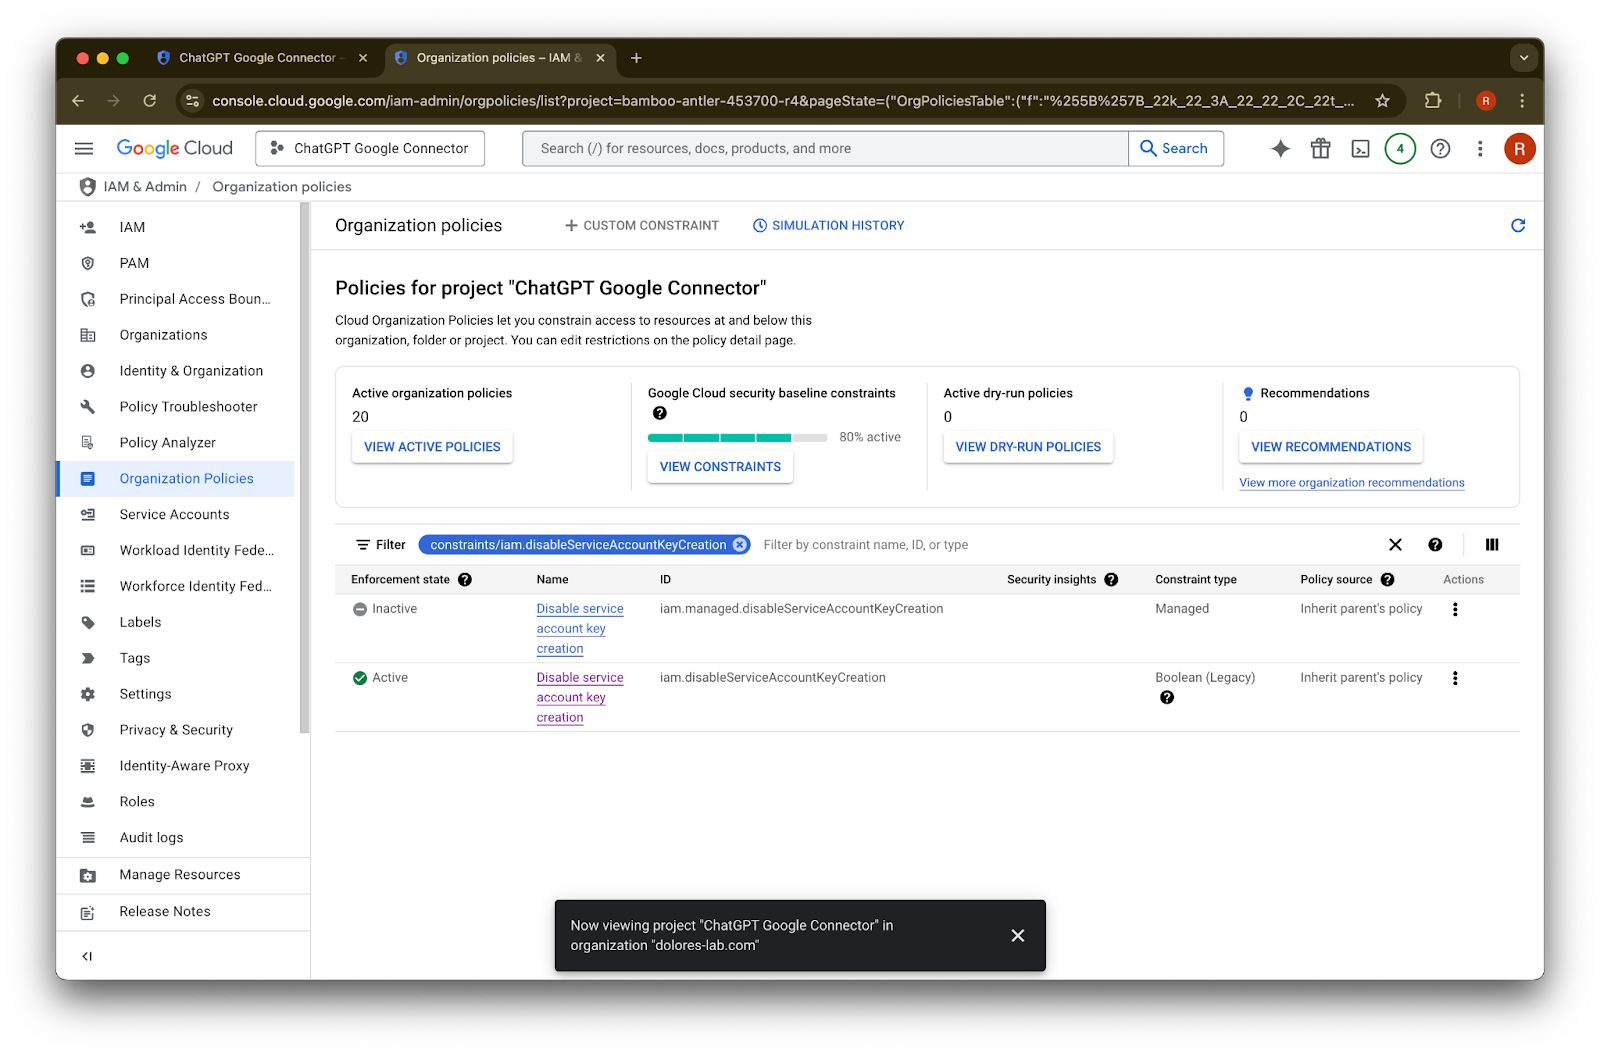
I-click ang resulta para sa constraints/iam.disableServiceAccountKeyCreation
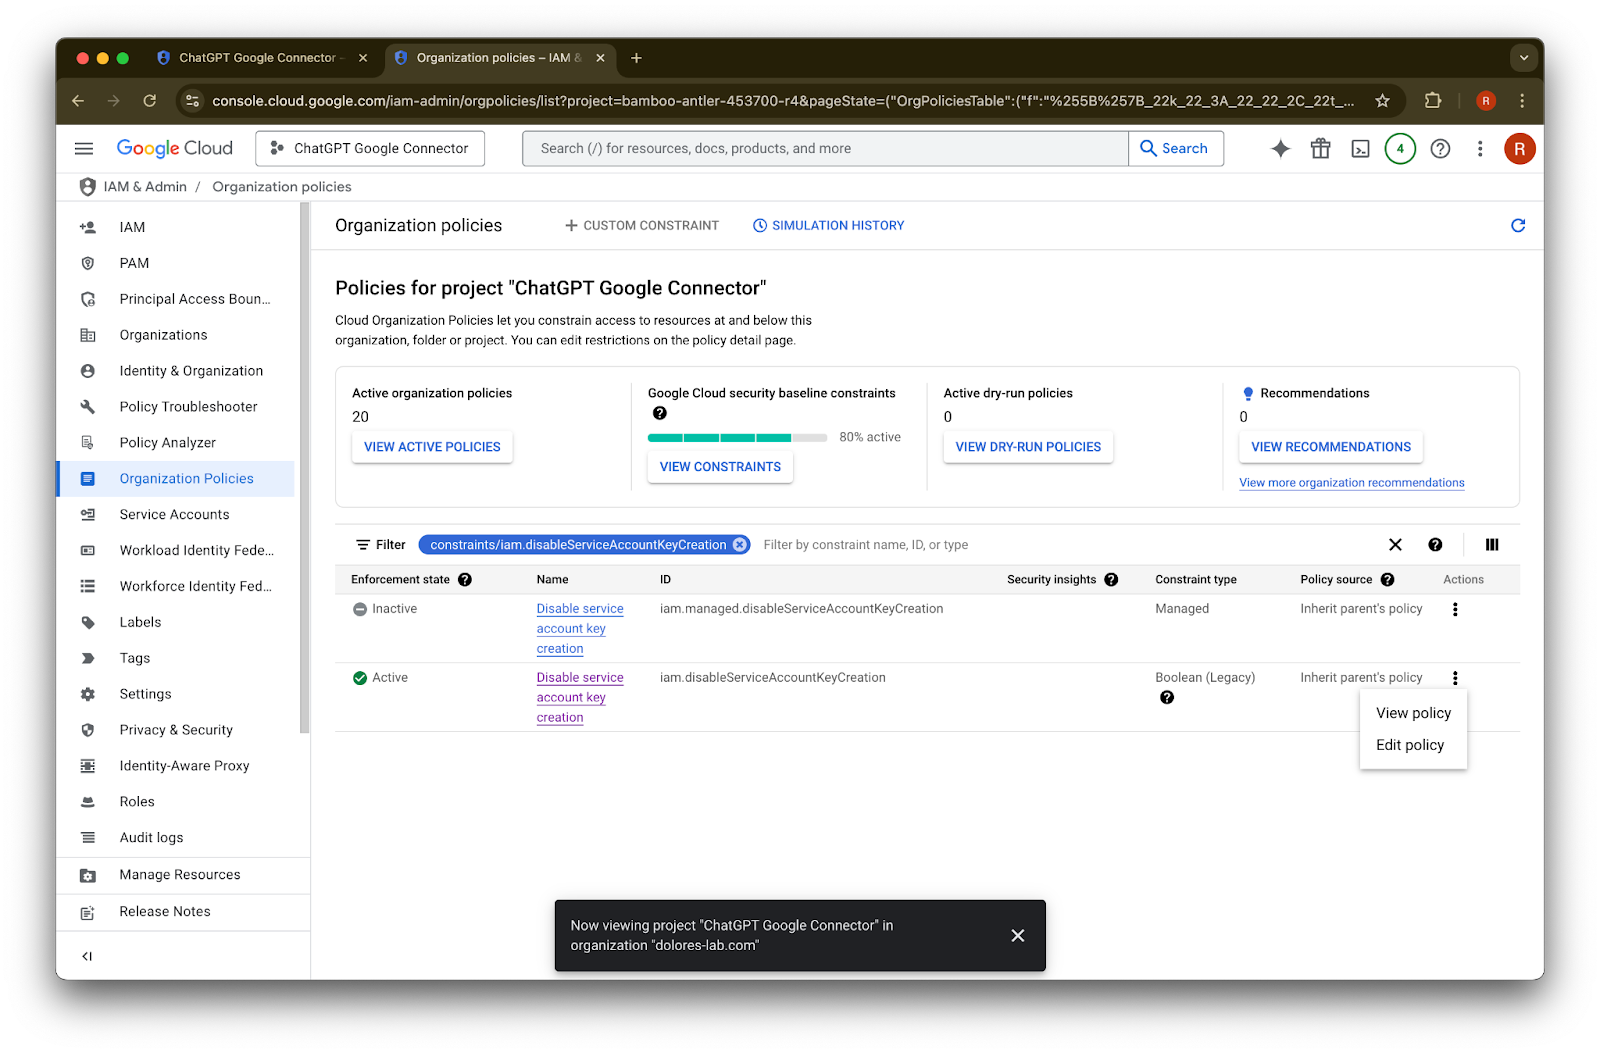
I-click ang … para sa row na may ID na iam.disableServiceAccountKeyCreation
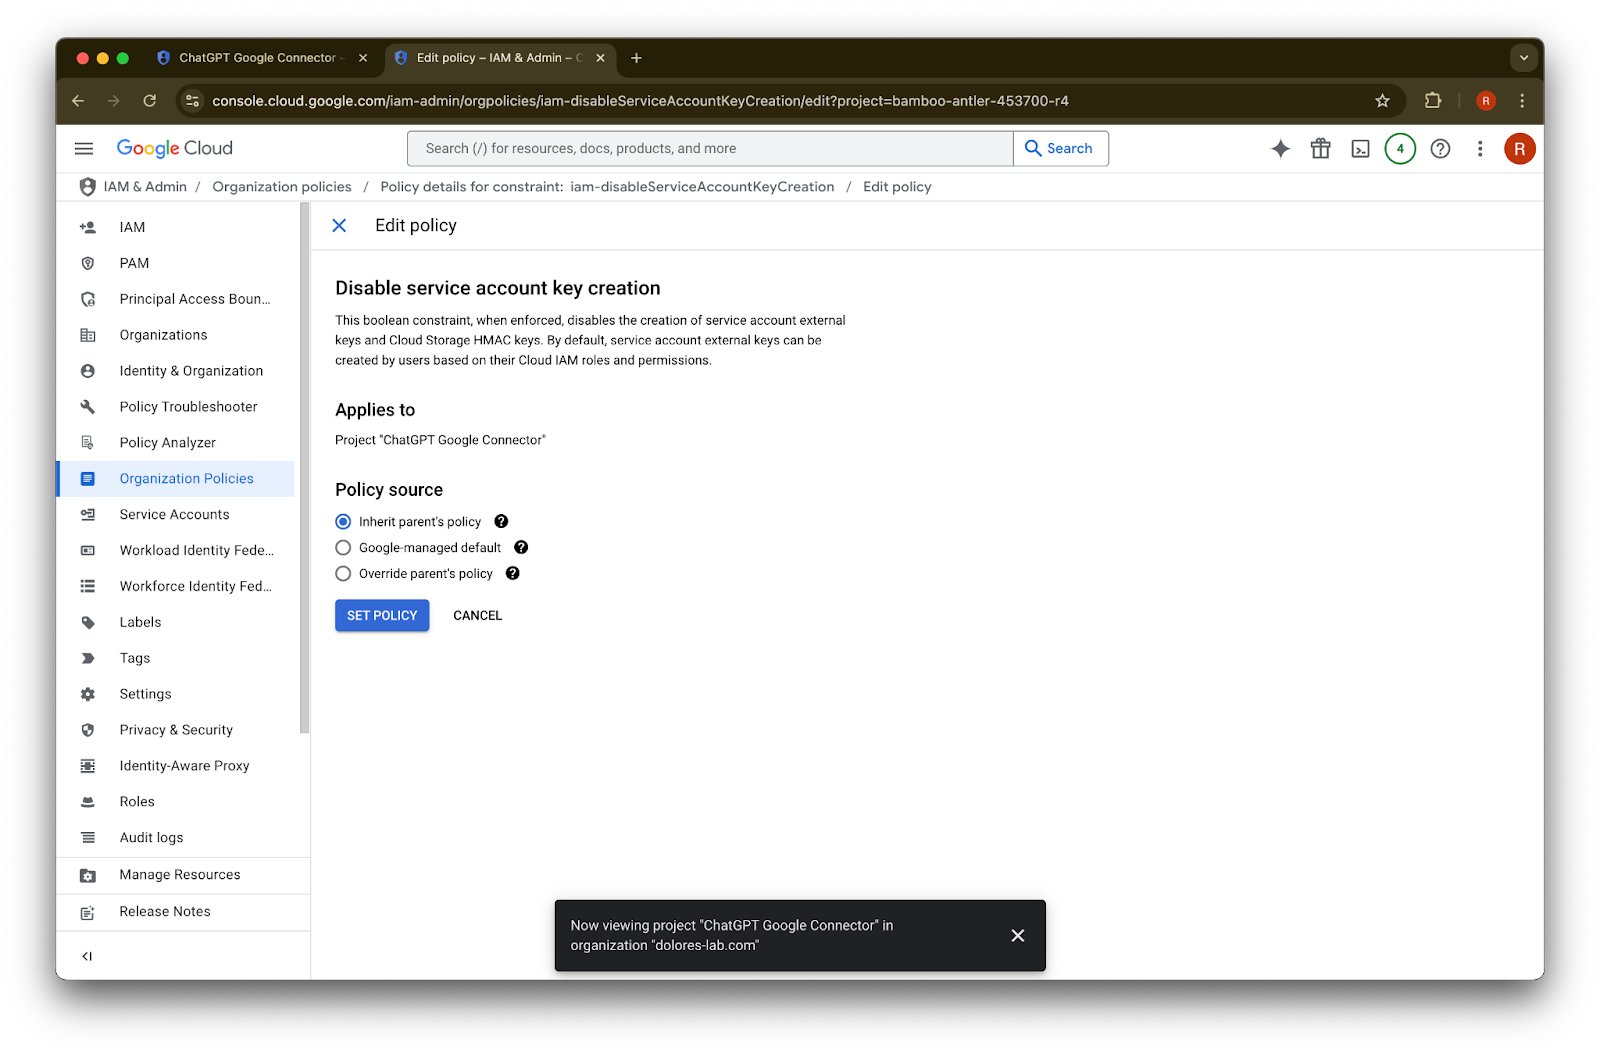
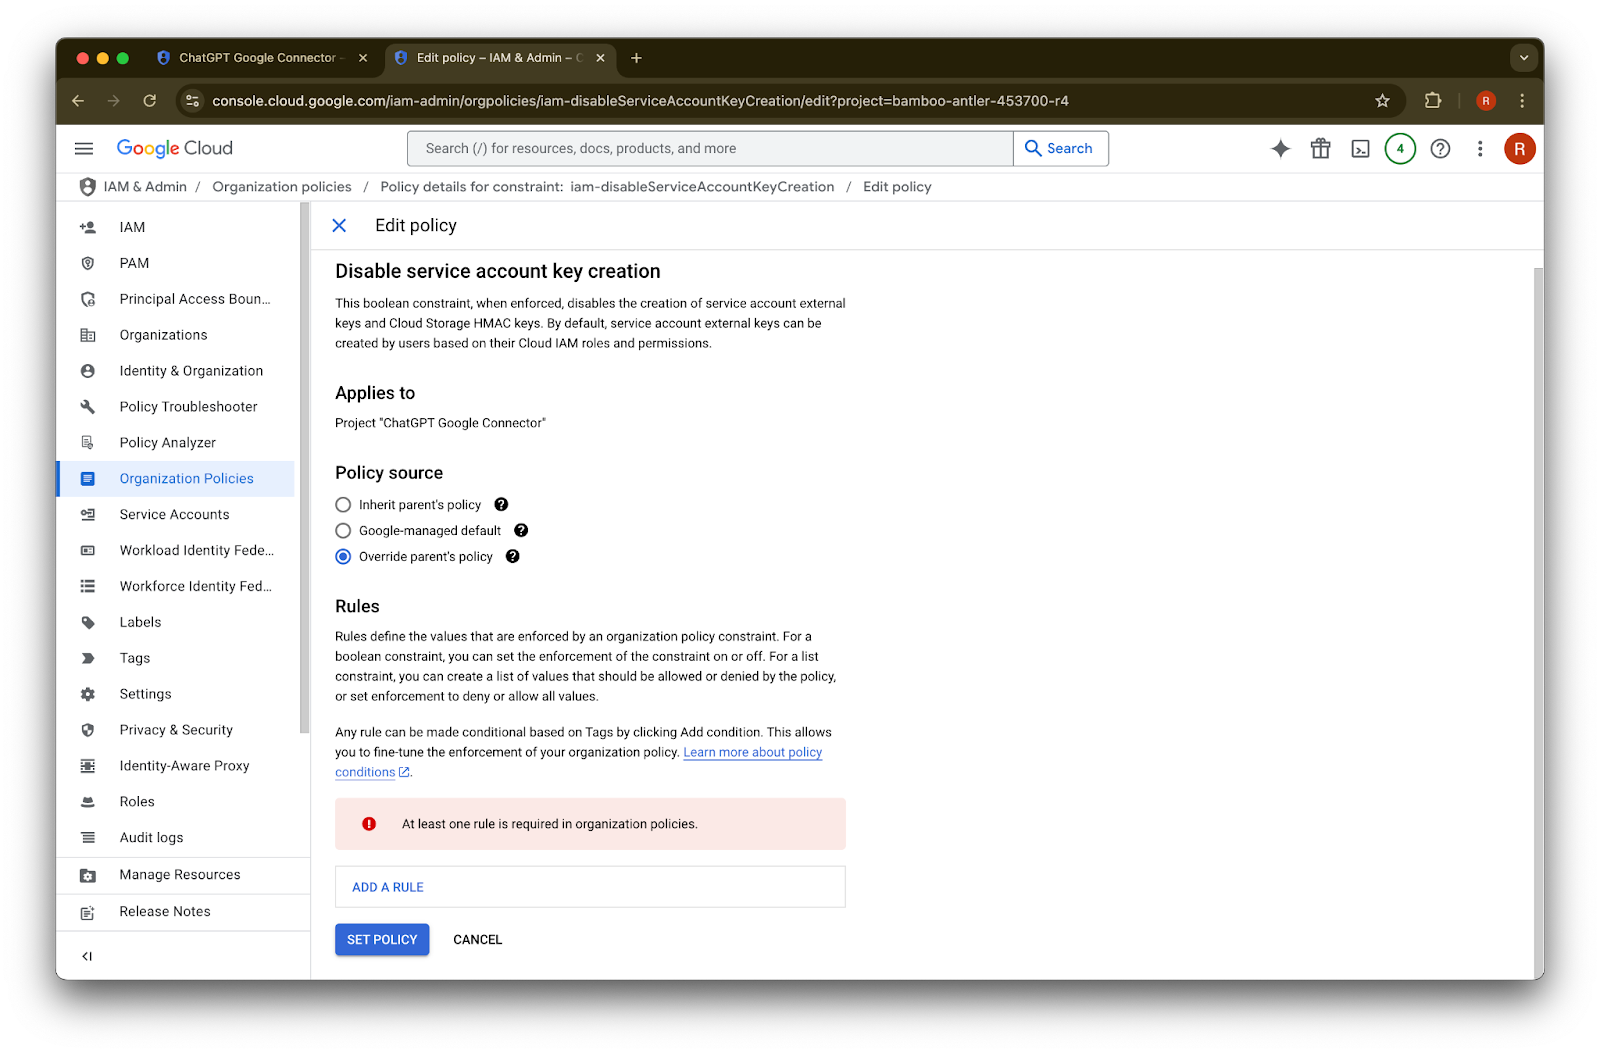
I-click ang Edit policy. Kung disabled ang Edit policy, kakailanganin mong maging Organization Policy Administrator.
I-click ang Override parent’s policy
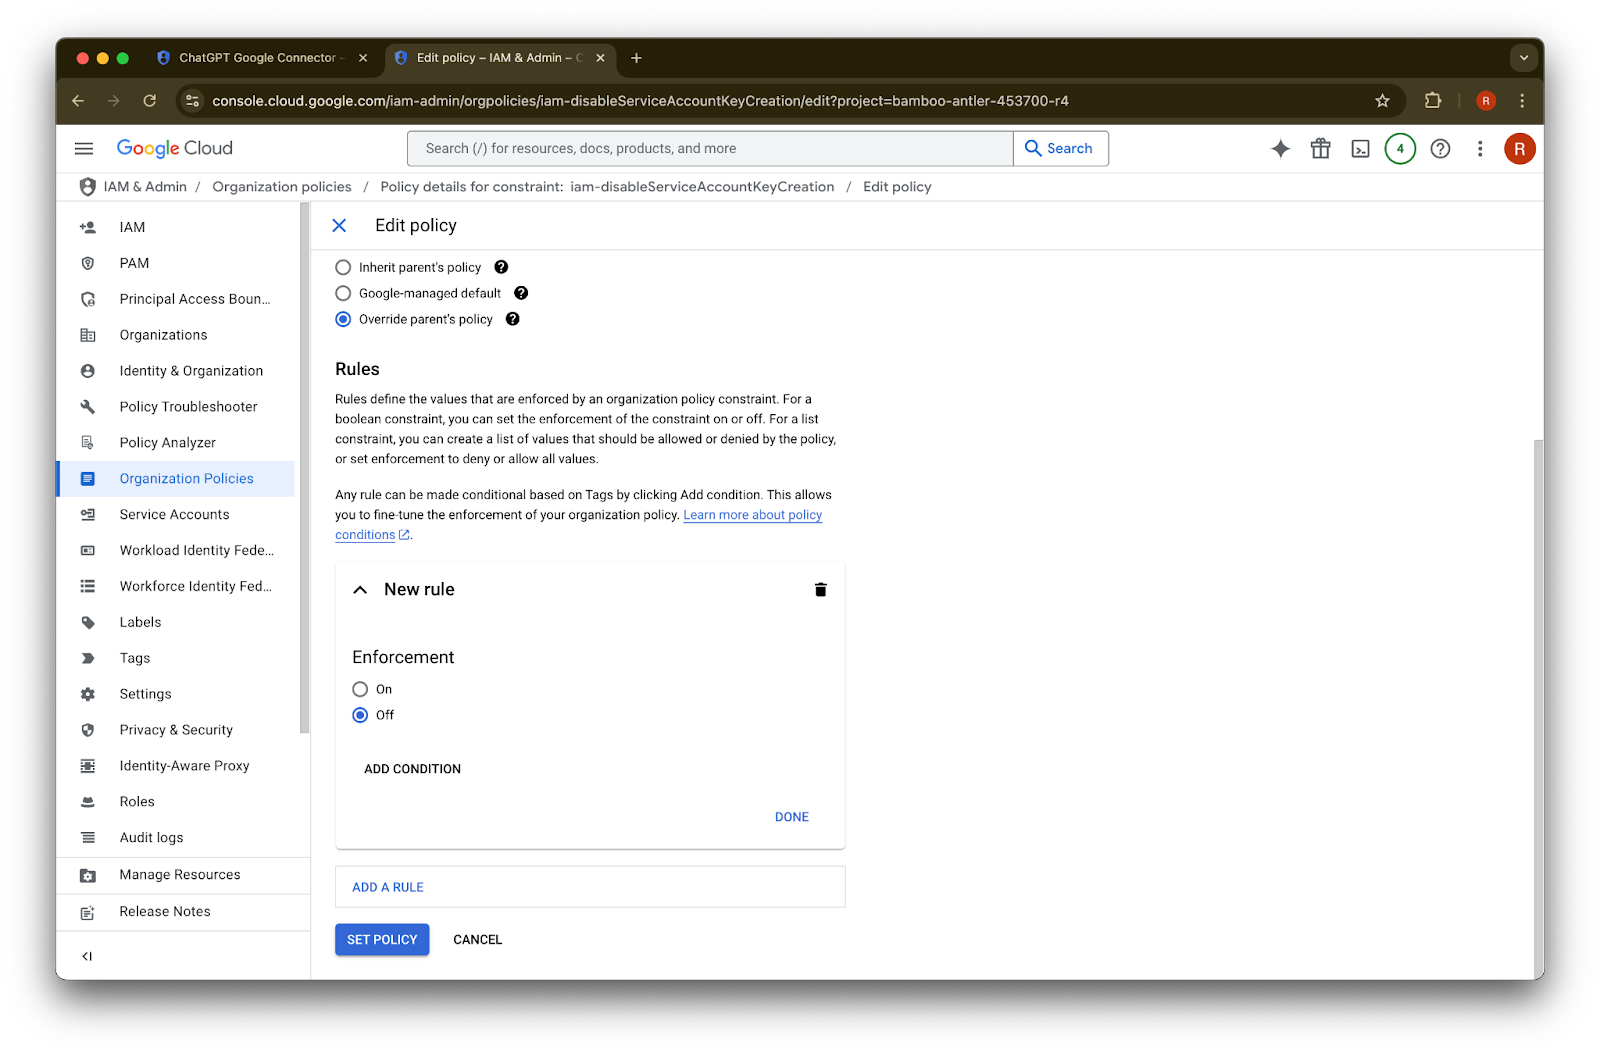
I-click ang Add a rule
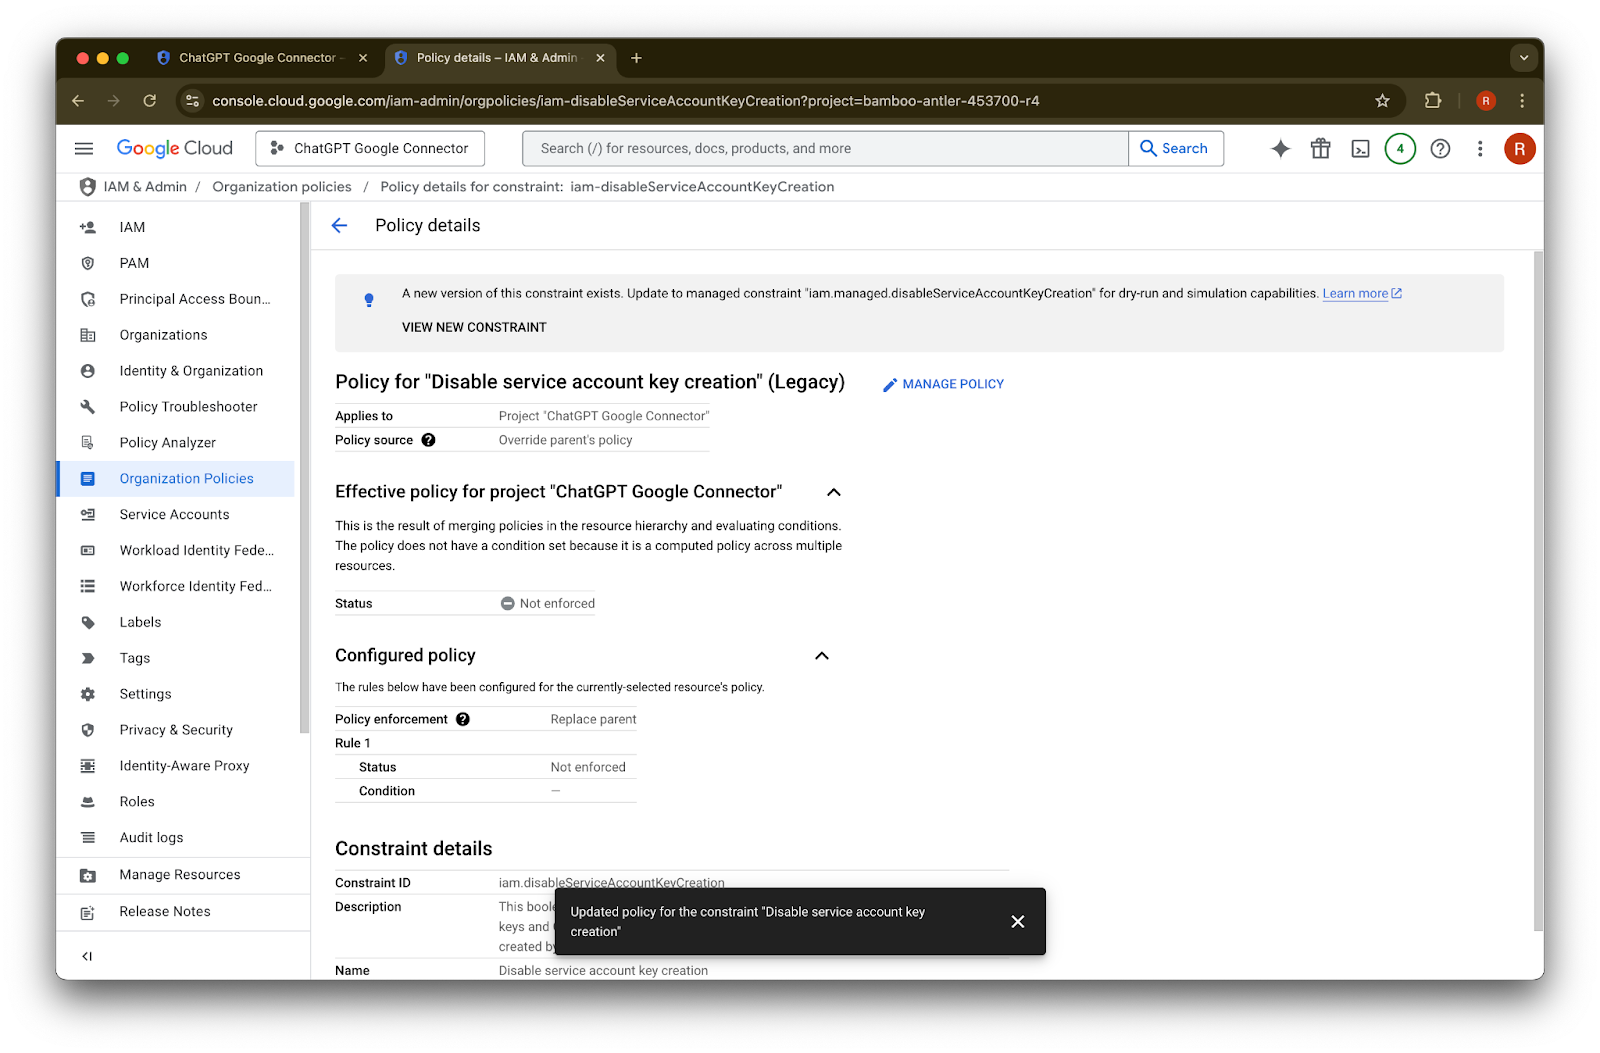
I-click ang Set Policy
Maaari ka nang gumawa ng service account key. Maaaring tumagal ng ilang minuto bago magkabisa ang enablement na ito.
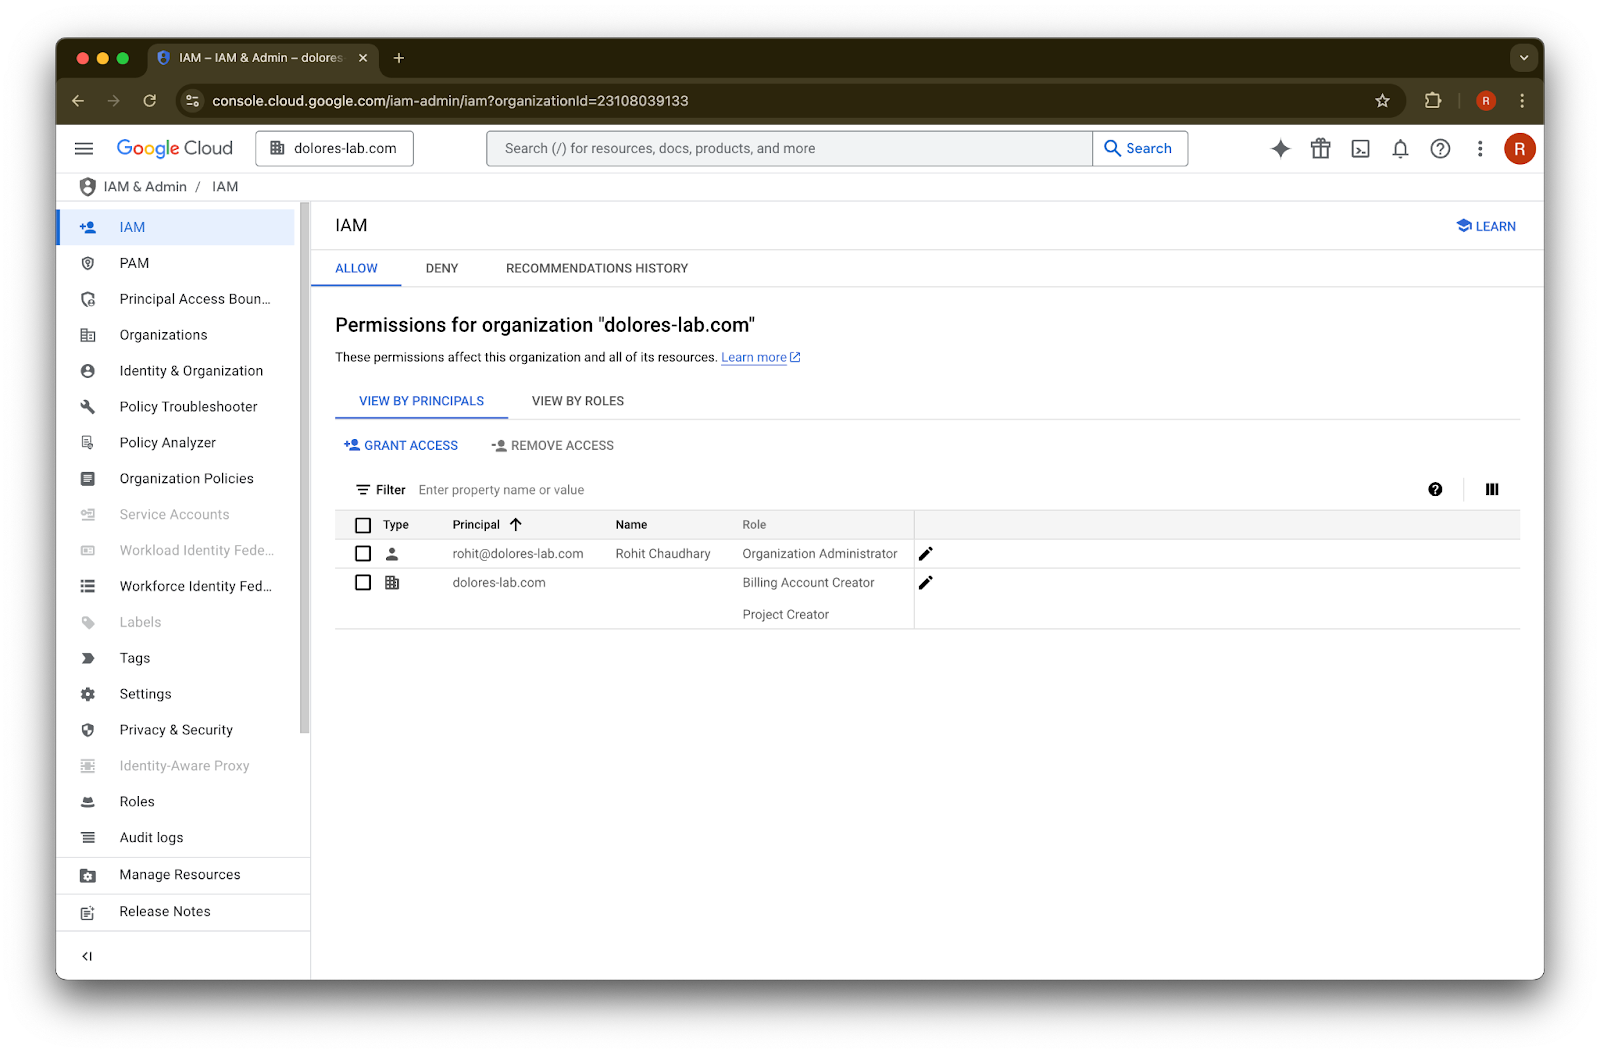
Pagiging Organization Policy Administrator
Pumunta sa console.cloud.google.com at i-click ang project/organization selector
I-click ang iyong organisasyon
I-click ang menu icon sa kaliwang itaas na sulok
I-hover ang IAM & Admin
I-click ang IAM
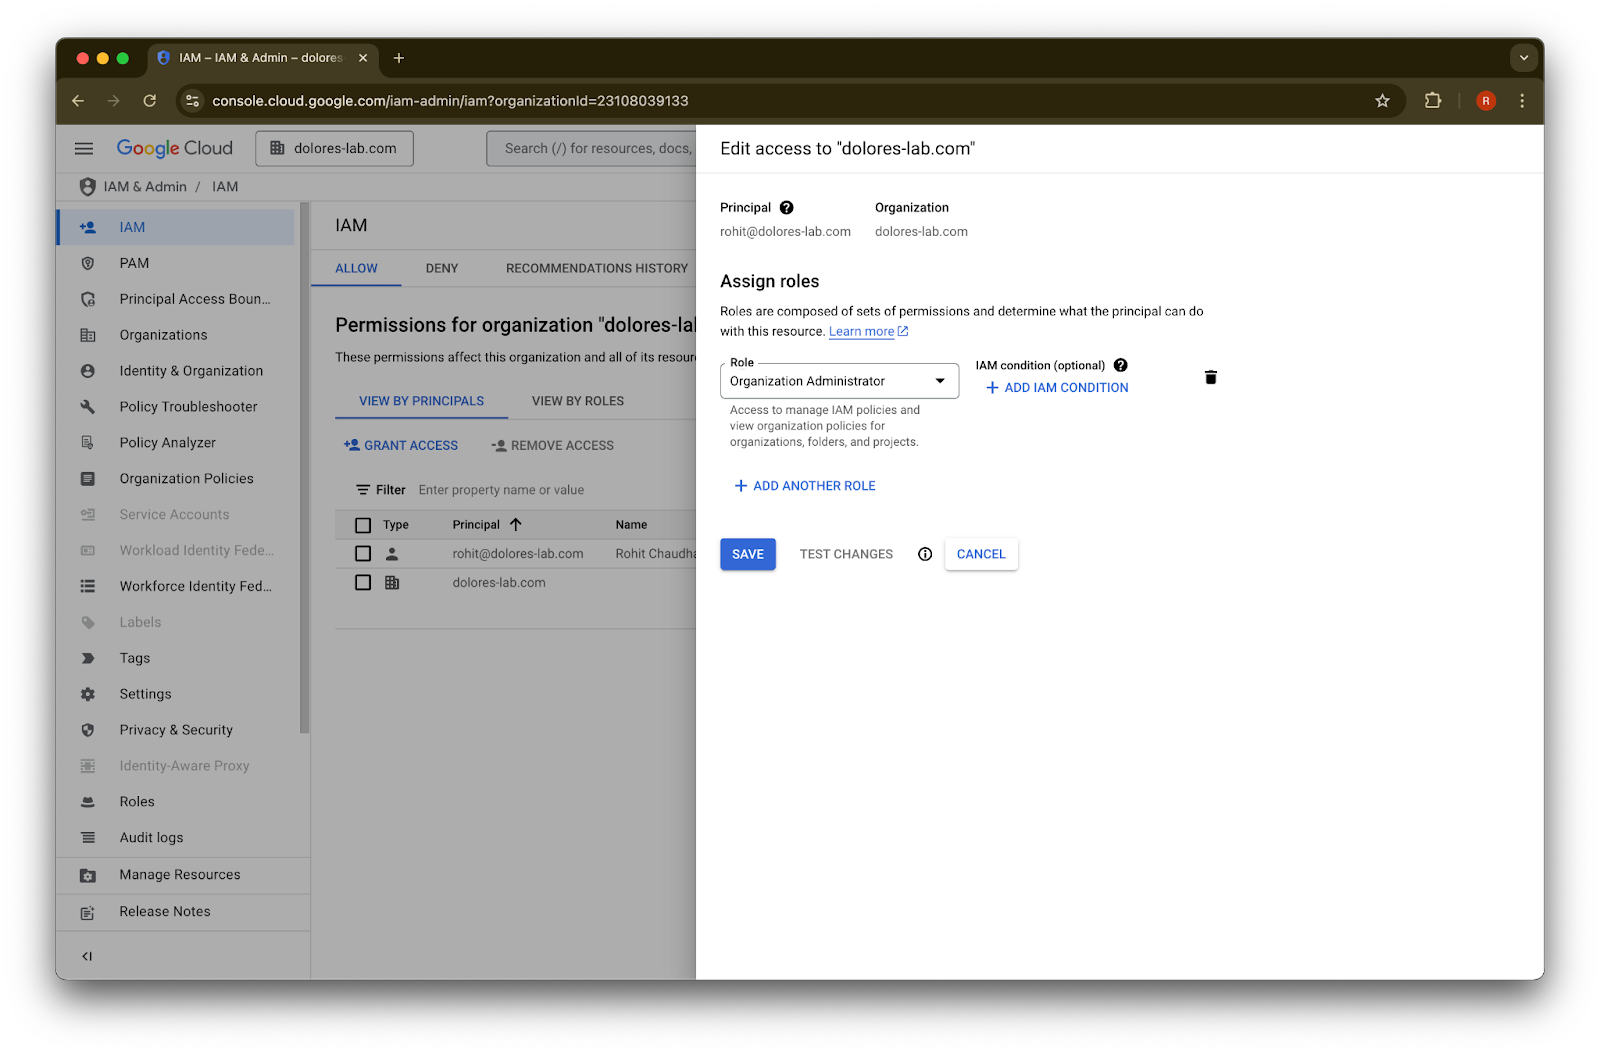
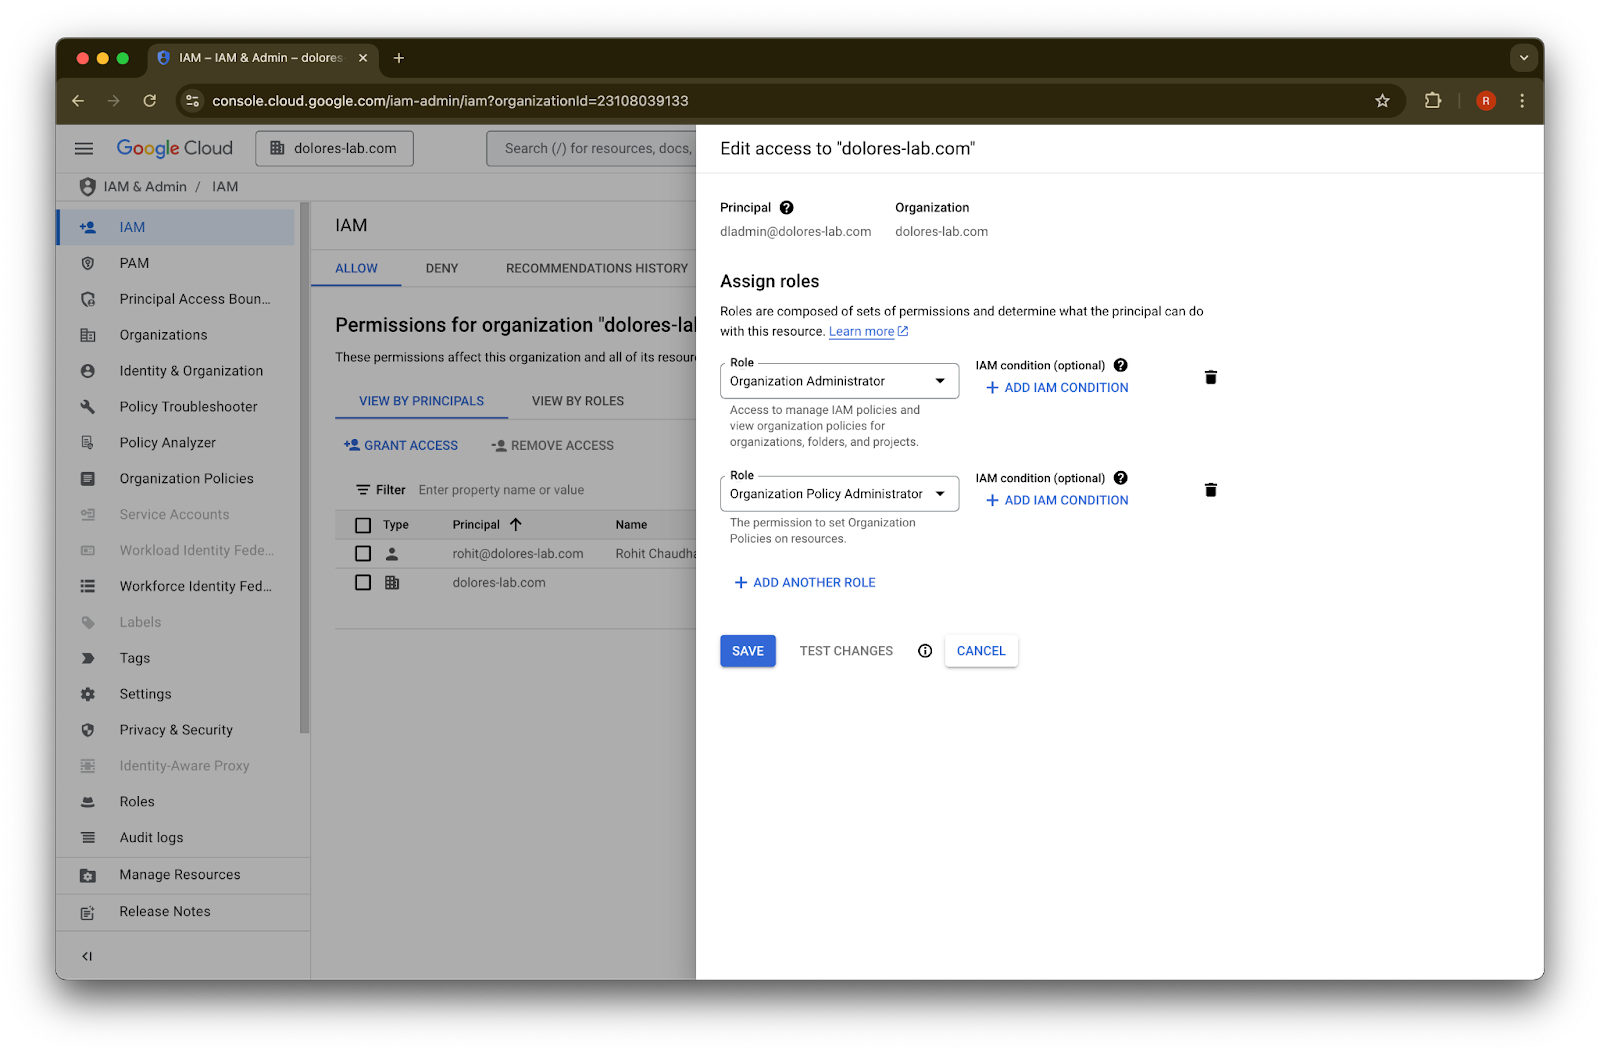
I-click ang pencil para sa iyong account
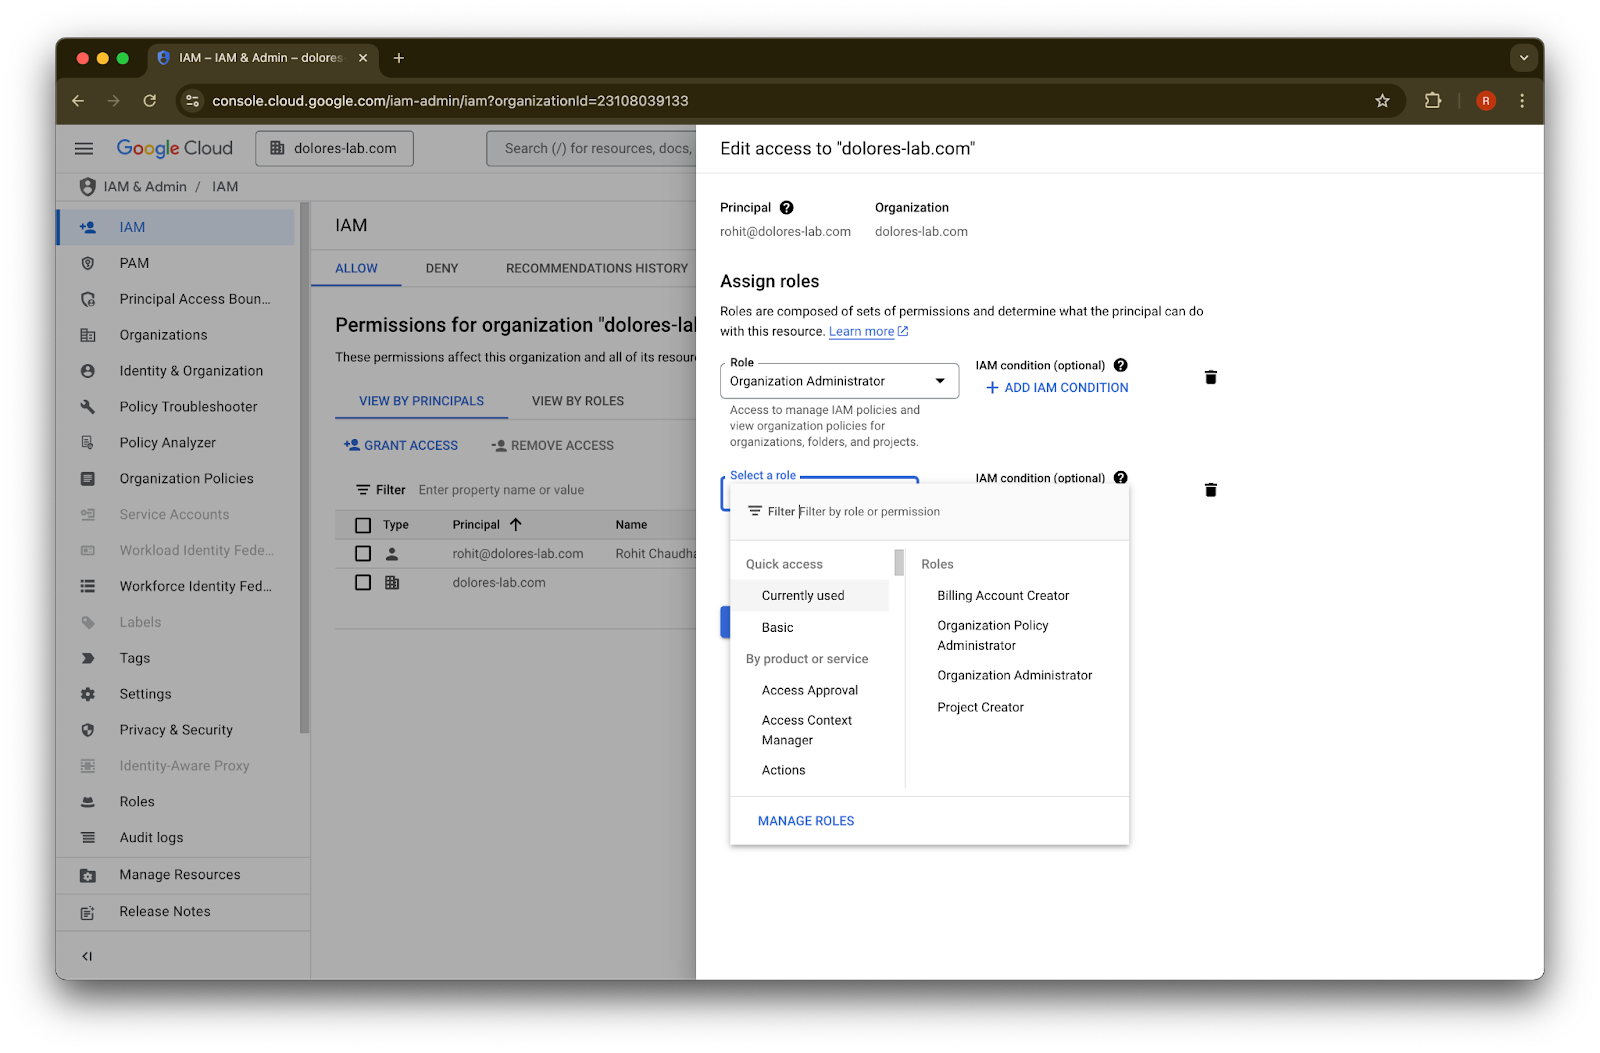
I-click ang Add Another Role
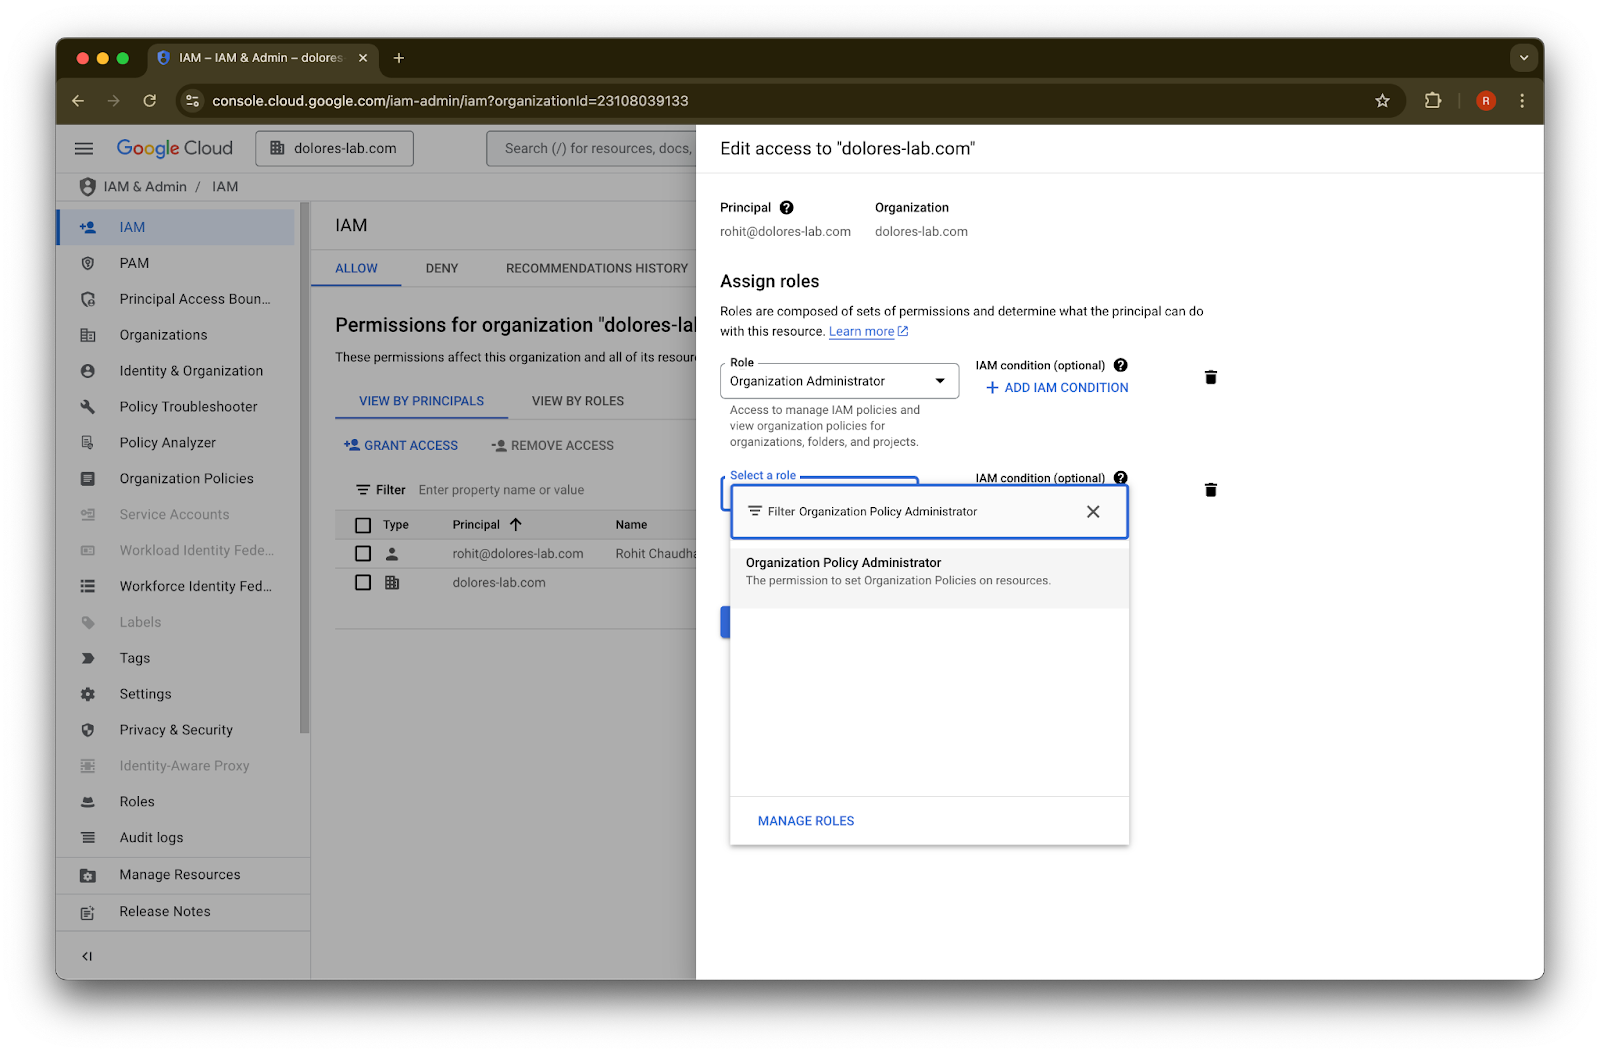
Hanapin ang Organization Policy Administrator
I-click ang Organization Policy Administrator
I-click ang Save
May pahintulot na ngayon ang iyong account upang i-enable ang paglikha ng service account key. Maaaring tumagal ng ilang minuto bago ito magkabisa.
Paggamit ng Google Email Alias upang Mapanatili ang Magkaibang Email Account para sa Google Workspace at ChatGPT
Kung ikaw ay admin na nagkokonekta ng Google Workspace sa iyong ChatGPT workspace gamit ang admin-managed setup para sa Google Drive synced connectors, at ang iyong organisasyon ay gumagamit ng magkaibang email domain para sa ChatGPT at Google Workspace, kakailanganin mong gumawa ng mga karagdagang hakbang upang matiyak na matagumpay na maa-access ng mga user ang Google Drive synced connectors.
Rekomendasyon: Kung maaari, gamitin ang parehong pangunahing email address para sa Google Workspace at ChatGPT accounts.
Kung hindi ito posible, sundin ang mga tagubilin sa ibaba upang mag-configure ng Google Workspace email alias na tumutugma sa email sa pag-sign in sa ChatGPT.
Mga Hakbang para Magdagdag ng Google Workspace Alias
Sundin ang mga hakbang na ito sa Google Admin Console upang matiyak na ang ChatGPT email ng bawat user ay maikokonekta sa kanilang Google Workspace account:
Pumunta sa Admin Console. Pumunta sa: Directory > Users
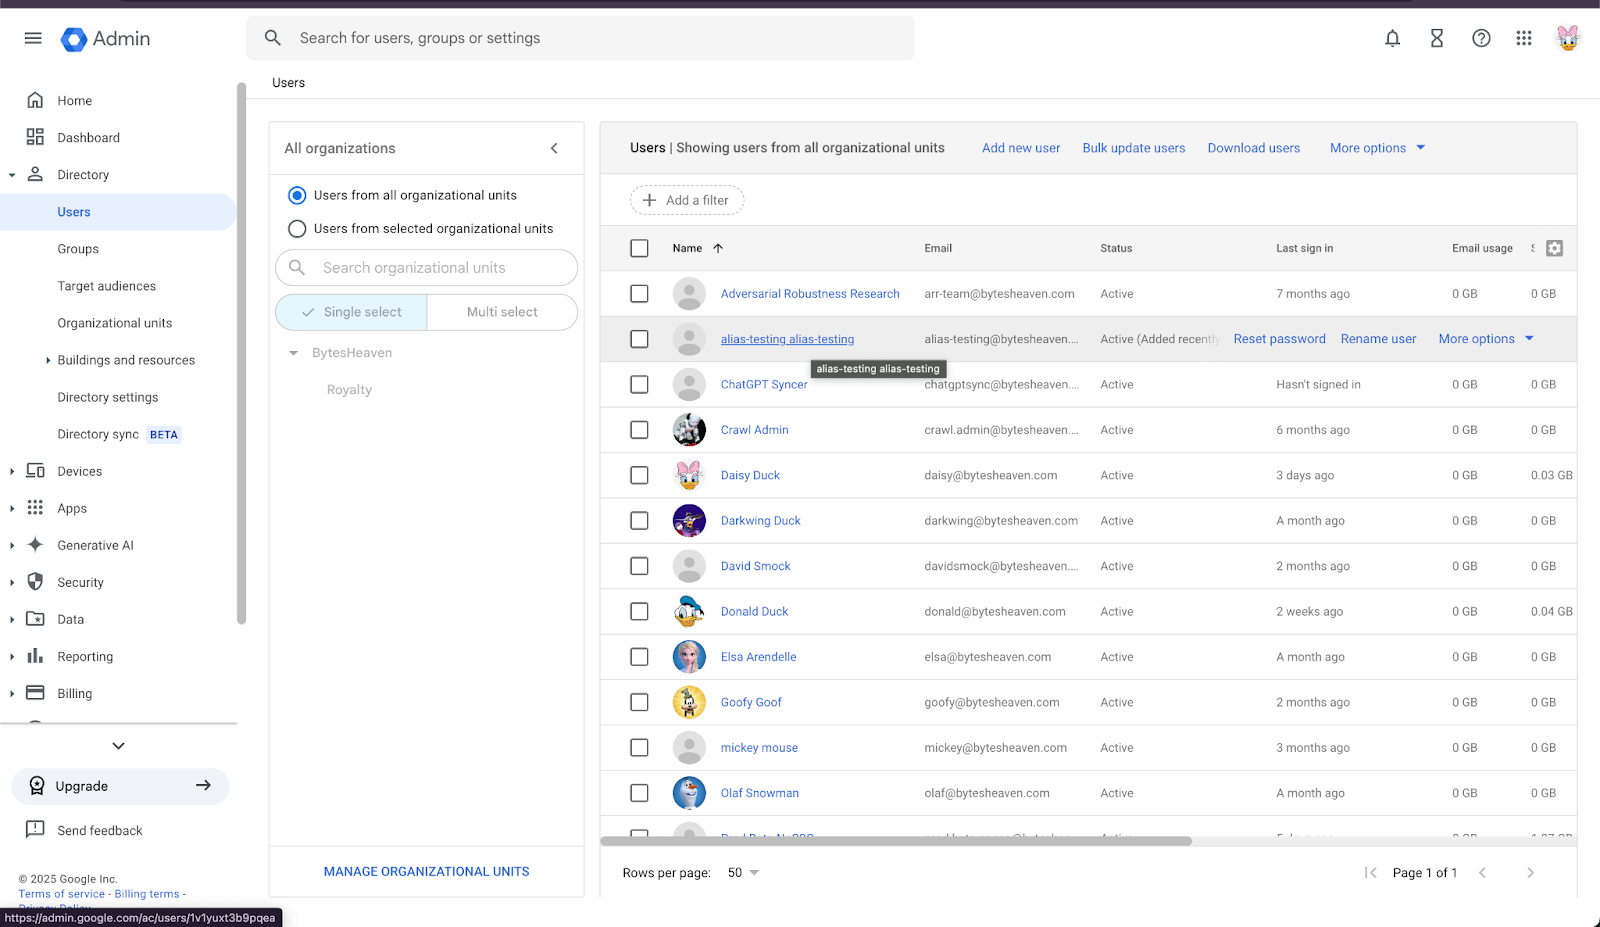
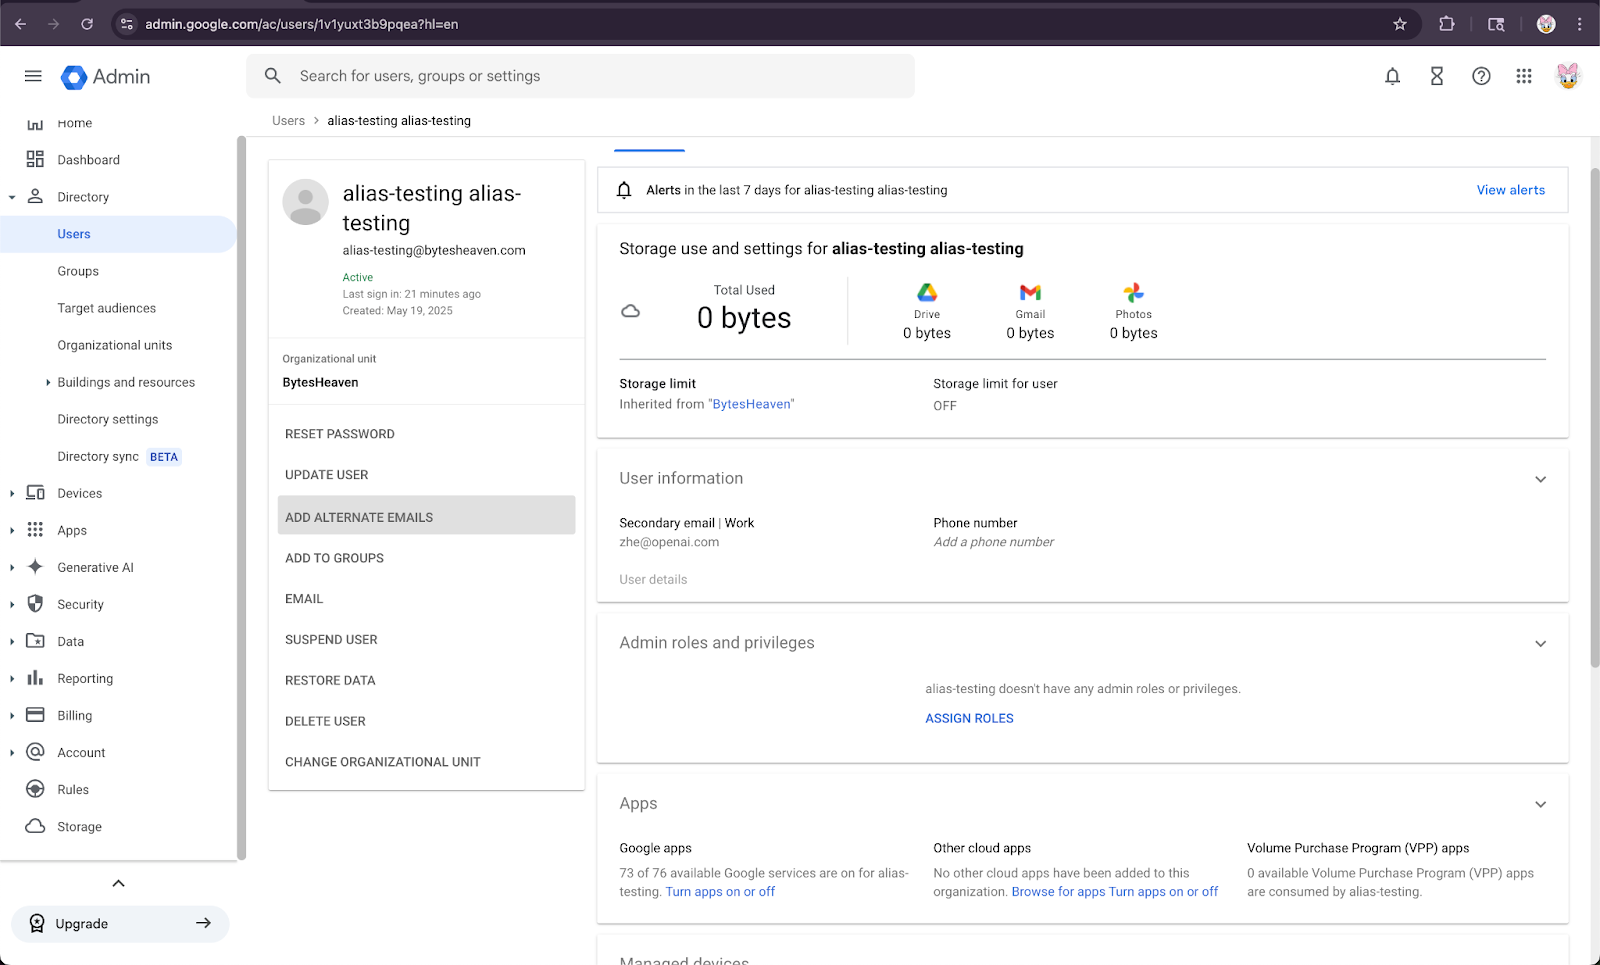
2. Pumili ng User, pagkatapos ay “ADD ALTERNATIVE EMAILS”.
3. Magdagdag ng Alternative Email. Tiyaking tumutugma ito sa ChatGPT account ng user.
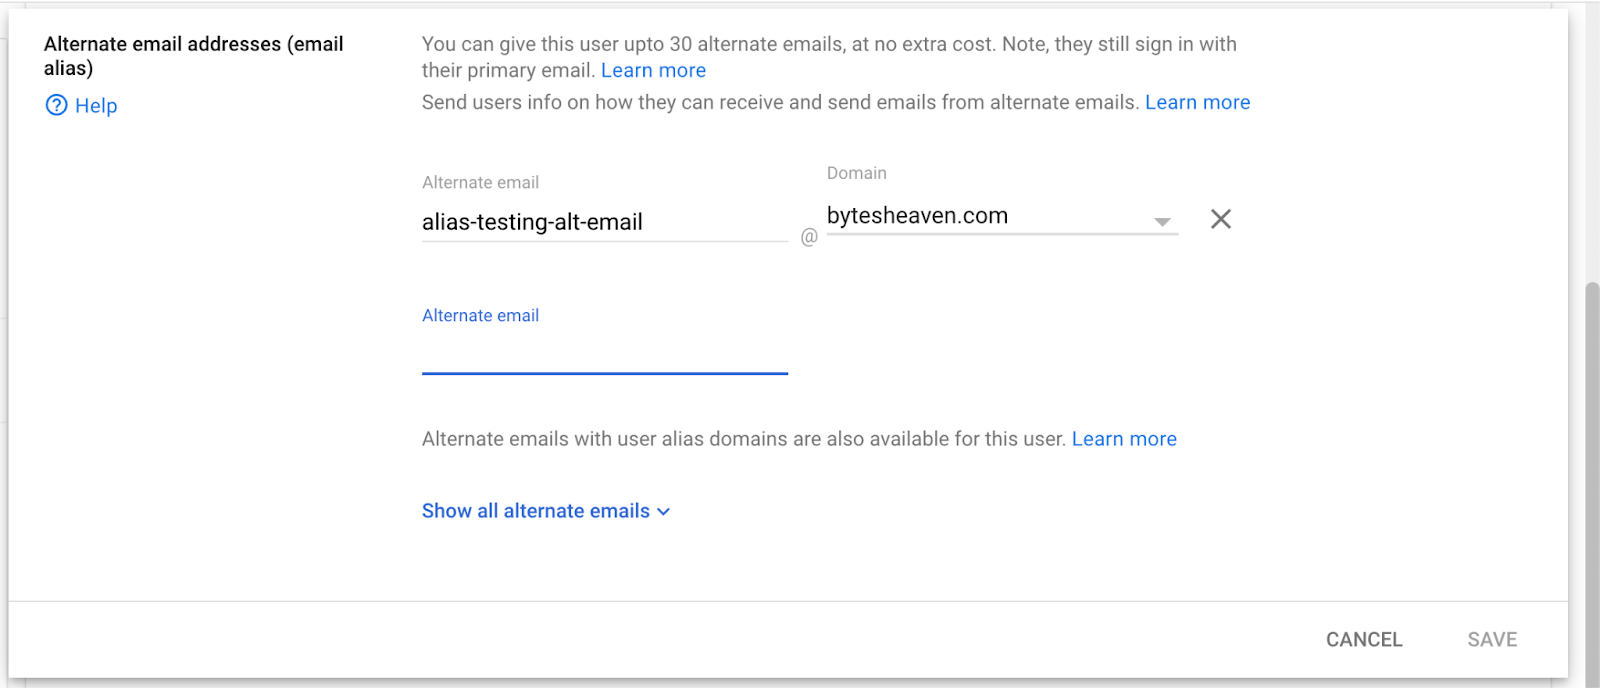
4. Piliin ang Save
Mga Kilalang Limitasyon
Hindi sinusuportahan ang mga personal na email address
Ang mga user na nagrerehistro sa ChatGPT gamit ang mga personal na address (hal., example@gmail.com) ay hindi makakakonekta sa Google Workspace. Hindi suportado ang setup na ito at may panganib sa seguridad, dahil nagbibigay ito ng access sa panloob na data mula sa labas ng organisasyon.
Hindi sinusuportahan ang Gmail “+” aliases
Pinapayagan ng Gmail ang mga user na gumawa ng aliases sa pamamagitan ng pagdaragdag ng “+” sa kanilang address (hal., user+alias@gmail.com). Hindi gumagana ang ganitong uri ng aliasing sa Google Drive synced connectors. Dapat tahasang i-configure ang alias sa Google Workspace.
Karaniwang Mensahe ng Error
Kung hindi wastong nakakaugnay ang mga email address, maaaring makita ng mga user ang mensaheng ito: “Hindi namin maikonekta ang iyong account sa Google Drive. I-click upang matuto pa.”
Kung matanggap ng mga user ang mensaheng ito, suriin ang mga hakbang sa dokumentong ito at tiyaking nasusunod ang mga ito nang tama. Kung kailangan ng karagdagang tulong, mangyaring makipag-ugnayan sa aming support team.