
იმისთვის, რომ თქვენი Google Workspace დაუკავშიროთ ChatGPT-ს ადმინისტრატორის მიერ მართული დაყენებით, ჯერ Google-ის ადმინისტრატორის კონსოლებში დააკონფიგურირებთ წვდომას:
შექმენით სერვისის ანგარიში Google Drive-ზე, მომხმარებლებზე და ჯგუფებზე მხოლოდ წაკითხვის წვდომით.
მკაცრად რეკომენდებულია, რომ ეს სერვისის ანგარიში შეიქმნას იმავე Google ანგარიშის ქვეშ, რომელიც დაკავშირებულია თქვენს ChatGPT სამუშაო სივრცესთან. თუ ChatGPT სამუშაო სივრცეში ანგარიშებს სხვა ელფოსტის დომენი აქვთ, ვიდრე Google Workspace-ში გამოიყენება, არსებობს დამატებითი ნაბიჯები, რომლებიც უნდა შეასრულოთ, რათა ეს კონექტორი თქვენი მომხმარებლებისთვის ჩართოთ.
შექმენით ადმინისტრატორის ანგარიში, რომლის სახელითაც იმოქმედებს სერვისის ანგარიში.
შემდეგ დაასრულეთ დაყენება ChatGPT-ის ადმინისტრატორის კონსოლში:
ატვირთეთ სერვისის ანგარიშის პირადი გასაღები (Google-ის JSON ფაილი)
მიუთითეთ ადმინისტრატორის ანგარიში (სერთიფიკატები საჭირო არ არის).
აირჩიეთ რომელი ფაილები დასინქრონდეს და აირჩიეთ მომხმარებლები, რომლებსაც ექნებათ წვდომა კავშირზე.
ეს გზამკვლევი გაგივლით ამ 6-ვე ნაბიჯს.
სერვისის ანგარიშის დაყენება
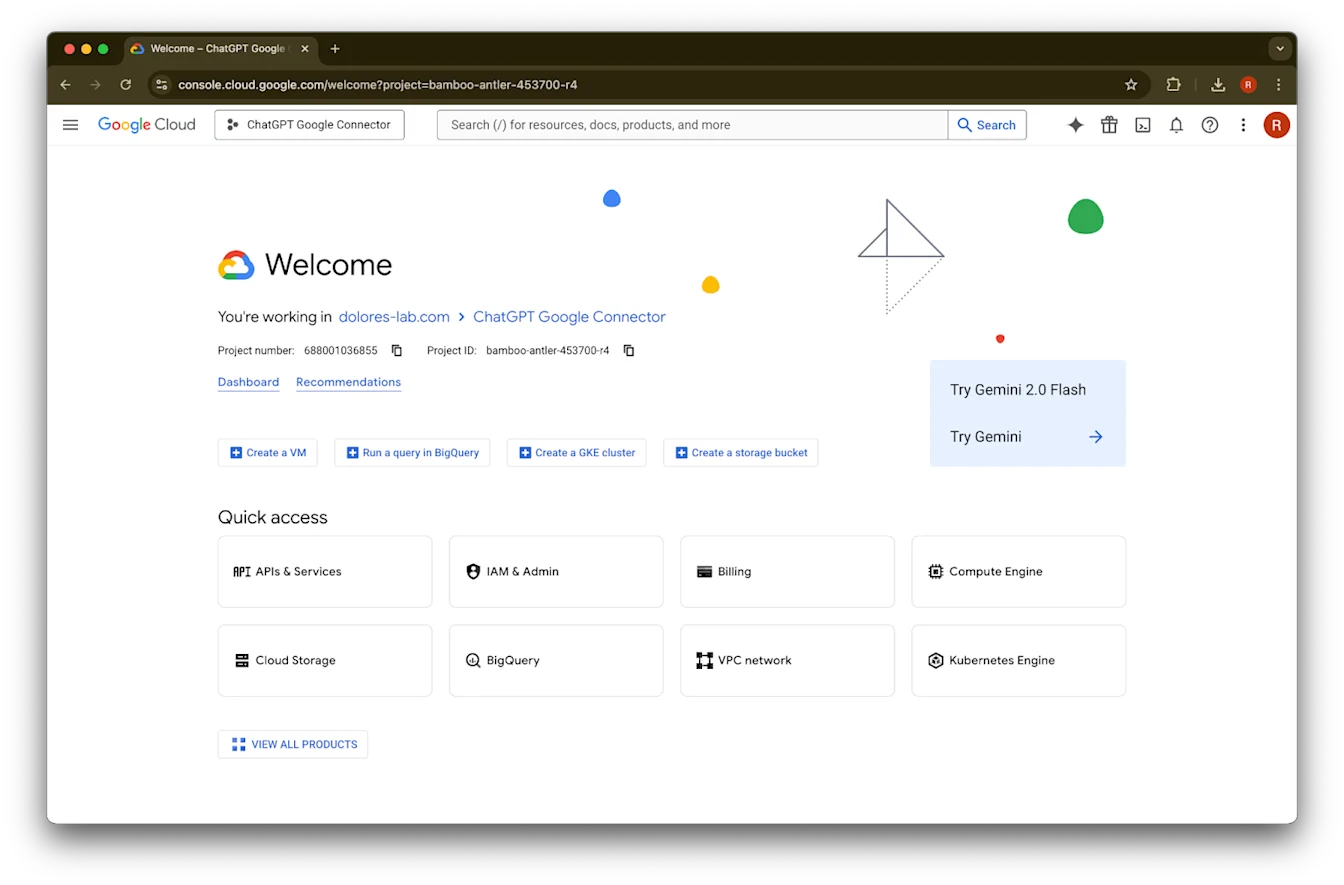
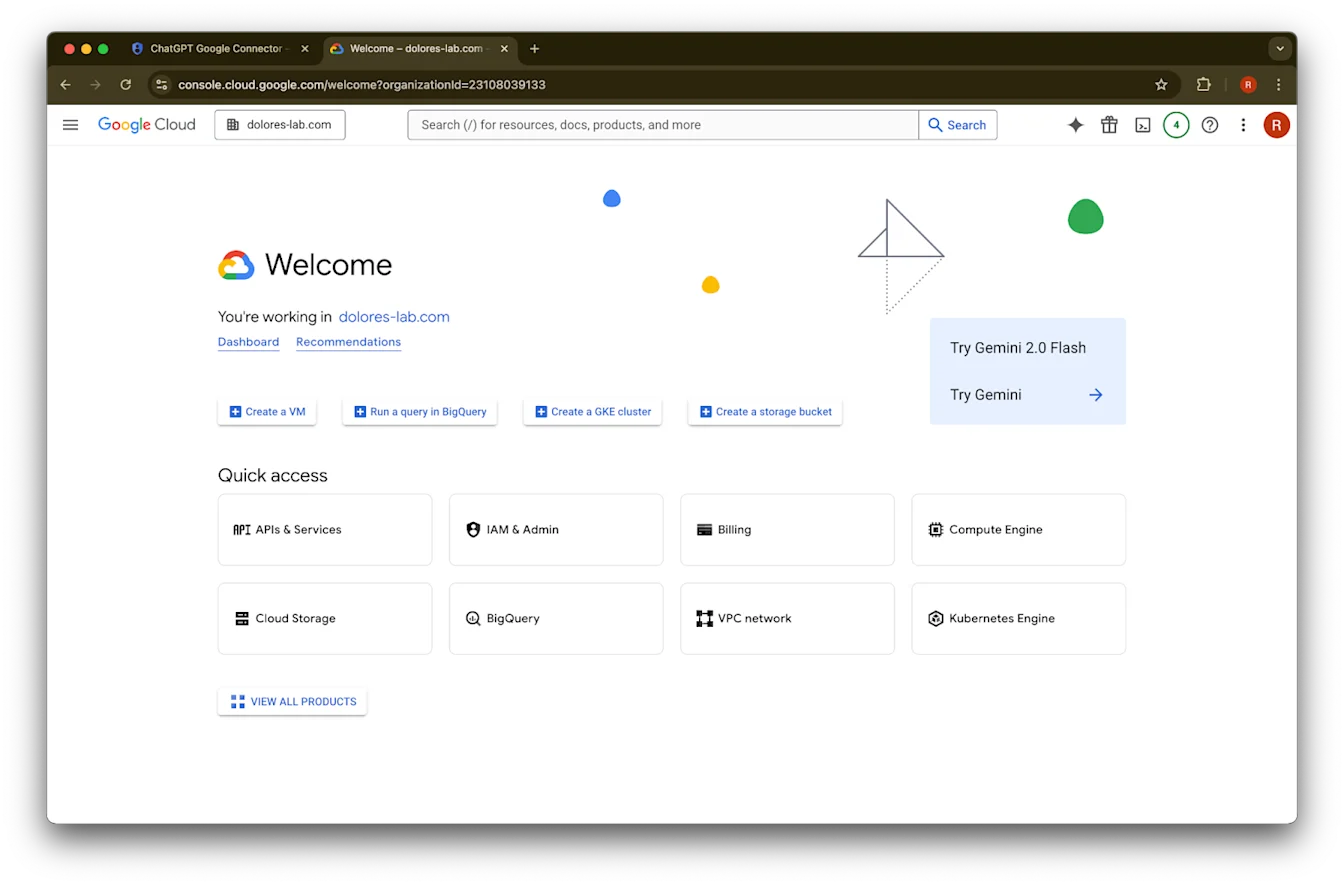
გადადით console.cloud.google.com-ზე.
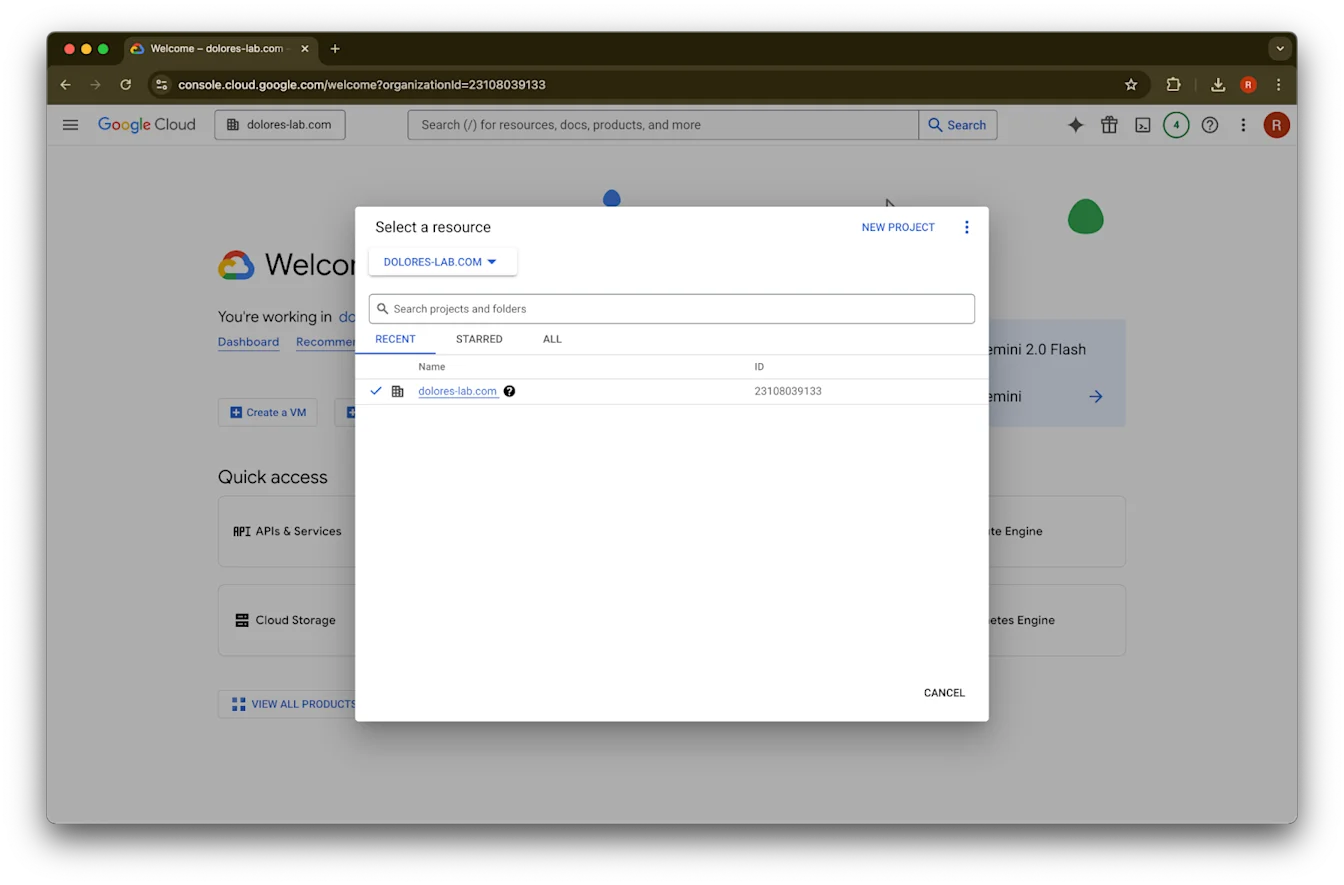
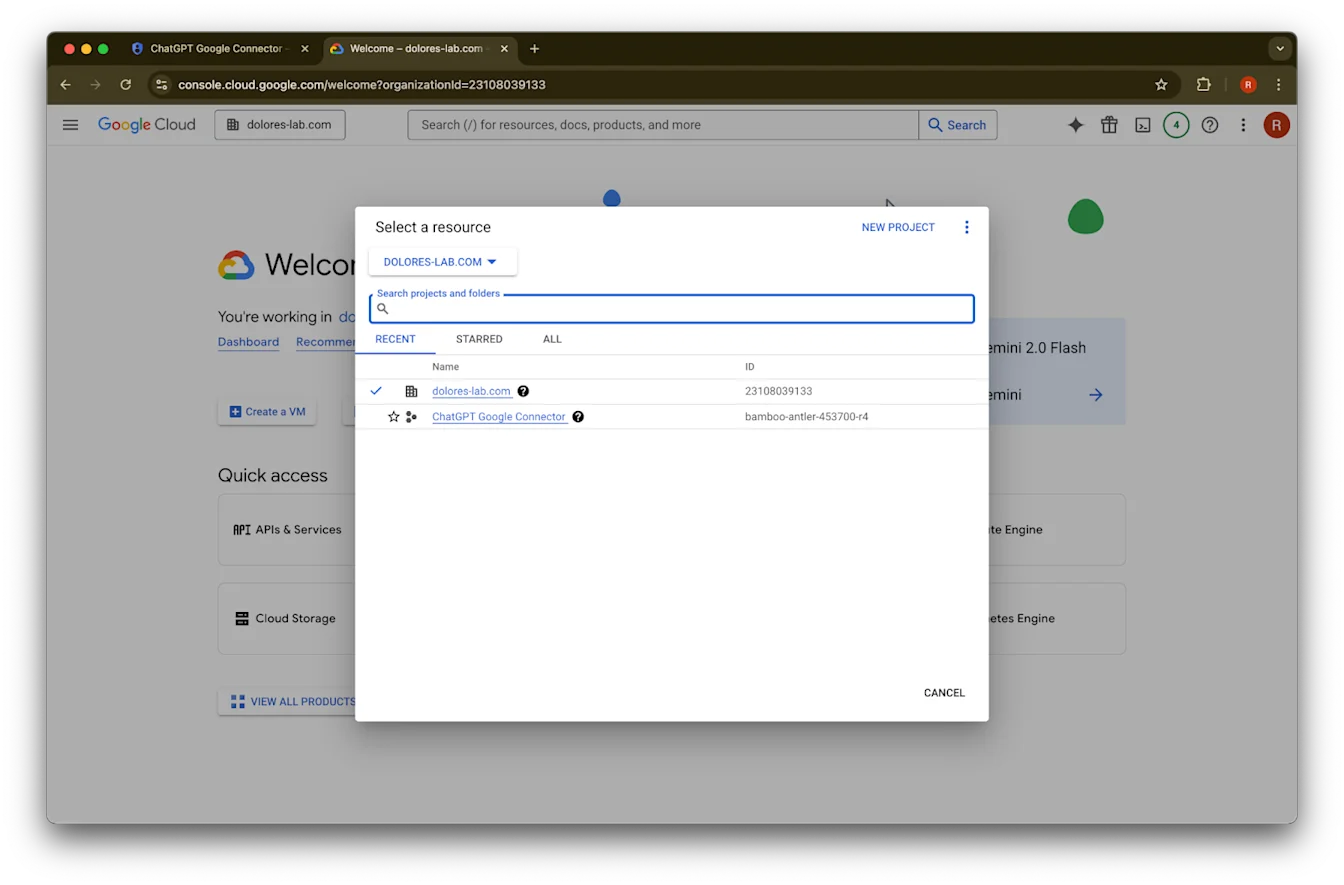
დააწკაპუნეთ პროექტების ჩამოსაშლელ მენიუზე.Imageდარწმუნდით, რომ შესული ხართ იმავე Google workspace-ში, რომელიც დაკავშირებულია თქვენს ChatGPT სამუშაო სივრცესთან (თუ არ გაქვთ Google workspace, რომელიც დაკავშირებულია თქვენს ChatGPT სამუშაო სივრცესთან და ამ ორს შორის განსხვავებული ელფოსტები გაქვთ, მოგიწევთ დამატებითი ნაბიჯების შესრულება, წინააღმდეგ შემთხვევაში თქვენმა მომხმარებლებმა შეიძლება ვერ შეძლონ Google Drive-ის სინქრონიზებული კონექტორების გამოყენება).
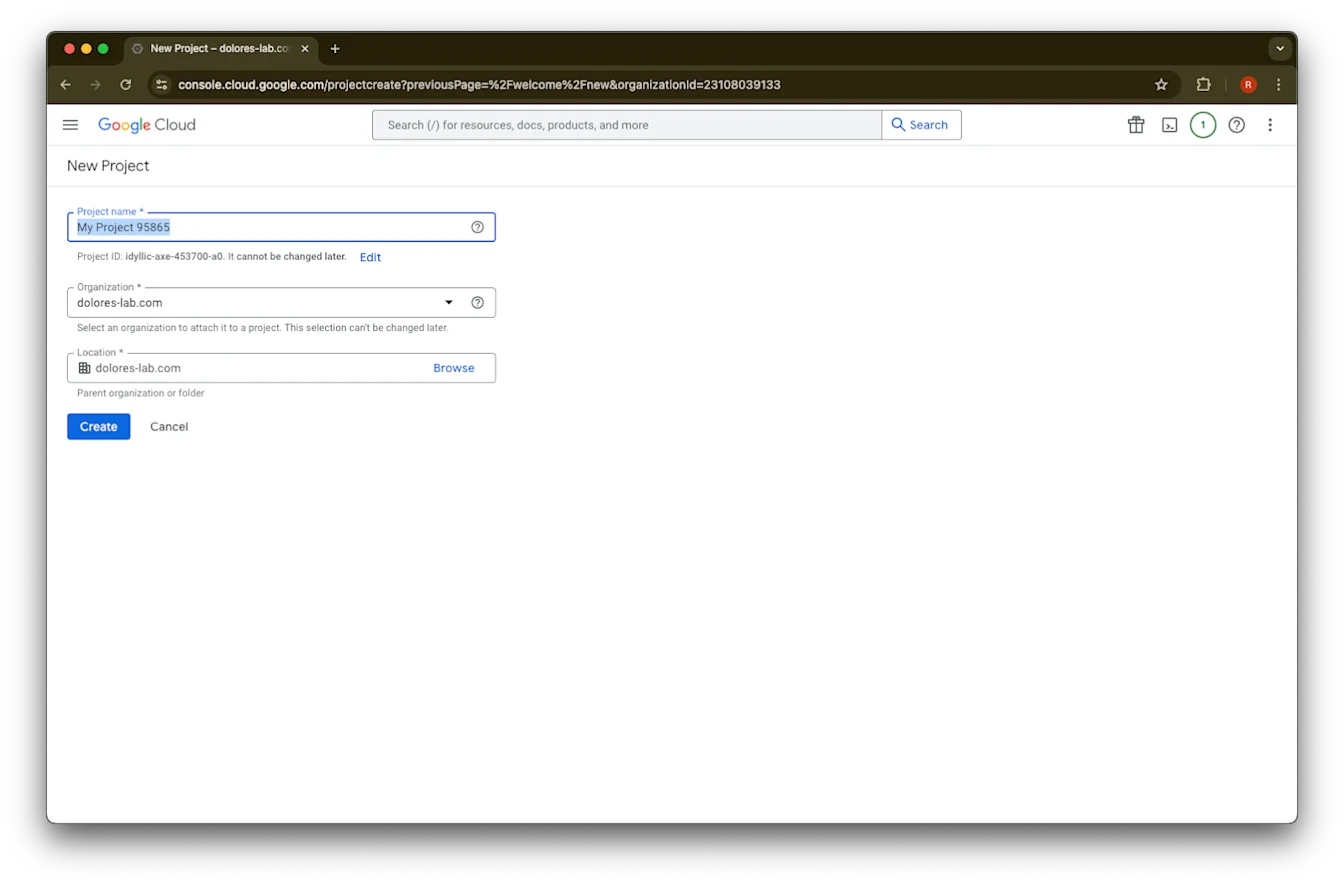
აირჩიეთ New Project
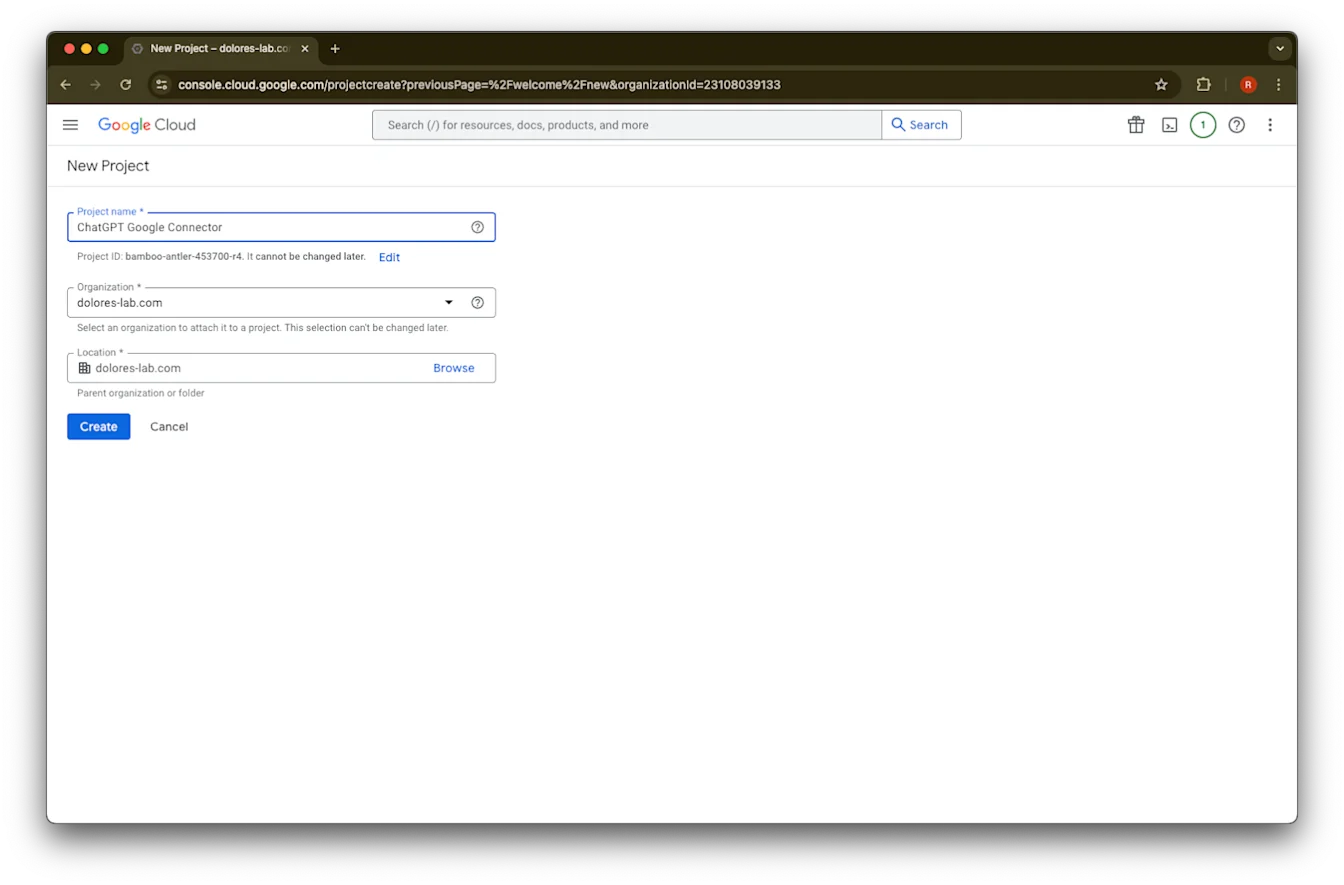
შეიყვანეთ Project Name
შექმენით პროექტი
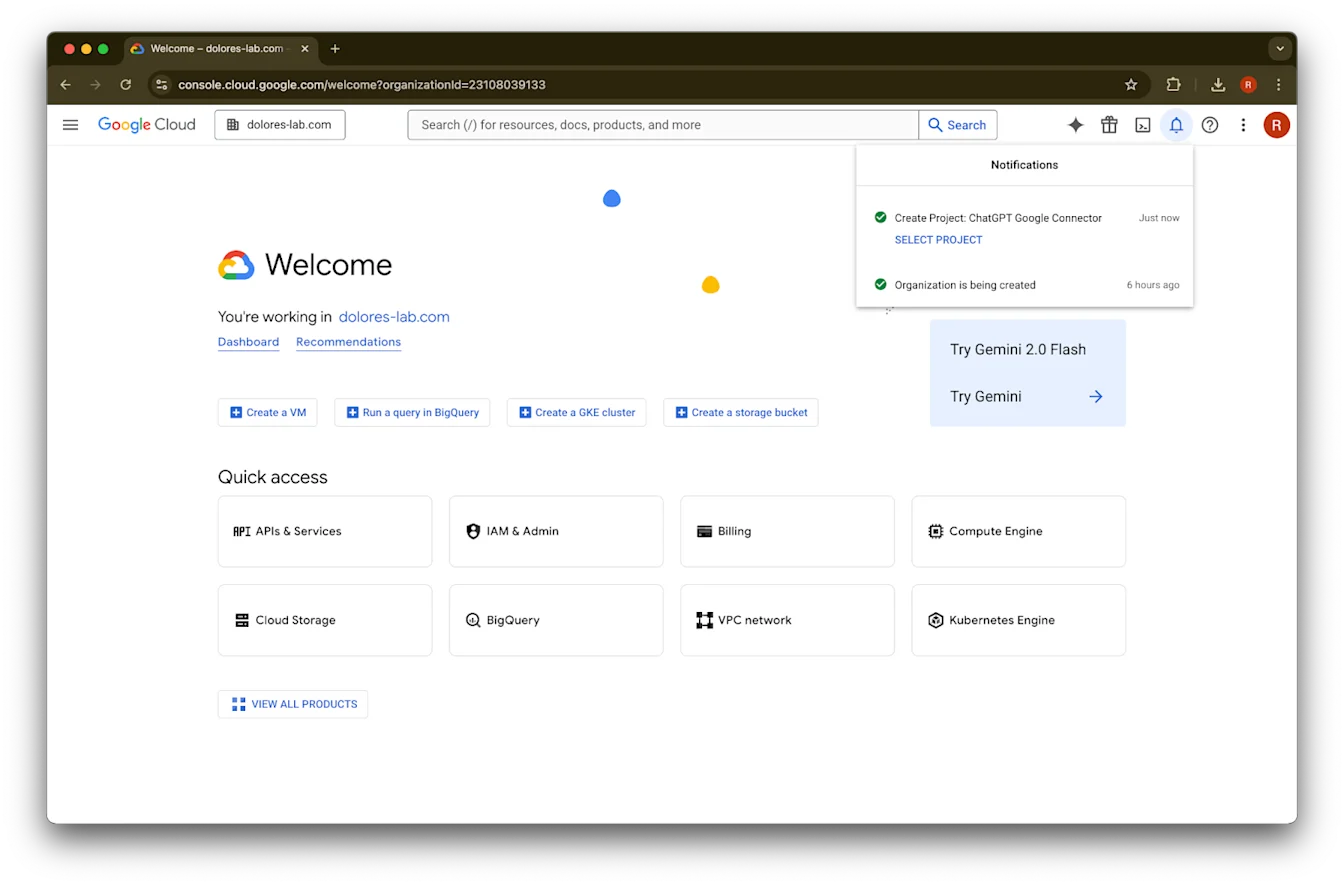
დაელოდეთ, სანამ პროექტი შეიქმნება, შემდეგ დააწკაპუნეთ Select Project-ზე
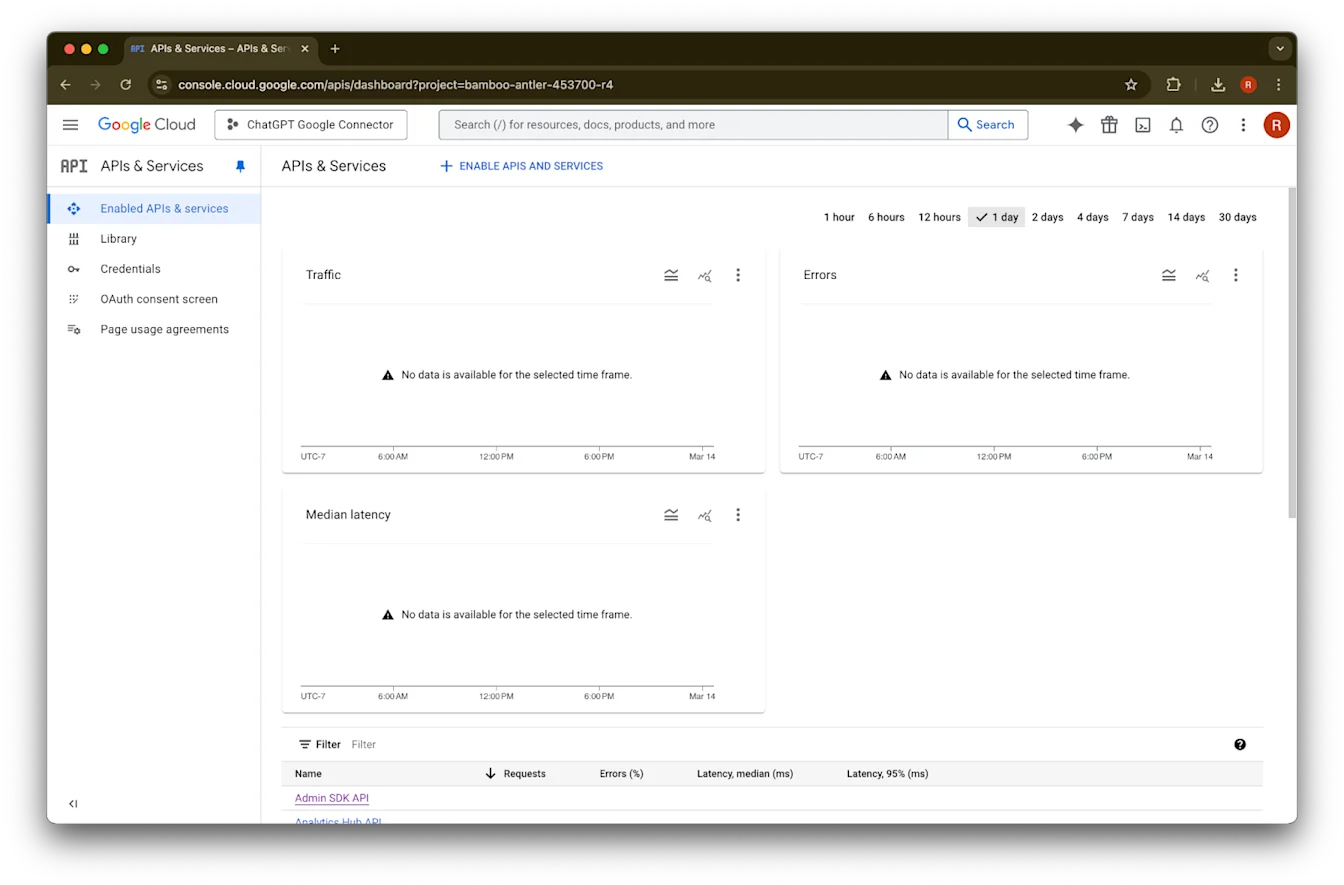
დააწკაპუნეთ APIs & Services-ზე
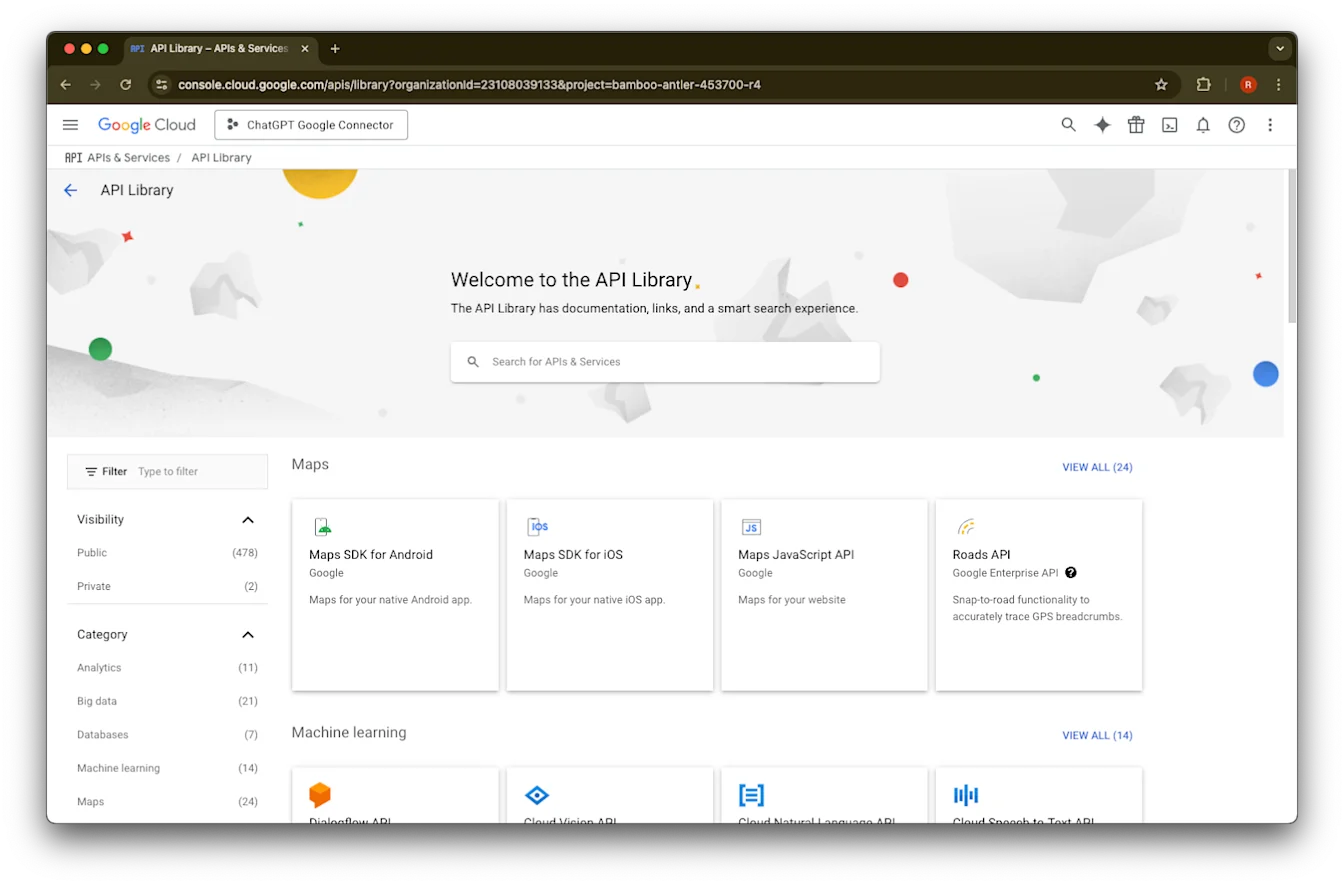
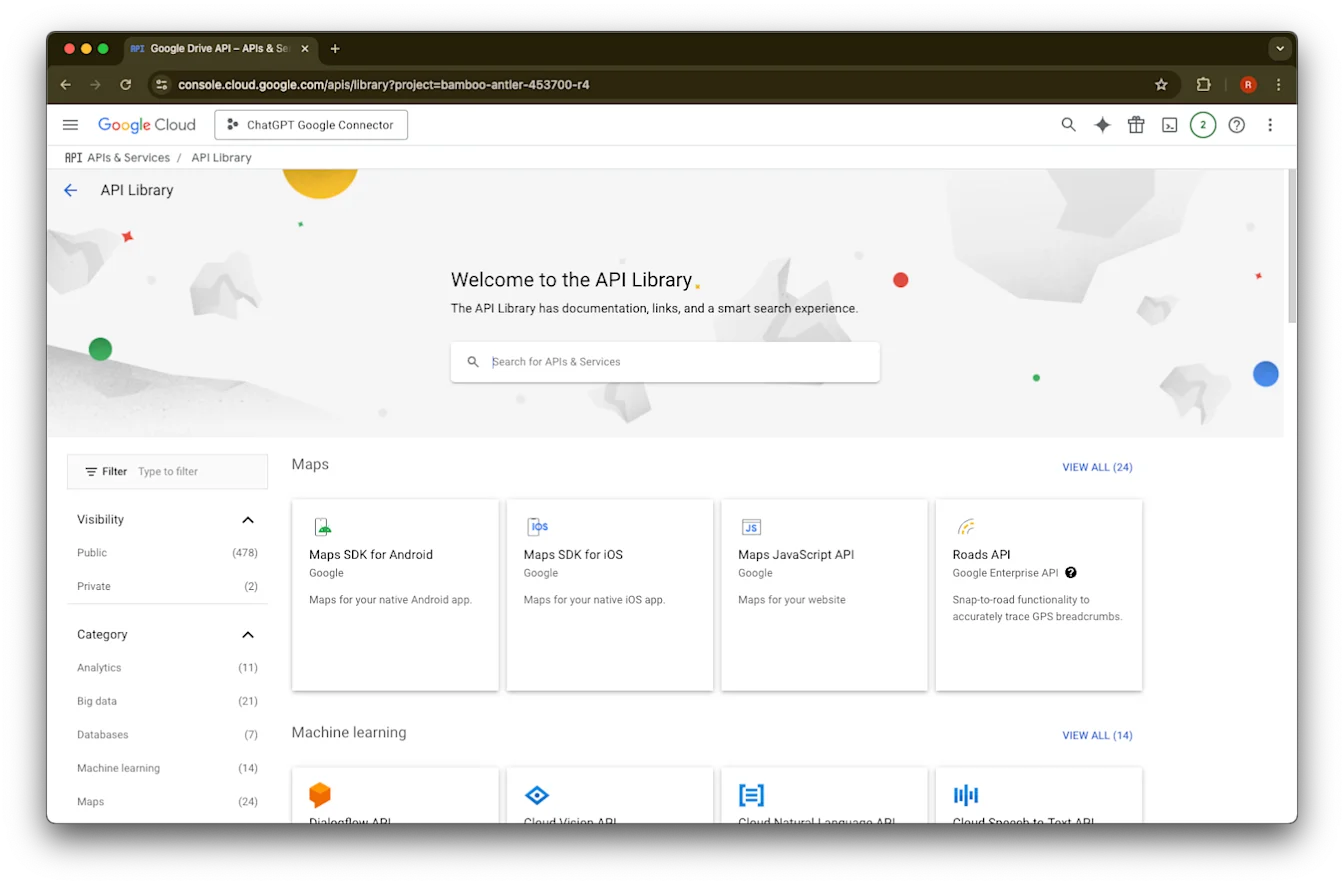
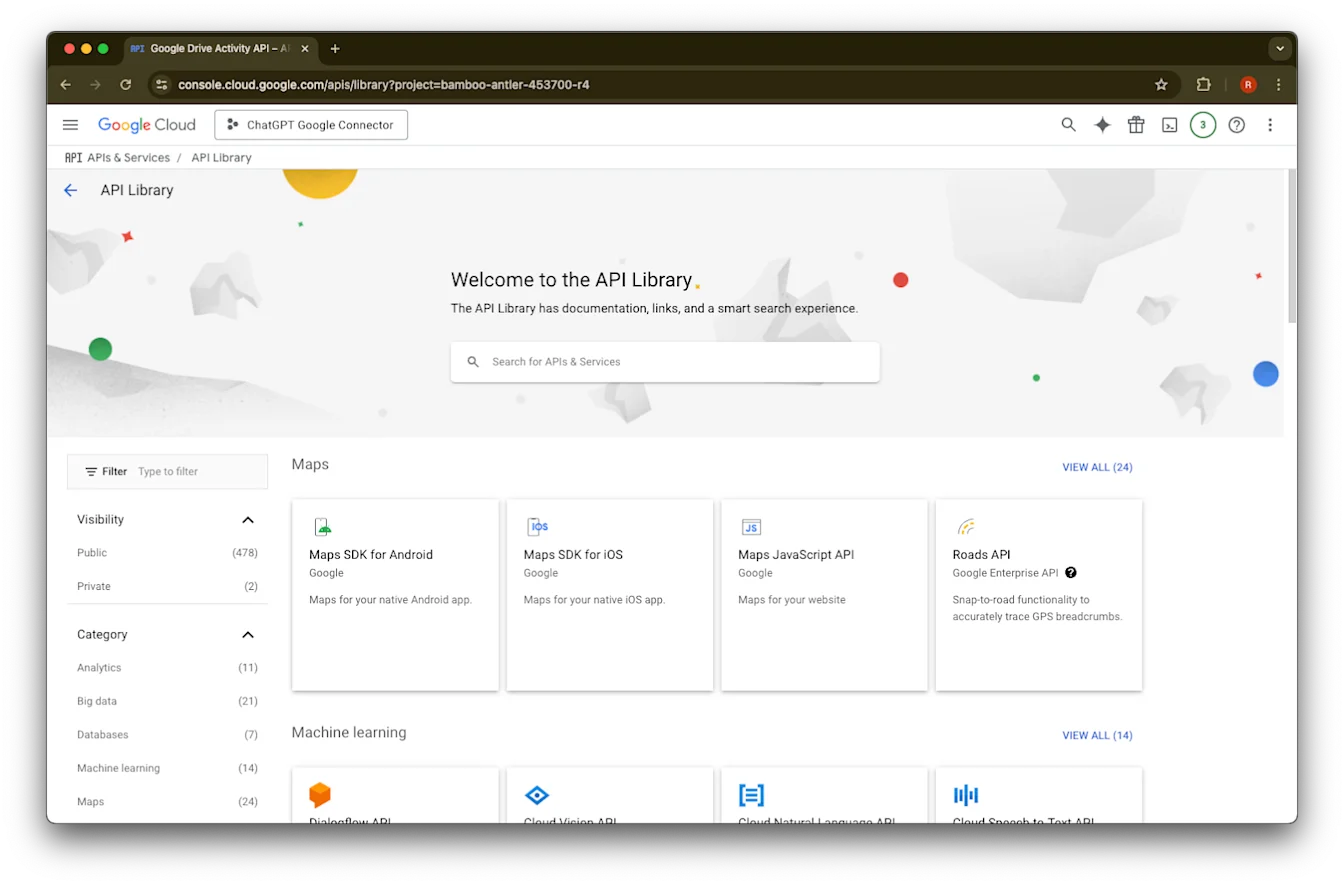
დააწკაპუნეთ Library-ზე
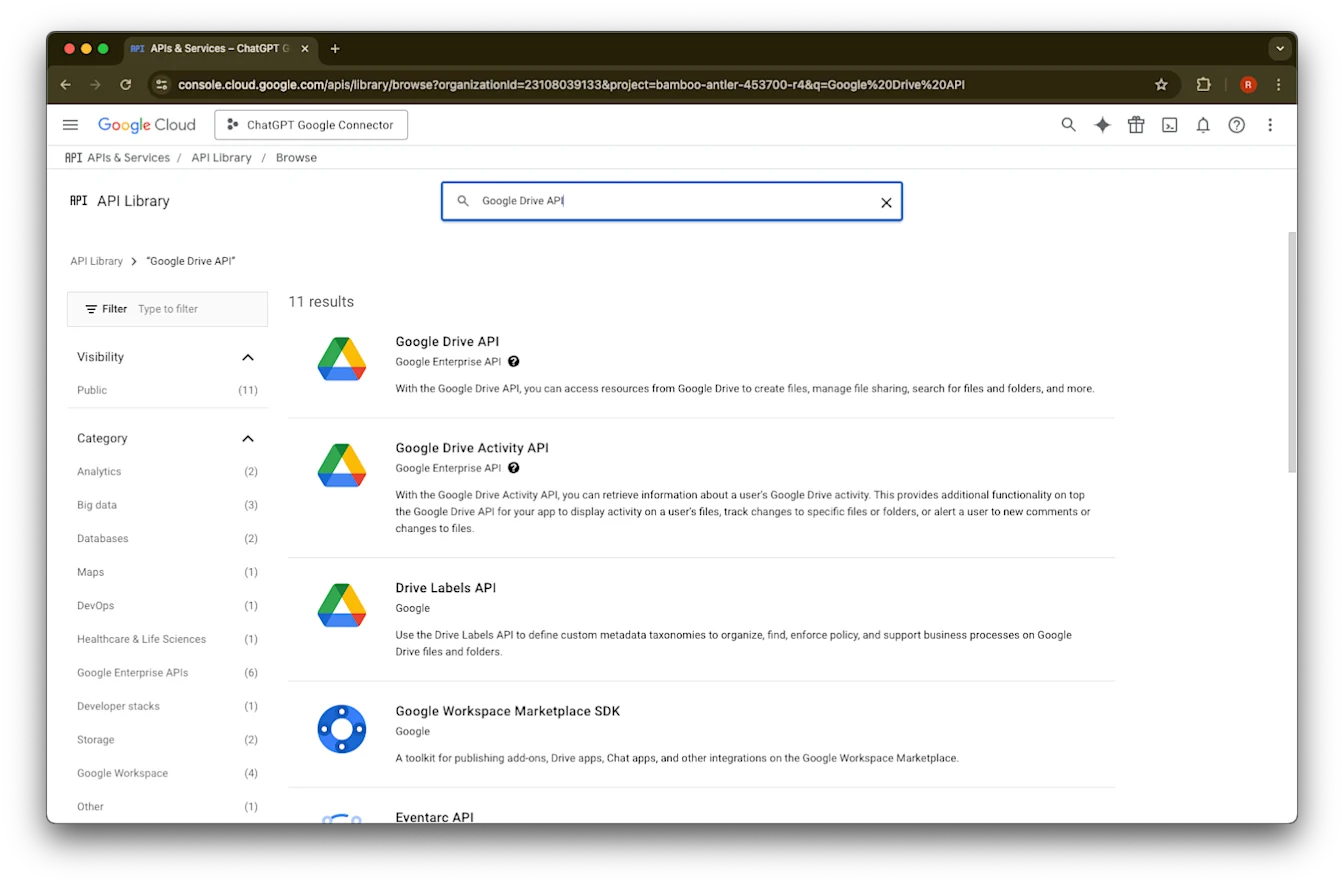
ახლა ვაპირებთ სამი API-ის დამატებას, მათ მოსაძებნად გამოიყენეთ search box
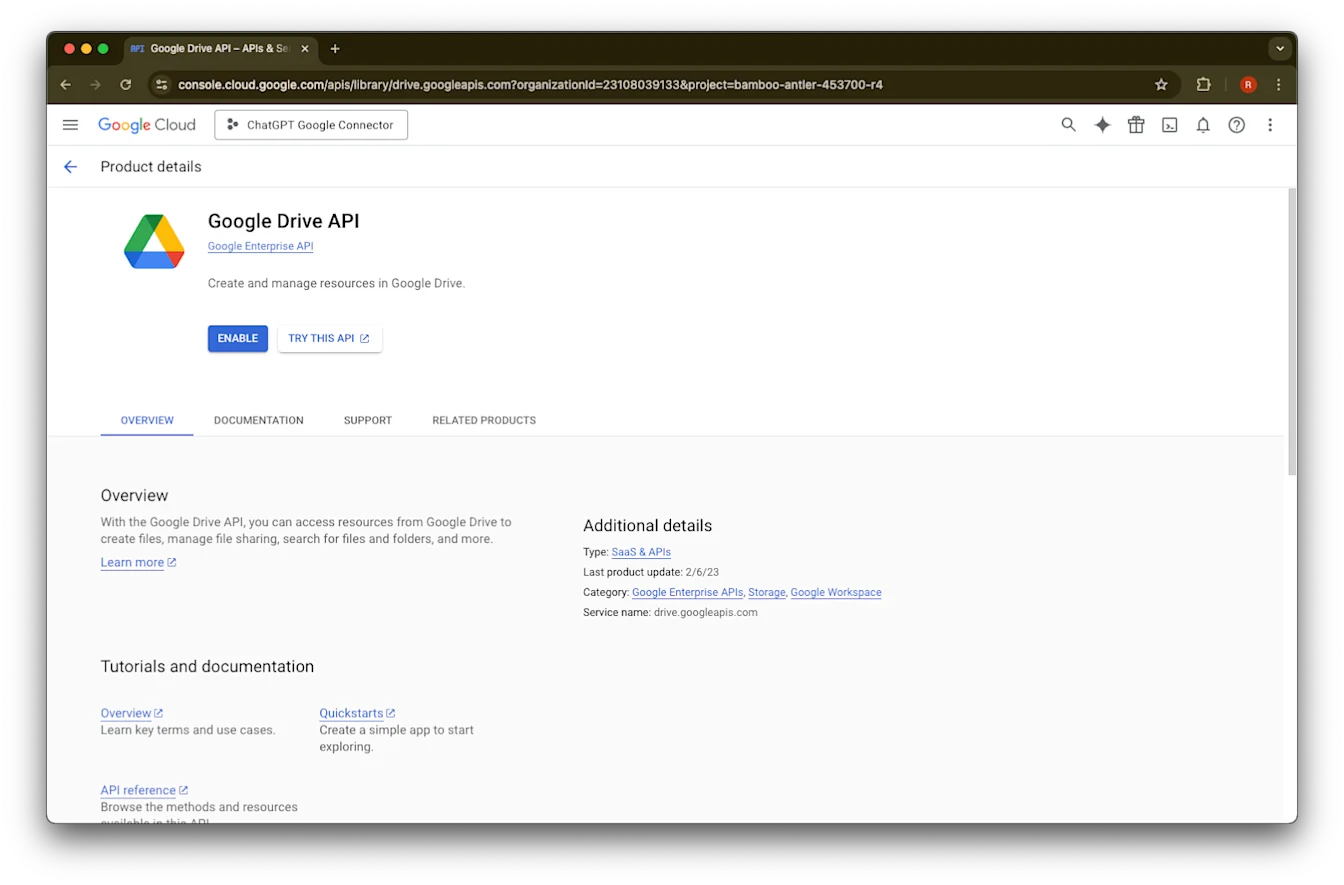
მოძებნეთ და აირჩიეთ Google Drive API
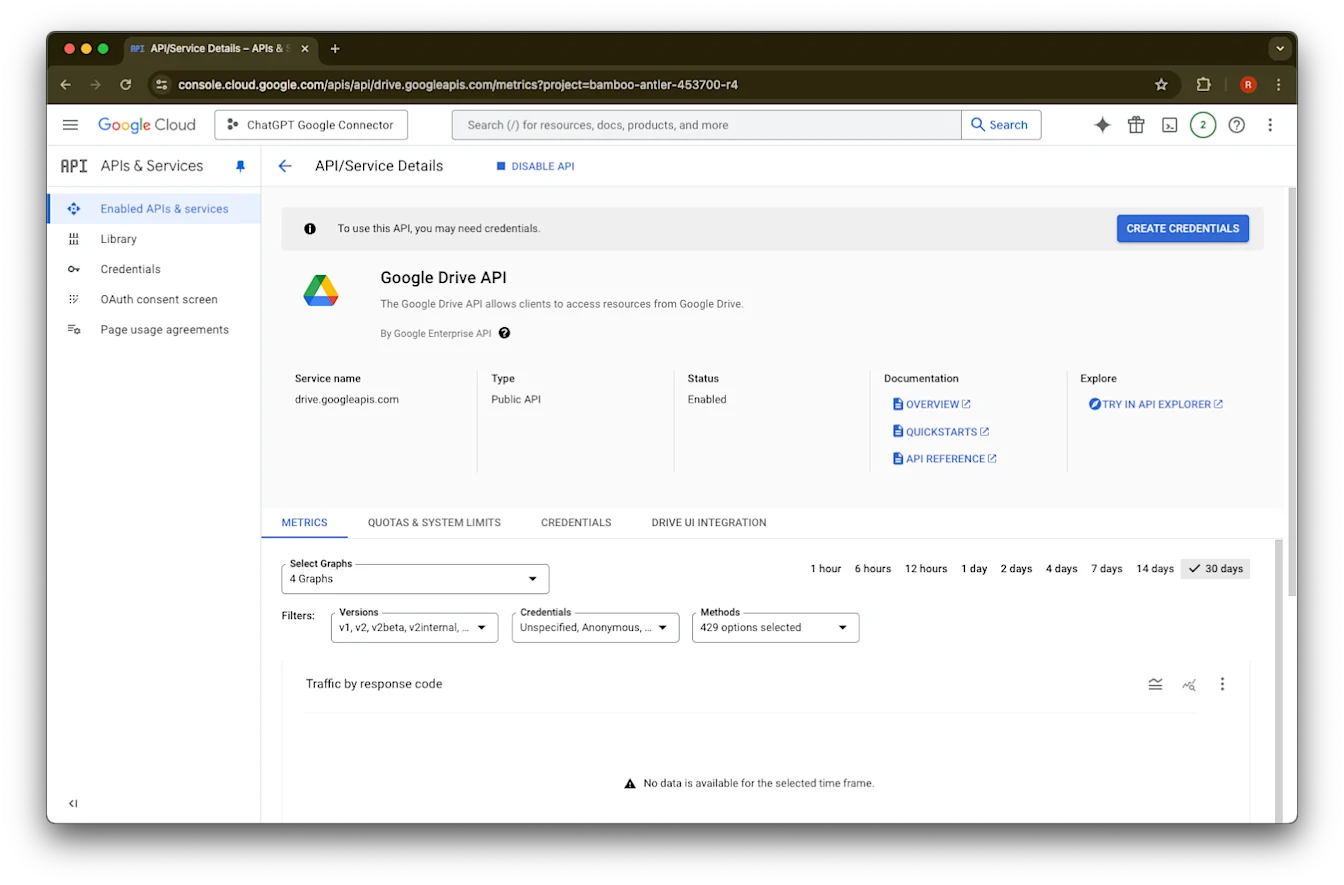
დააწკაპუნეთ Enable-ზე
დააწკაპუნეთ Library-ზე
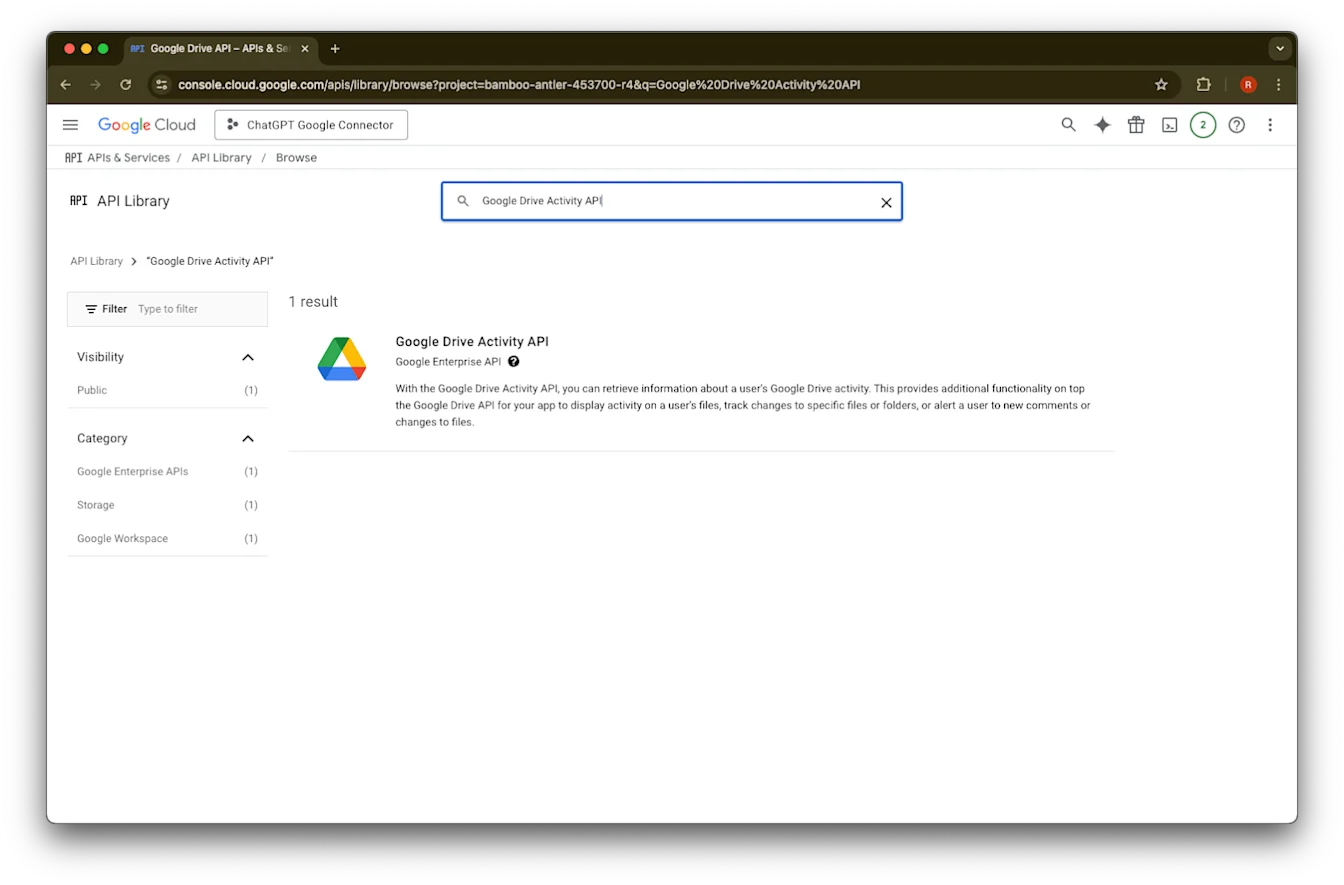
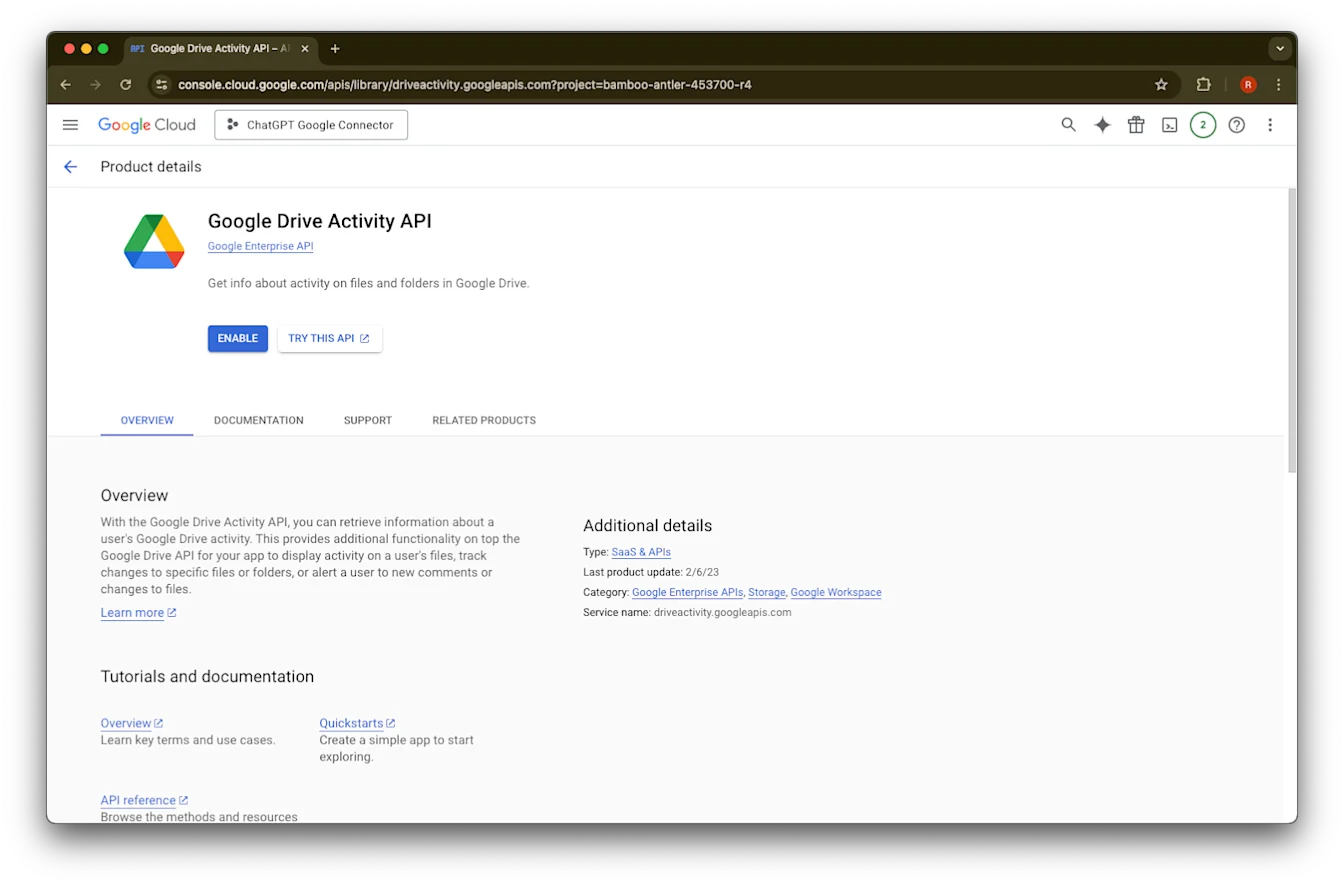
მოძებნეთ Google Drive Activity
აირჩიეთ Google Drive Activity API
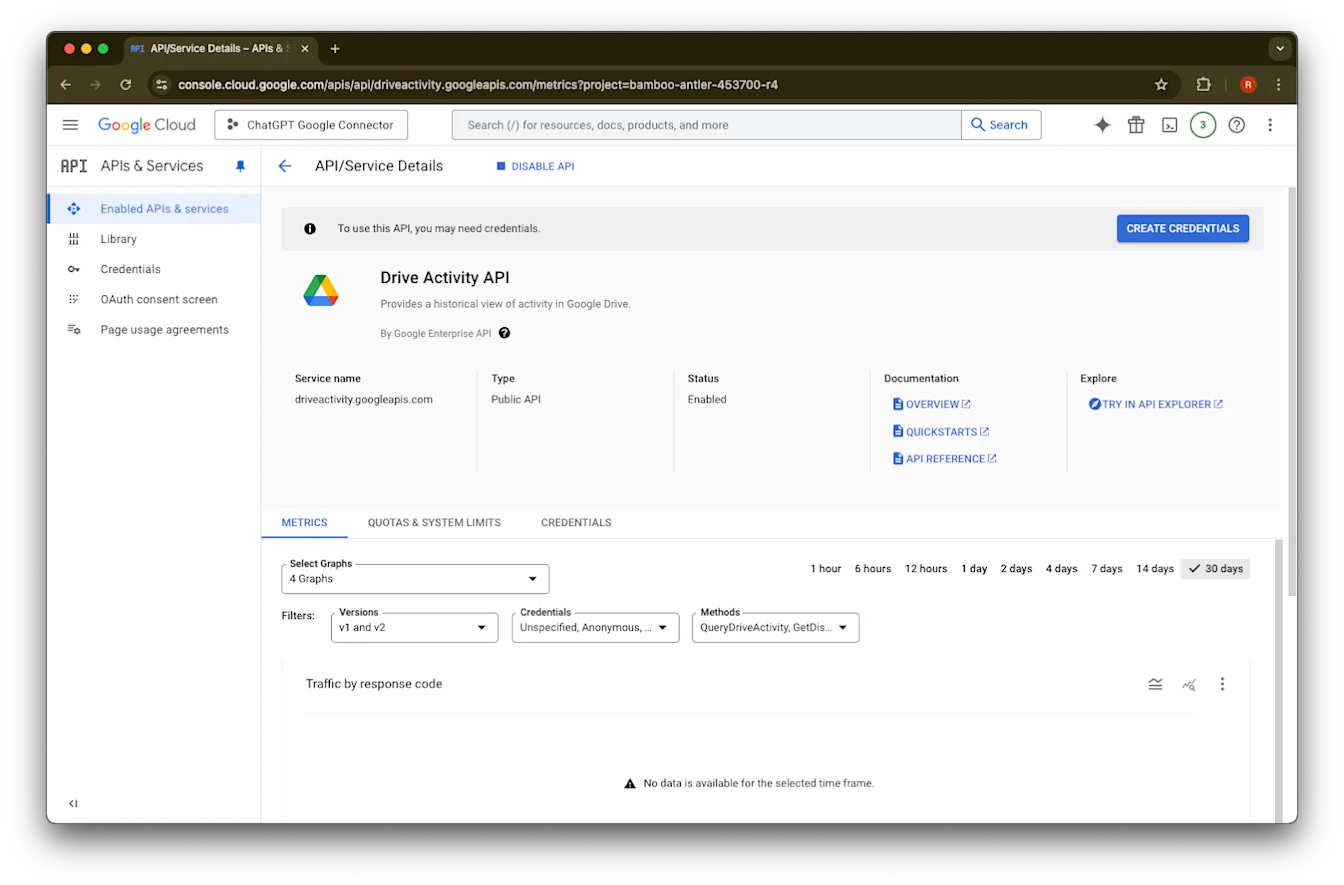
დააწკაპუნეთ Enable-ზე
დააწკაპუნეთ Library-ზე
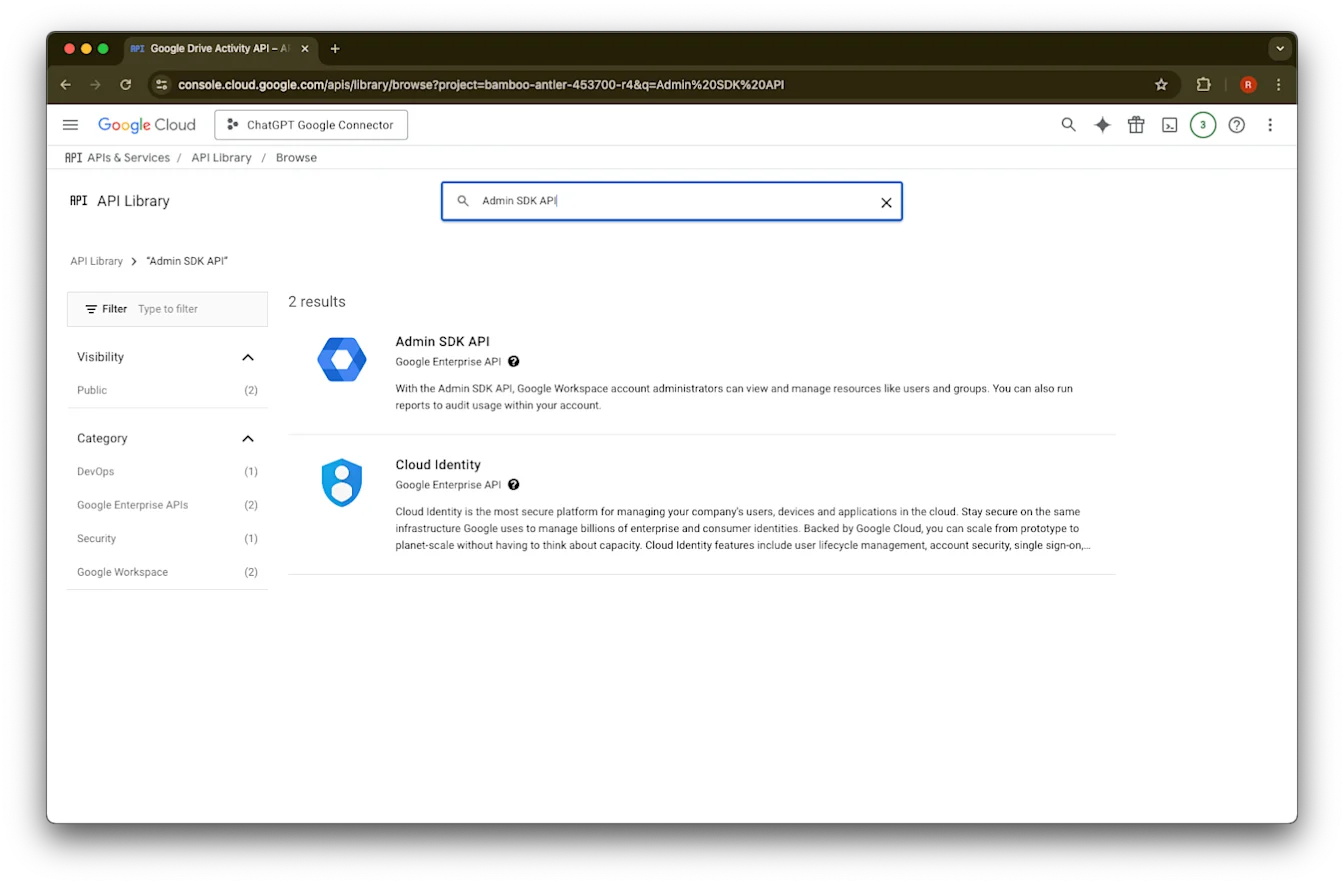
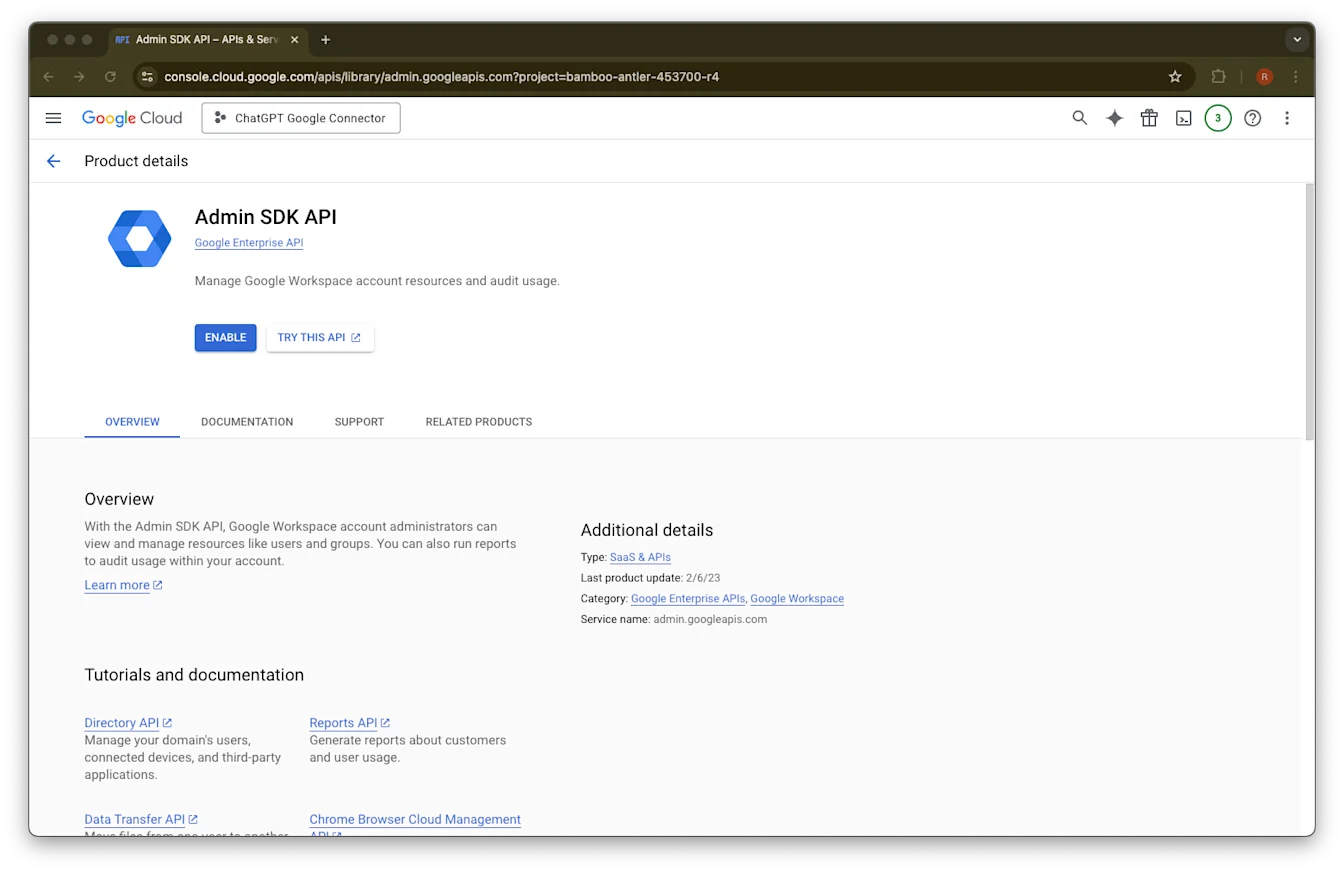
მოძებნეთ Admin SDK API
აირჩიეთ Admin SDK API
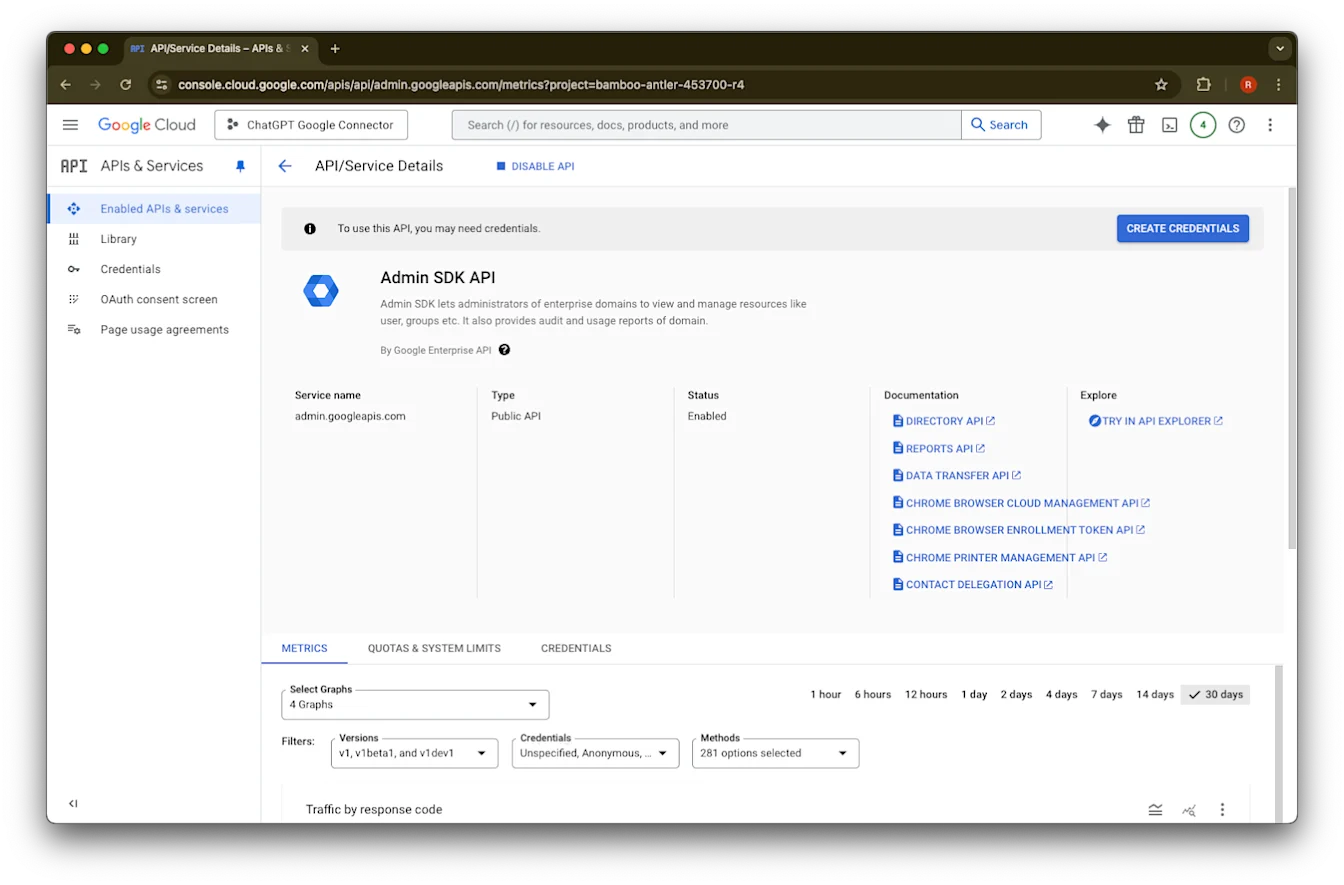
დააწკაპუნეთ Enable-ზე
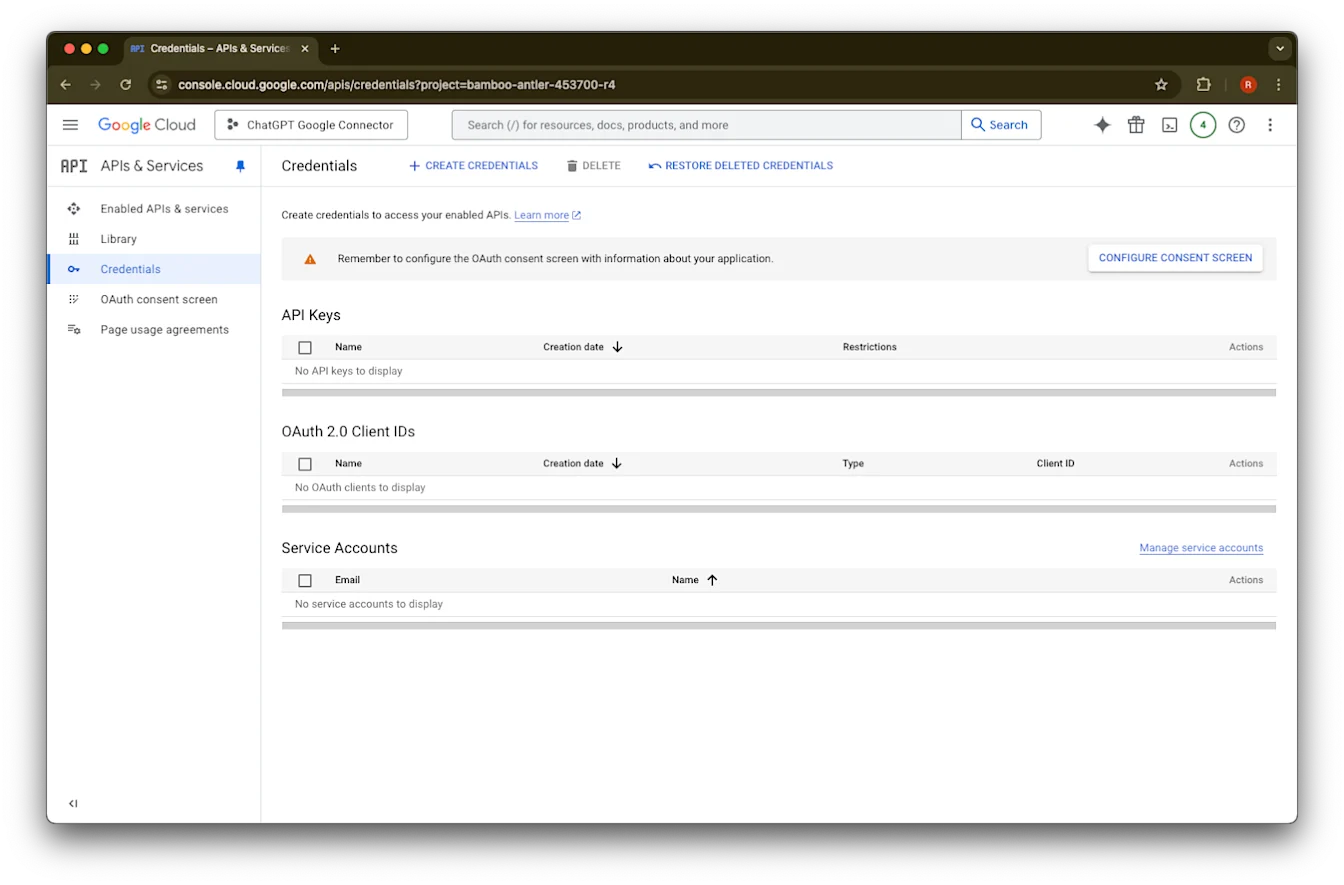
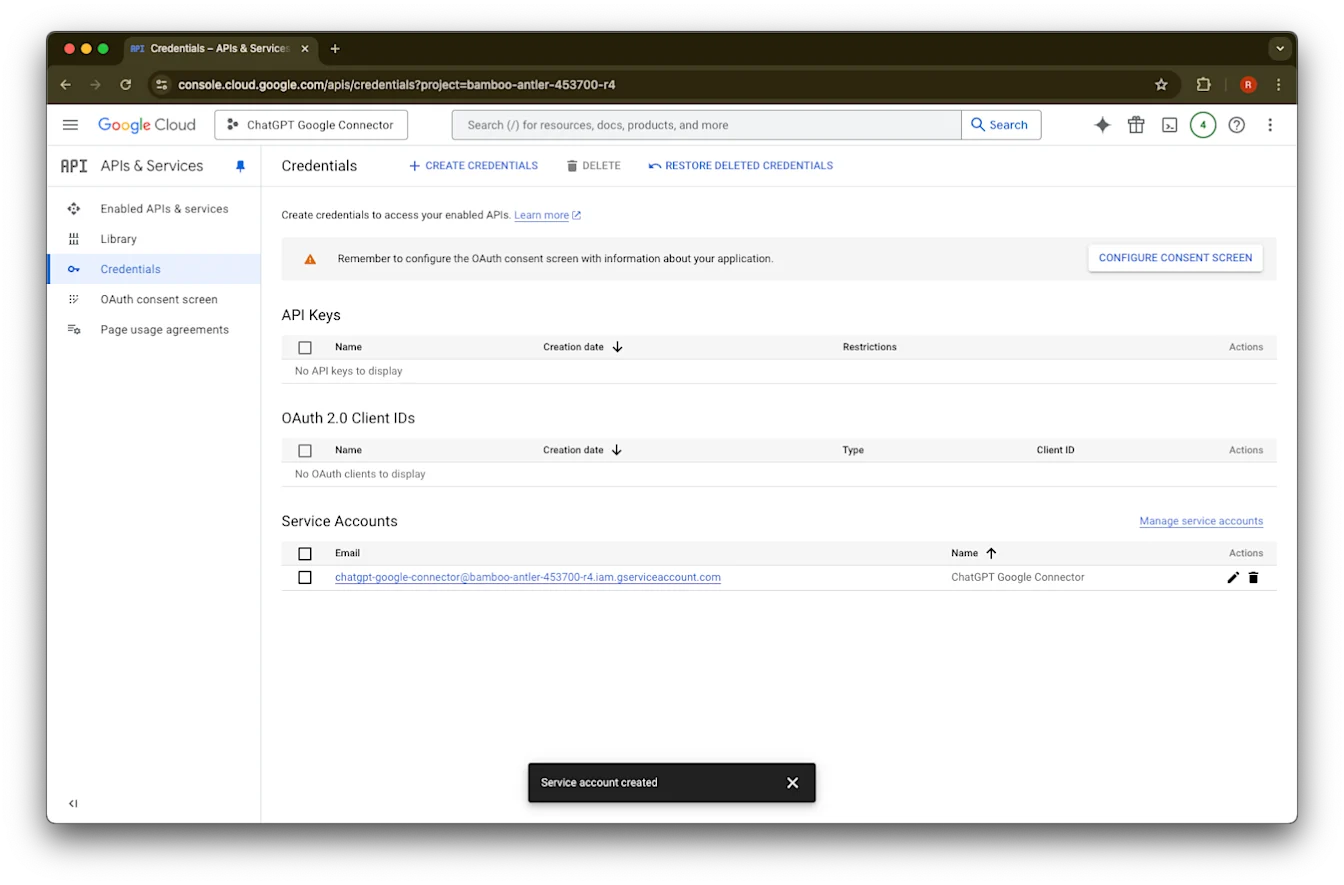
დააწკაპუნეთ Credentials-ზე
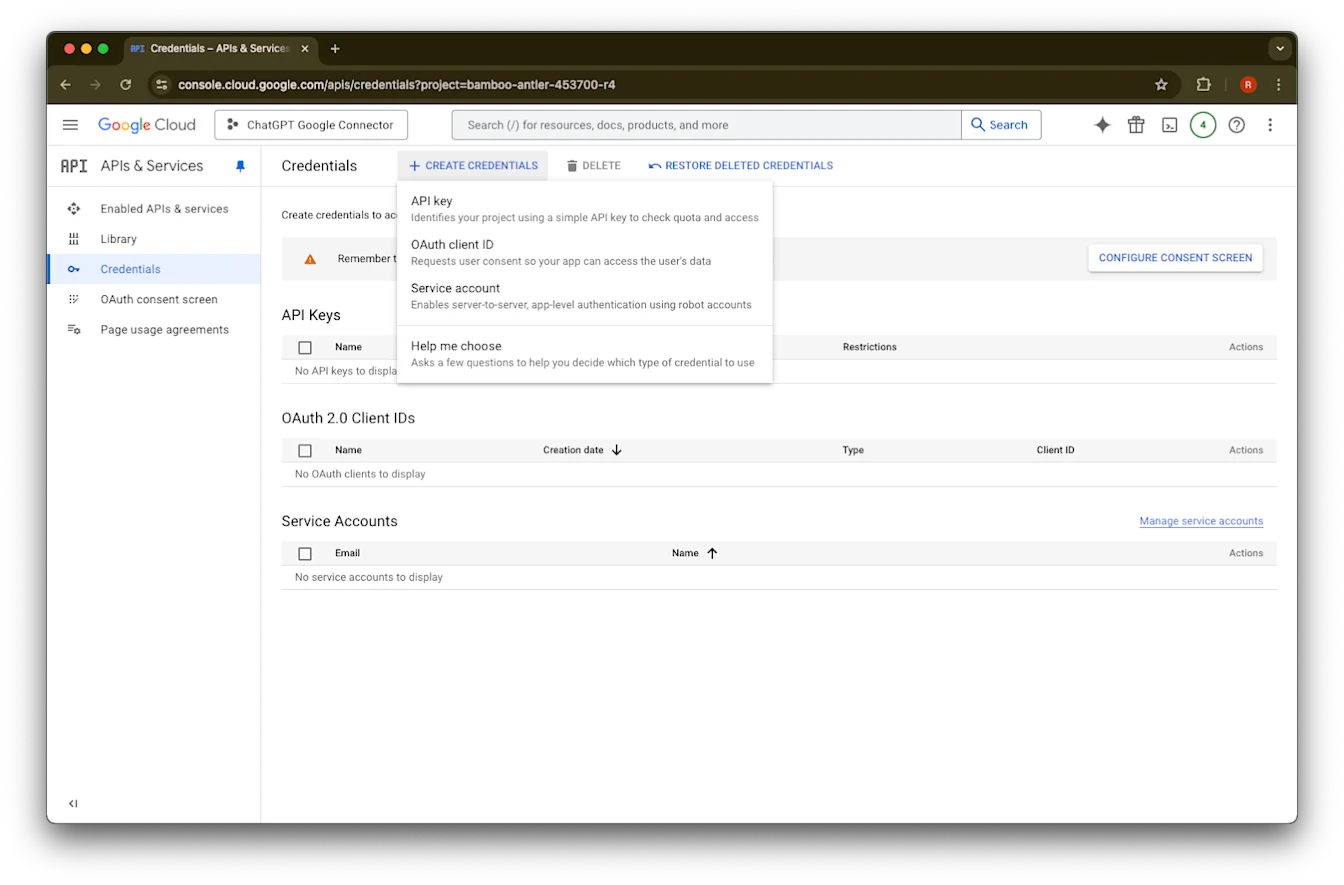
დააწკაპუნეთ Create Credentials-ზე
დააწკაპუნეთ Service account-ზე
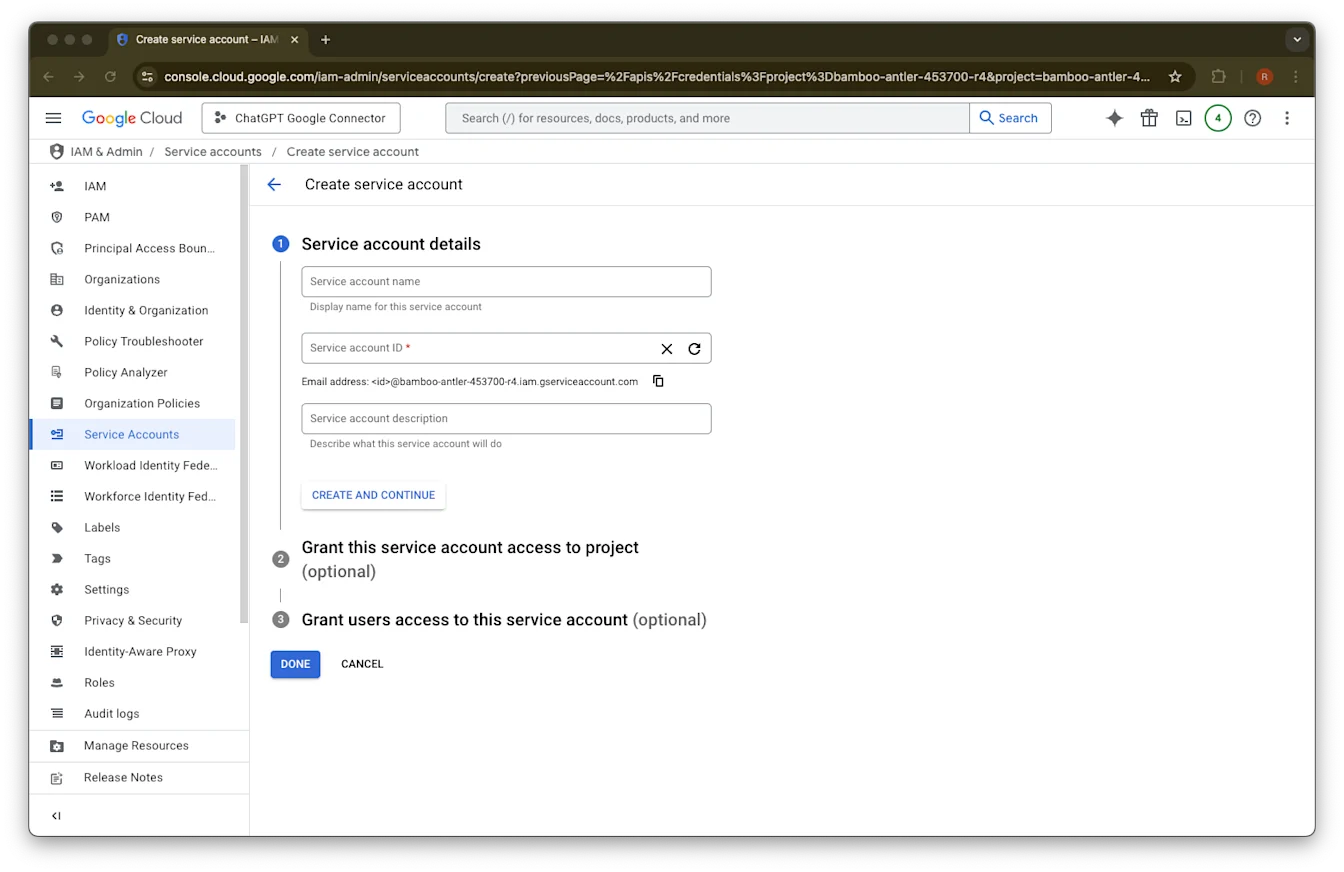
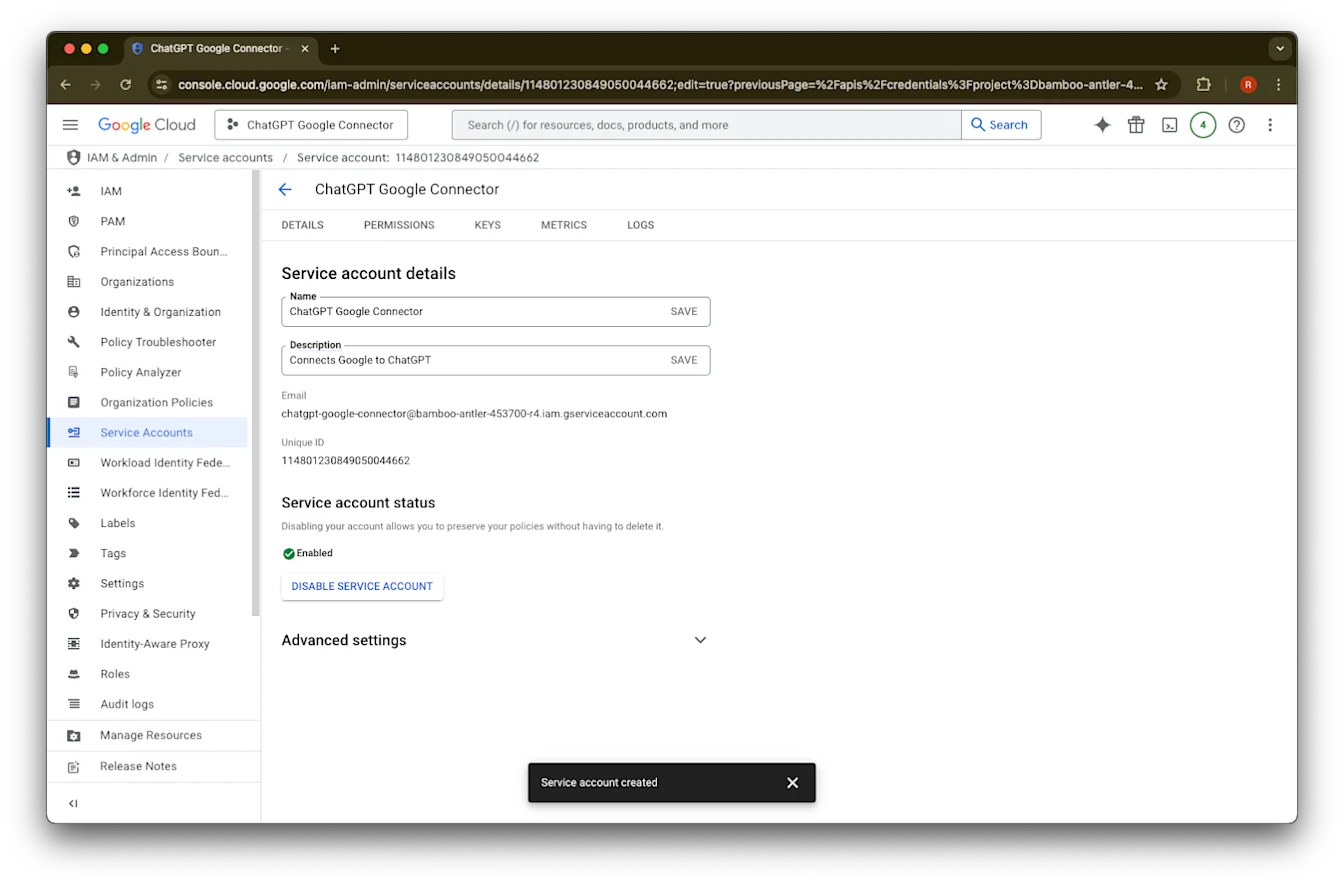
ამ სერვისის ანგარიშისთვის მიუთითეთ თქვენთვის სასურველი name და description
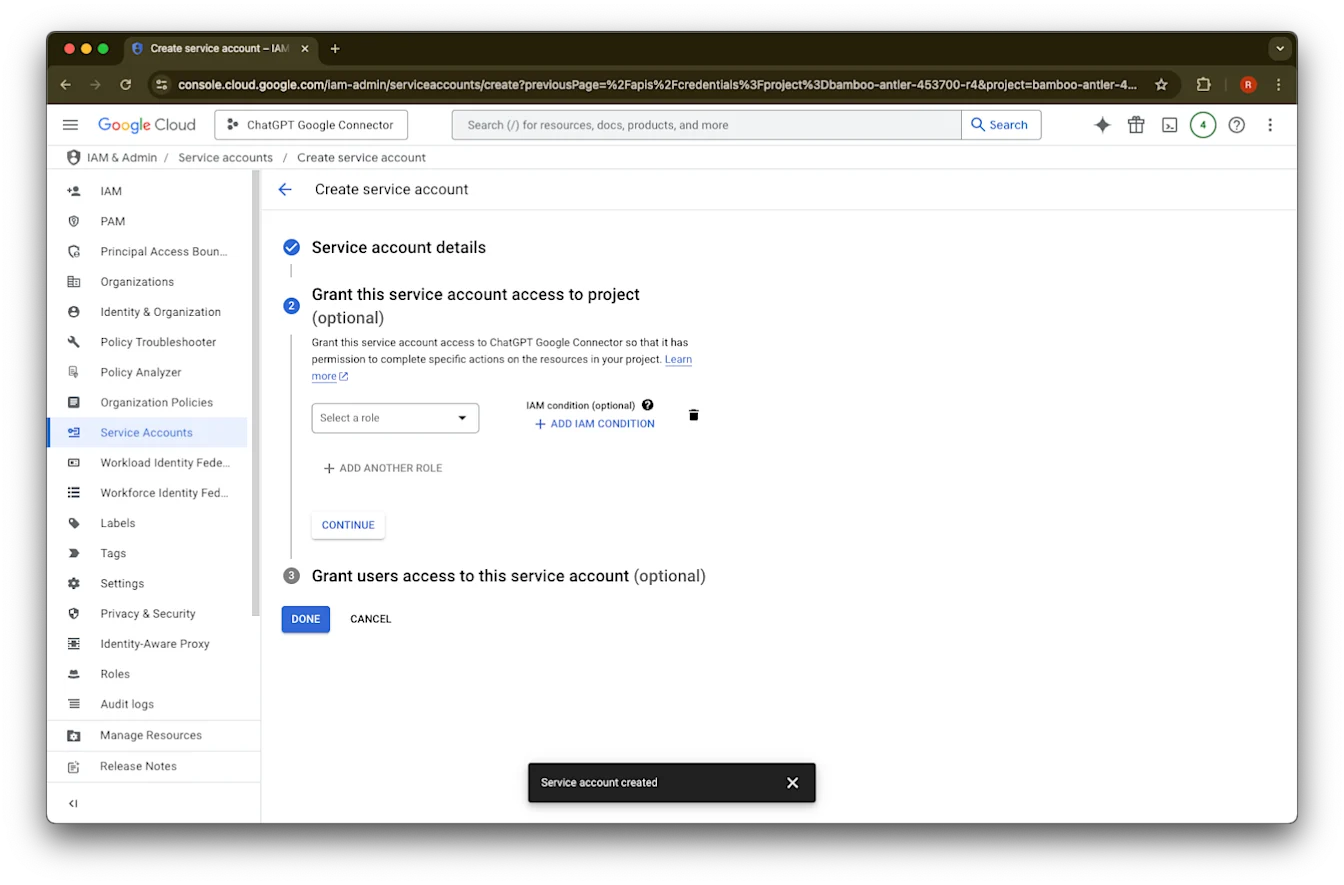
(არასავალდებულო) შეგიძლიათ მიანიჭოთ როლი — ეს ChatGPT-ს არ სჭირდება.
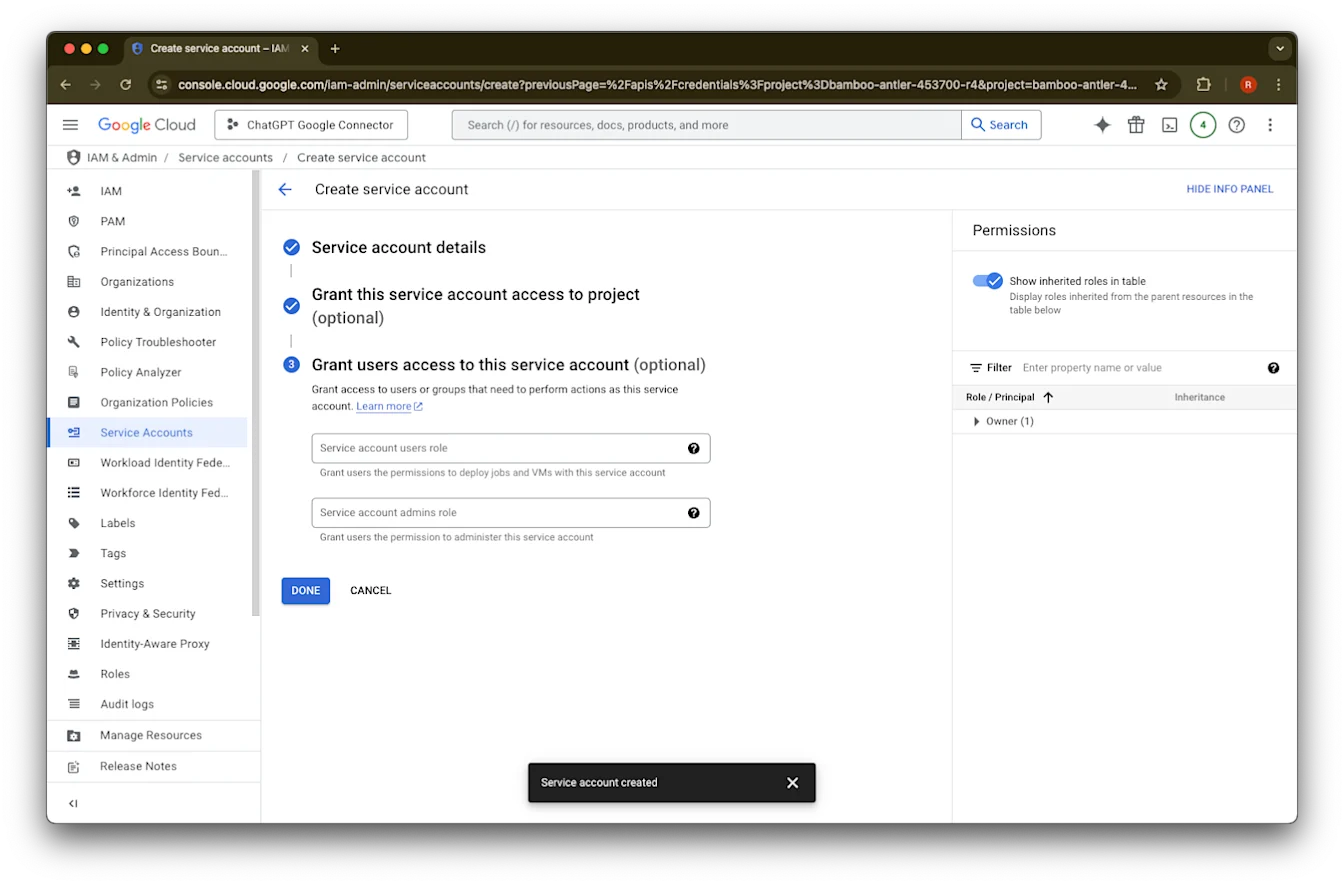
(არასავალდებულო) შეგიძლიათ სერვისის ანგარიშს მიანიჭოთ წვდომა — ეს ChatGPT-ს არ სჭირდება.
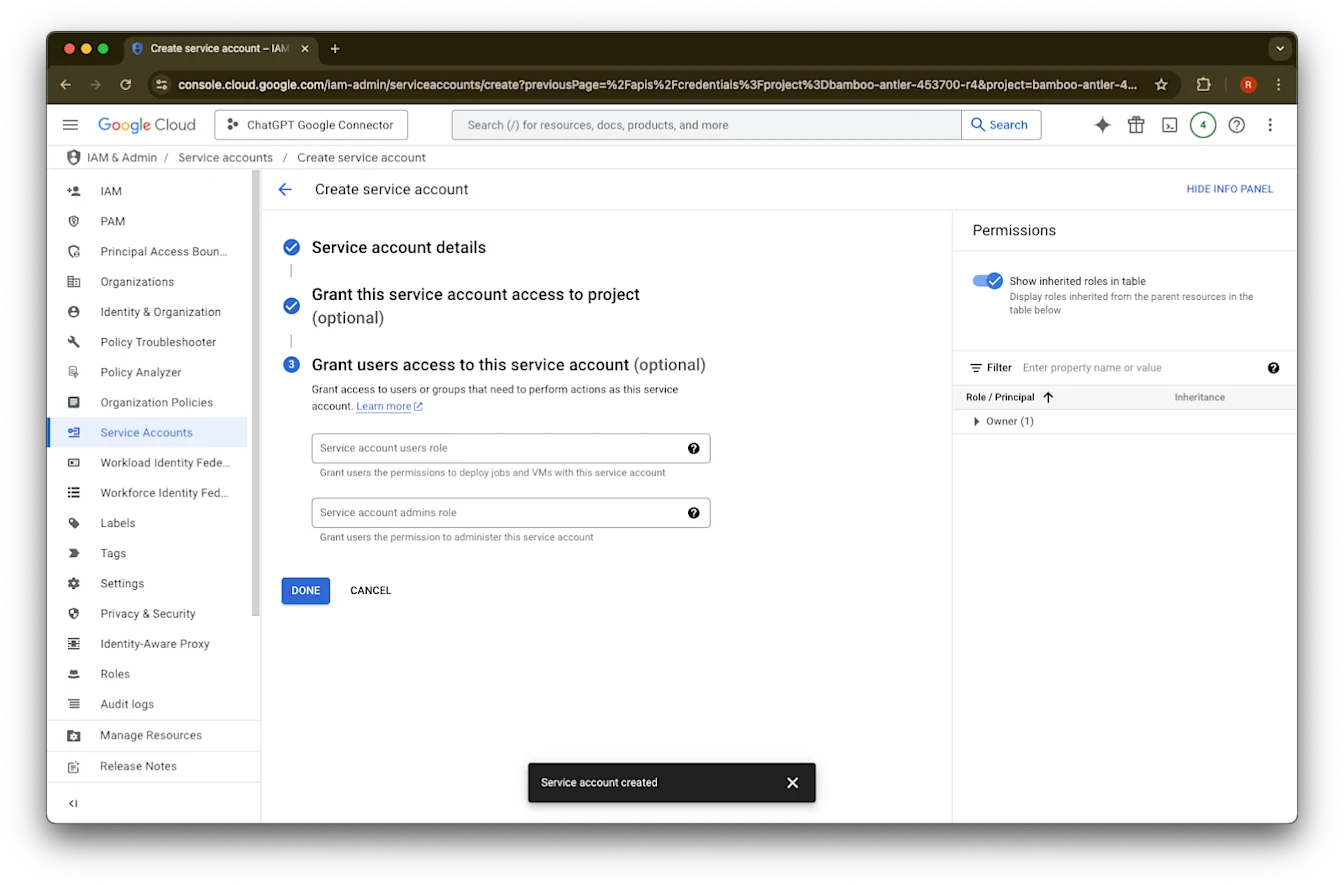
დააწკაპუნეთ Done-ზე.
დააწკაპუნეთ ახლახან შექმნილ service account-ზე.
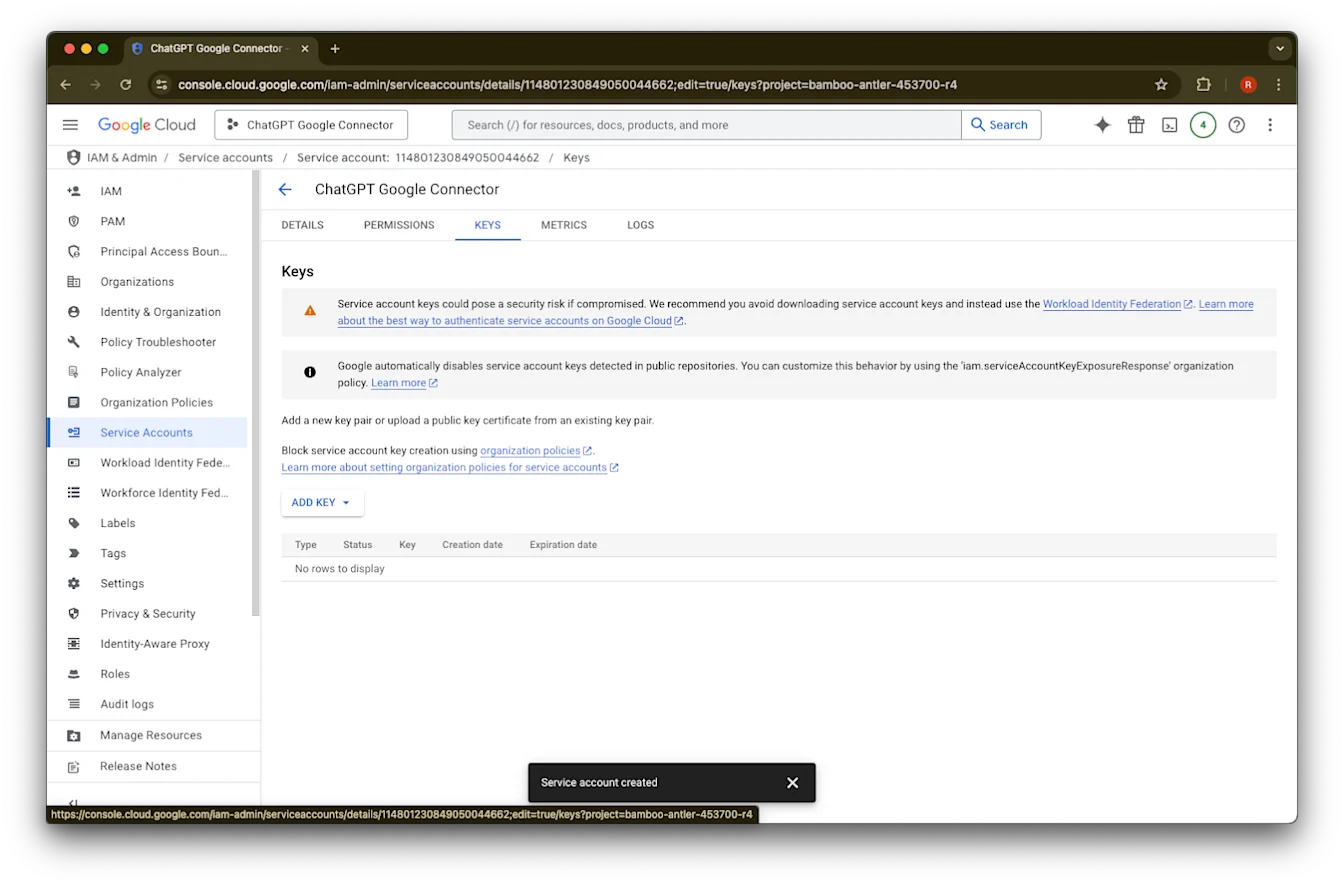
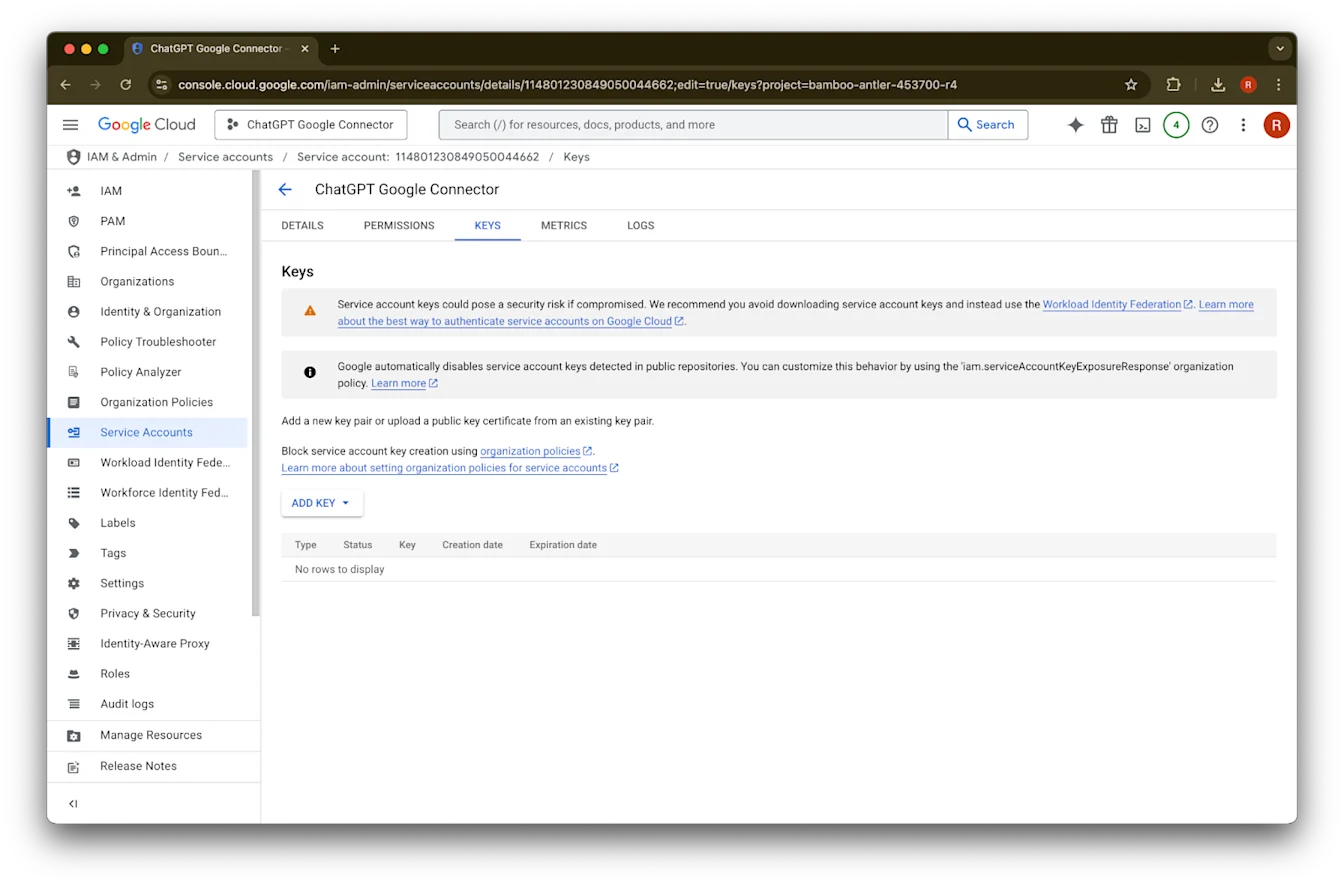
დააწკაპუნეთ keys.-ზე
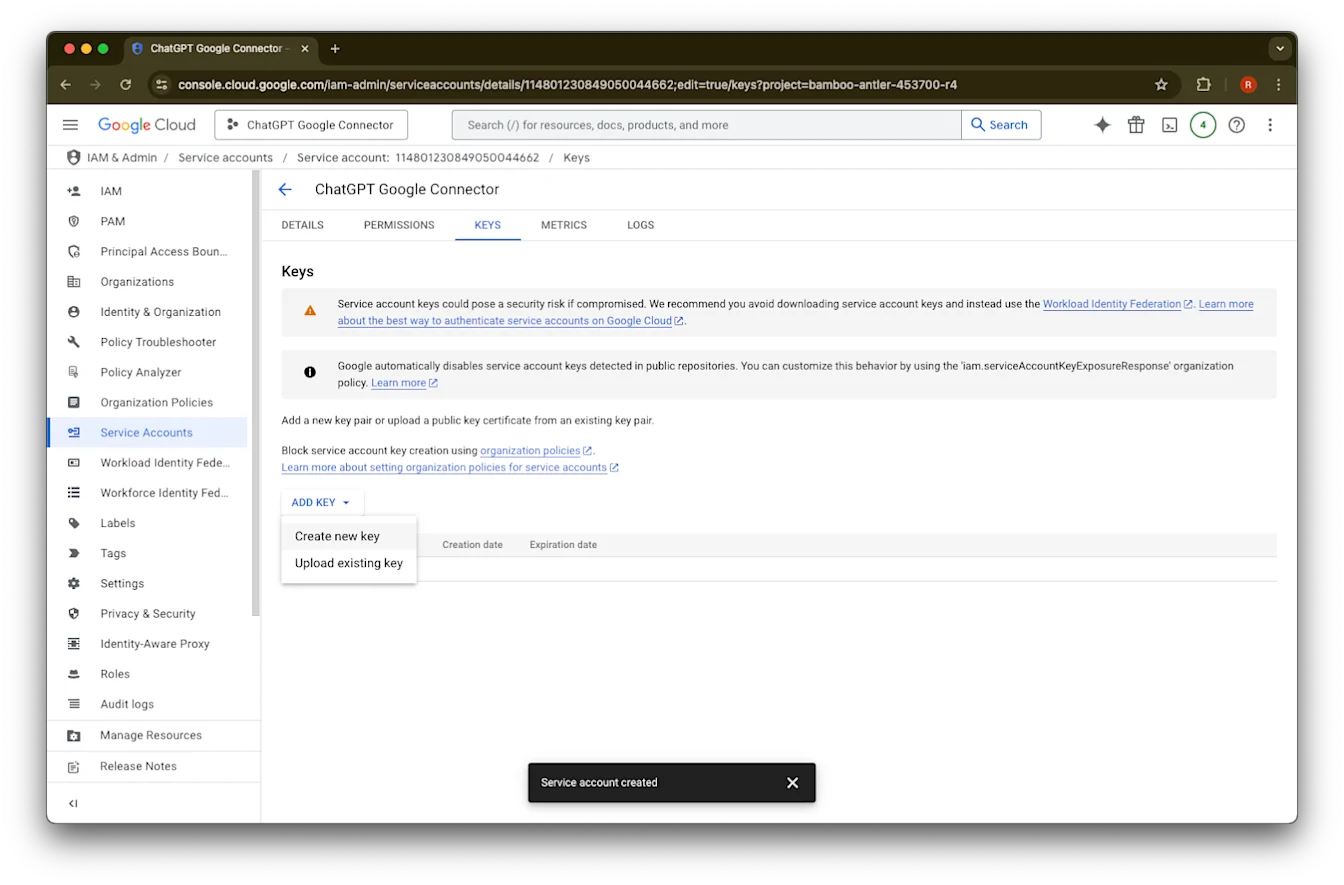
დააწკაპუნეთ Add Key-ზე
დააწკაპუნეთ Create new key-ზე
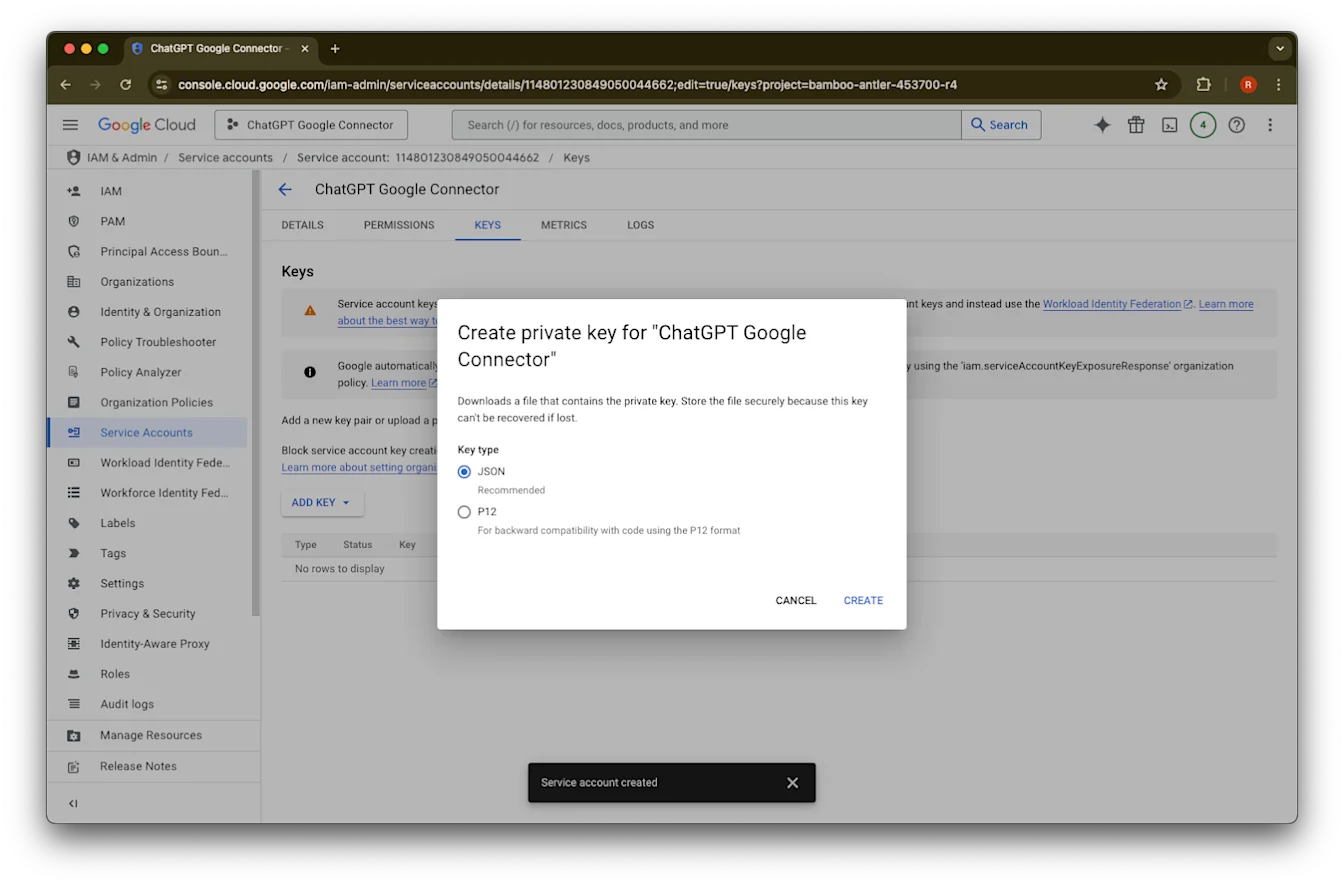
დატოვეთ ნაგულისხმევი JSON key type და დააწკაპუნეთ Create-ზე
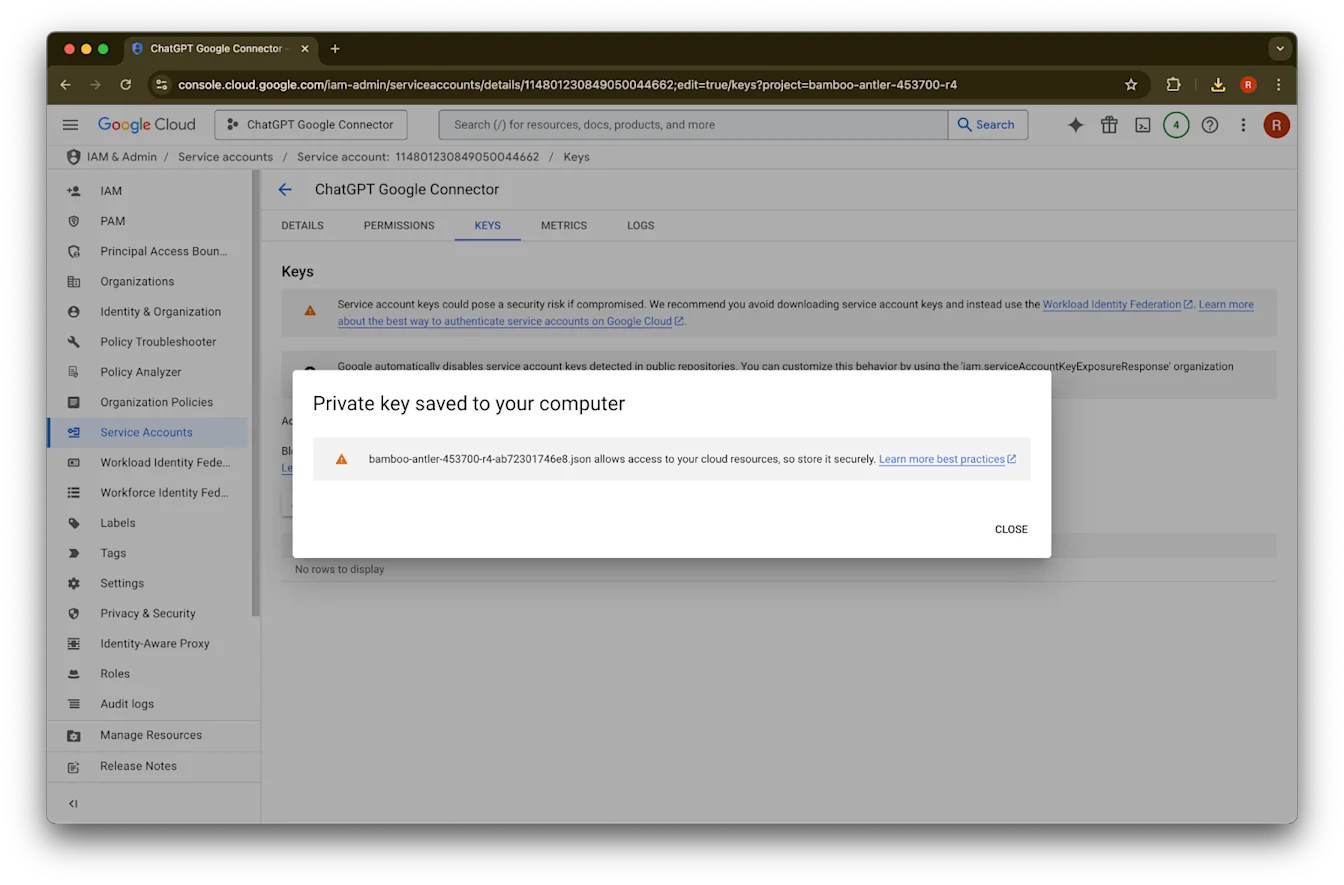
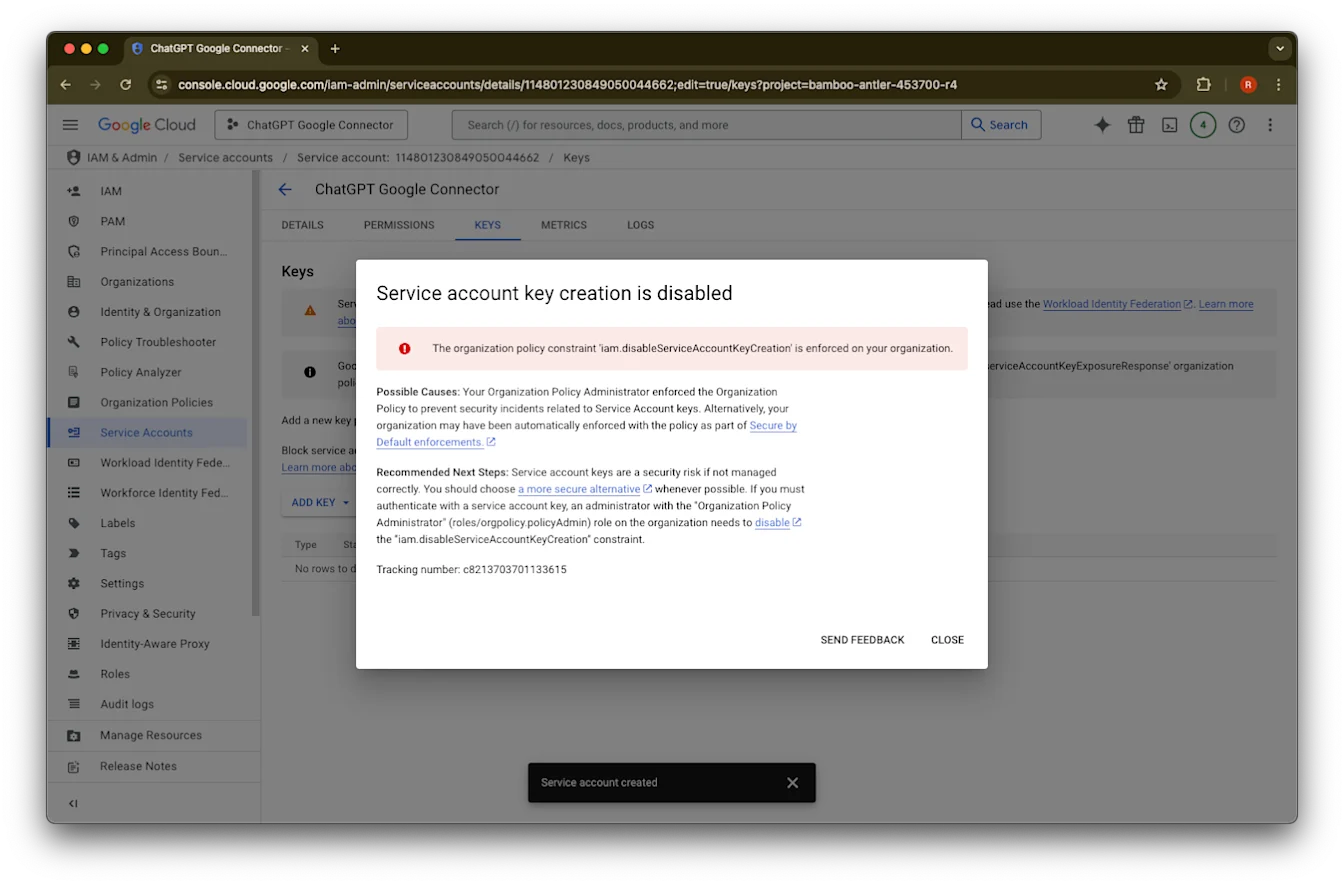
თუ ხედავთ შეცდომის შეტყობინებას, რომელშიც წერია “Service account key creation is disabled”, შექმნის გასააქტიურებლად მიჰყევით ამ ნაბიჯებს.დააწკაპუნეთ Close-ზე. გასაღები ახლა ჩამოტვირთულია თქვენს კომპიუტერში. მოგვიანებით მას ატვირთავთ ChatGPT-ის ადმინისტრატორის კონსოლში.
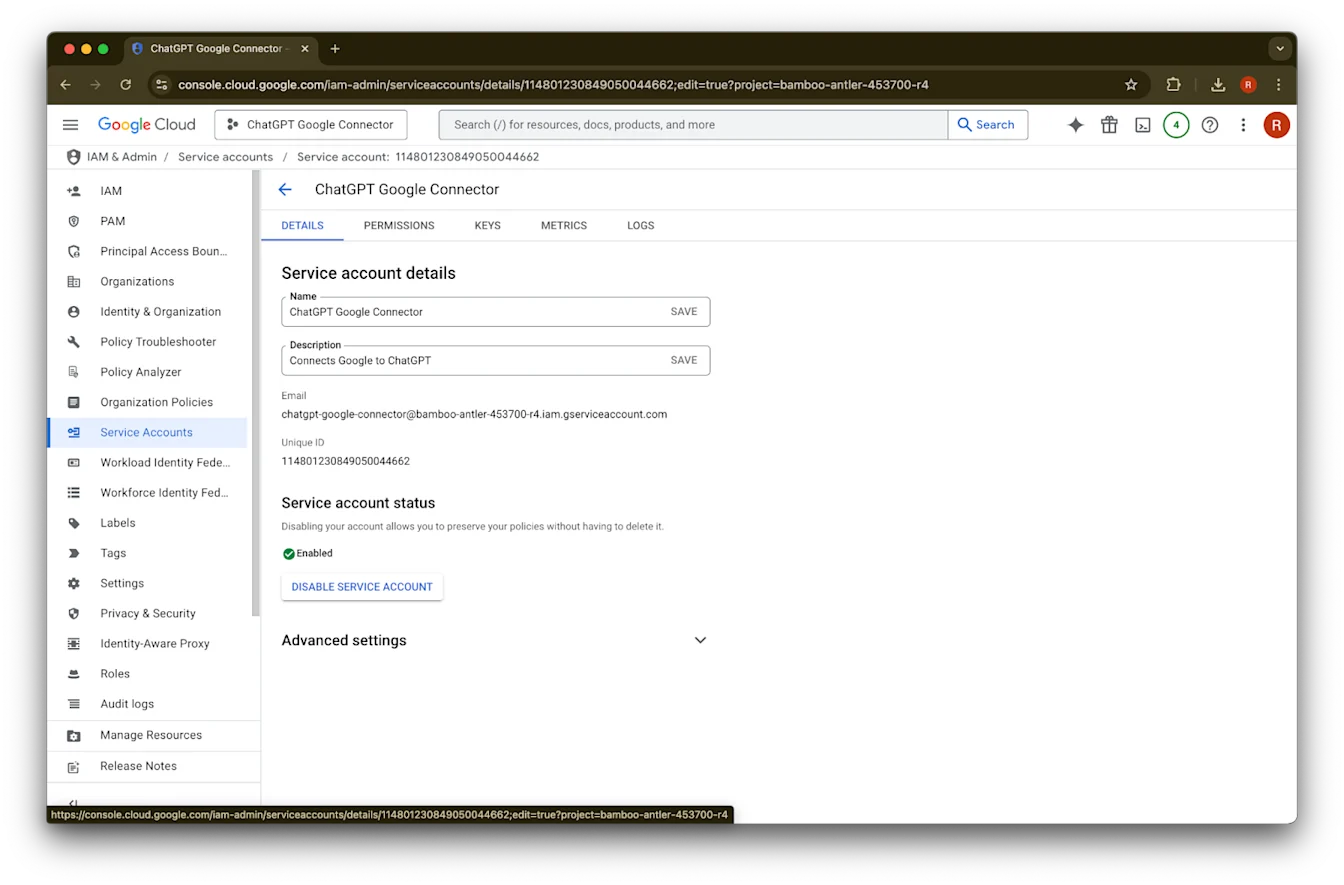
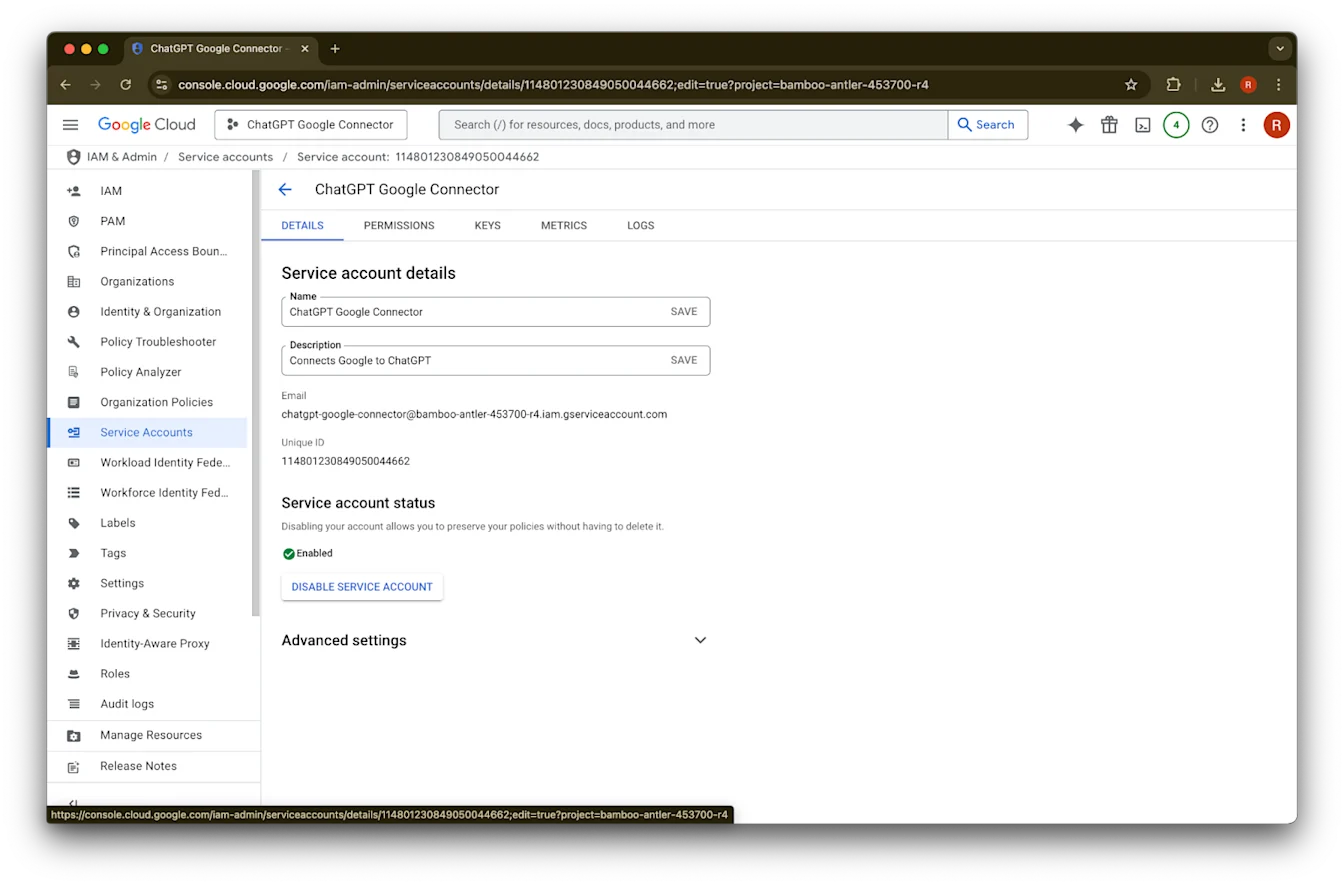
დააწკაპუნეთ details-ზე
გაითვალისწინეთ Unique ID. ეს საჭირო იქნება 42-ე ნაბიჯში.
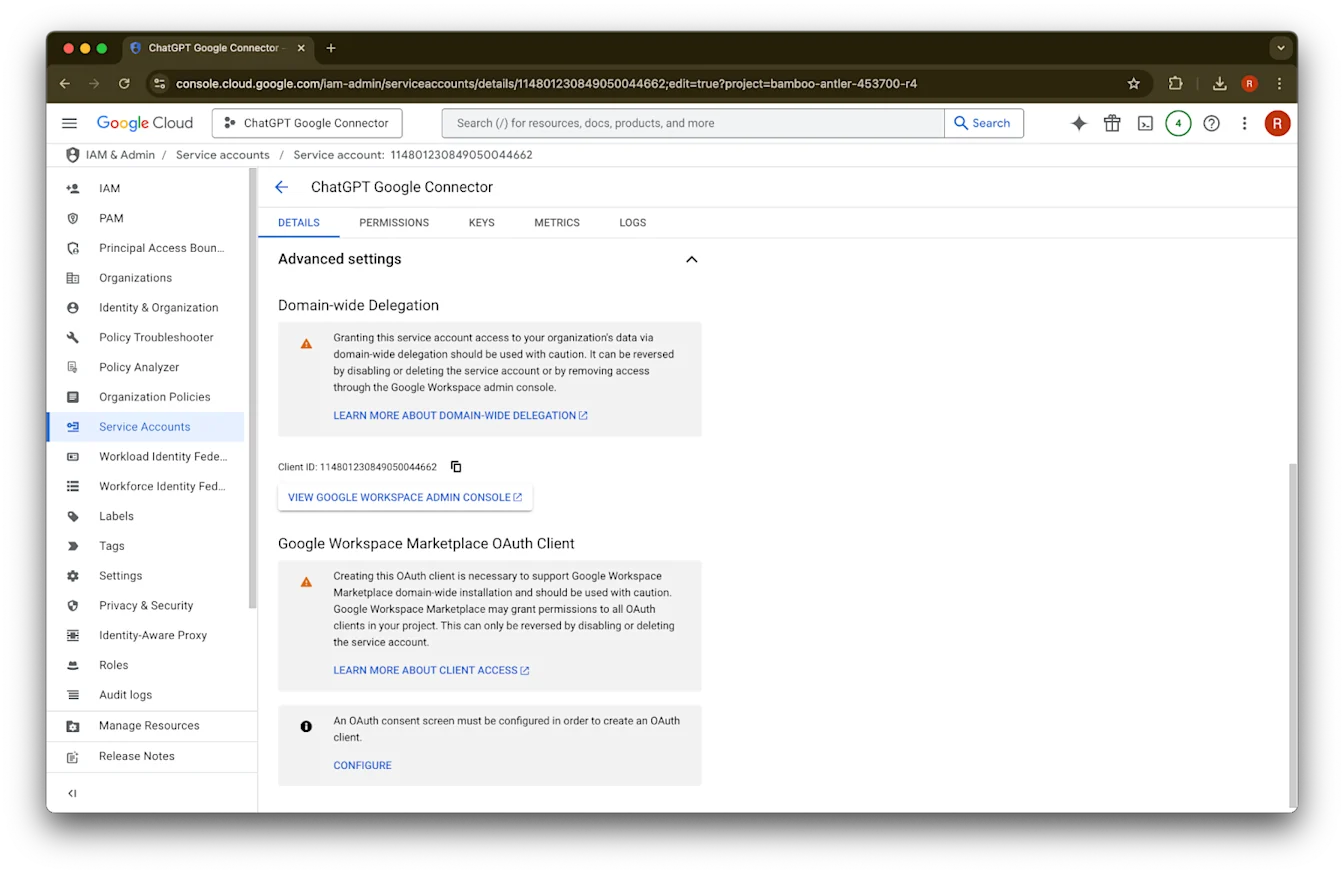
გაშალეთ Advanced settings
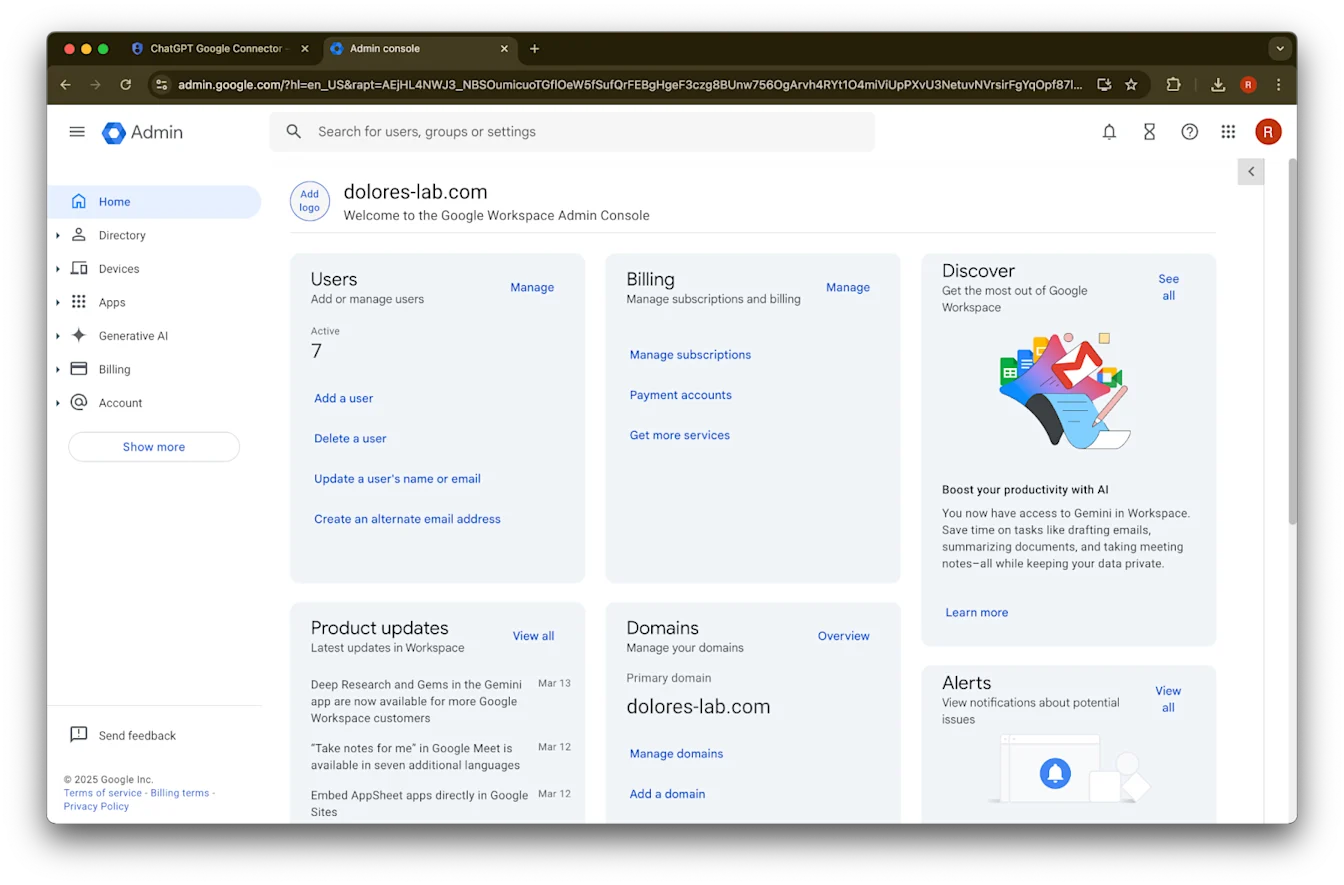
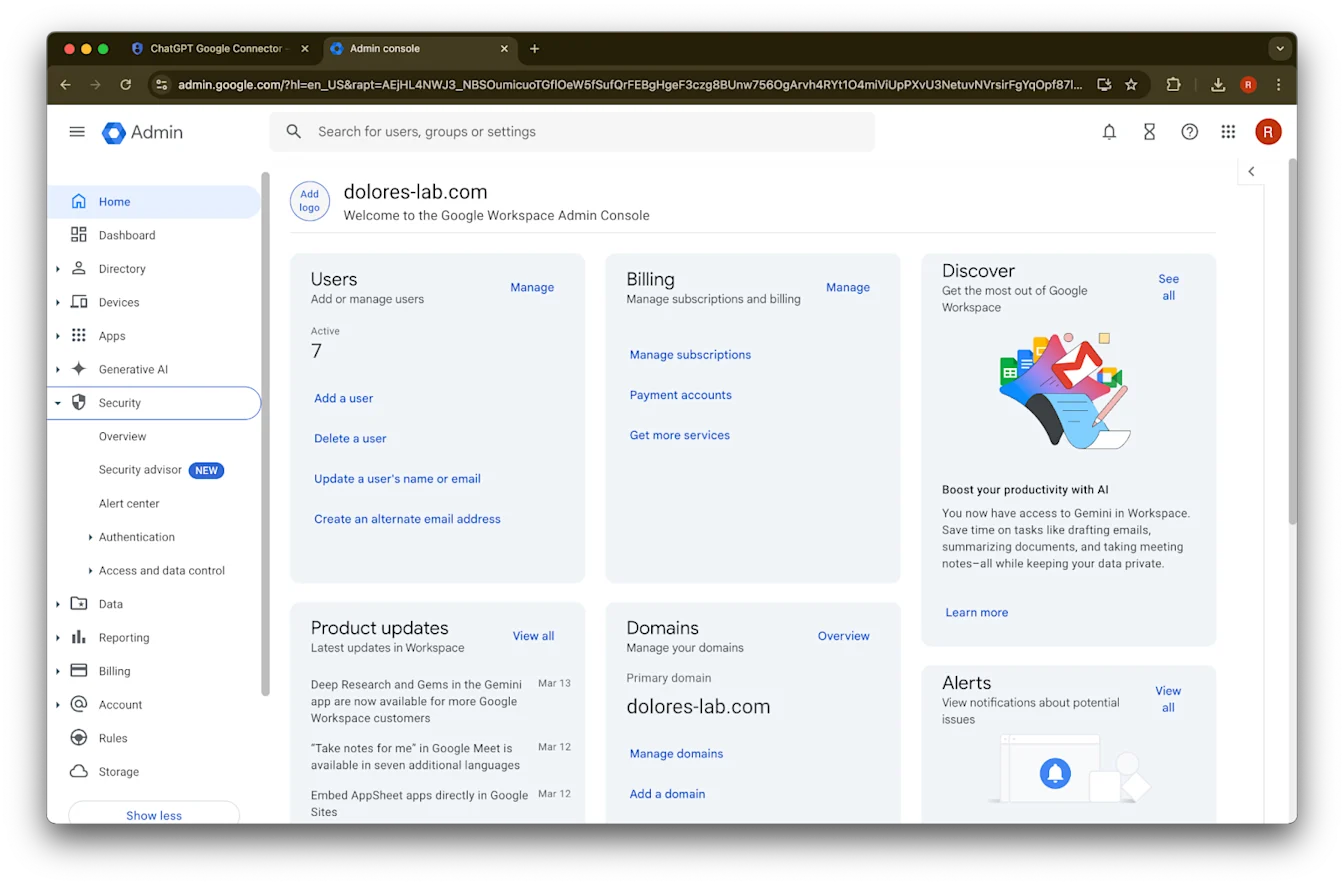
ჩამოწიეთ ქვემოთ და დააწკაპუნეთ View Google Workspace Admin Console-ზე. Google Workspace-ის კონსოლი ახალ ჩანართში გაიხსნება.
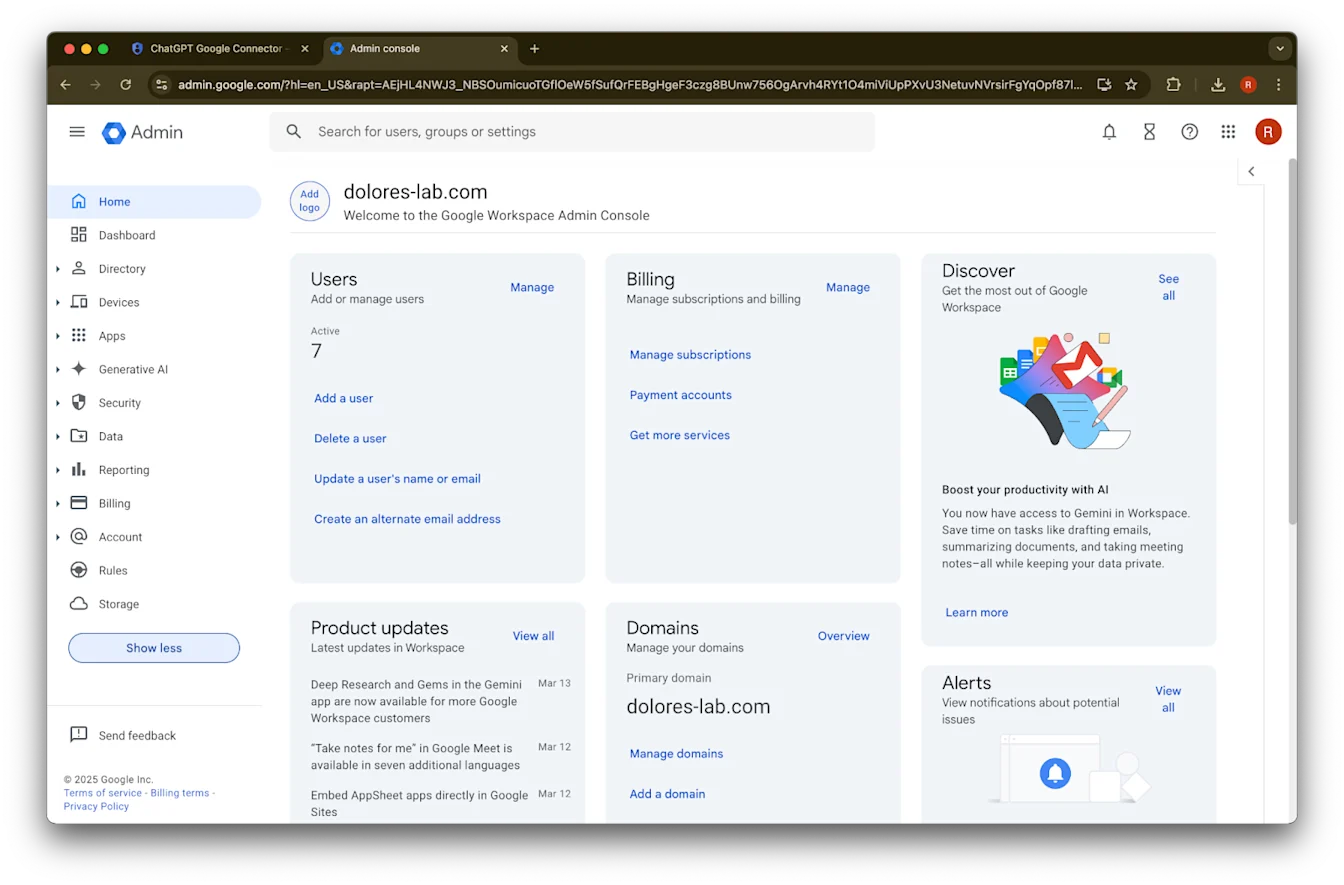
დააწკაპუნეთ Show more-ზე
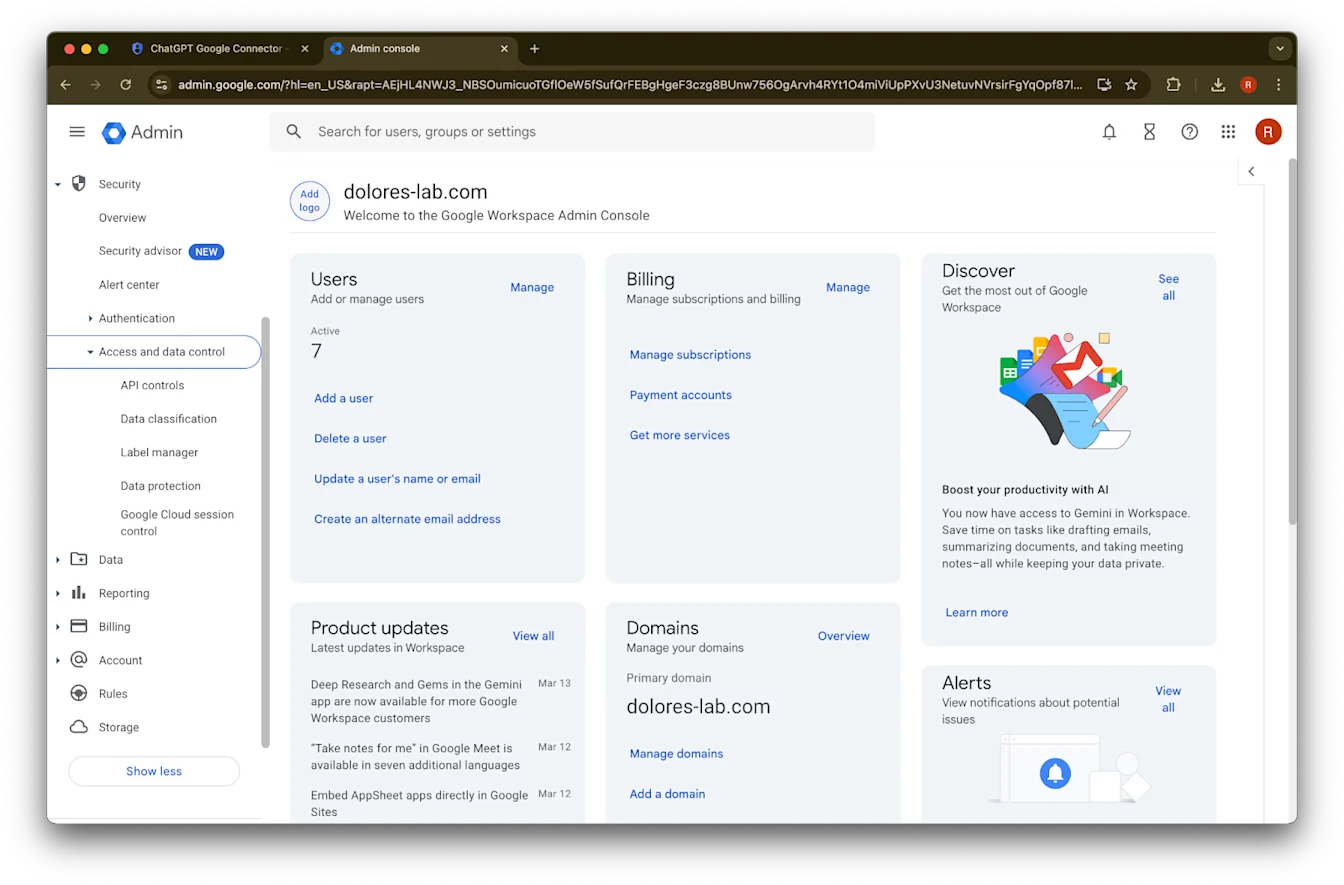
გაშალეთ Security სექცია
გაშალეთ Access and data controls სექცია
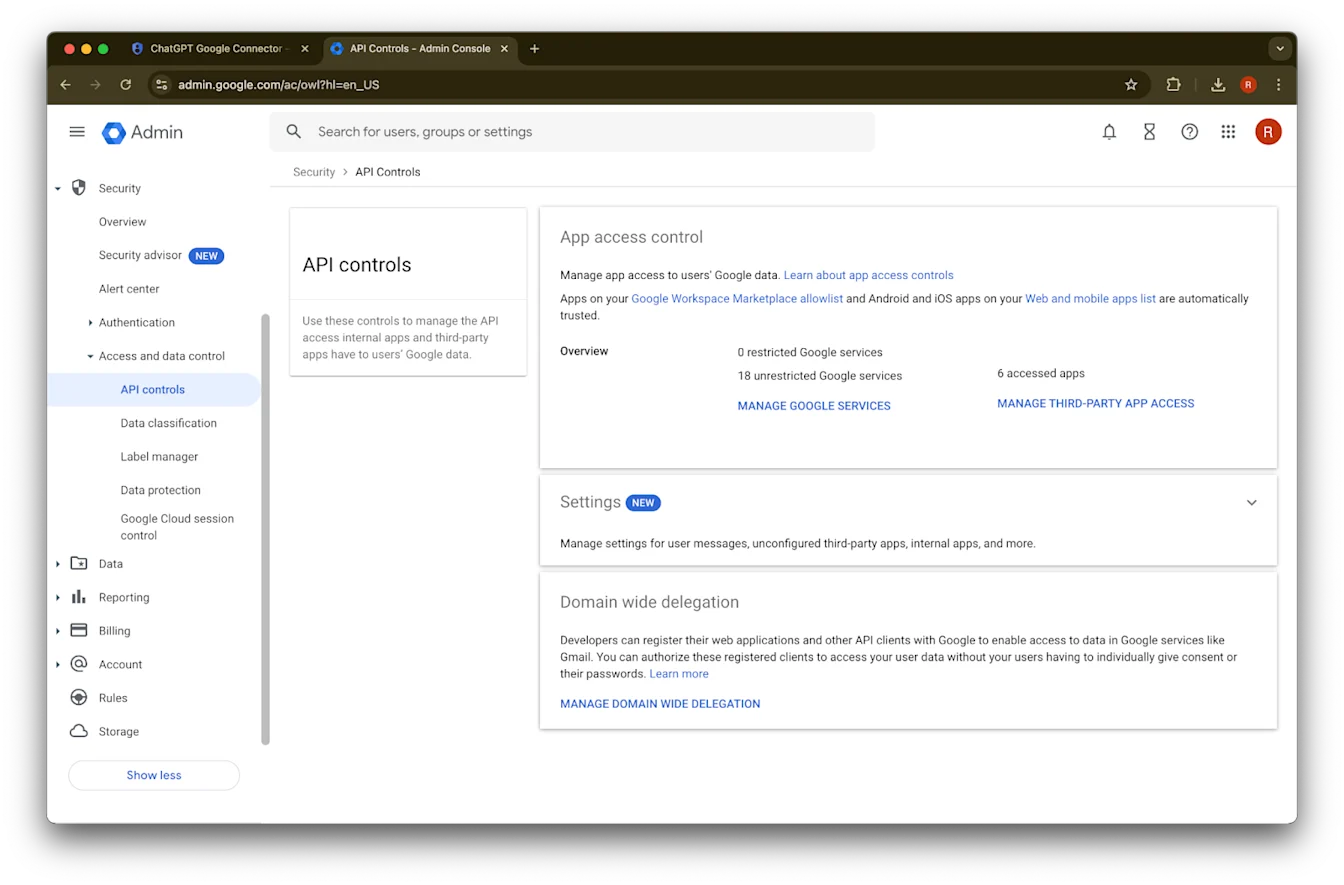
დააწკაპუნეთ API controls სექციაზე
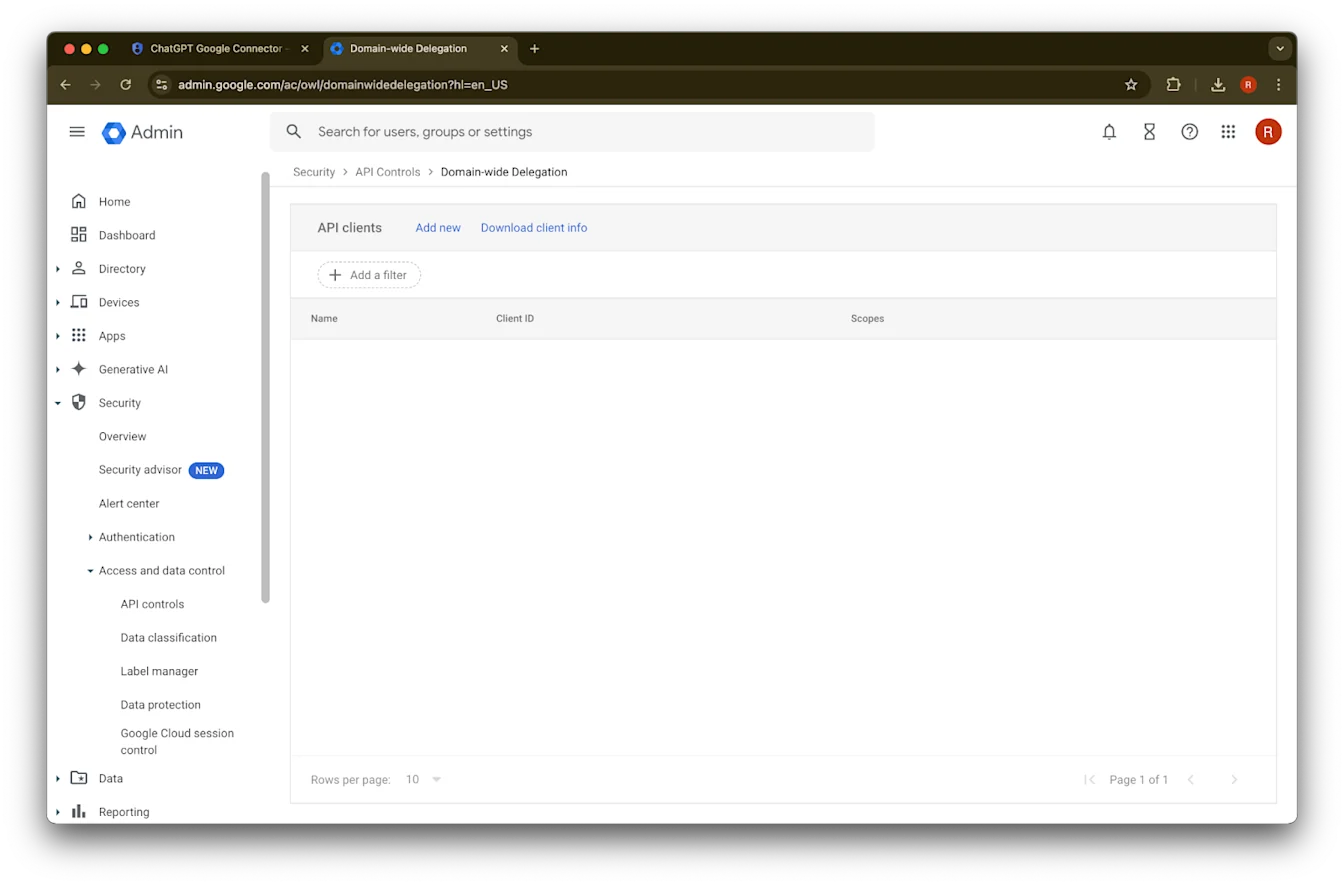
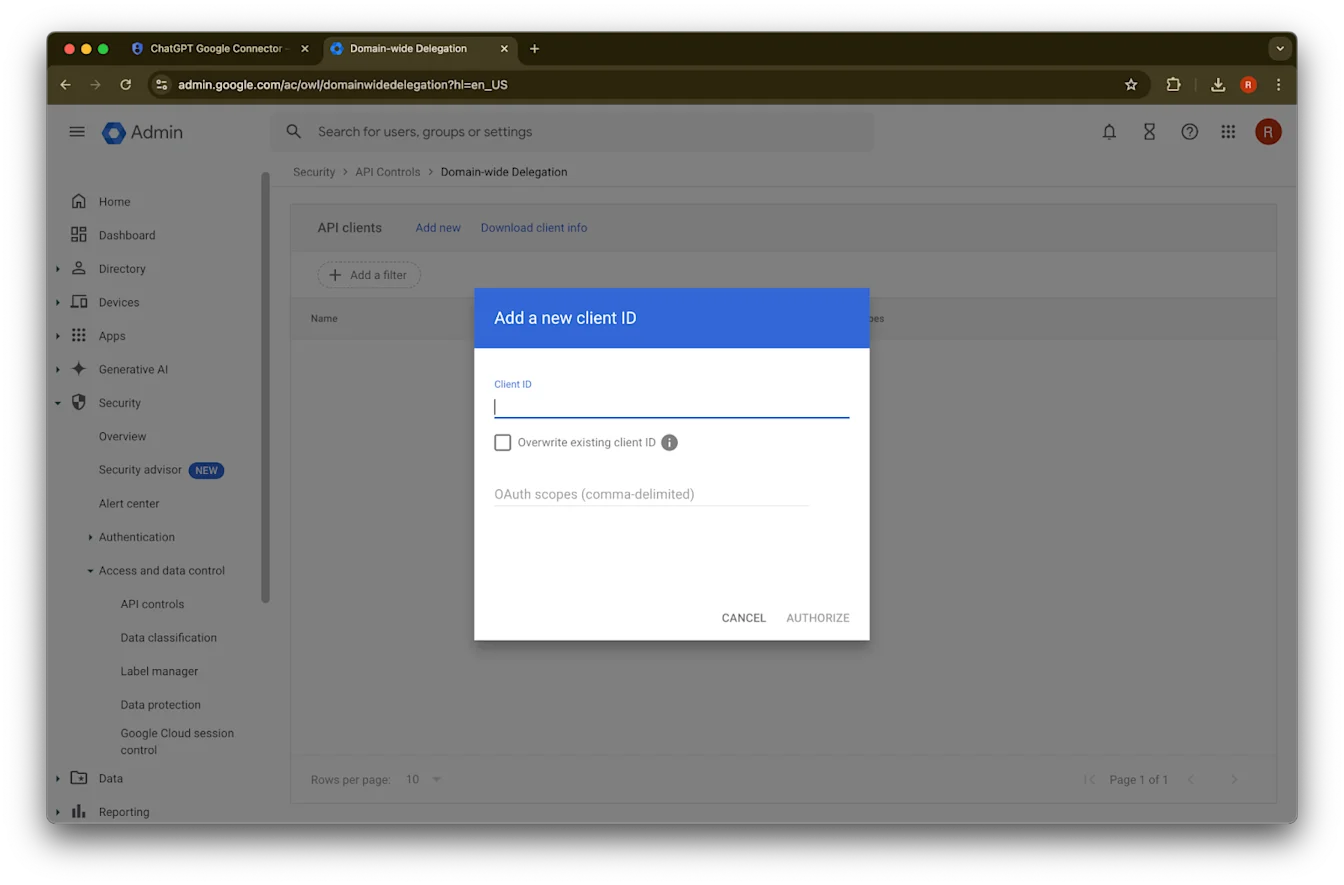
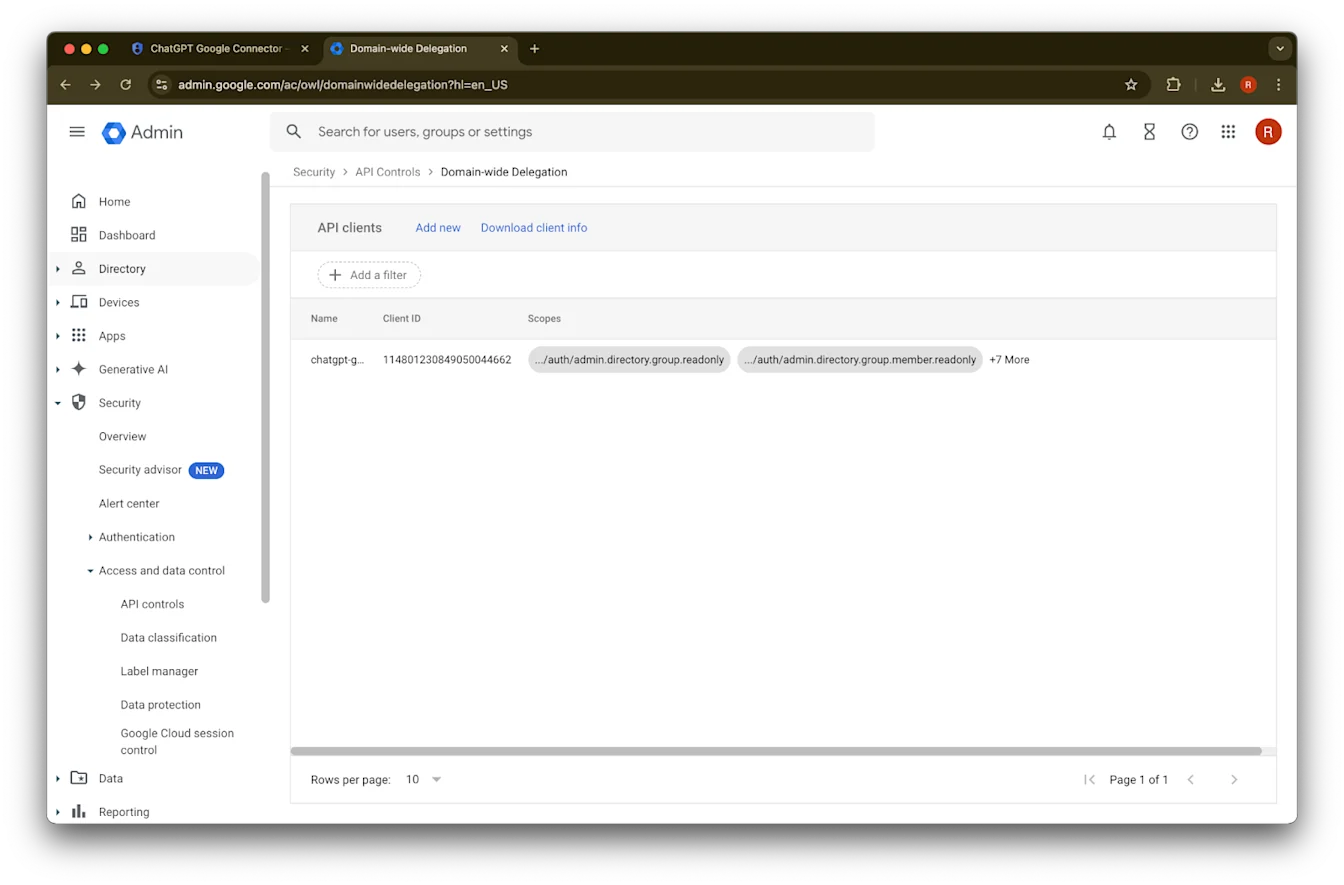
დააწკაპუნეთ Manage Domain Wide Delegation-ზე
დააწკაპუნეთ Add new-ზე
ამ Client ID-ის მნიშვნელობად გამოიყენეთ ადრე შენახული Unique ID
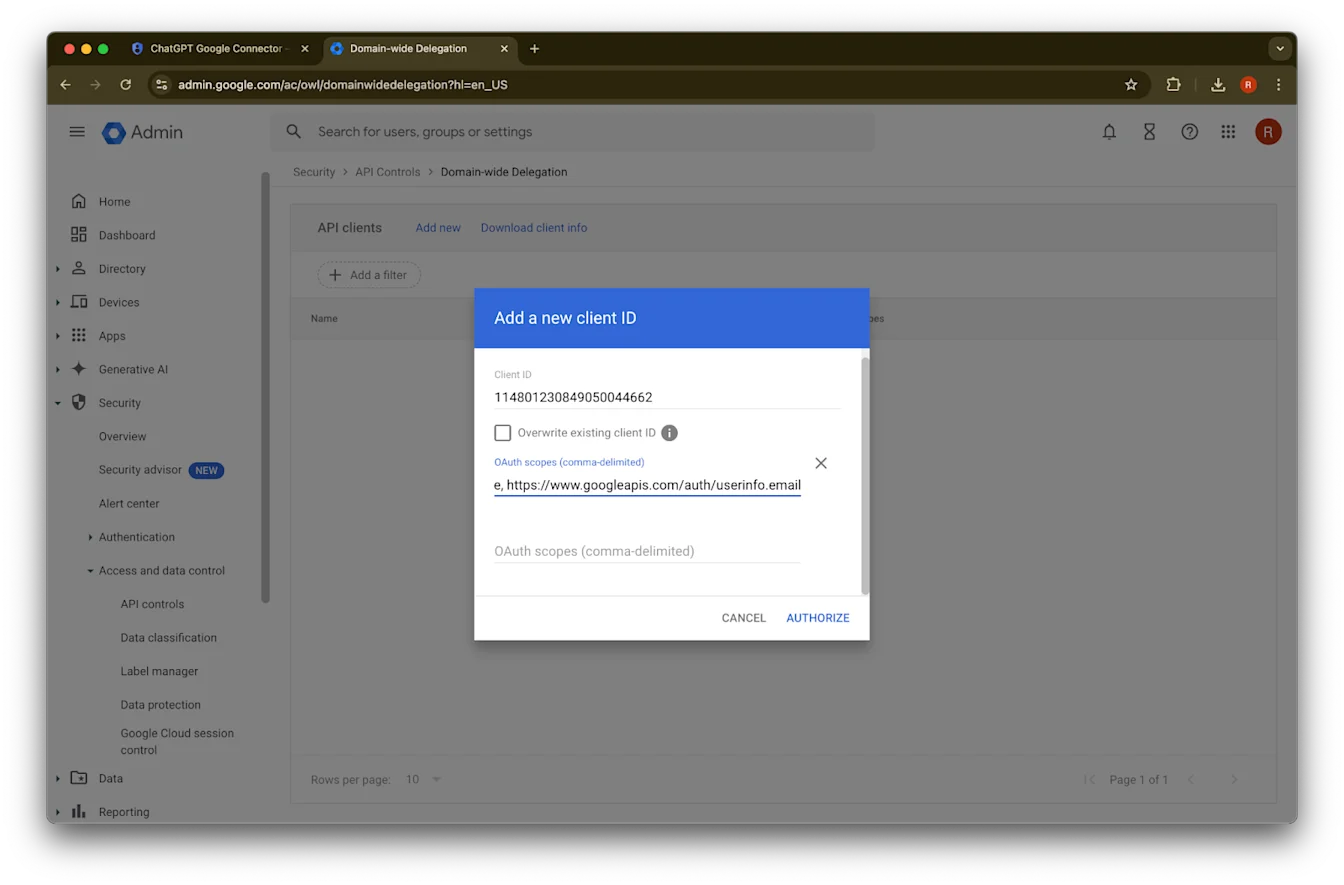
OAuth scopes-ისთვის იხილეთ ქვემოთ მოცემული მძიმით გამოყოფილი auth scope-ების მნიშვნელობები, რომლებიც უნდა დააკოპიროთ და ჩასვათ:
https://www.googleapis.com/auth/admin.directory.group.readonly, https://www.googleapis.com/auth/admin.directory.group.member.readonly, https://www.googleapis.com/auth/admin.directory.user.readonly, https://www.googleapis.com/auth/admin.directory.user.alias.readonly, https://www.googleapis.com/auth/drive.activity.readonly, https://www.googleapis.com/auth/drive.metadata.readonly, https://www.googleapis.com/auth/drive.readonly, https://www.googleapis.com/auth/userinfo.profile, https://www.googleapis.com/auth/userinfo.email| Scope | მსჯელობა |
| admin.directory.group.readonly | ჯგუფებზე დაფუძნებული ნებართვების იძულებით გამოყენება |
| admin.directory.group.member.readonly | ჯგუფებზე დაფუძნებული ნებართვების იძულებით გამოყენება |
| admin.directory.user.alias.readonly | იმ შემთხვევების დამუშავება, როცა მომხმარებელს ნებართვა alias-ის მეშვეობით ენიჭება |
| drive.activity.readonly | ფაილებში ცვლილებების შესახებ შეტყობინებების მისაღებად |
| drive.metadata.readonly | ფაილის შიგთავსისა და მასთან დაკავშირებული მეტამონაცემების სინქრონიზაციისთვის (მაგ., ბოლო ცვლილების თარიღი) |
| drive.readonly | ფაილის შიგთავსისა და მასთან დაკავშირებული მეტამონაცემების სინქრონიზაციისთვის (მაგ., ბოლო ცვლილების თარიღი) |
| userinfo.profile | იმ მომხმარებლების დასადგენად, ვისთვისაც ფაილებს ვასინქრონებთ |
| userinfo.email | იმ მომხმარებლების დასადგენად, ვისთვისაც ფაილებს ვასინქრონებთ |
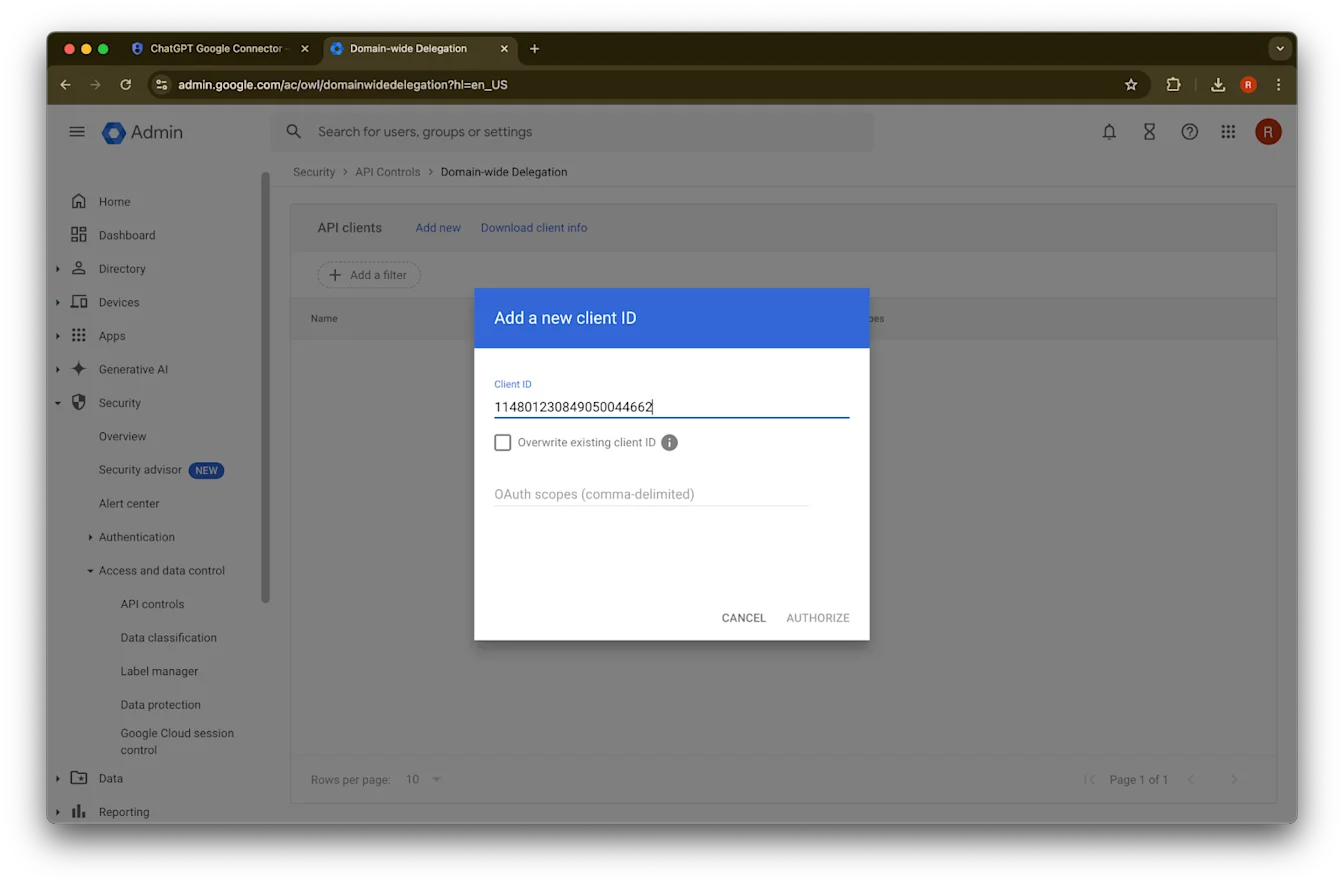
45. დააწკაპუნეთ Authorize-ზე
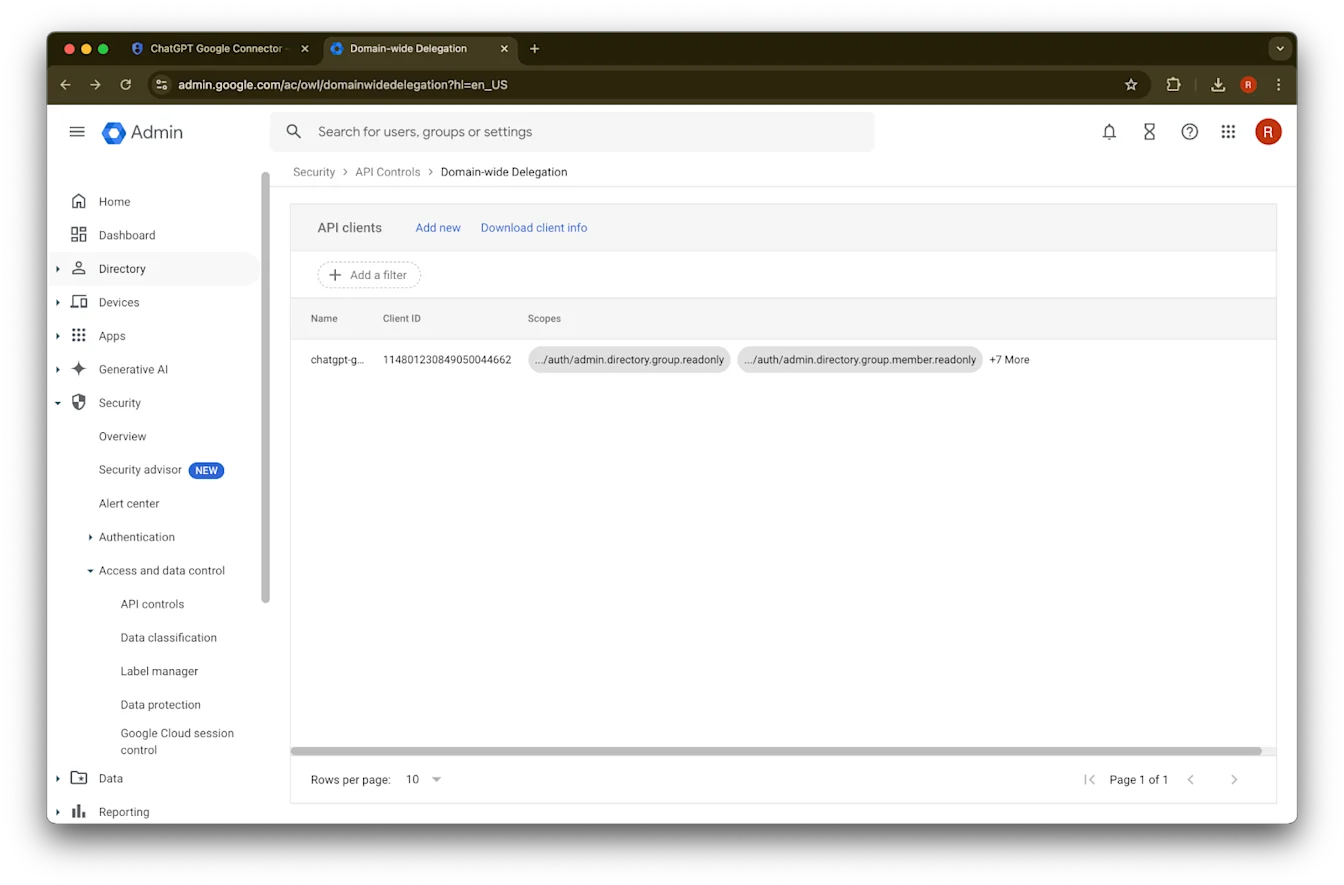
46. წარმატება!
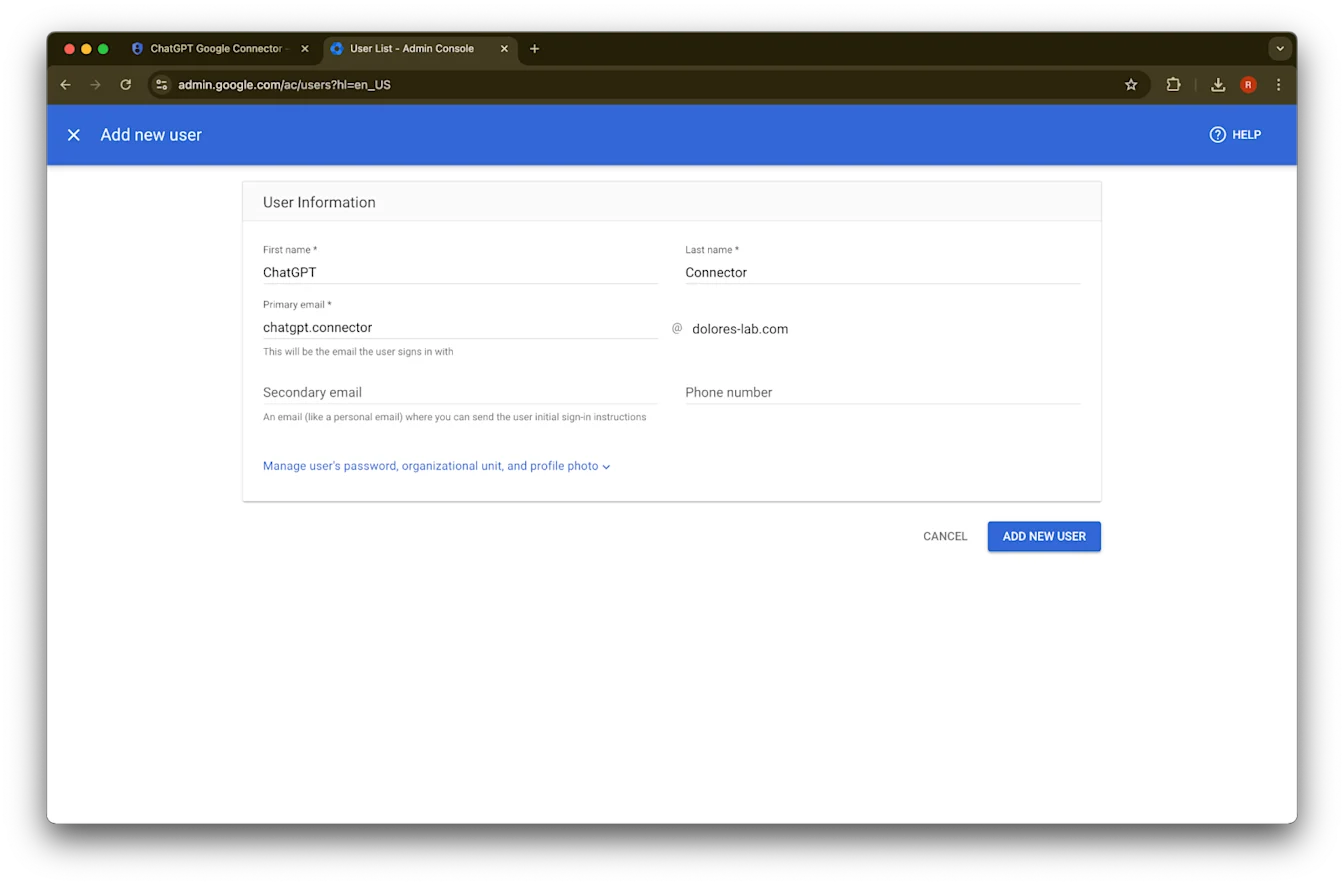
ადმინისტრატორის ანგარიშის დაყენება
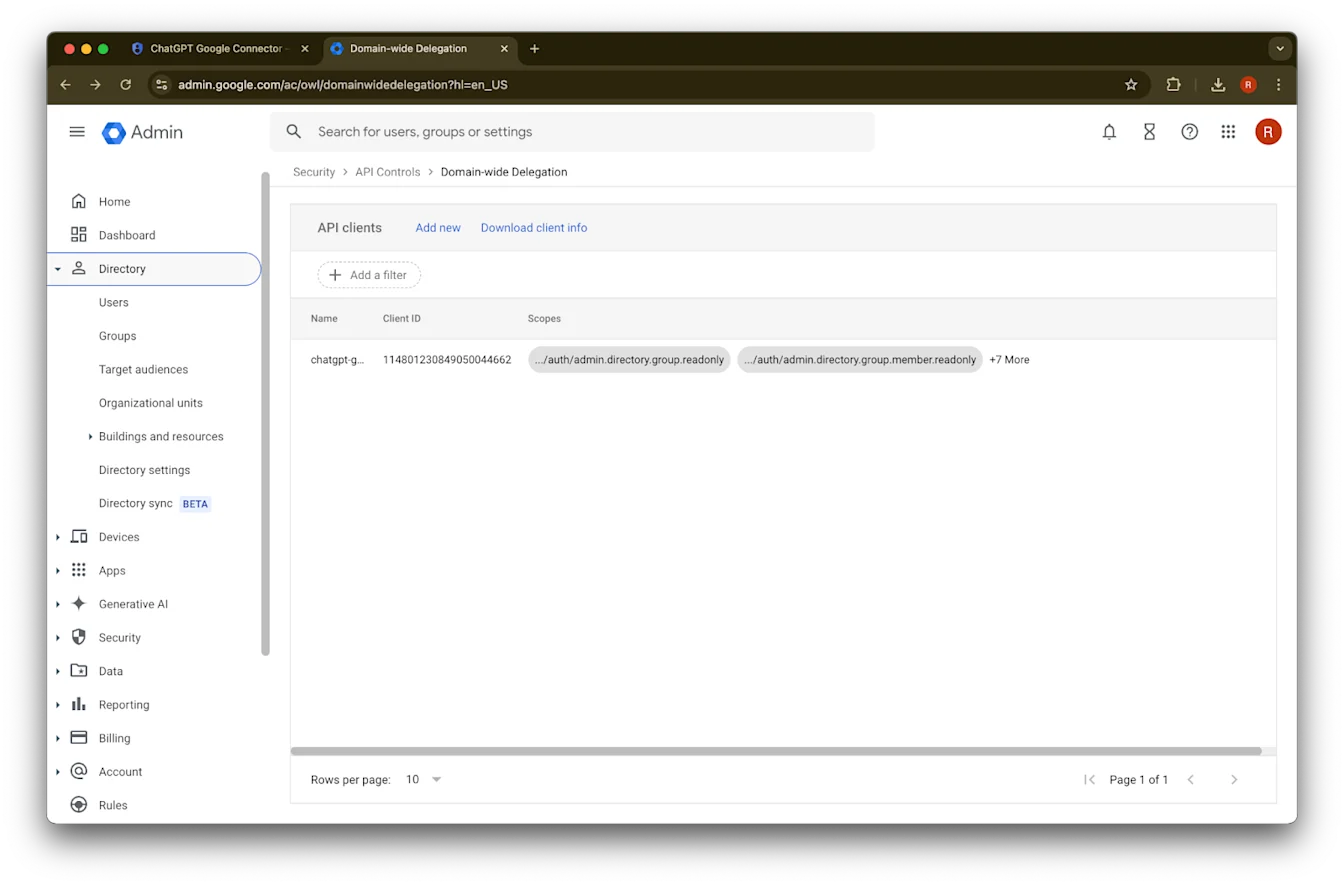
გაშალეთ Directory
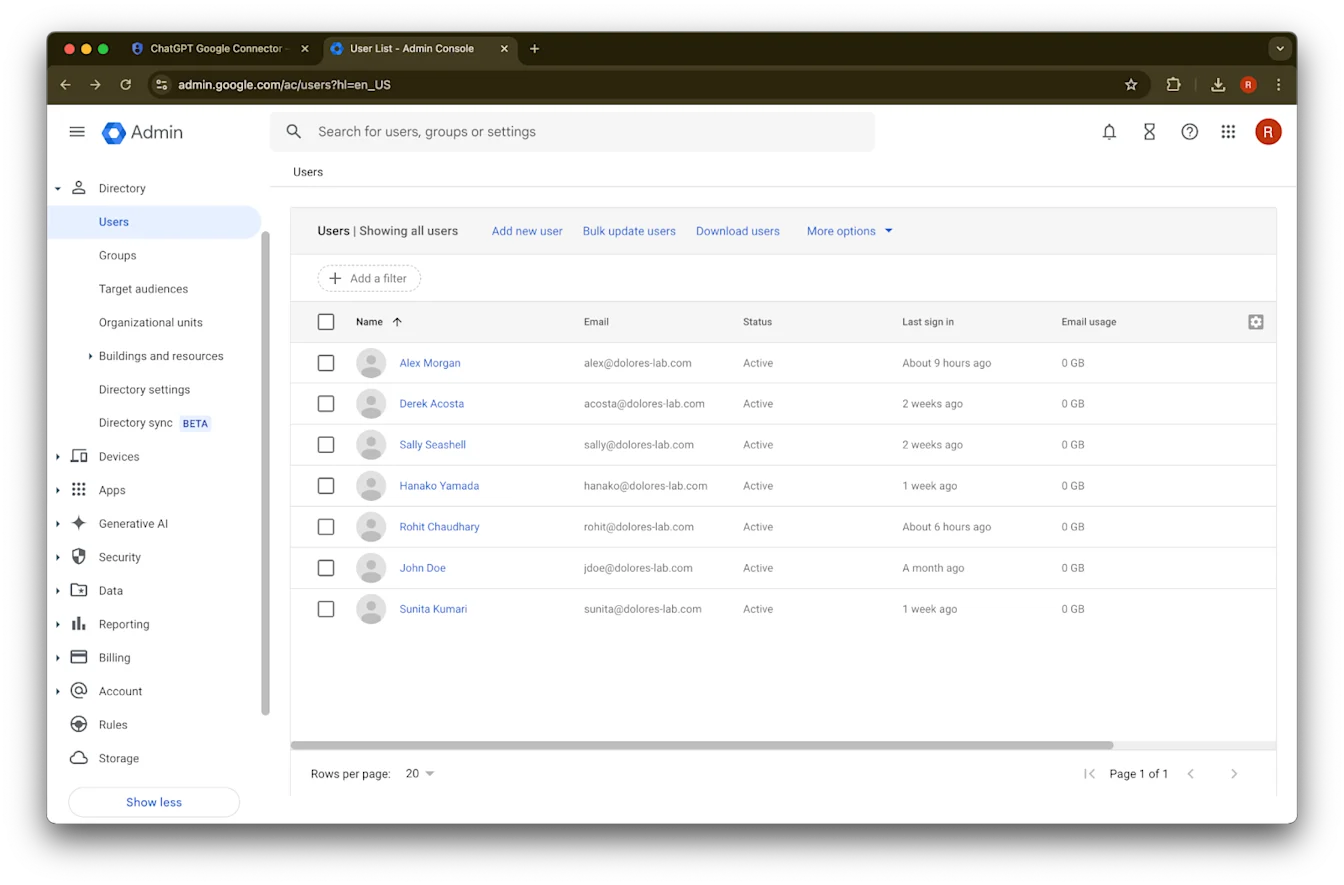
დააწკაპუნეთ Users-ზე
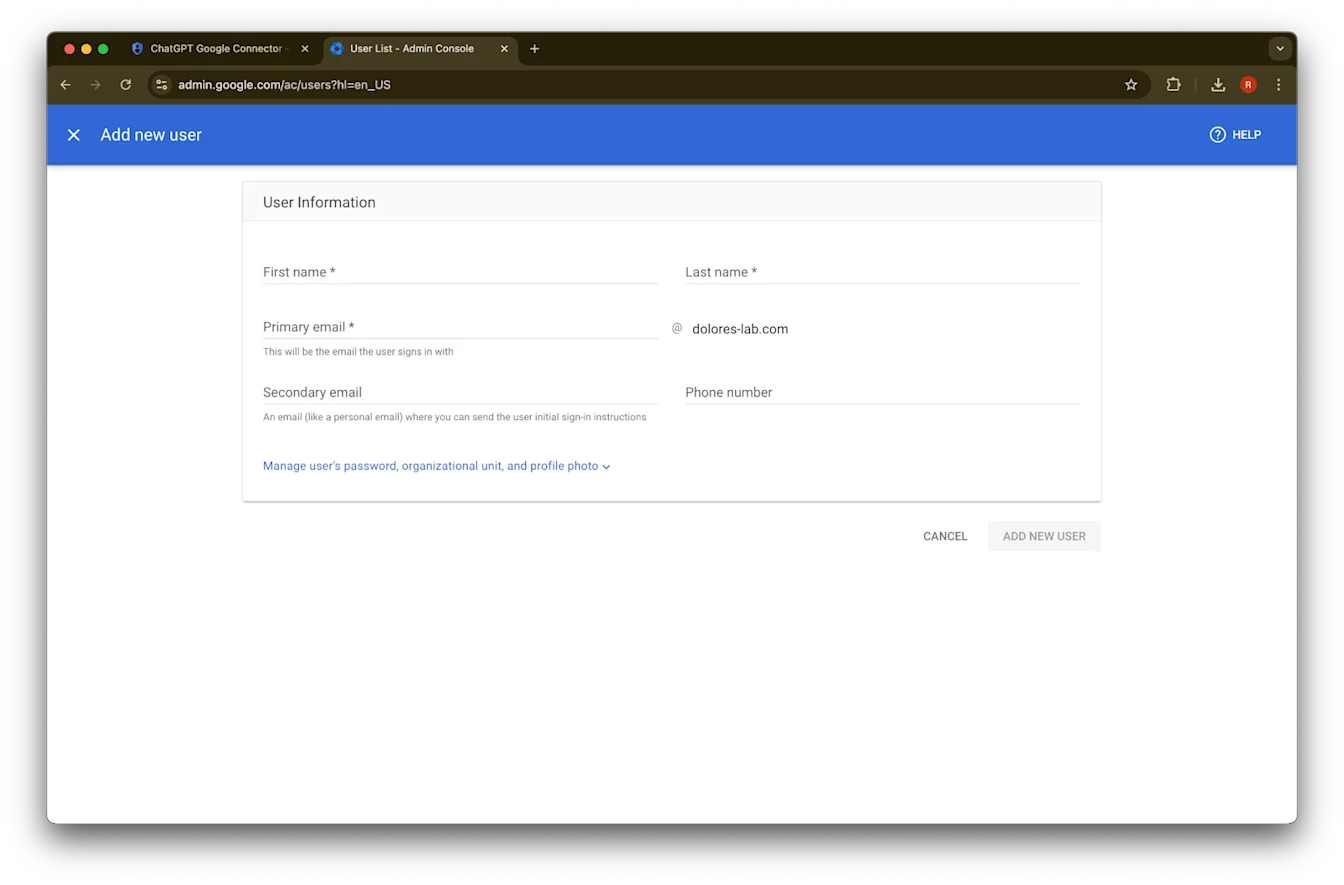
მიუთითეთ თქვენი არჩევანის first name, last name და primary email address
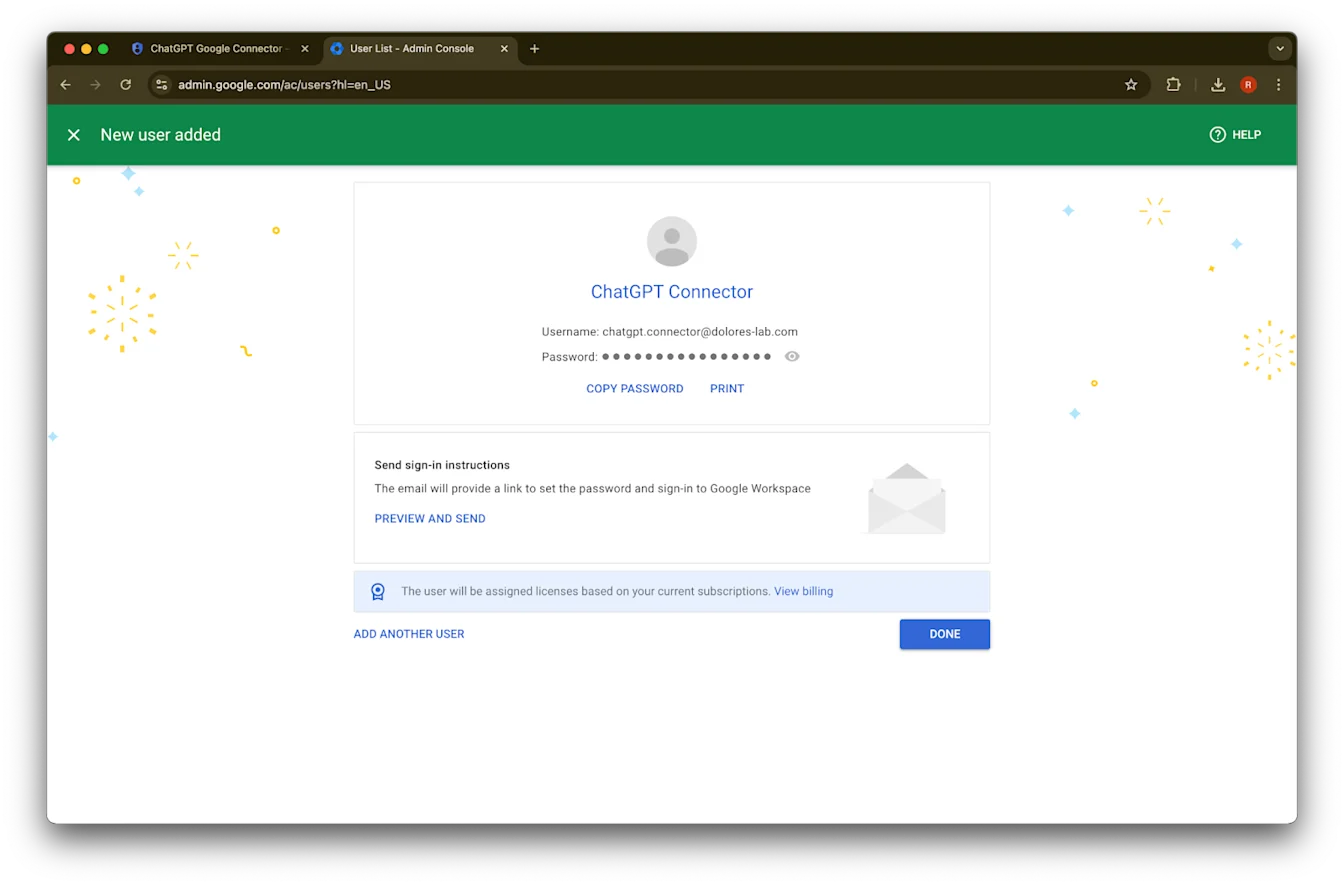
დააწკაპუნეთ Add new user
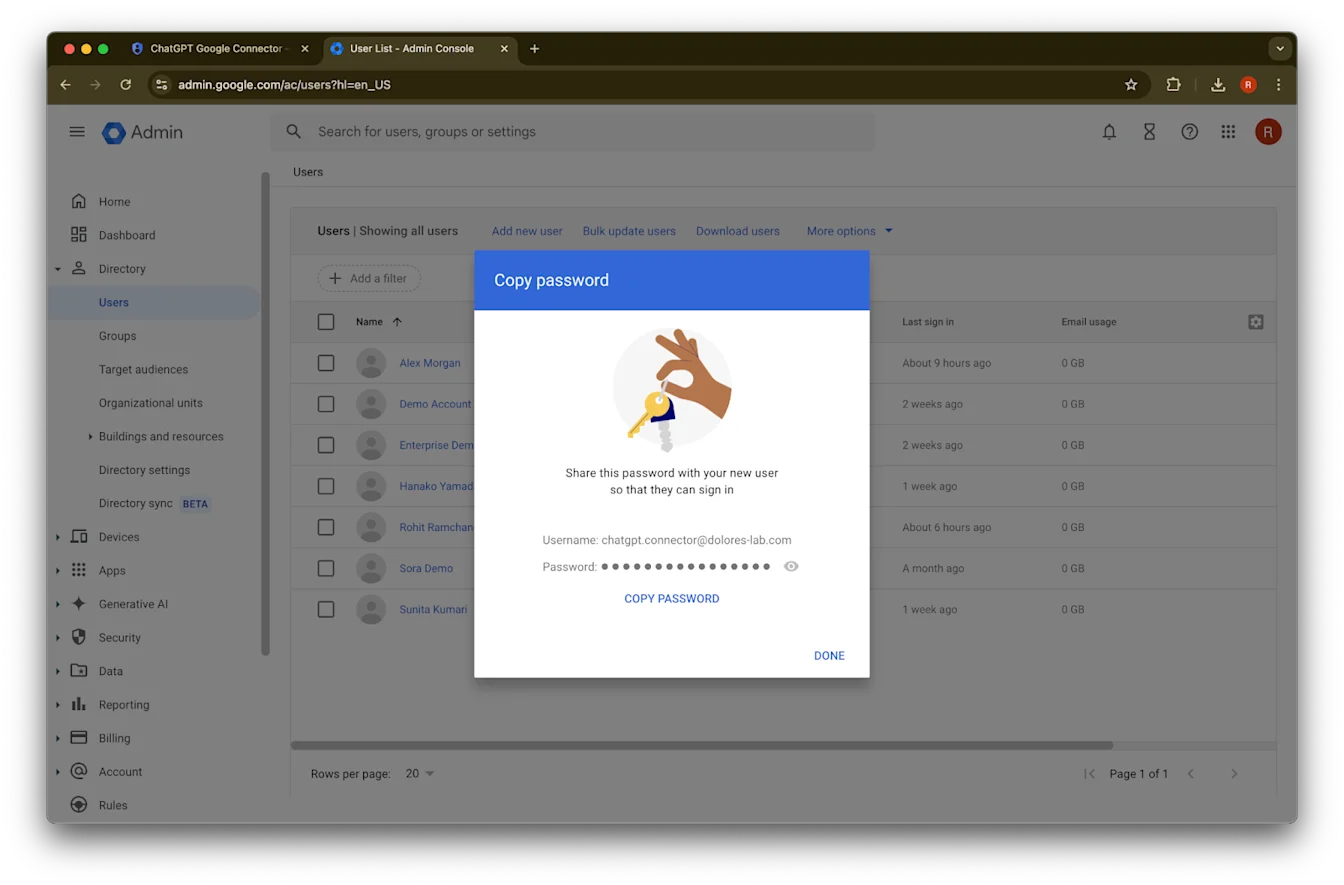
(არასავალდებულო) შეინახეთ ეს სერთიფიკატები. ChatGPT-ს ეს სერთიფიკატები არ სჭირდება.
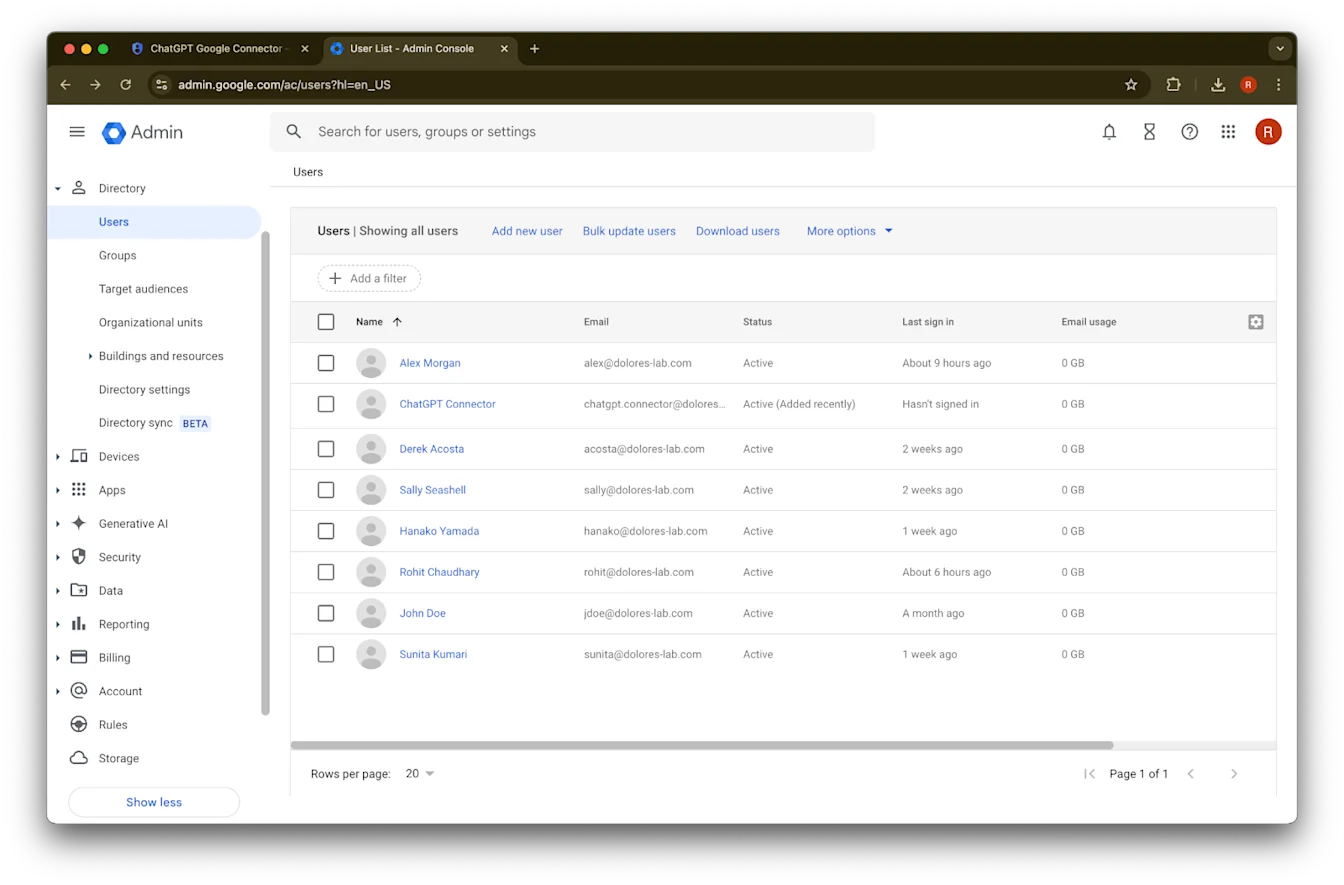
დააწკაპუნეთ Done-ზე.
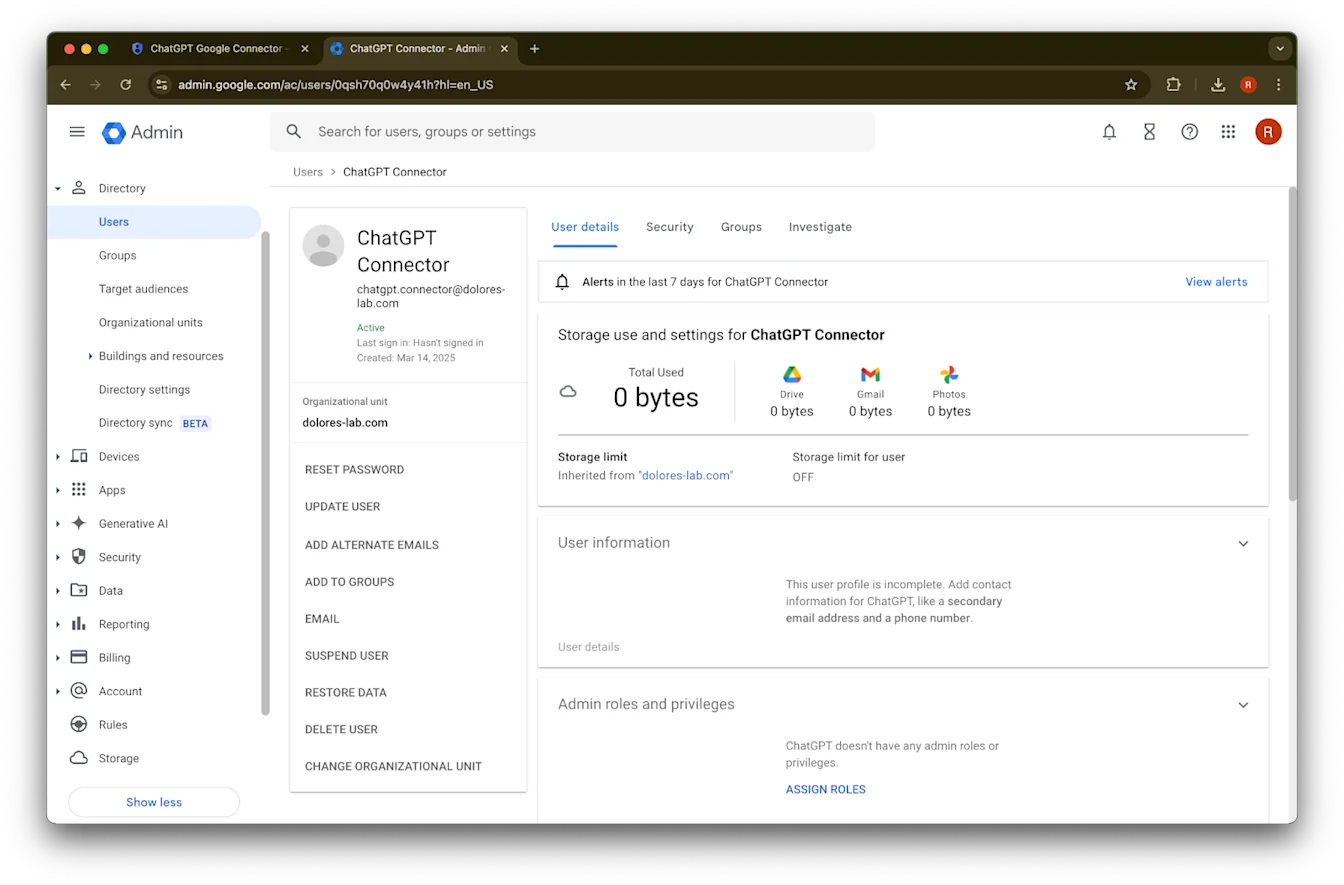
დააწკაპუნეთ ახლახან შექმნილ account-ზე. თუ ის სიაში არ ჩანს, განაახლეთ გვერდი ან გაასუფთავეთ ქეში და ქუქიები და სცადეთ ისევ.
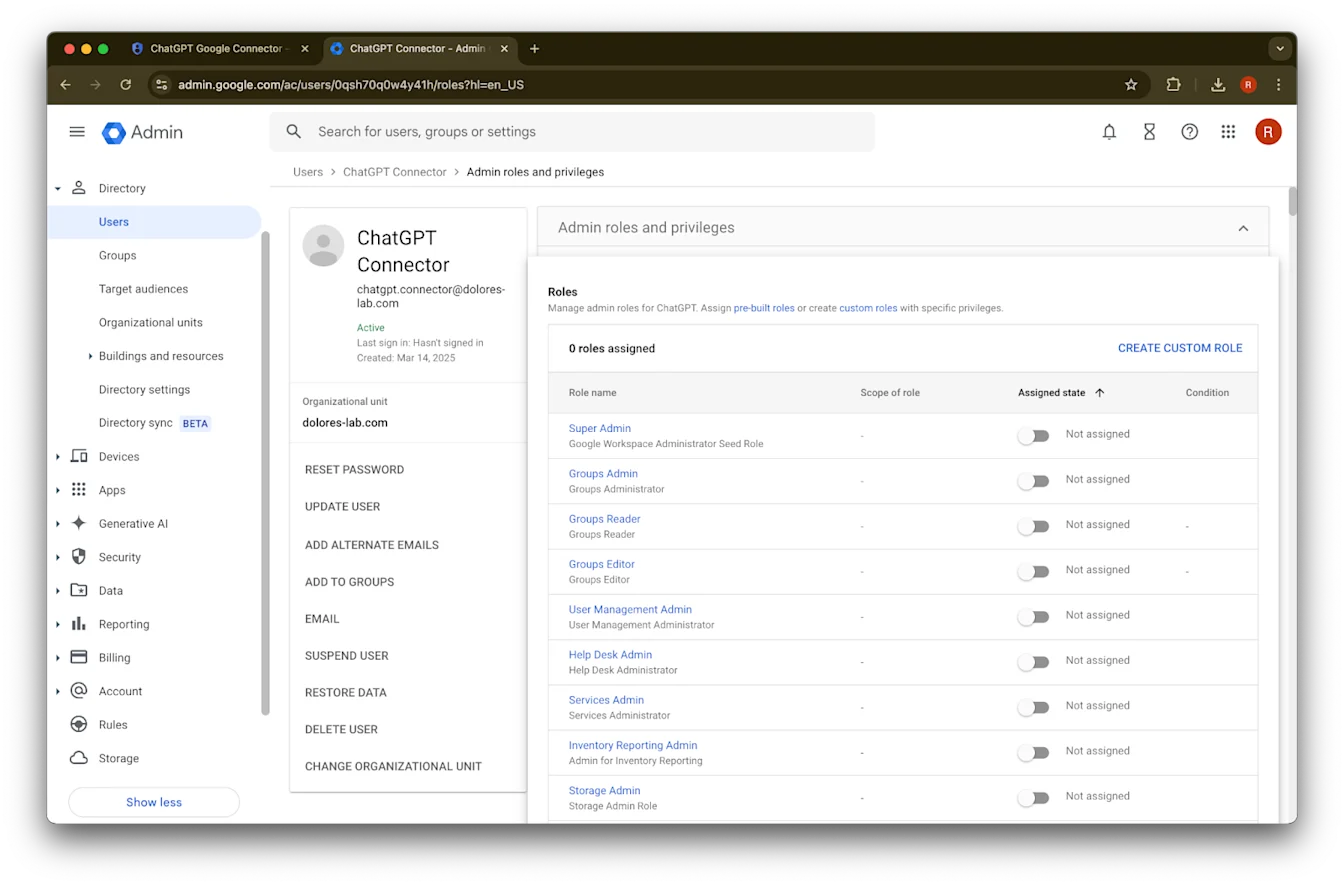
დააწკაპუნეთ assign roles-ზე.
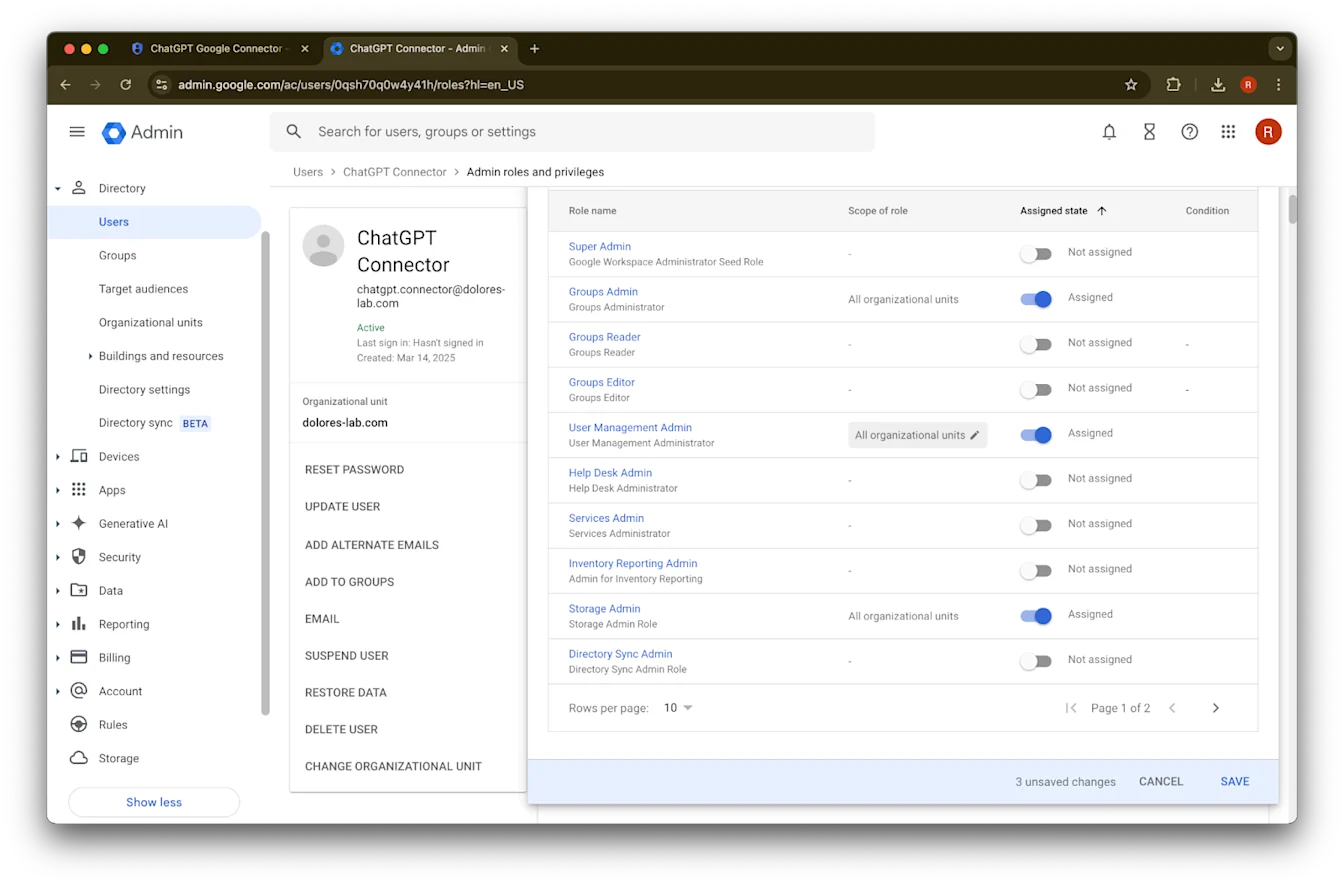
ჩართეთ Groups Reader, User Management Admin, და Storage Admin როლები.
ჩამოწიეთ ქვემოთ და დააწკაპუნეთ Save.-ზე. ადმინისტრატორის ანგარიში ახლა წარმატებით შეიქმნა და დაკონფიგურირდა.
დაყენების დასრულება ChatGPT-ის ადმინისტრატორის კონსოლში
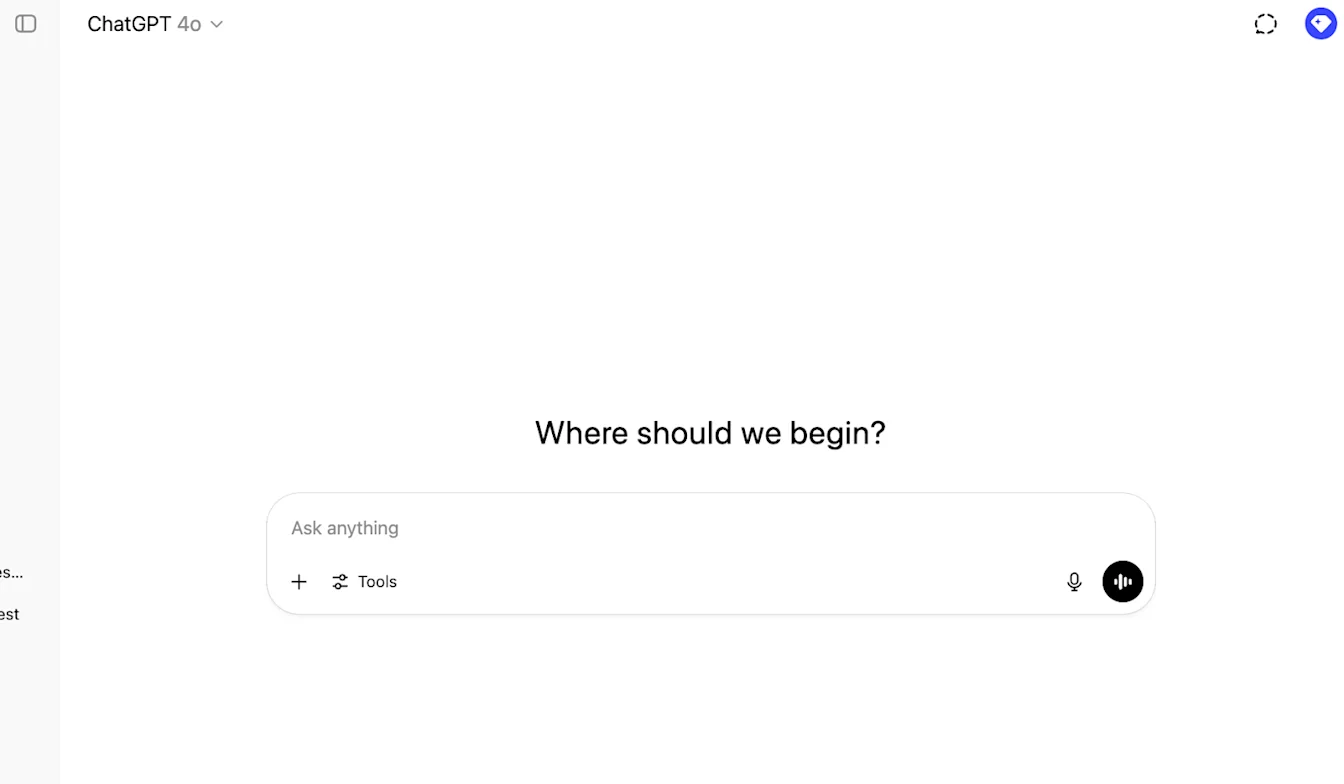
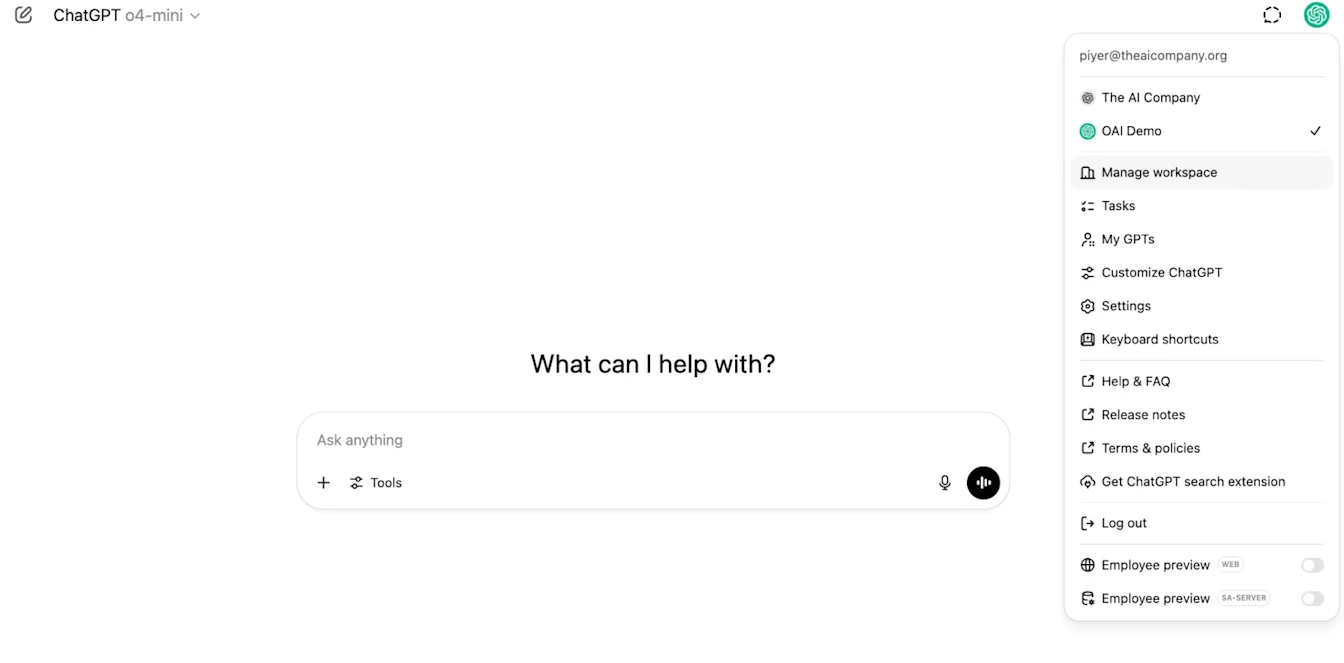
გადადით ChatGPT-ში და გვერდის ზედა მარჯვენა კუთხეში დააწკაპუნეთ პროფილის ხატულაზე.
დააწკაპუნეთ Manage workspace
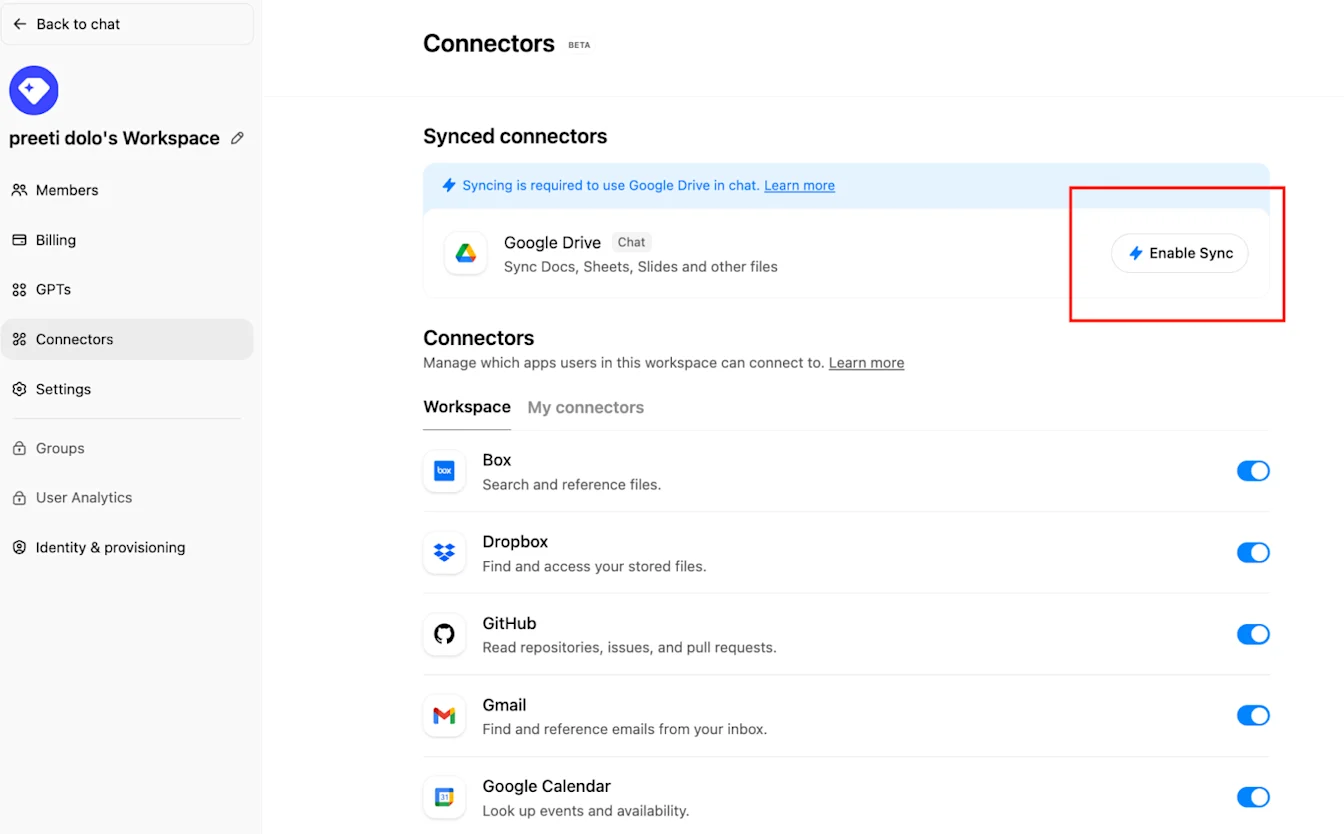
დააწკაპუნეთ Connections -ზე და შემდეგ „Synced connectors“-ის ქვეშ → Enable Sync
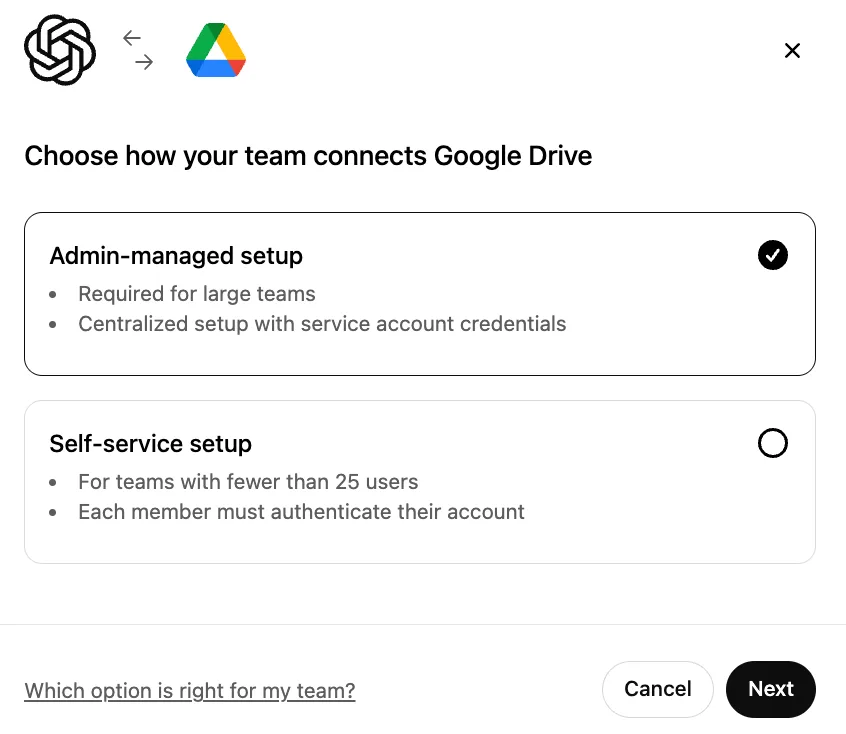
დარწმუნდით, რომ არჩეულია Admin-managed და დააწკაპუნეთ Next-ზე
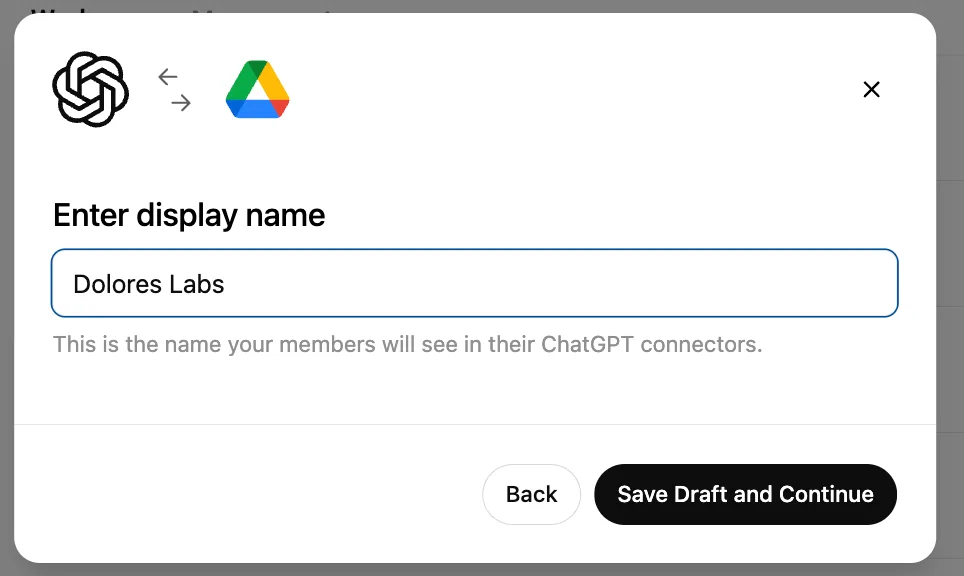
შეიყვანეთ display name. გირჩევთ გამოიყენოთ თქვენი Google Workspace-ის სახელი.
გთხოვთ გაითვალისწინოთ, რომ ამჟამად თქვენი კავშირის სახელის შეცვლას არ ვუჭერთ მხარს.დააწკაპუნეთ Save Draft and Continue-ზე
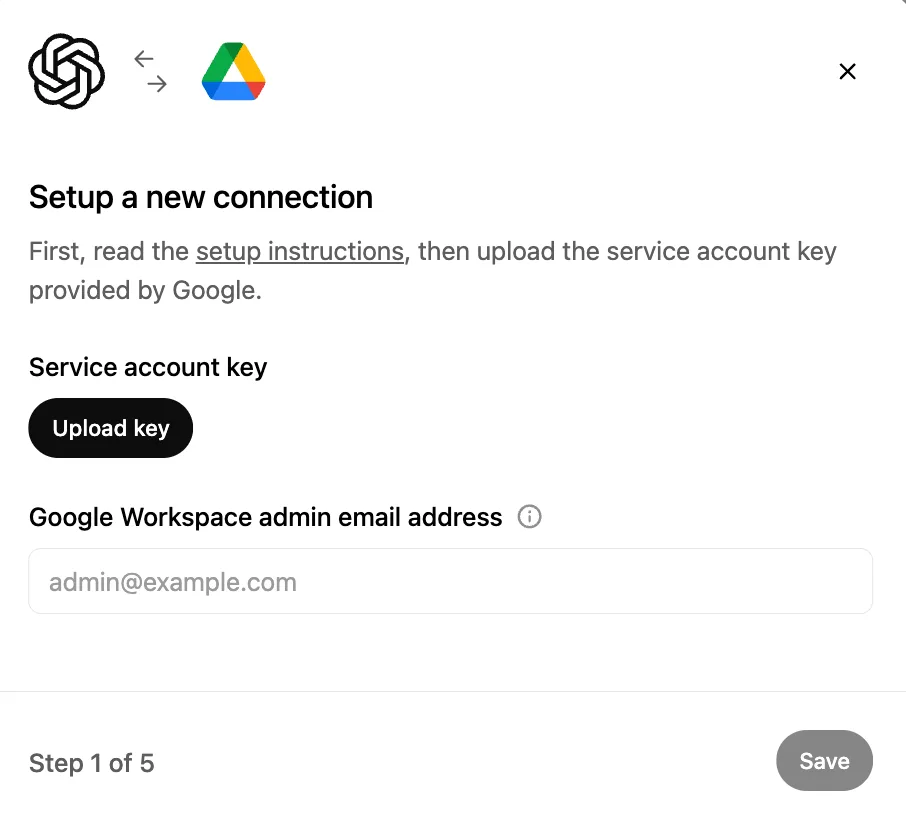
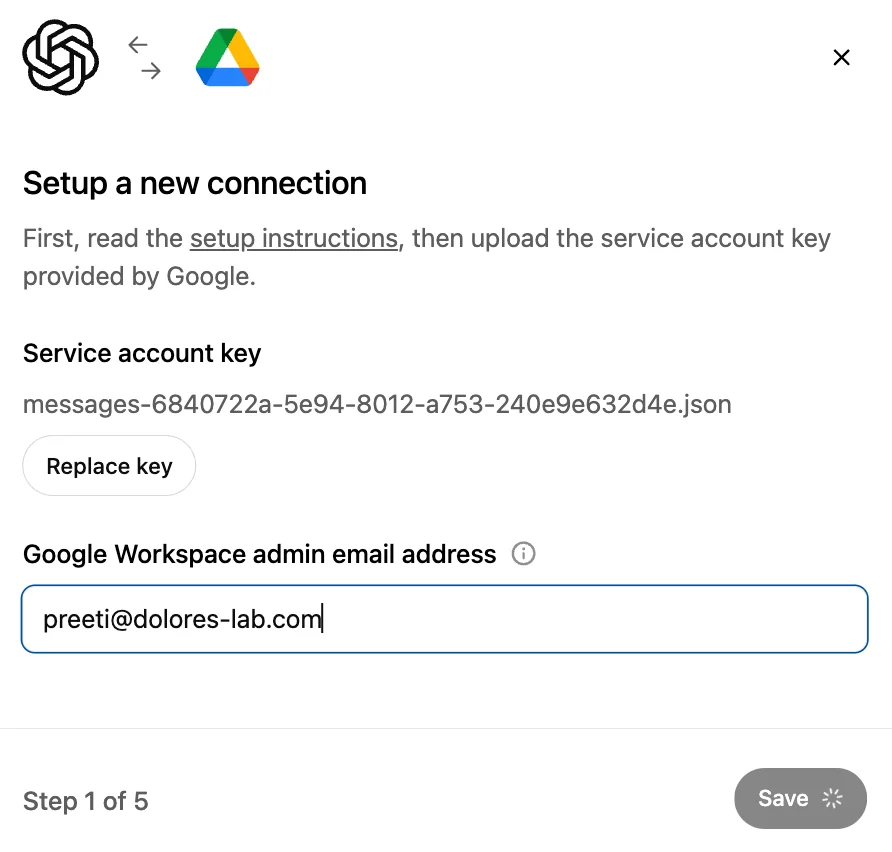
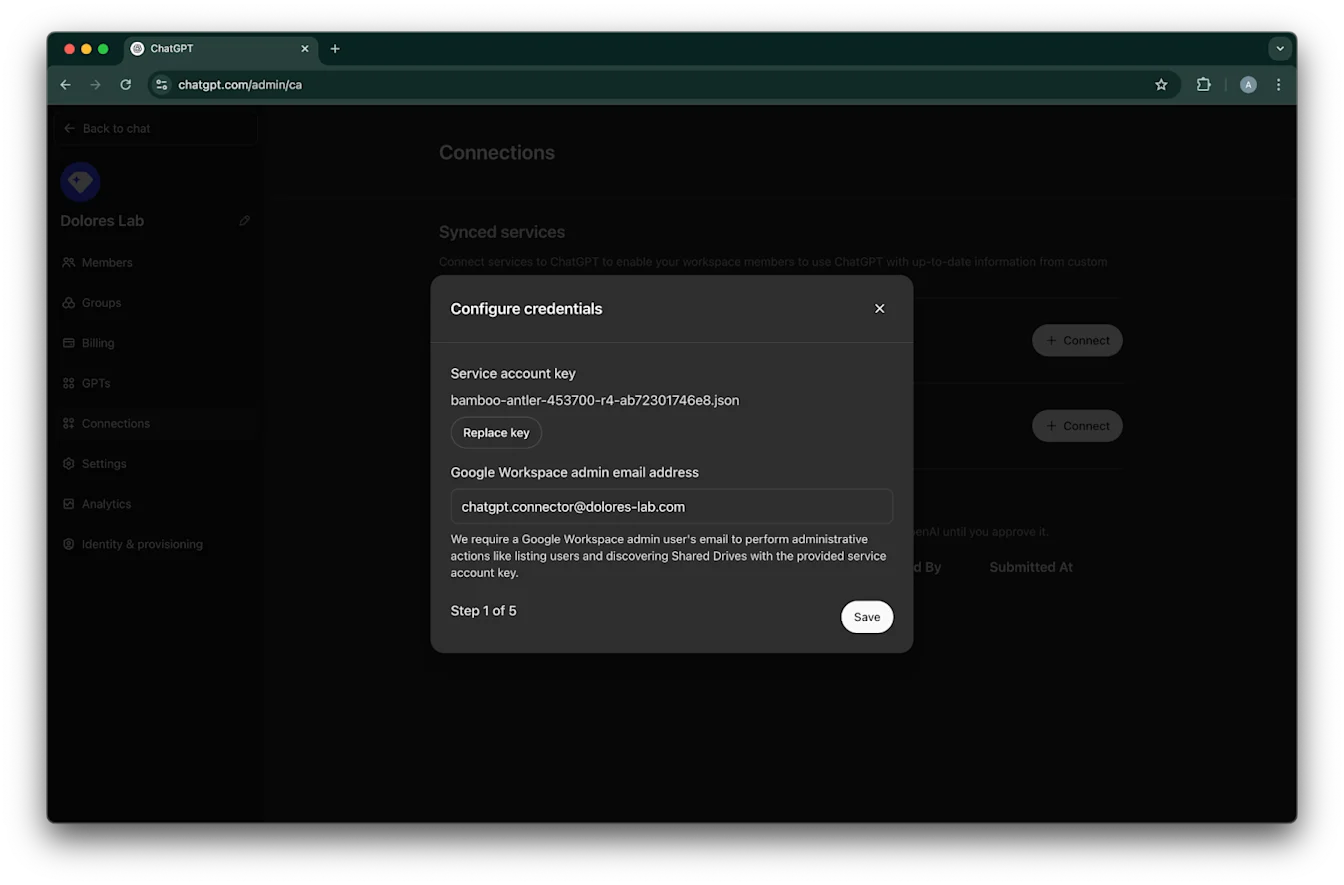
დააწკაპუნეთ Upload key-ზე. აირჩიეთ JSON ფაილი, რომელიც არის გასაღები, რომელიც ზემოთ სერვისის ანგარიშის დაყენების ფარგლებში ჩამოტვირთეთ. დარწმუნდით, რომ ეს გასაღები სწორია
შეიყვანეთ admin email address. ეს არის ადმინისტრატორის ანგარიში, რომელიც ადრე შექმენით.
დააწკაპუნეთ Save.-ზე
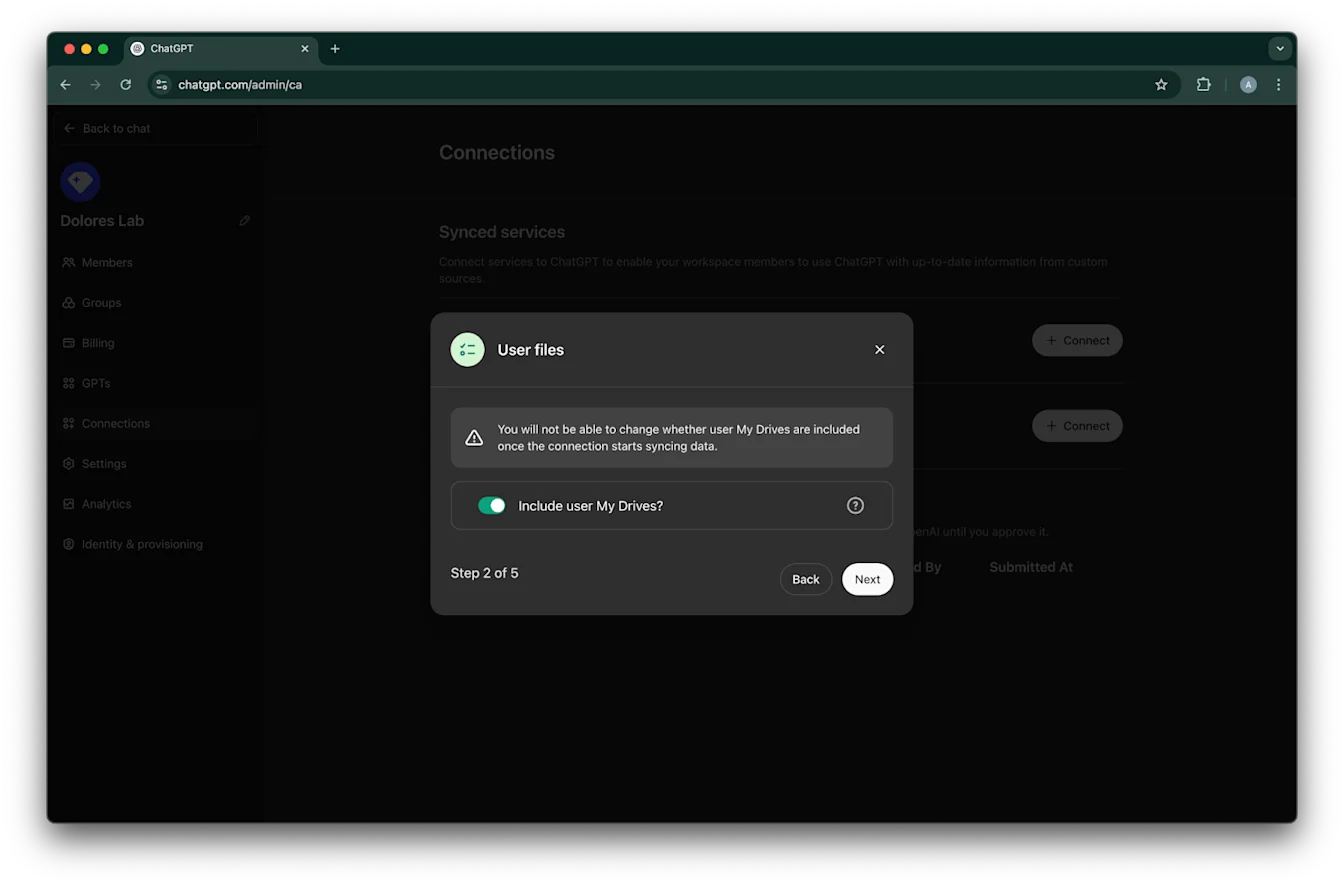
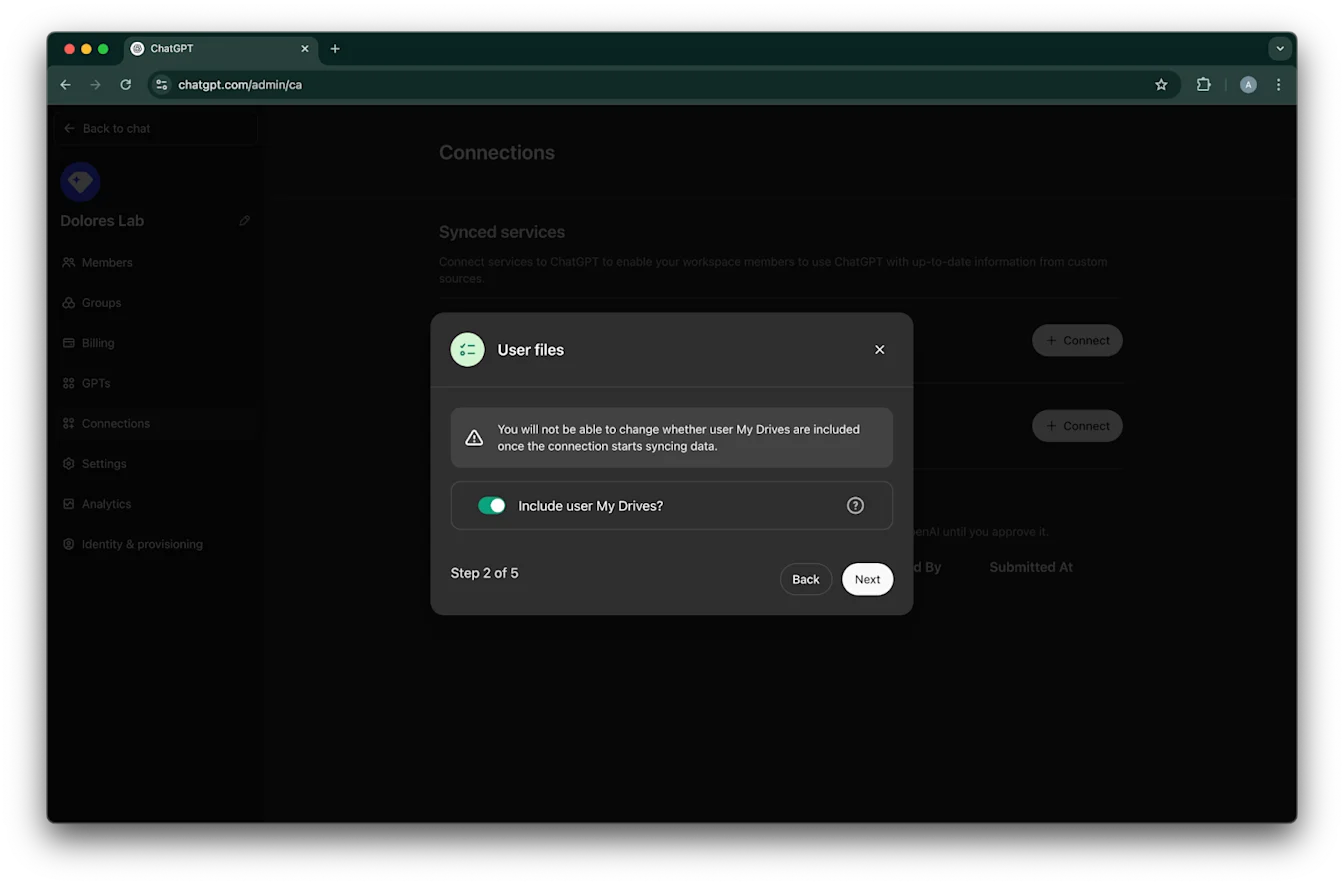
აირჩიეთ, გსურთ თუ არა, რომ თქვენი ყველა მომხმარებლის My Drive-ში არსებული ფაილები ჩართული იყოს.
დააწკაპუნეთ Next-ზე
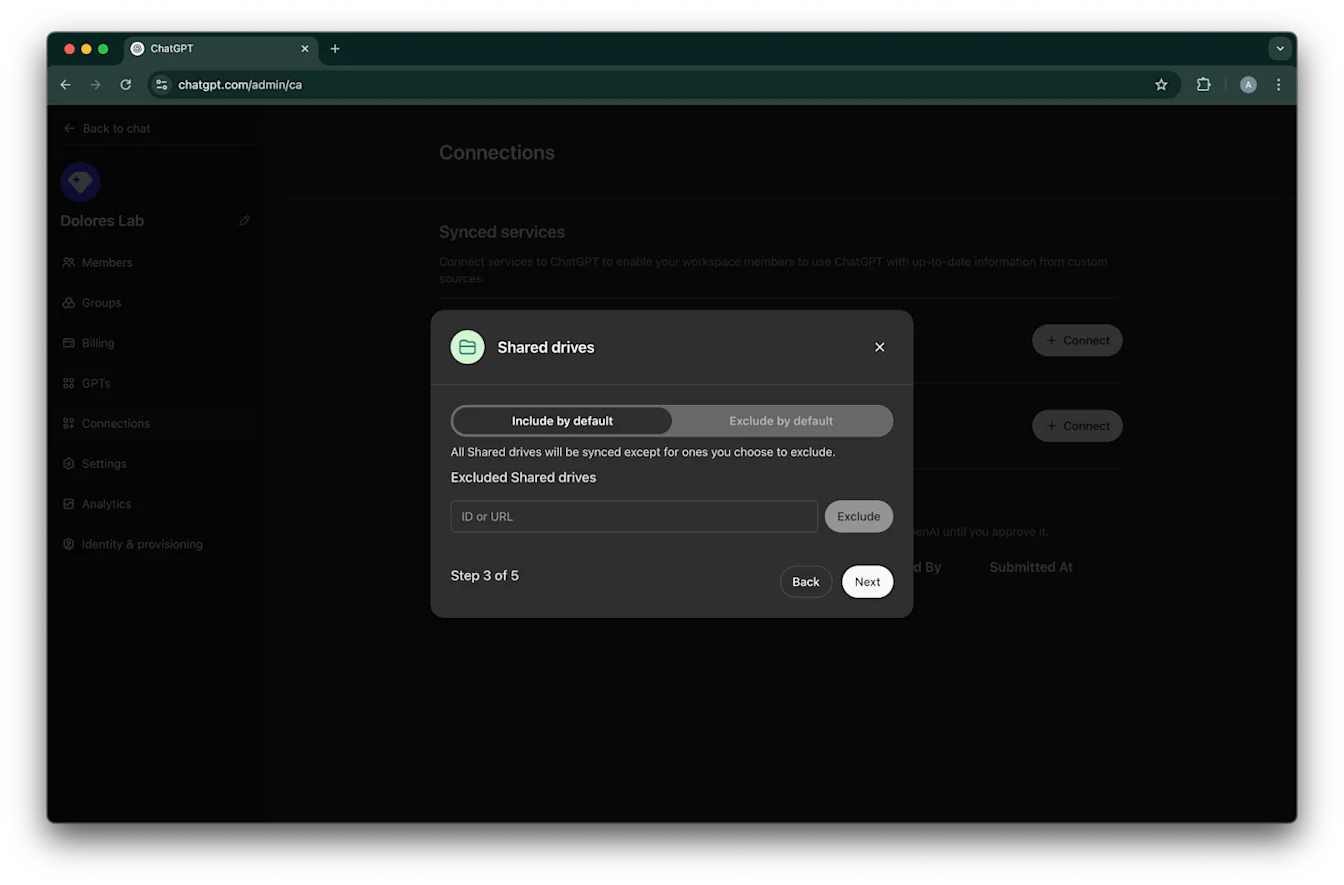
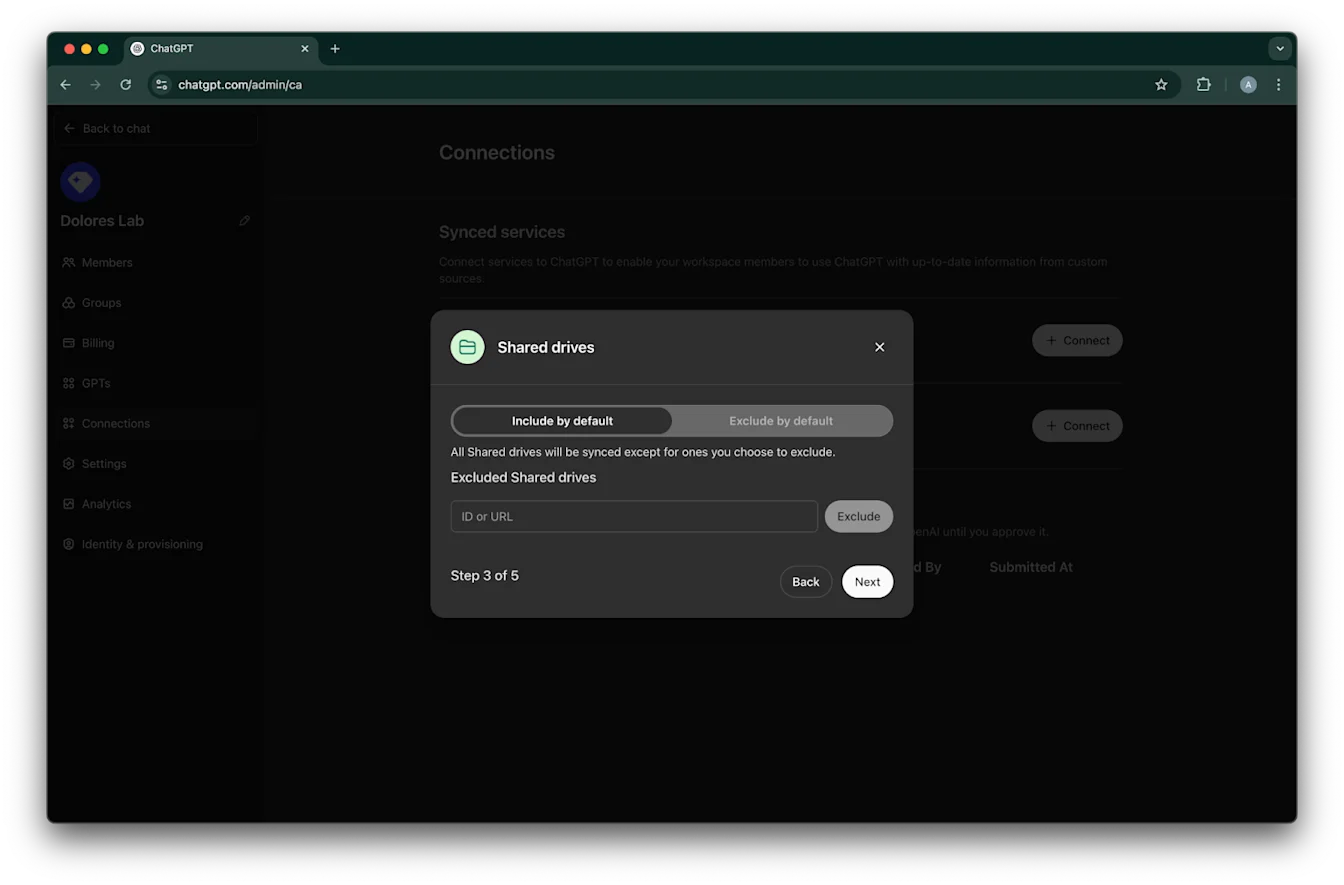
აირჩიეთ, როგორ მართოთ გაზიარებული დისკები. ჩვენ მხარს ვუჭერთ შემდეგ სამ სცენარს:
თუ გსურთ ყველა გაზიარებული დისკის ჩართვა, აირჩიეთ Include by default და არ დაამატოთ გამოსარიცხი გაზიარებული დისკების ID-ები
თუ გსურთ გაზიარებული დისკების უმეტესობის ჩართვა, აირჩიეთ Include by default და დაამატეთ იმ გაზიარებული დისკების ID-ები, რომელთა გამორიცხვაც გსურთ
თუ გსურთ გაზიარებული დისკების უმეტესობის გამორიცხვა, აირჩიეთ Exclude by default და დაამატეთ იმ გაზიარებული დისკების ID-ები, რომელთა ჩართვაც გსურთ
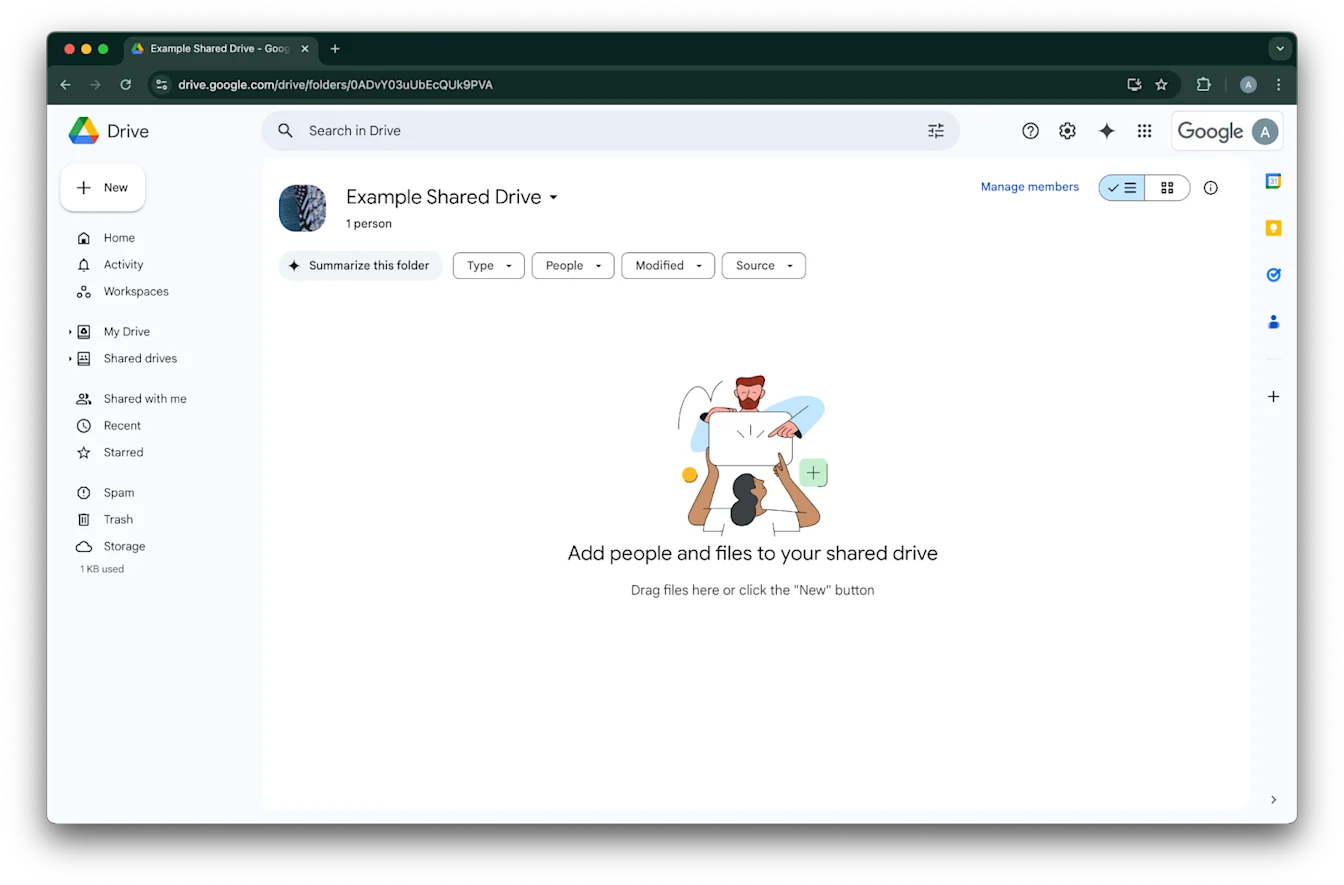
გაზიარებული დისკის ID-ის მოსაძებნად, გადადით მასზე ვებბრაუზერში. URL-ის ბოლო ნაწილი არის გაზიარებული დისკის ID.
შემდეგ მაგალითში ეს არის `0ADvY03uUbEcQUk9PVA`'დააწკაპუნეთ Next-ზე
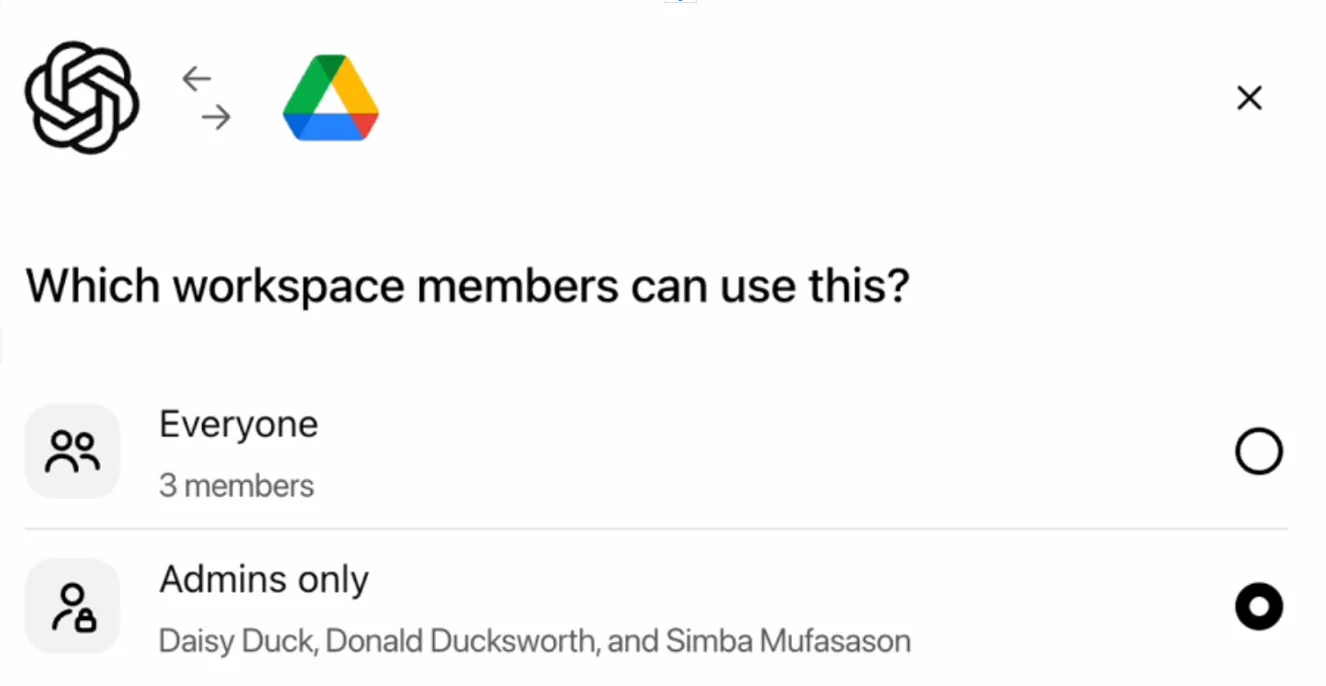
აირჩიეთ, ვის უნდა ჰქონდეს წვდომა Google Drive-ის კავშირზე. შეგიძლიათ აირჩიოთ მხოლოდ ChatGPT სამუშაო სივრცის ადმინისტრატორები, ან ჩართოთ ის ყველასთვის. თუ ყველასთვის ჩართულია, სამუშაო სივრცეში დამატებული ახალი მომხმარებლები ავტომატურად იქნებიან ჩართული.
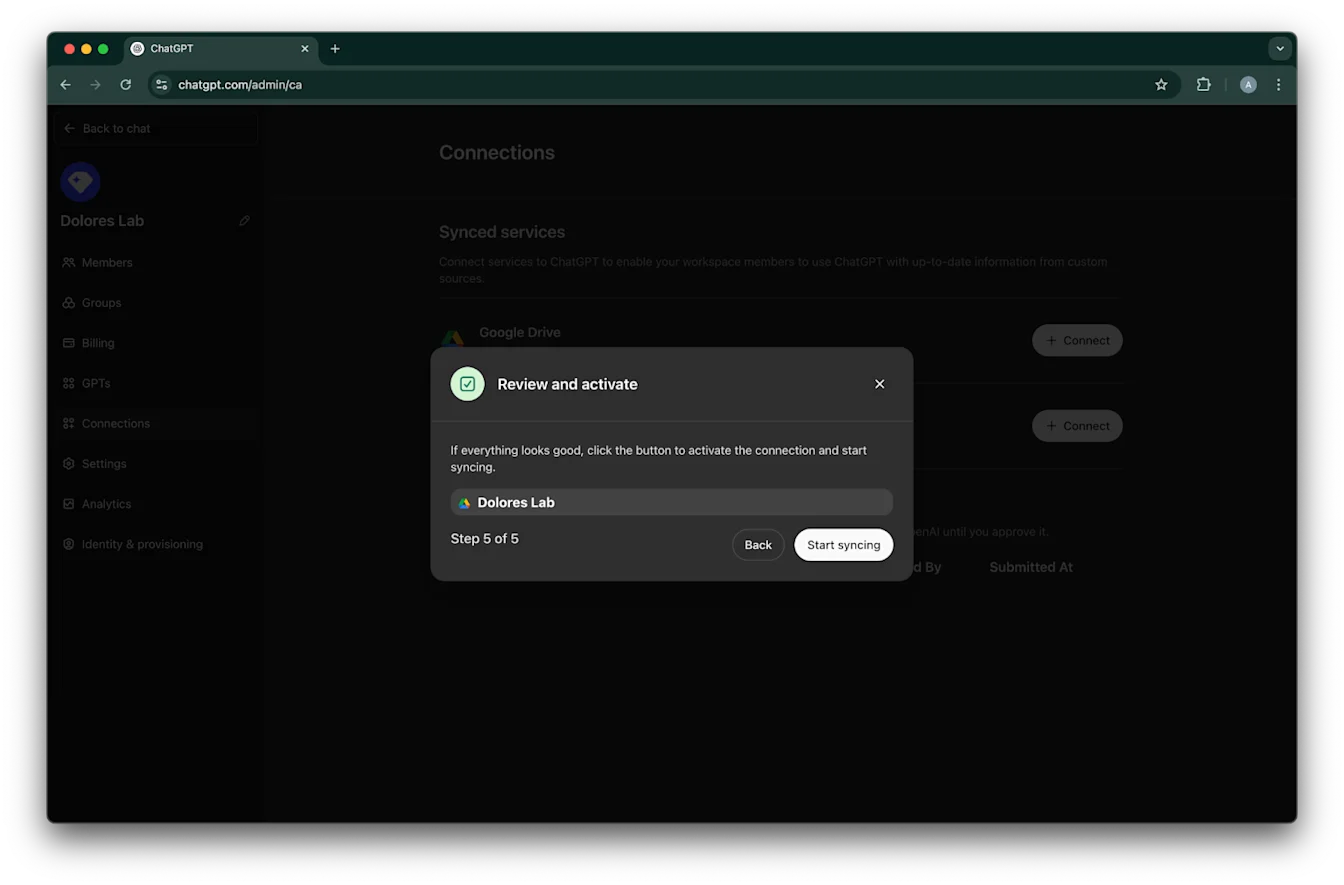
დააწკაპუნეთ Start syncing-ზე
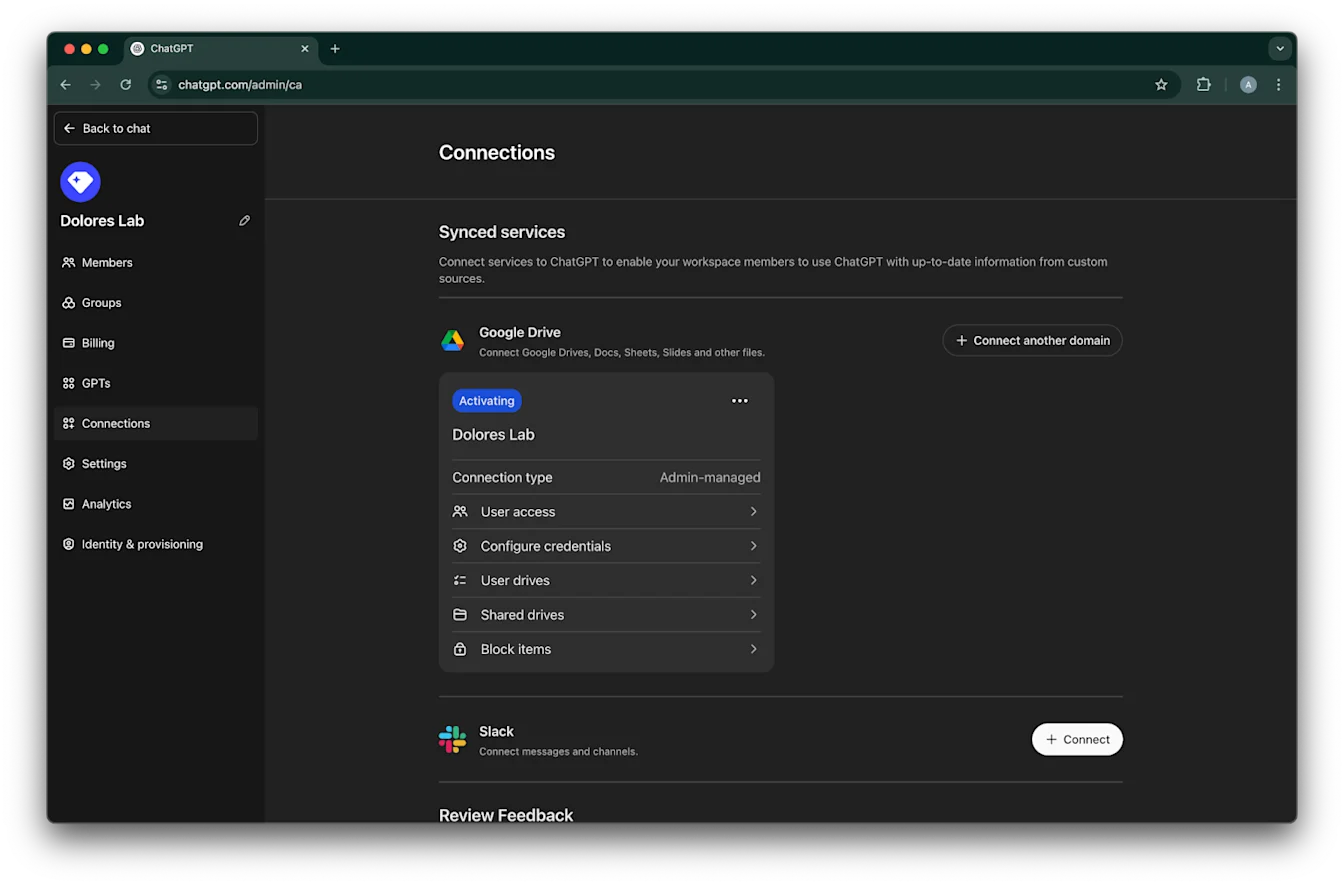
თქვენი Google Drive-ის კავშირი ახლა წარმატებით შეიქმნა!
გთხოვთ გაითვალისწინოთ, რომ მიუხედავად იმისა, რომ სინქრონიზაცია დაუყოვნებლივ დაიწყება, დასრულებას შეიძლება საათებიდან დღეებამდე დასჭირდეს, იმის მიხედვით, თუ რამდენი ფაილი იყო ჩართული თქვენი პარამეტრების მიხედვით.
როდესაც ბოლო 30 დღის განმავლობაში დამატებული/ჩასწორებული ფაილების სინქრონიზაცია დასრულდება, კონექტორი ხელმისაწვდომი გახდება იმ მომხმარებლებისთვის, ვისთვისაც ის ჩართეთ.
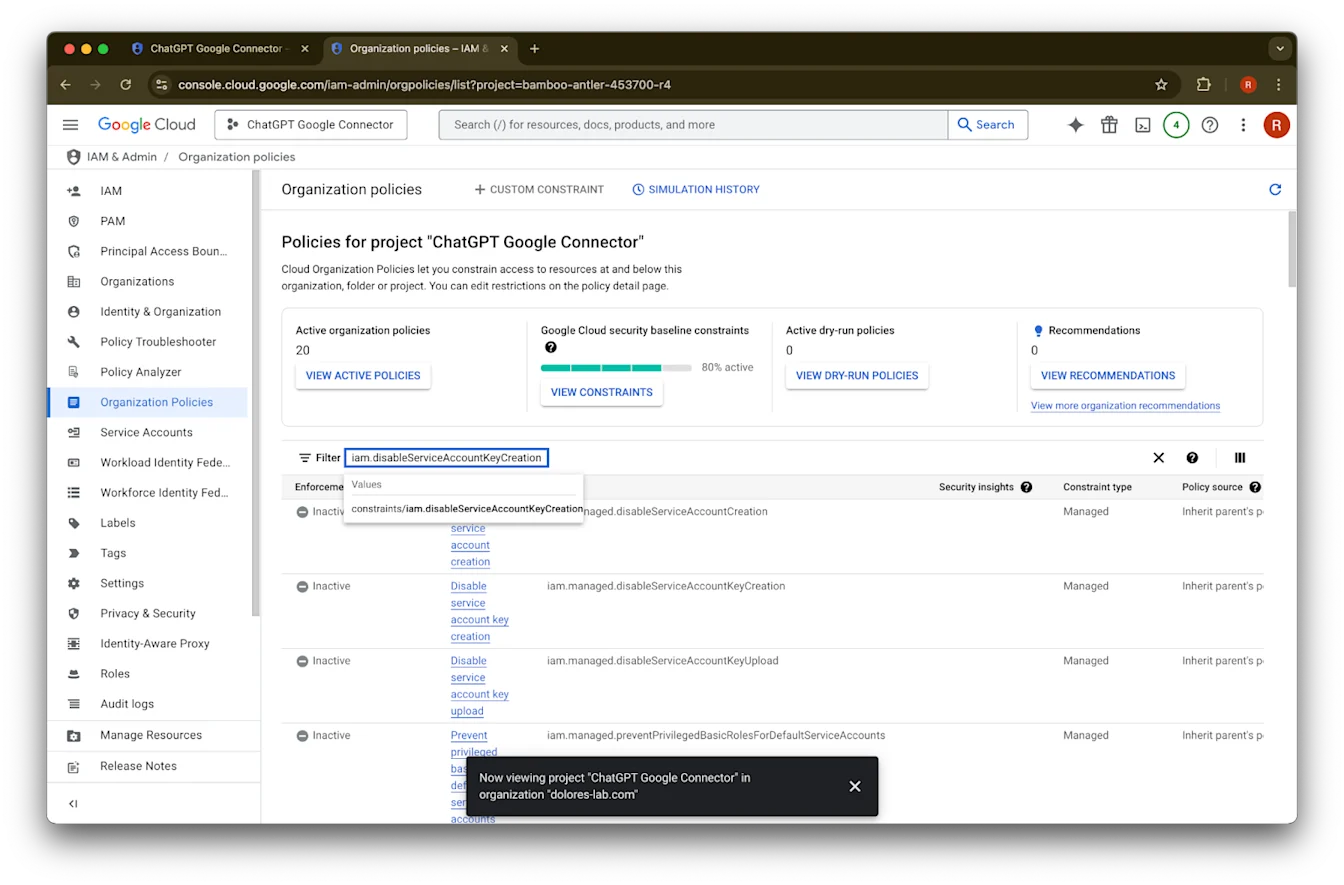
სერვისის ანგარიშის გასაღების შექმნის ჩართვა
თუ მიიღებთ შემდეგ შეცდომას, ამ კონკრეტული პროექტისთვის მოგიწევთ სერვისის ანგარიშის შექმნის ჩართვა:
> ორგანიზაციის პოლიტიკის შეზღუდვა ‘iam.disableServiceAccountKeyCreation’ ამოქმედებულია თქვენს ორგანიზაციაზე.
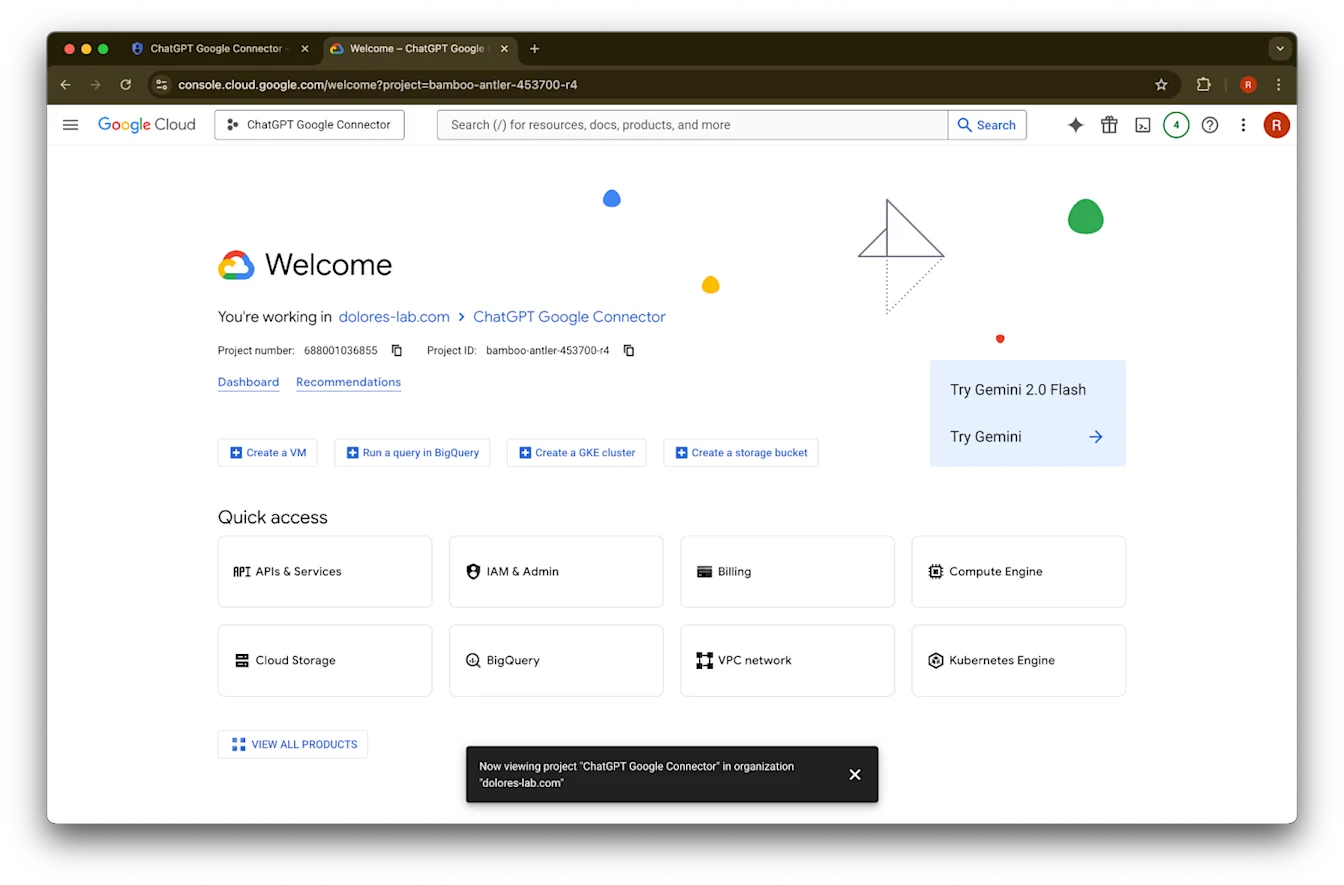
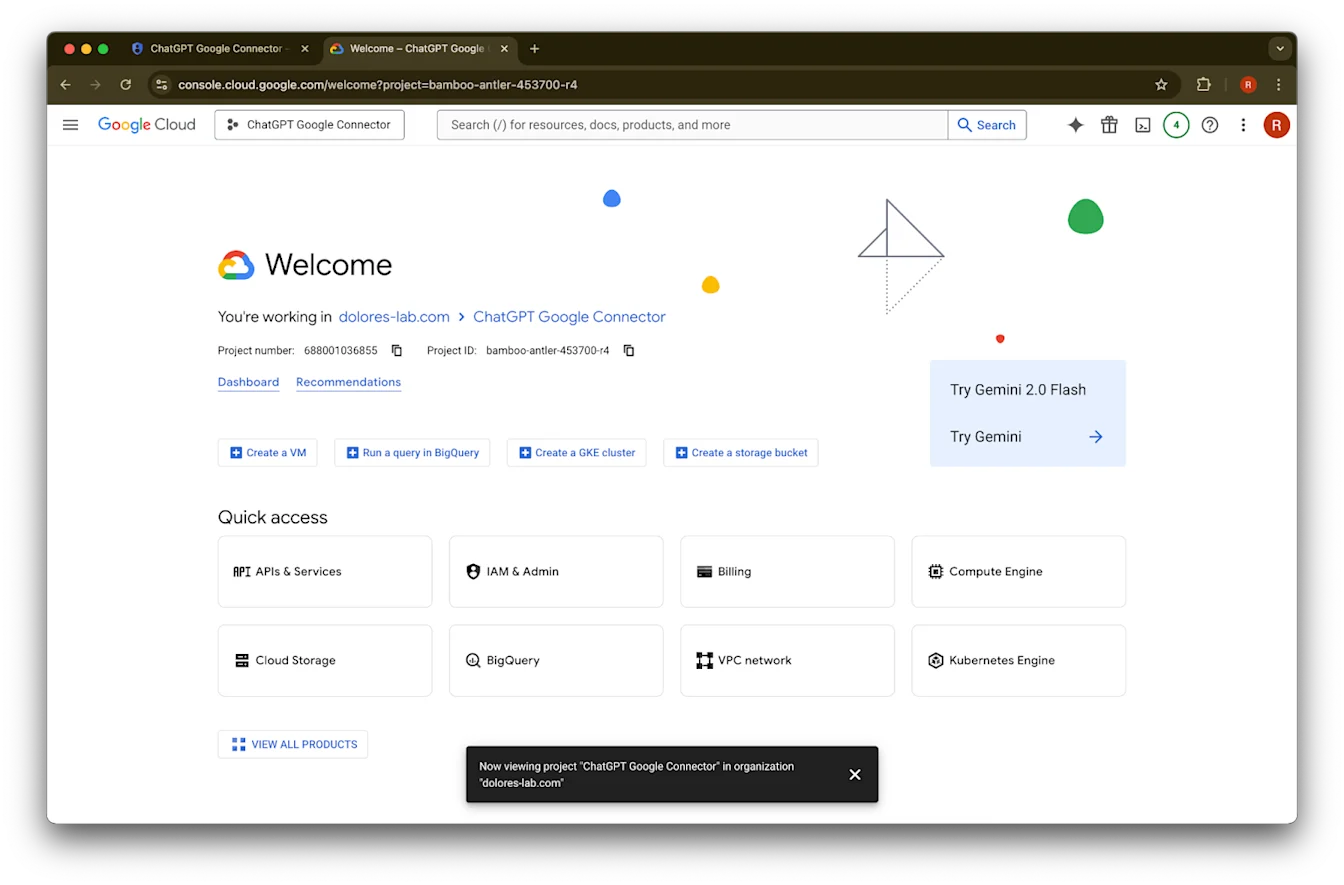
გახსენით ახალი ჩანართი და გადადით console.cloud.google.com-ზე. დარწმუნდით, რომ არჩეული პროექტი ისაა, რომელიც უკვე გაქვთ არჩეული.
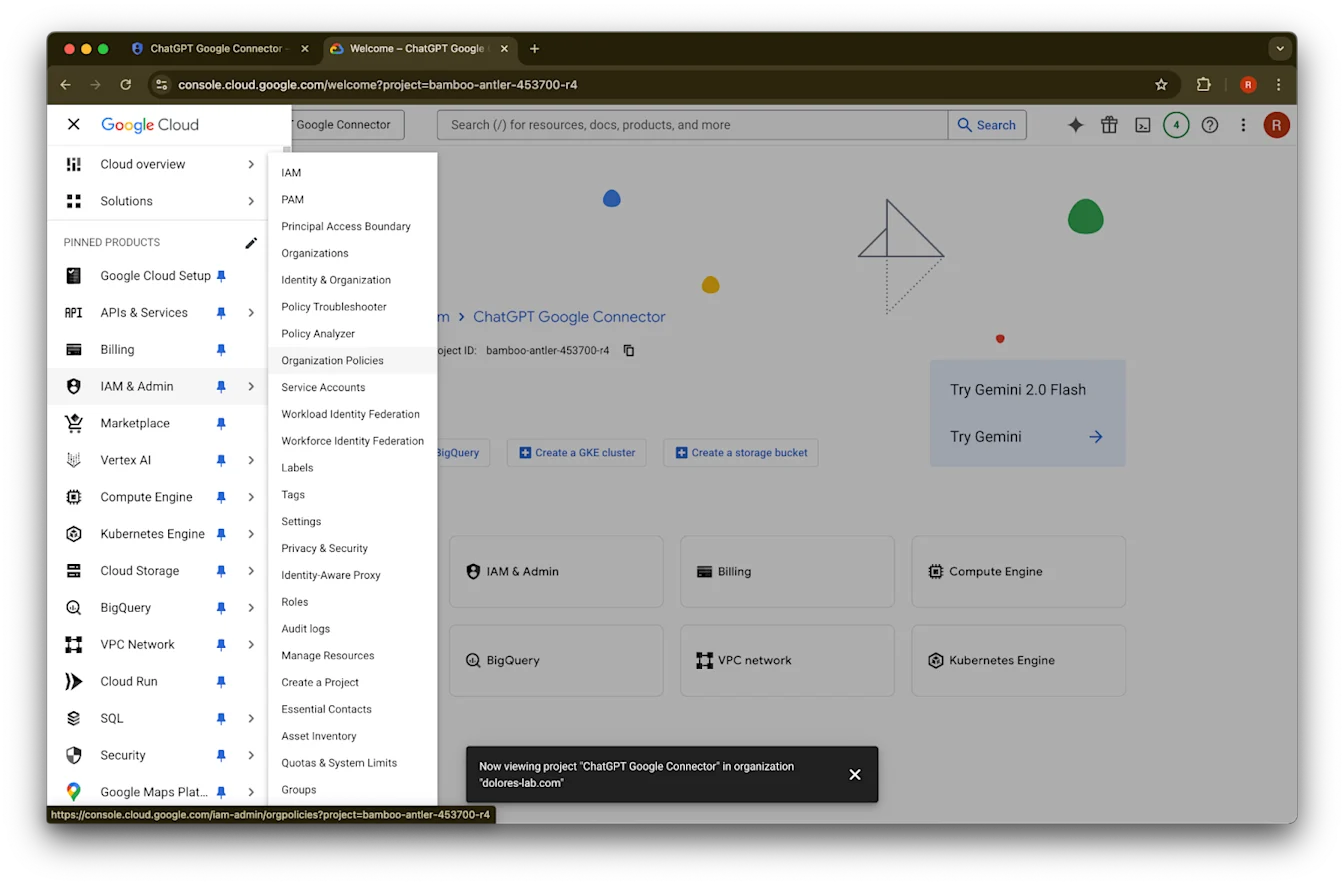
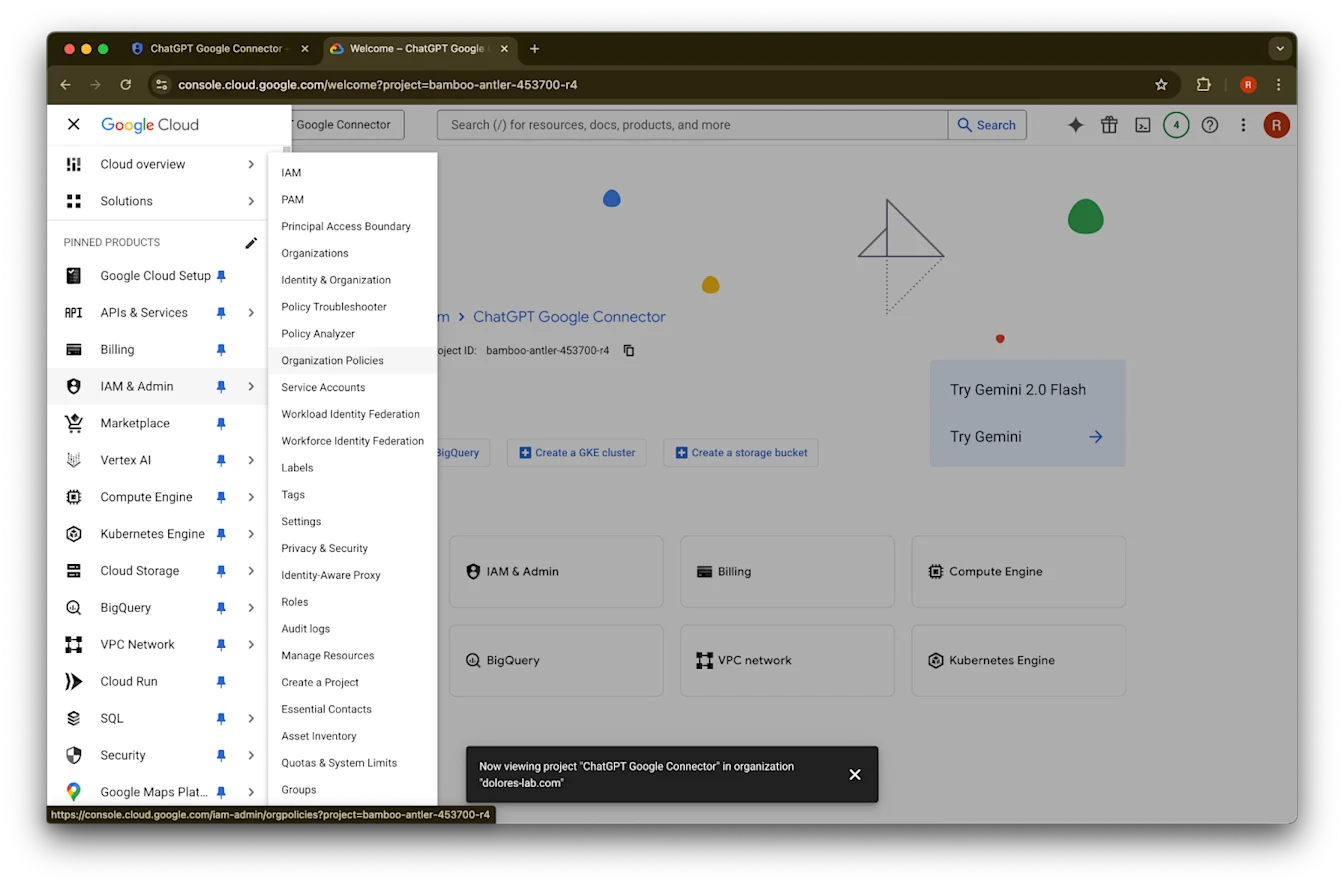
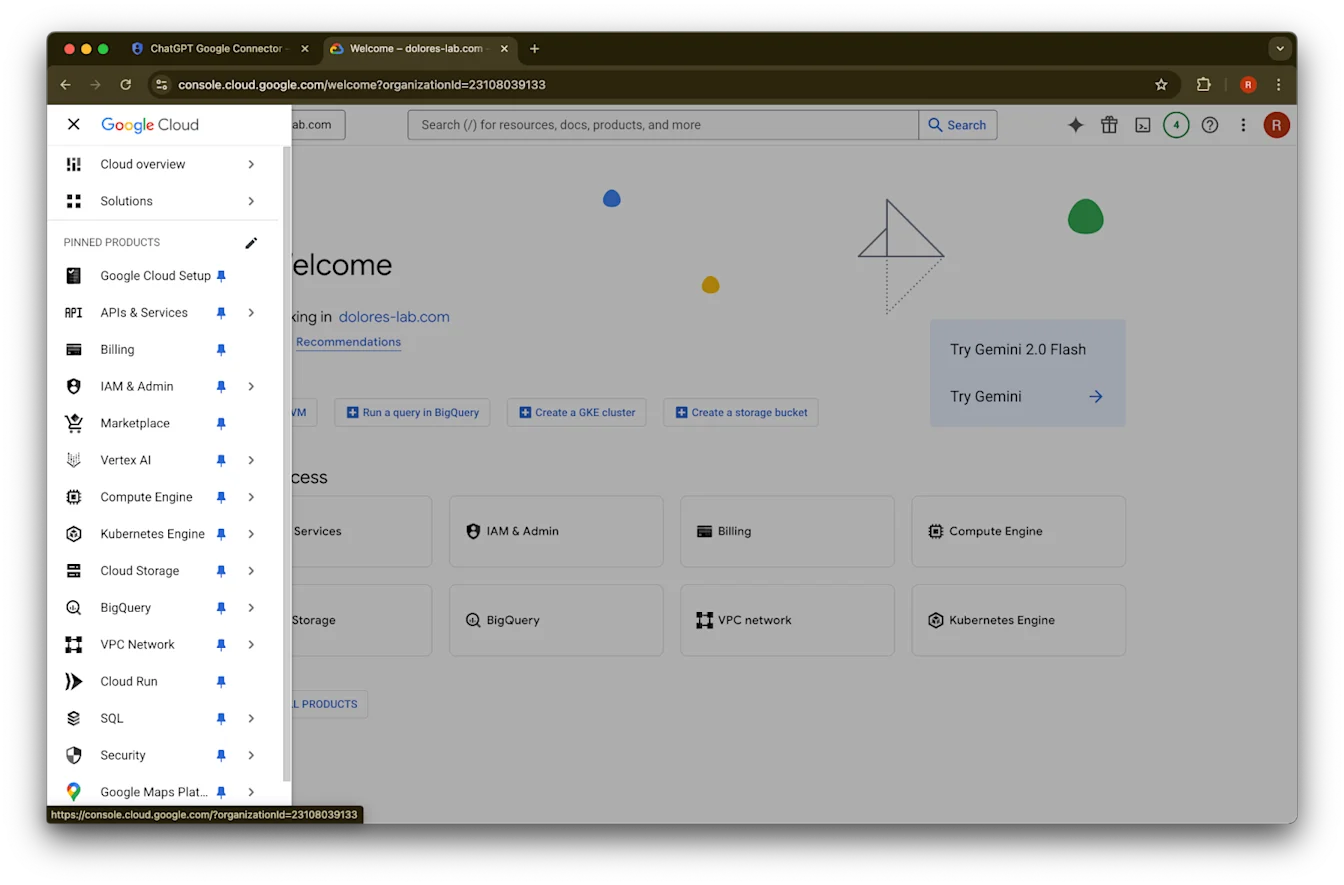
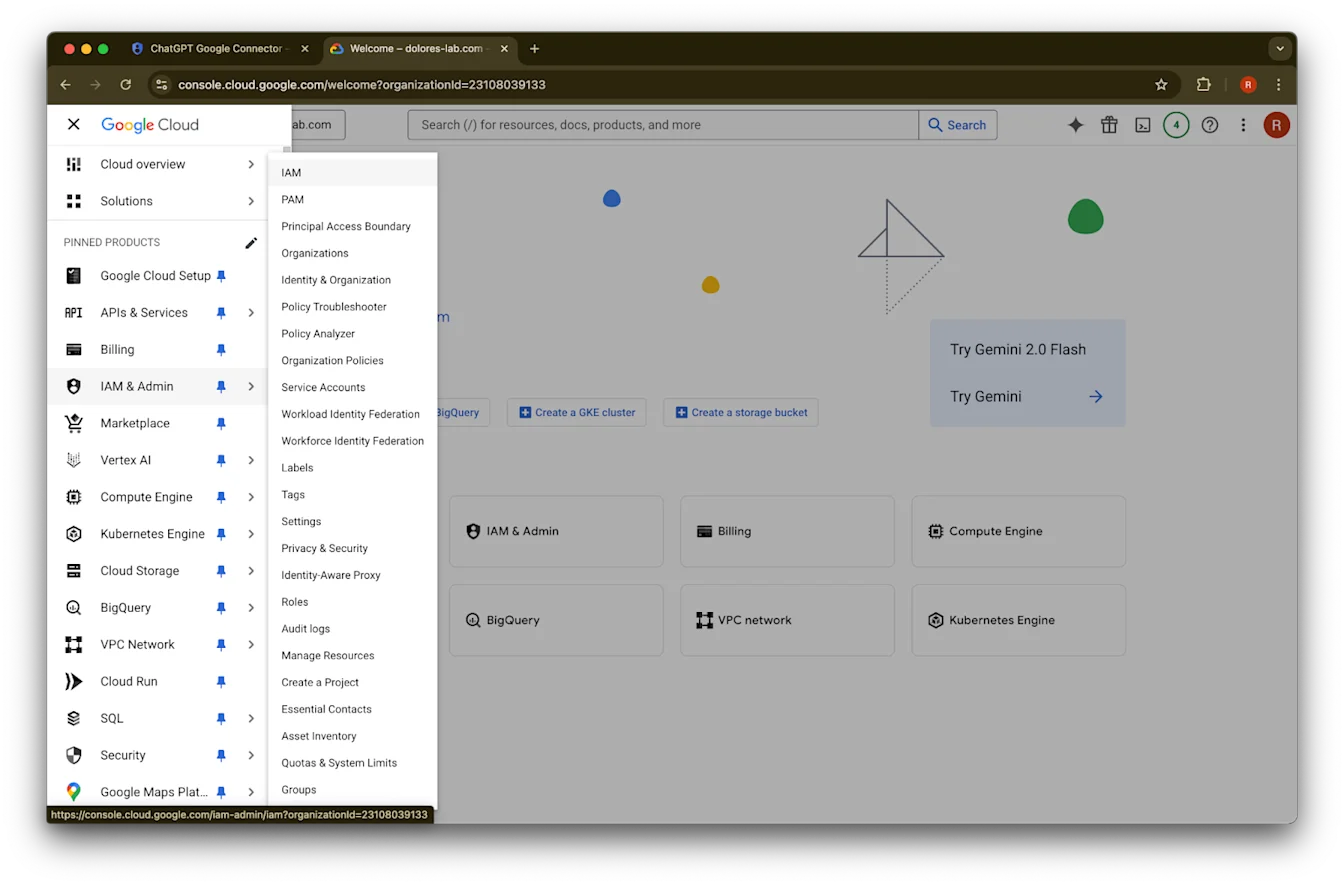
დააწკაპუნეთ ზედა მარცხენა კუთხეში menu icon-ზე.მიიტანეთ კურსორი IAM & Admin-ზე
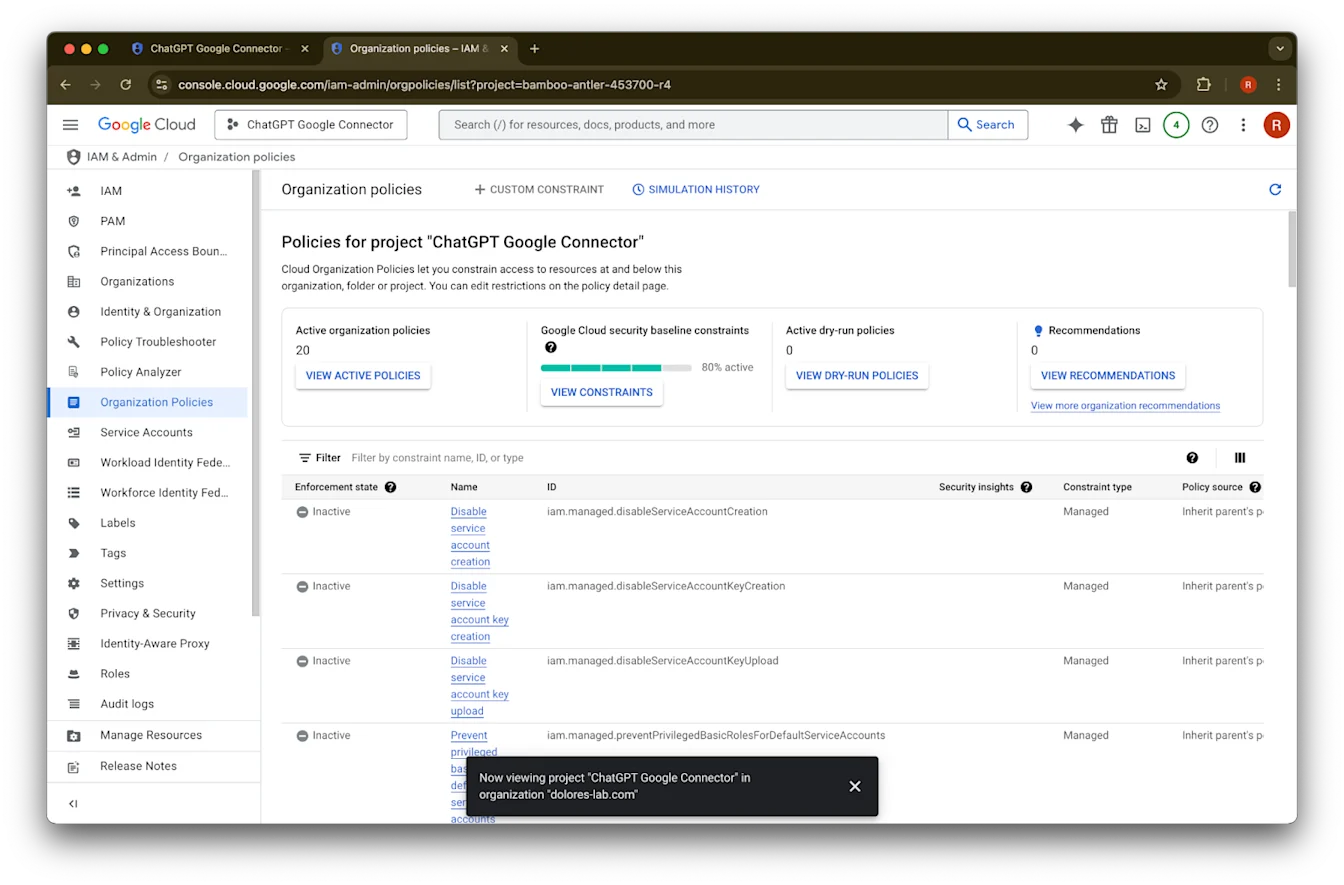
დააწკაპუნეთ Organizational Policies-ზე
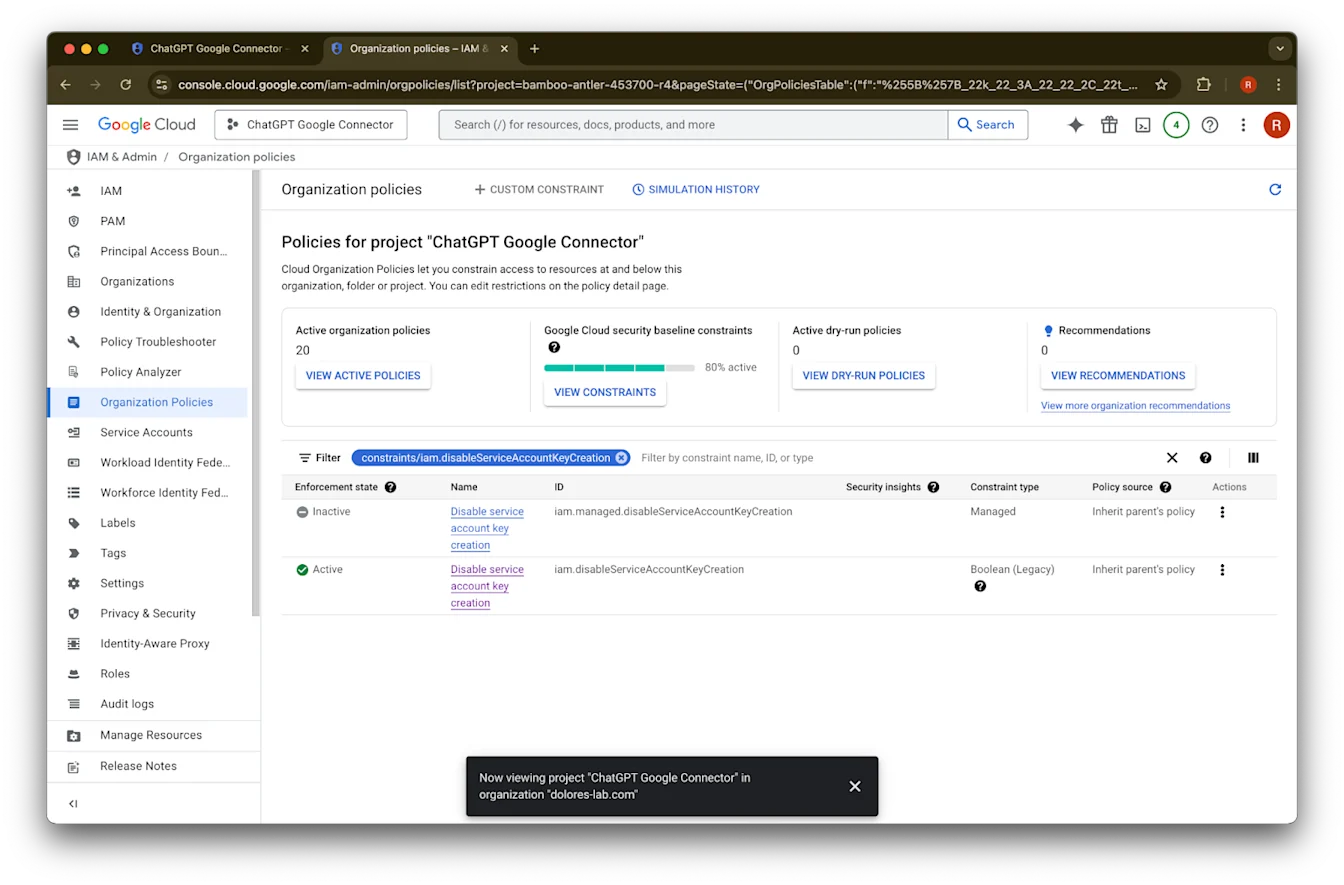
მოძებნეთ iam.disableServiceAccountKeyCreation
დააწკაპუნეთ შედეგზე constraints/iam.disableServiceAccountKeyCreation
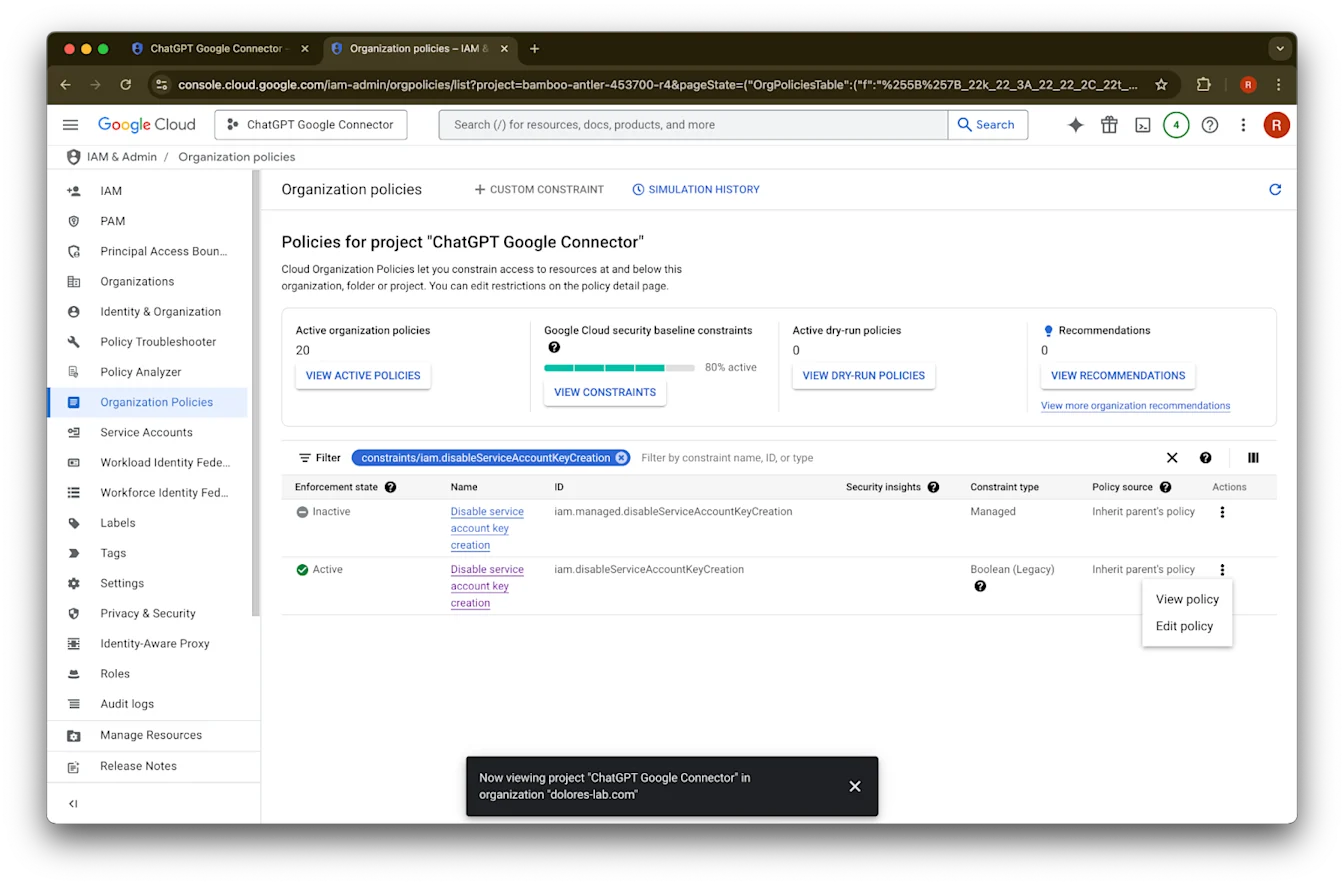
დააწკაპუნეთ …-ზე იმ მწკრივისთვის, რომლის ID არის iam.disableServiceAccountKeyCreation
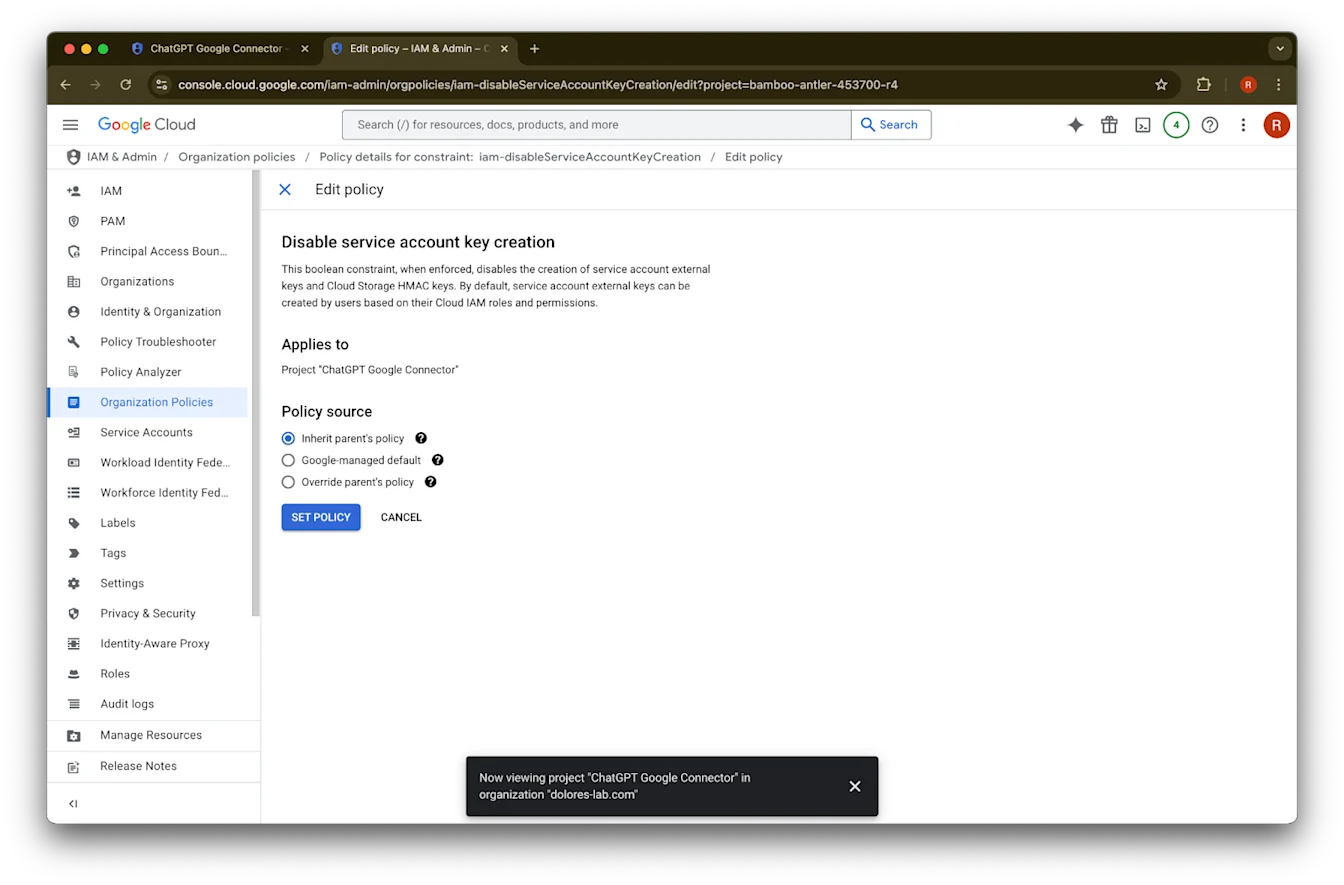
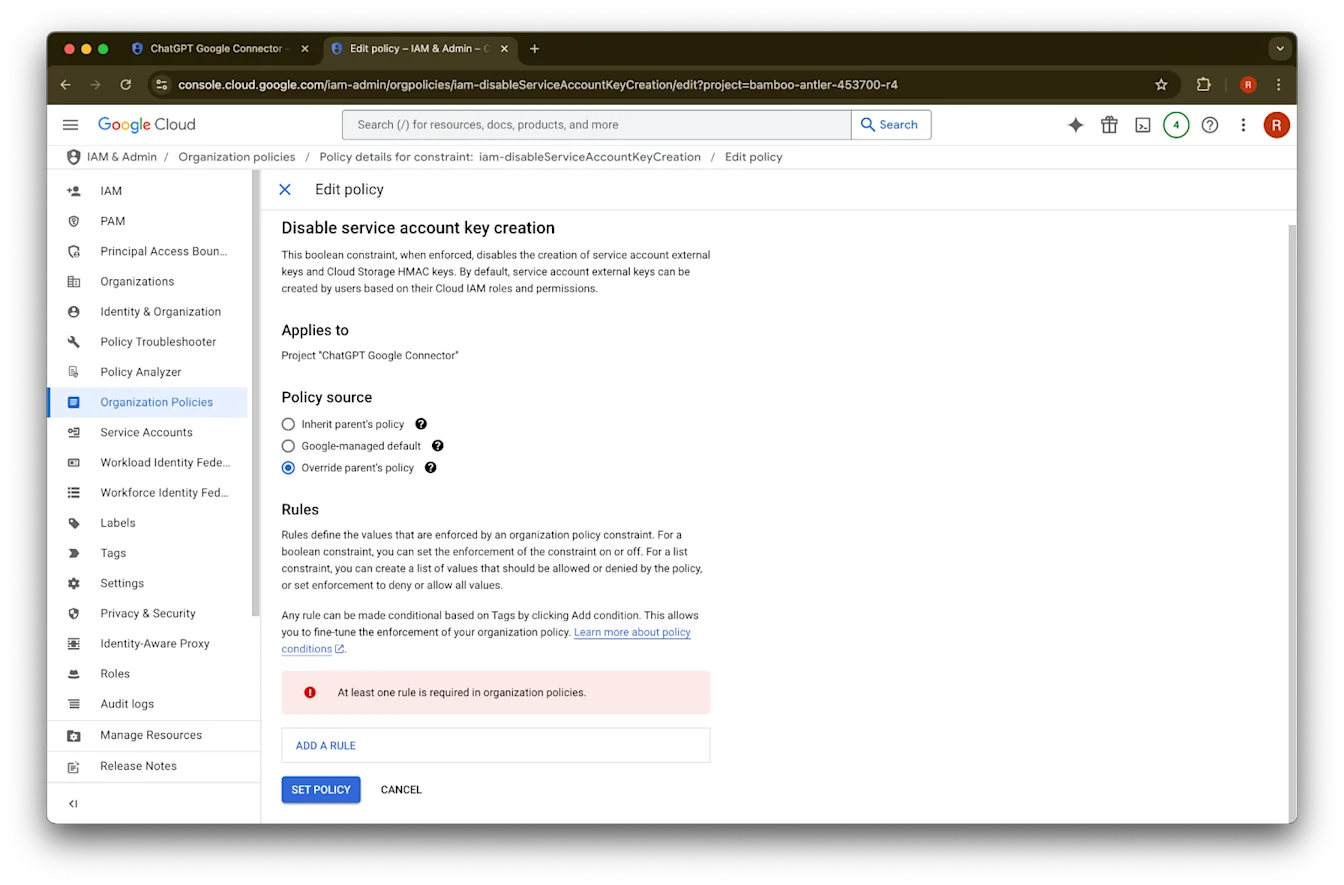
დააწკაპუნეთ Edit policy-ზე. თუ Edit policy გამორთულია, თქვენ უნდა გახდეთ Organization Policy Administrator.
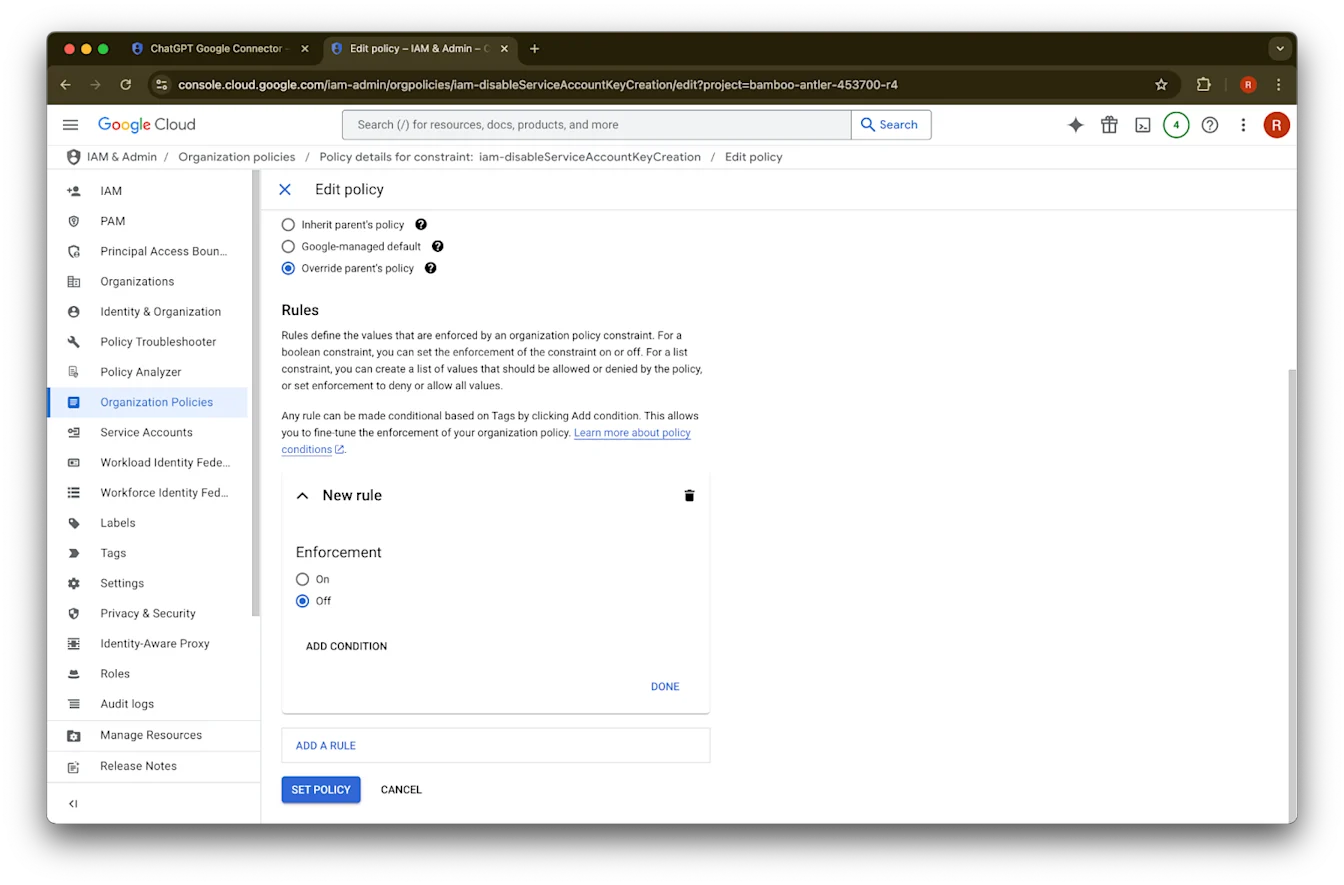
დააწკაპუნეთ Override parent’s policy
დააწკაპუნეთ Add a rule
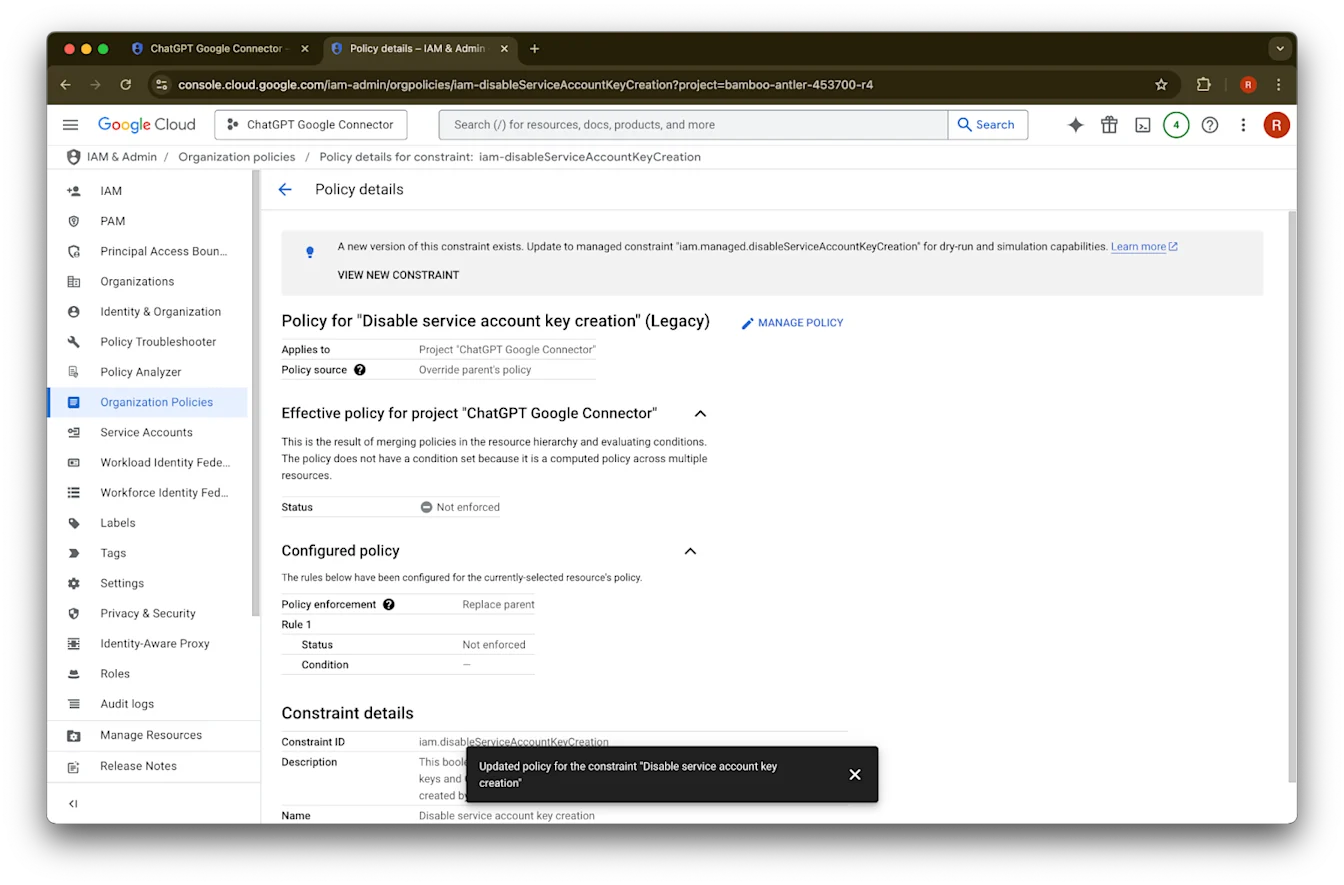
დააწკაპუნეთ Set Policy
ახლა შეგიძლიათ შექმნათ სერვისის ანგარიშის გასაღები. ამ ჩართვას ძალაში შესასვლელად შეიძლება რამდენიმე წუთი დასჭირდეს.
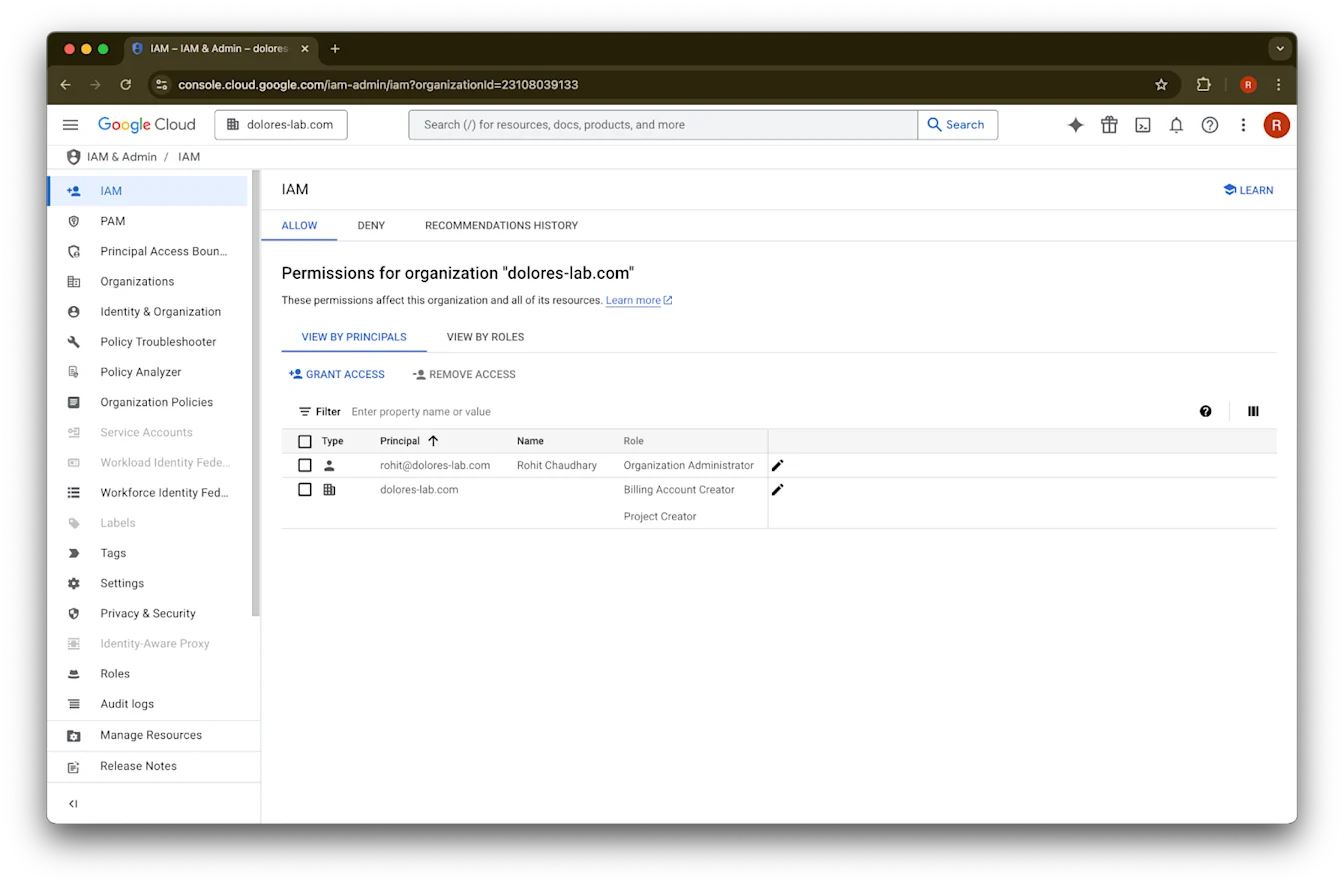
როგორ გახდეთ Organization Policy Administrator
გადადით console.cloud.google.com-ზე და დააწკაპუნეთ project/organization selector-ზე
დააწკაპუნეთ your organization-ზე
დააწკაპუნეთ ზედა მარცხენა კუთხეში menu icon-ზე
მიიტანეთ კურსორი IAM & Admin-ზე
დააწკაპუნეთ IAM-ზე
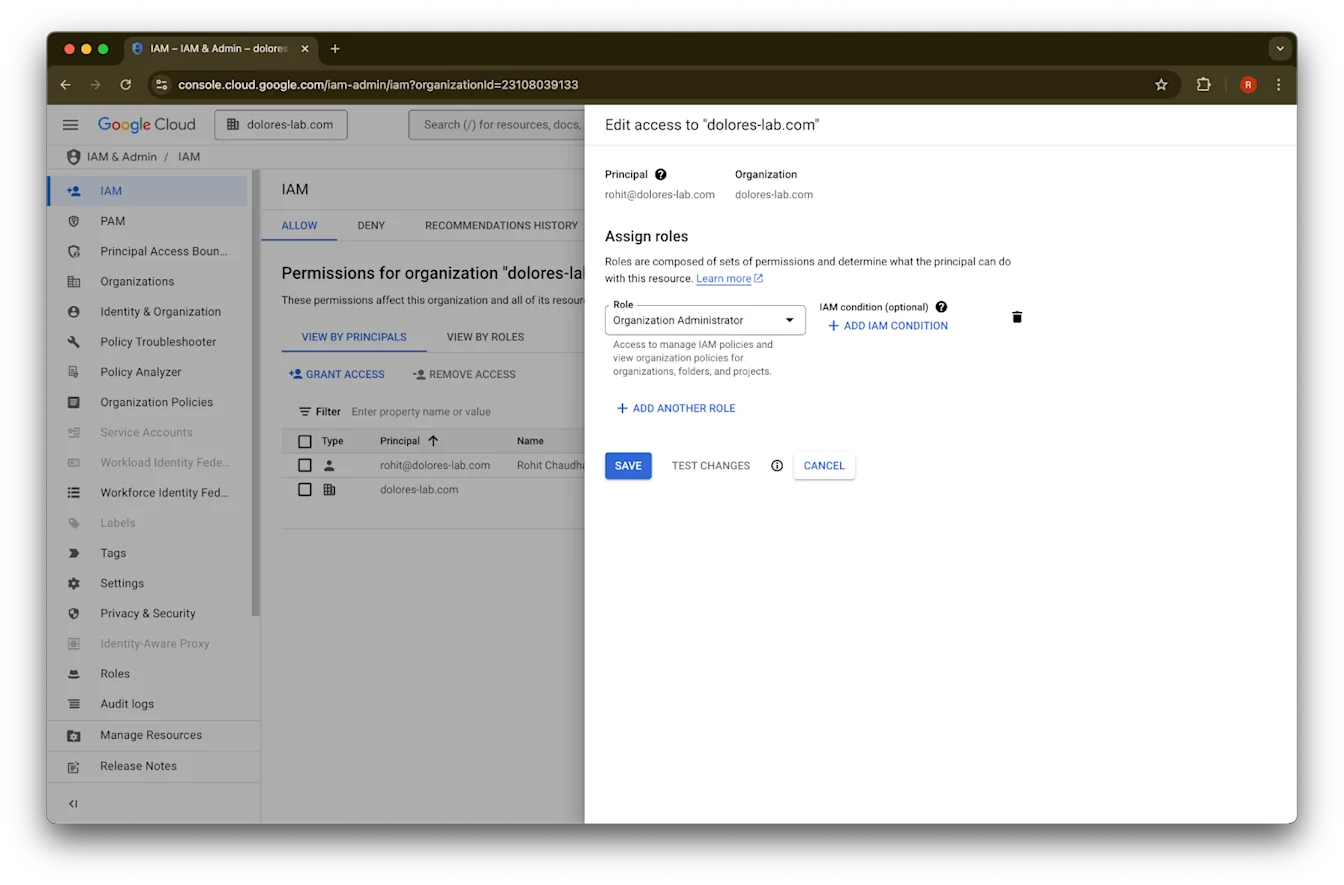
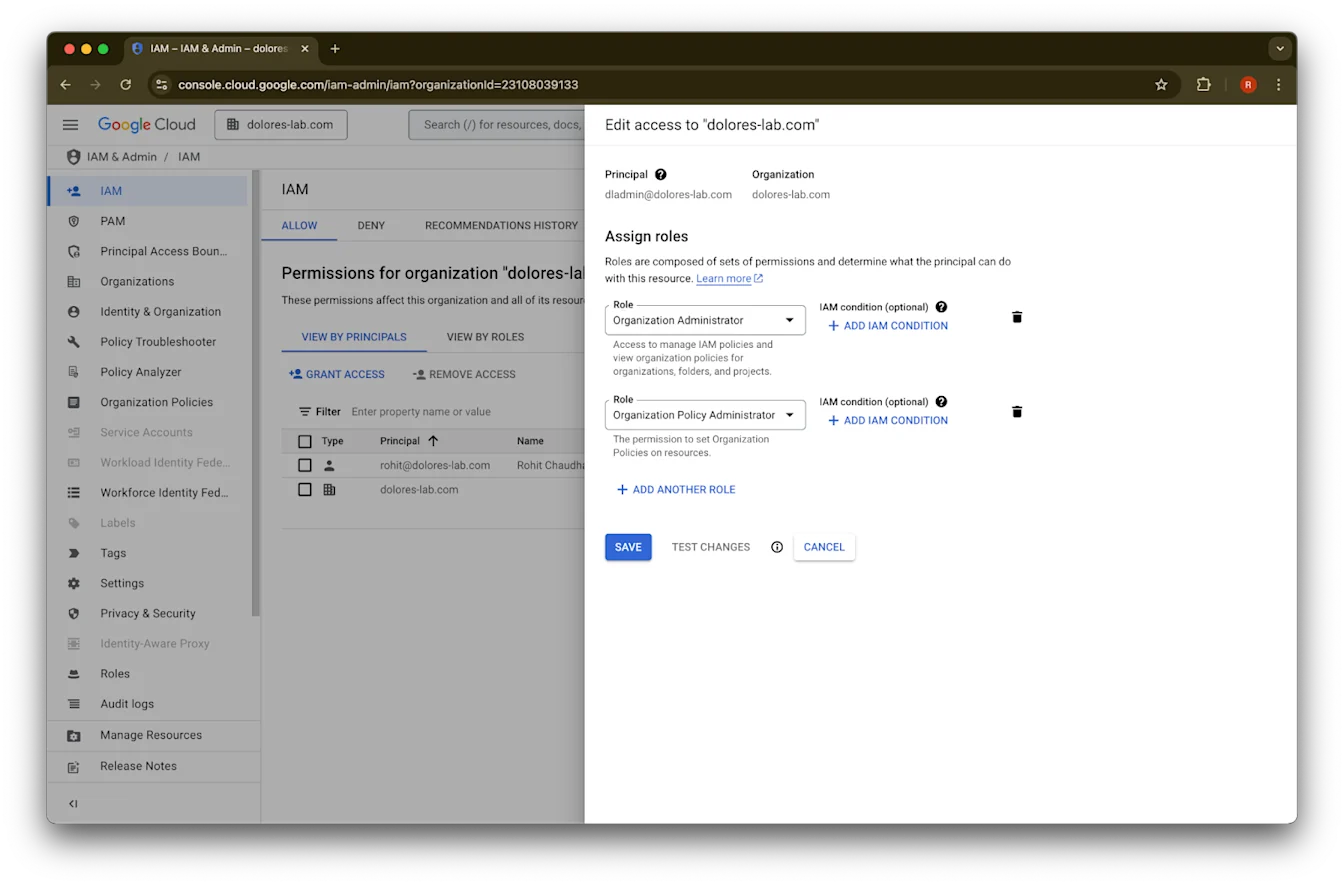
თქვენი ანგარიშისთვის დააწკაპუნეთ pencil -ზე
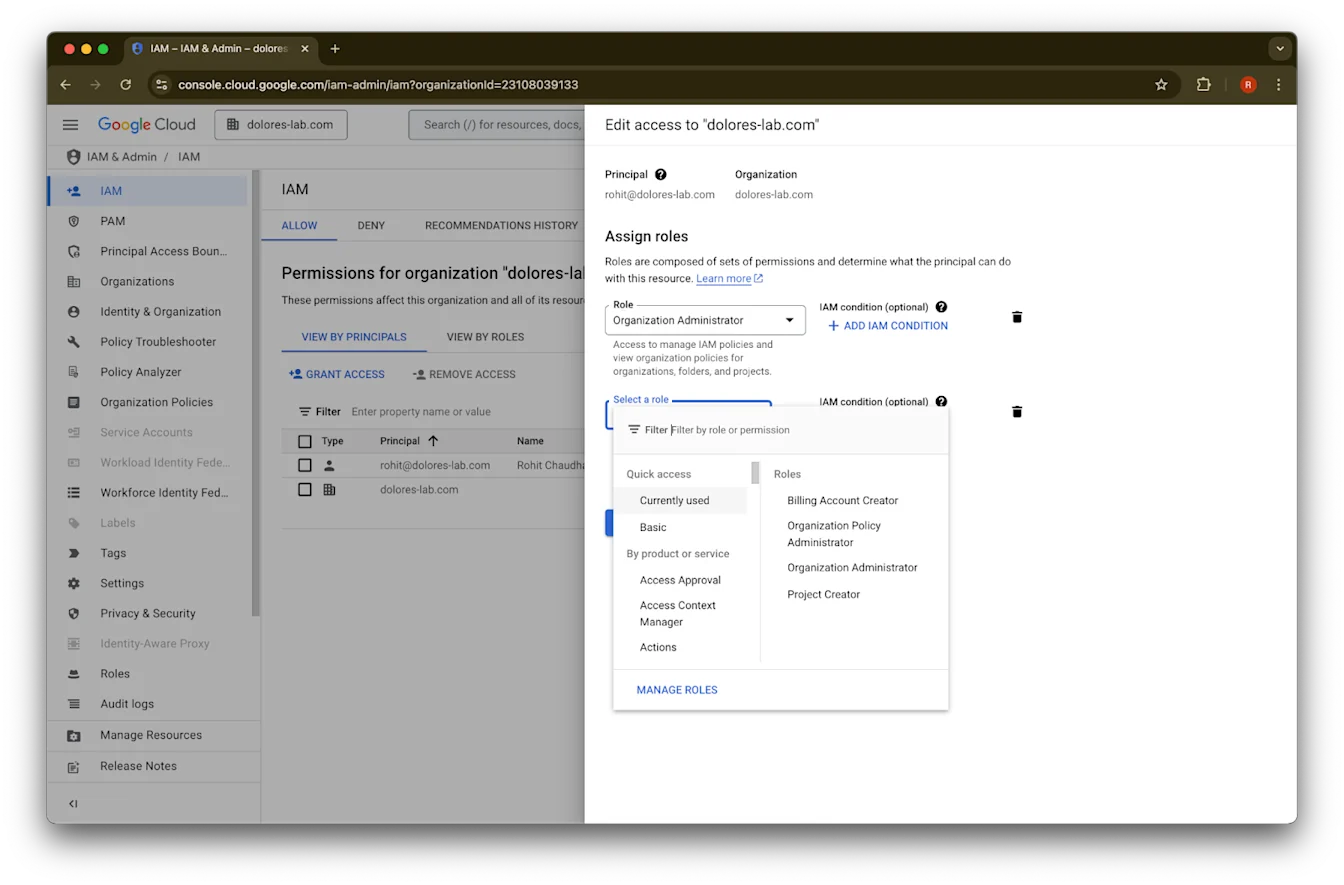
დააწკაპუნეთ Add Another Role-ზე
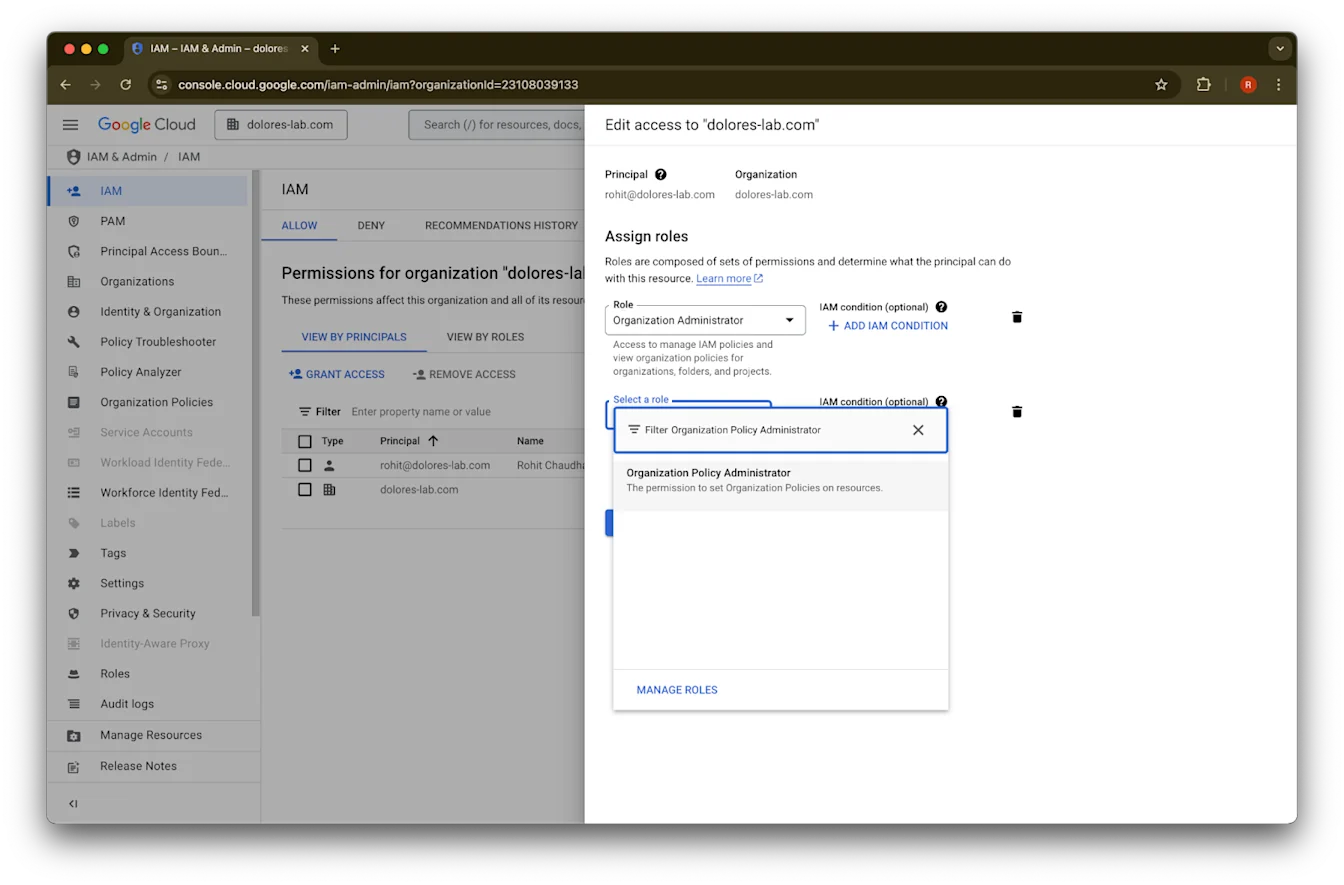
მოძებნეთ Organization Policy Administrator
დააწკაპუნეთ Organization Policy Administrator-ზე
დააწკაპუნეთ Save-ზე
თქვენს ანგარიშს ახლა აქვს სერვისის ანგარიშის გასაღების შექმნის ჩართვის ნებართვა. ძალაში შესასვლელად ამას შეიძლება რამდენიმე წუთი დასჭირდეს.
Google ელფოსტის Alias-ის გამოყენება Google Workspace-ისა და ChatGPT-ისთვის განსხვავებული ელფოსტის ანგარიშების შესანარჩუნებლად
თუ თქვენ ხართ ადმინისტრატორი, რომელიც Google Workspace-ს თქვენს ChatGPT სამუშაო სივრცეს უკავშირებს Google Drive-ის სინქრონიზებული კონექტორებისთვის ადმინისტრატორის მიერ მართული დაყენებით, და თქვენი ორგანიზაცია იყენებს სხვადასხვა ელფოსტის დომენებს ChatGPT-ისა და Google Workspace-ისთვის, მოგიწევთ დამატებითი ნაბიჯების გადადგმა, რათა დარწმუნდეთ, რომ მომხმარებლებს წარმატებით ექნებათ წვდომა Google Drive-ის სინქრონიზებულ კონექტორებზე.
რეკომენდაცია: როდესაც შესაძლებელია, გამოიყენეთ ერთი და იგივე ძირითადი ელფოსტის მისამართები როგორც Google Workspace-ის, ისე ChatGPT ანგარიშებისთვის.
თუ ეს შესაძლებელი არ არის, მიჰყევით ქვემოთ მოცემულ ინსტრუქციებს, რათა დააკონფიგურიროთ Google Workspace-ის ელფოსტის alias, რომელიც ემთხვევა ChatGPT-ში შესასვლელ ელფოსტას.
ნაბიჯები Google Workspace Alias-ის დასამატებლად
მიჰყევით ამ ნაბიჯებს Google Admin Console-ში, რათა დარწმუნდეთ, რომ თითოეული მომხმარებლის ChatGPT ელფოსტა შეიძლება დაკავშირებული იყოს მის Google Workspace ანგარიშთან:
გადადით Admin Console-ში. გადადით: Directory > Users
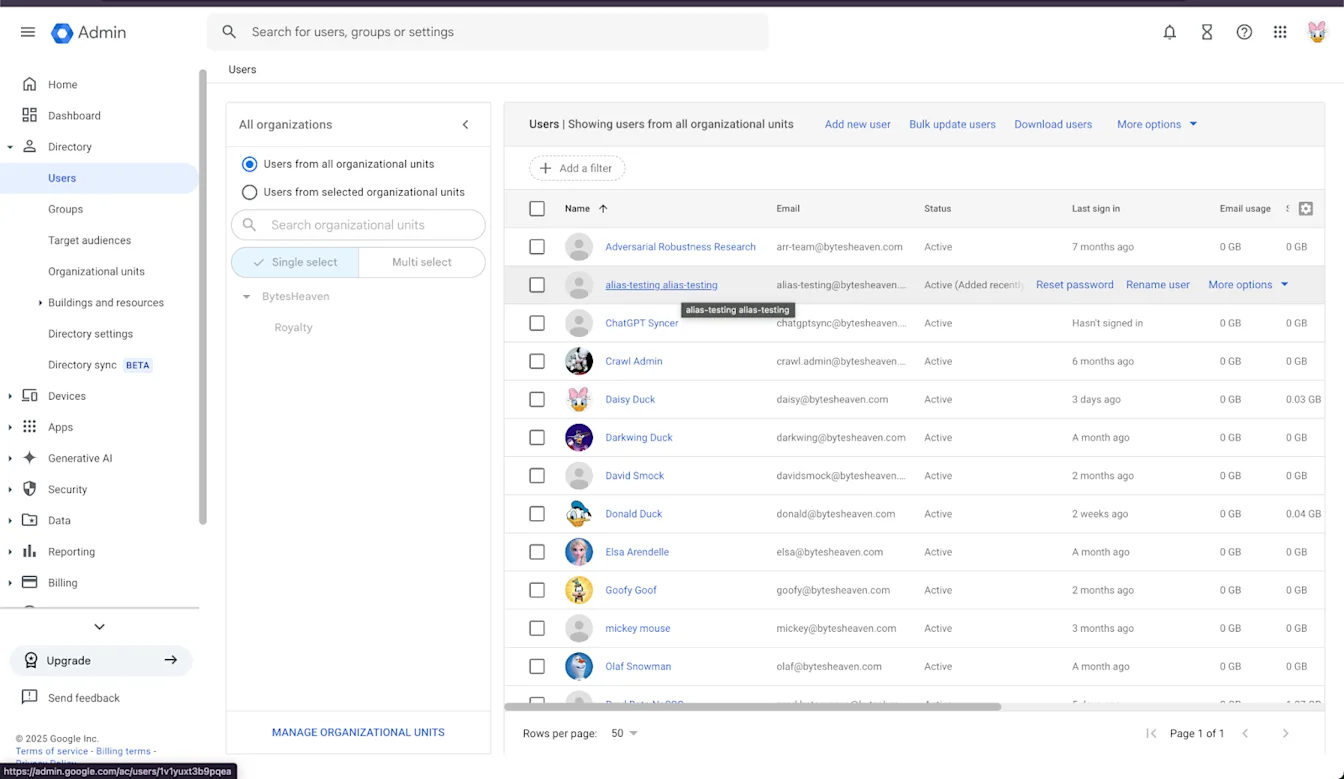
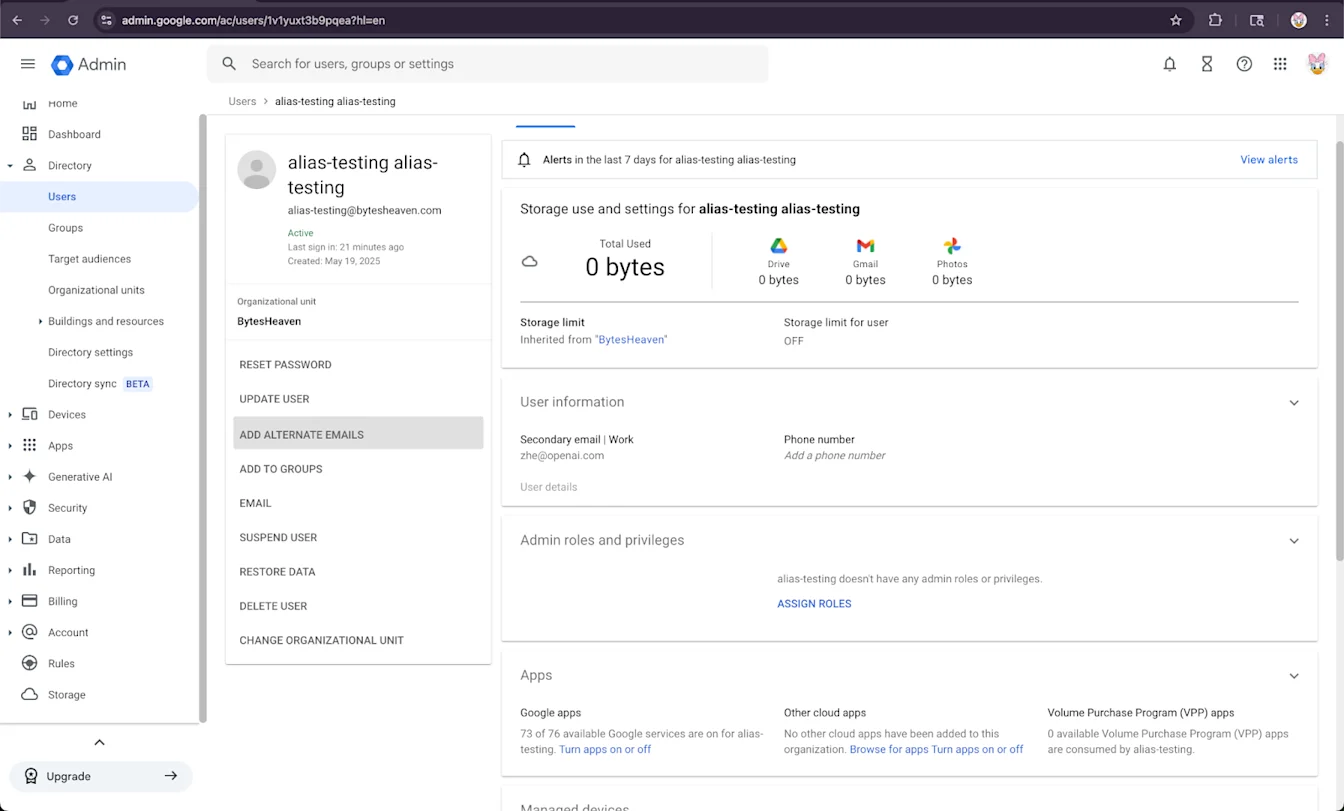
2. აირჩიეთ მომხმარებელი, შემდეგ „ADD ALTERNATIVE EMAILS“.
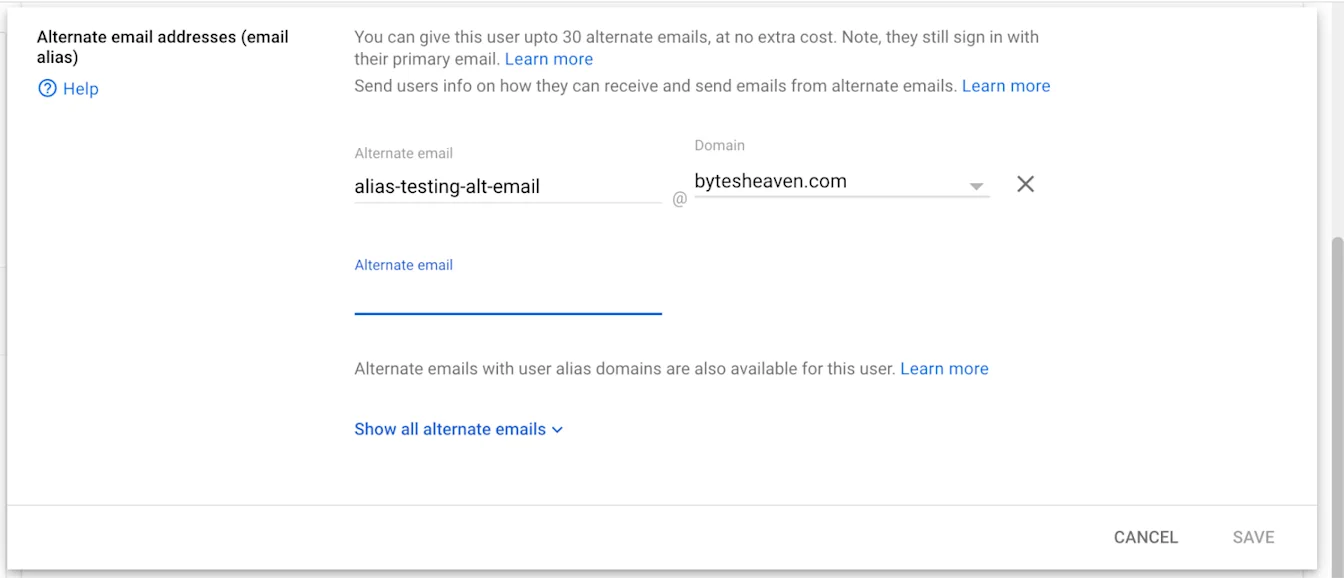
3. დაამატეთ ალტერნატიული ელფოსტა. დარწმუნდით, რომ ის შეესაბამება მომხმარებლის ChatGPT ანგარიშს.
4. აირჩიეთ Save
ცნობილი შეზღუდვები
პირადი ელფოსტის მისამართები მხარდაჭერილი არ არის
მომხმარებლები, რომლებიც ChatGPT-ში რეგისტრირდებიან პირადი მისამართებით (მაგ., example@gmail.com), ვერ დაუკავშირდებიან Google Workspace-ს. ეს დაყენება მხარდაჭერილი არ არის და უსაფრთხოების რისკს ქმნის, რადგან ორგანიზაციის გარედან შიდა მონაცემებზე წვდომის საშუალებას იძლევა.
Gmail-ის "+" alias-ები მხარდაჭერილი არ არის
Gmail მომხმარებლებს საშუალებას აძლევს alias-ები შექმნან თავიანთ მისამართზე "+"-ის დამატებით (მაგ., user+alias@gmail.com). ამ ტიპის aliasing არ მუშაობს Google Drive-ის სინქრონიზებულ კონექტორებთან. Alias აშკარად უნდა იყოს კონფიგურირებული Google Workspace-ში.
გავრცელებული შეცდომის შეტყობინება
თუ ელფოსტის მისამართები სწორად არ არის დაკავშირებული, მომხმარებლებს შეიძლება შეხვდეთ ეს შეტყობინება: „ვერ შევძელით თქვენი ანგარიშის Google Drive-თან დაკავშირება. დააწკაპუნეთ მეტის გასაგებად.“
თუ მომხმარებლები ამ შეტყობინებას იღებენ, გადახედეთ ამ დოკუმენტის ნაბიჯებს და დარწმუნდით, რომ ისინი ზუსტად არის შესრულებული. თუ დამატებითი დახმარებაა საჭირო, გთხოვთ დაუკავშირდეთ ჩვენი მხარდაჭერის გუნდს.