หากต้องการเชื่อมต่อ Google Workspace ของคุณกับ ChatGPT โดยใช้การตั้งค่าแบบ admin-managed ก่อนอื่นคุณจะต้องกำหนดค่าการเข้าถึงในคอนโซลผู้ดูแลระบบของ Google:
สร้างบัญชีบริการที่มีสิทธิ์เข้าถึงแบบอ่านอย่างเดียวสำหรับ Google Drive ผู้ใช้ และกลุ่ม
ขอแนะนำอย่างยิ่งให้สร้างบัญชีบริการนี้ภายใต้บัญชี Google เดียวกันกับที่เชื่อมโยงกับเวิร์กสเปซ ChatGPT ของคุณ หากบัญชีในเวิร์กสเปซ ChatGPT ใช้โดเมนอีเมลต่างจากที่ใช้ใน Google Workspace จะมีขั้นตอนเพิ่มเติมที่คุณต้องทำตามเพื่อเปิดใช้ตัวเชื่อมต่อนี้สำหรับผู้ใช้ของคุณ
สร้างบัญชีผู้ดูแลระบบที่บัญชีบริการจะทำงานแทน
จากนั้นทำการตั้งค่าให้เสร็จสิ้นในคอนโซลผู้ดูแลระบบ ChatGPT:
อัปโหลดคีย์ส่วนตัวของบัญชีบริการ (ไฟล์ JSON จาก Google)
ระบุบัญชีผู้ดูแลระบบ (ไม่ต้องใช้ข้อมูลเข้าสู่ระบบ)
เลือกไฟล์ที่จะซิงค์ และเลือกผู้ใช้ที่จะมีสิทธิ์เข้าถึงการเชื่อมต่อ
คู่มือนี้จะพาคุณทำตามทั้ง 6 ขั้นตอนนี้
การตั้งค่าบัญชีบริการ
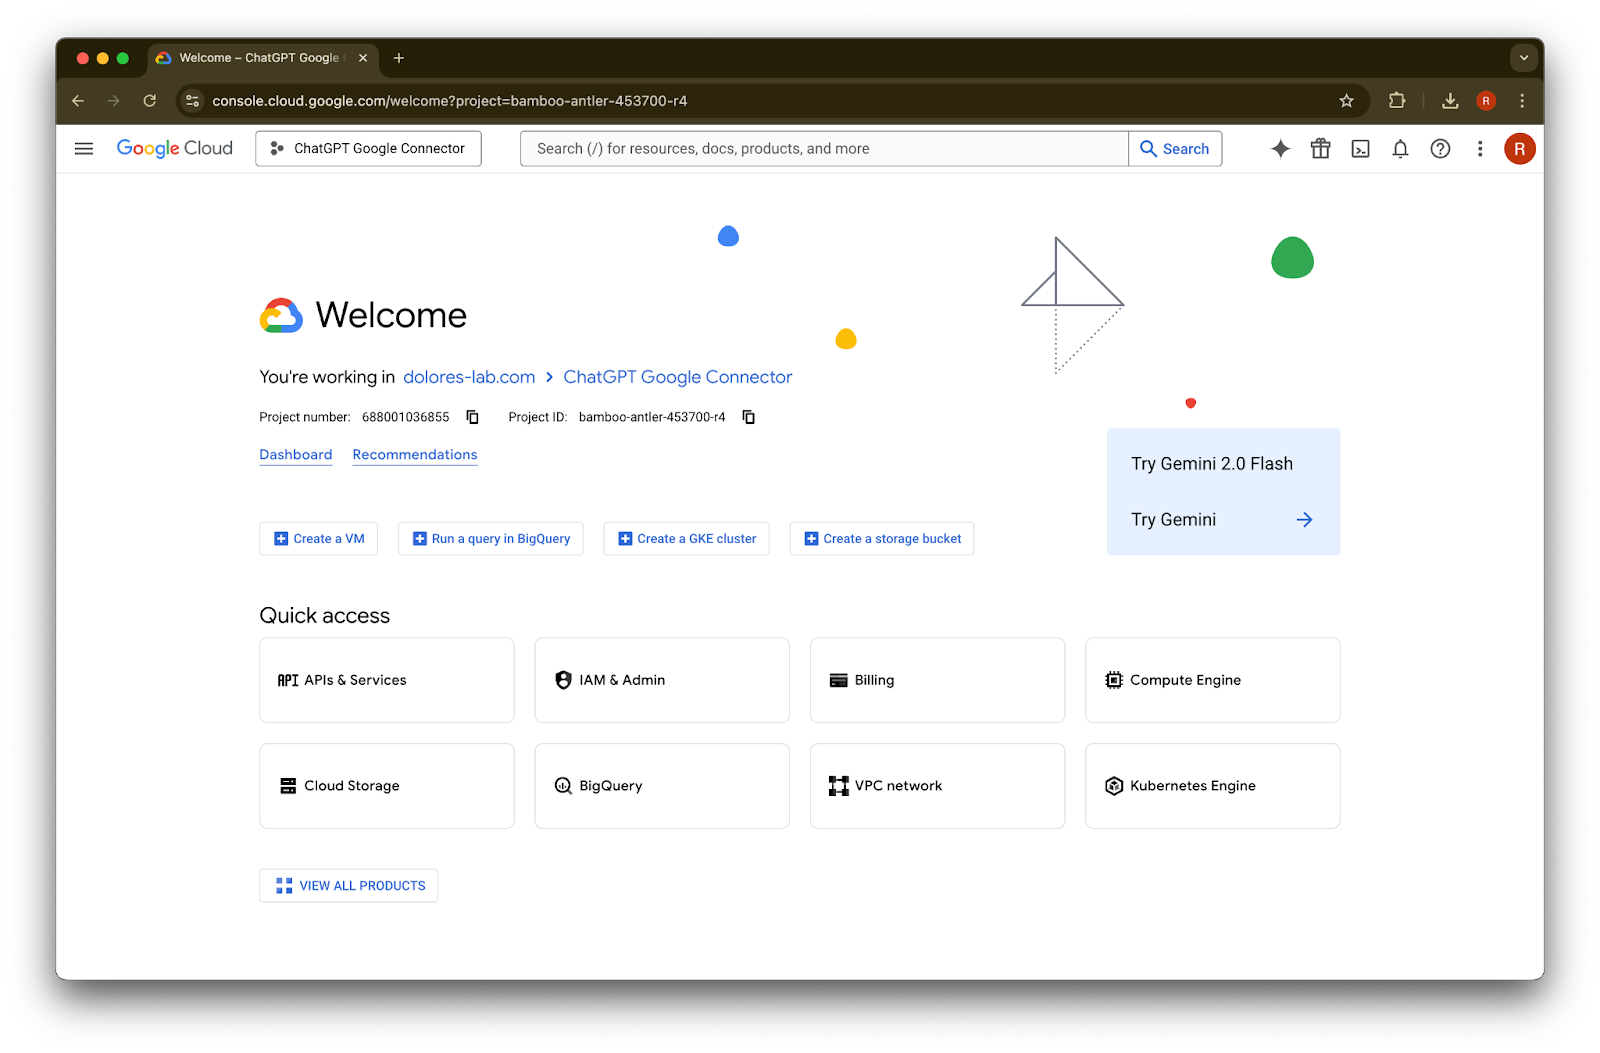
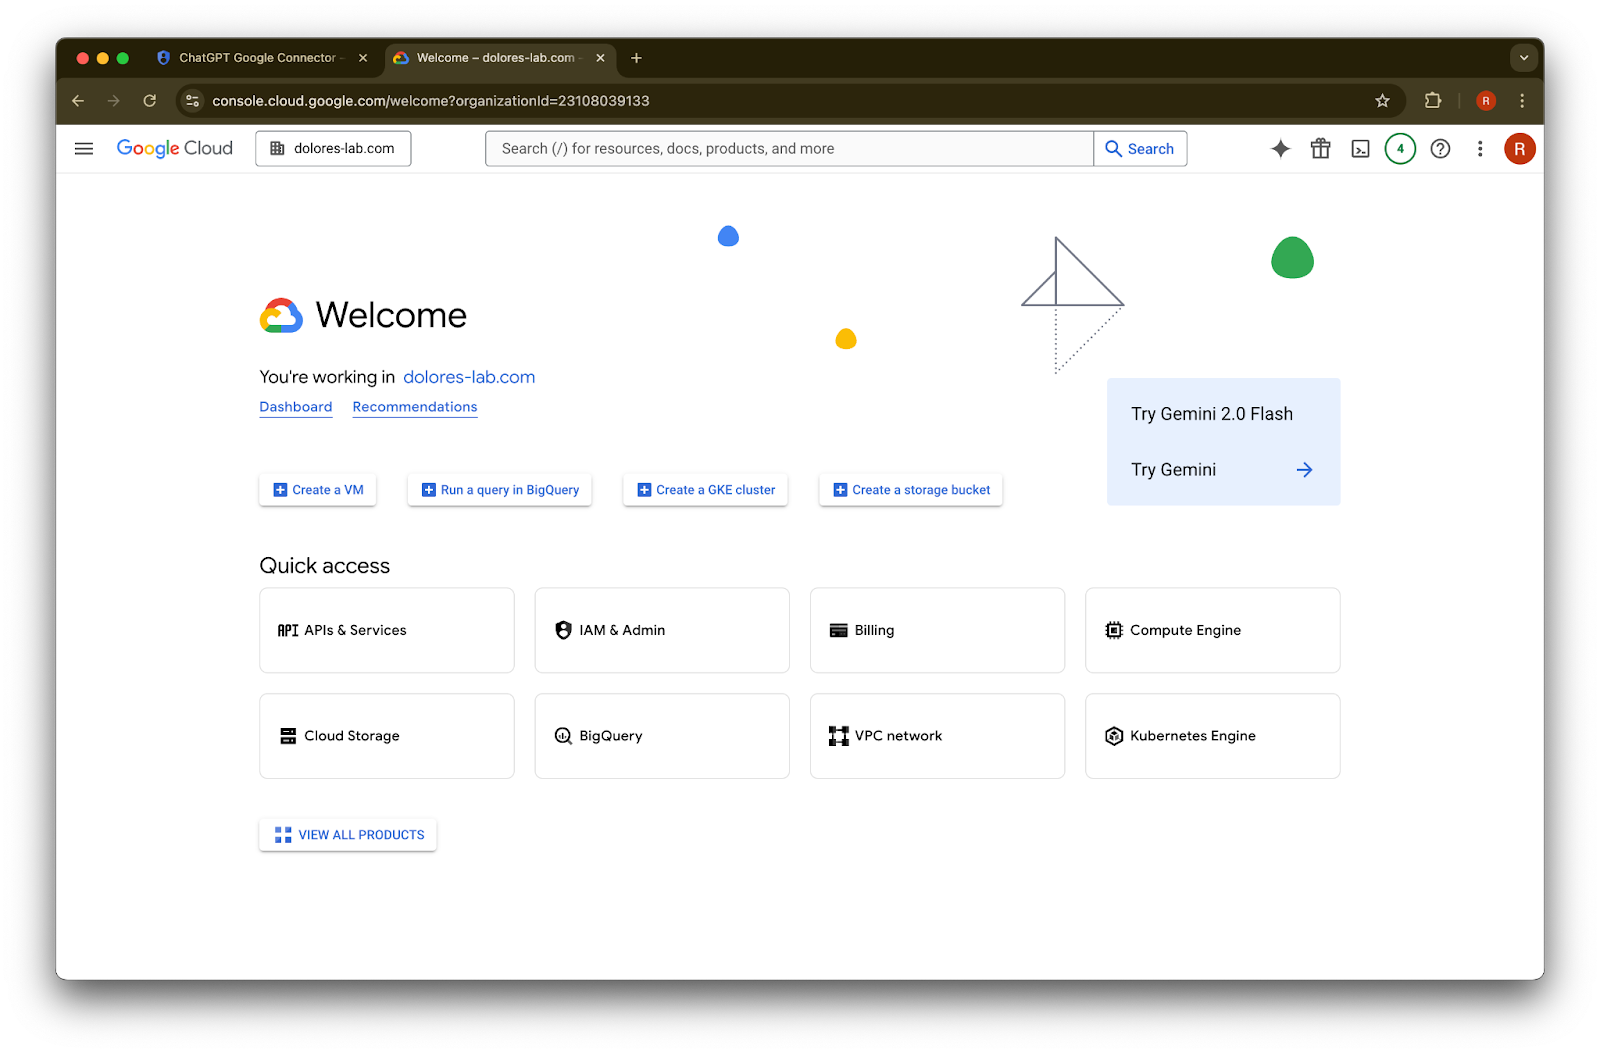
ไปที่ console.cloud.google.com
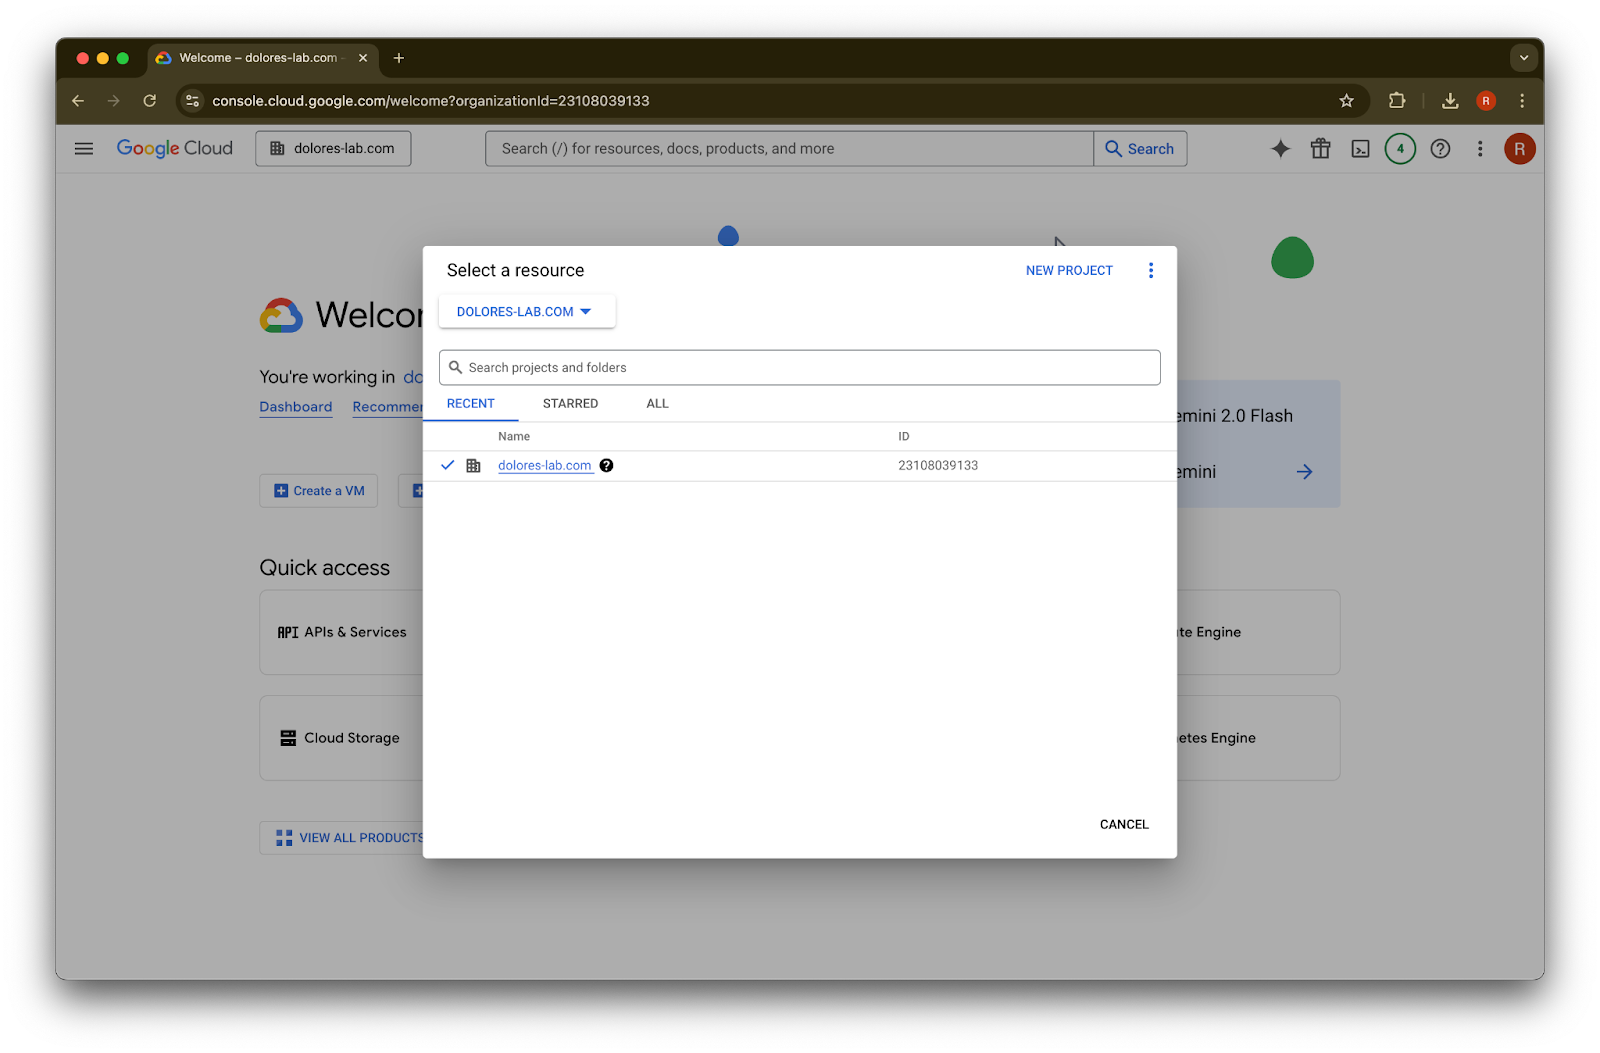
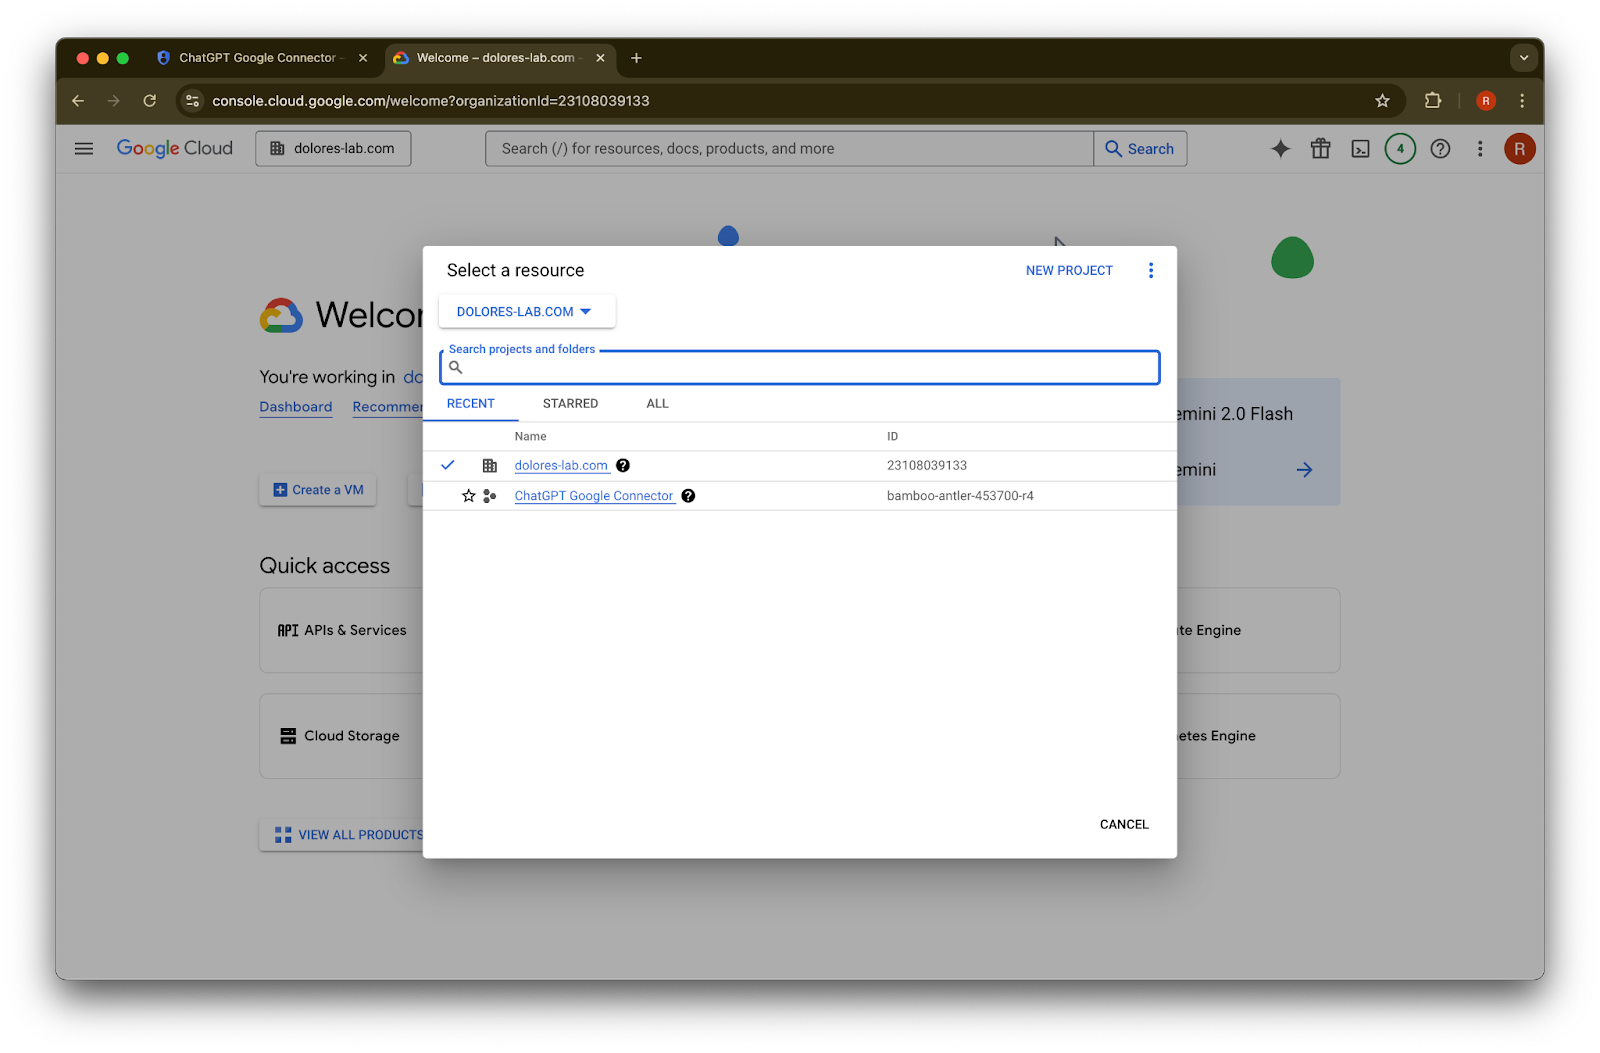
คลิกเมนูแบบเลื่อนลงของโปรเจกต์Imageตรวจสอบให้แน่ใจว่าคุณลงชื่อเข้าใช้ Google workspace เดียวกันกับที่เชื่อมโยงกับเวิร์กสเปซ ChatGPT ของคุณ (หากคุณไม่มี Google workspace ที่เชื่อมโยงกับเวิร์กสเปซ ChatGPT และใช้อีเมลต่างกันระหว่างทั้งสอง คุณจะต้อง ทำตามขั้นตอนเพิ่มเติม มิฉะนั้นผู้ใช้ของคุณอาจไม่สามารถใช้ตัวเชื่อมต่อที่ซิงค์กับ Google Drive ได้)
เลือก New Project
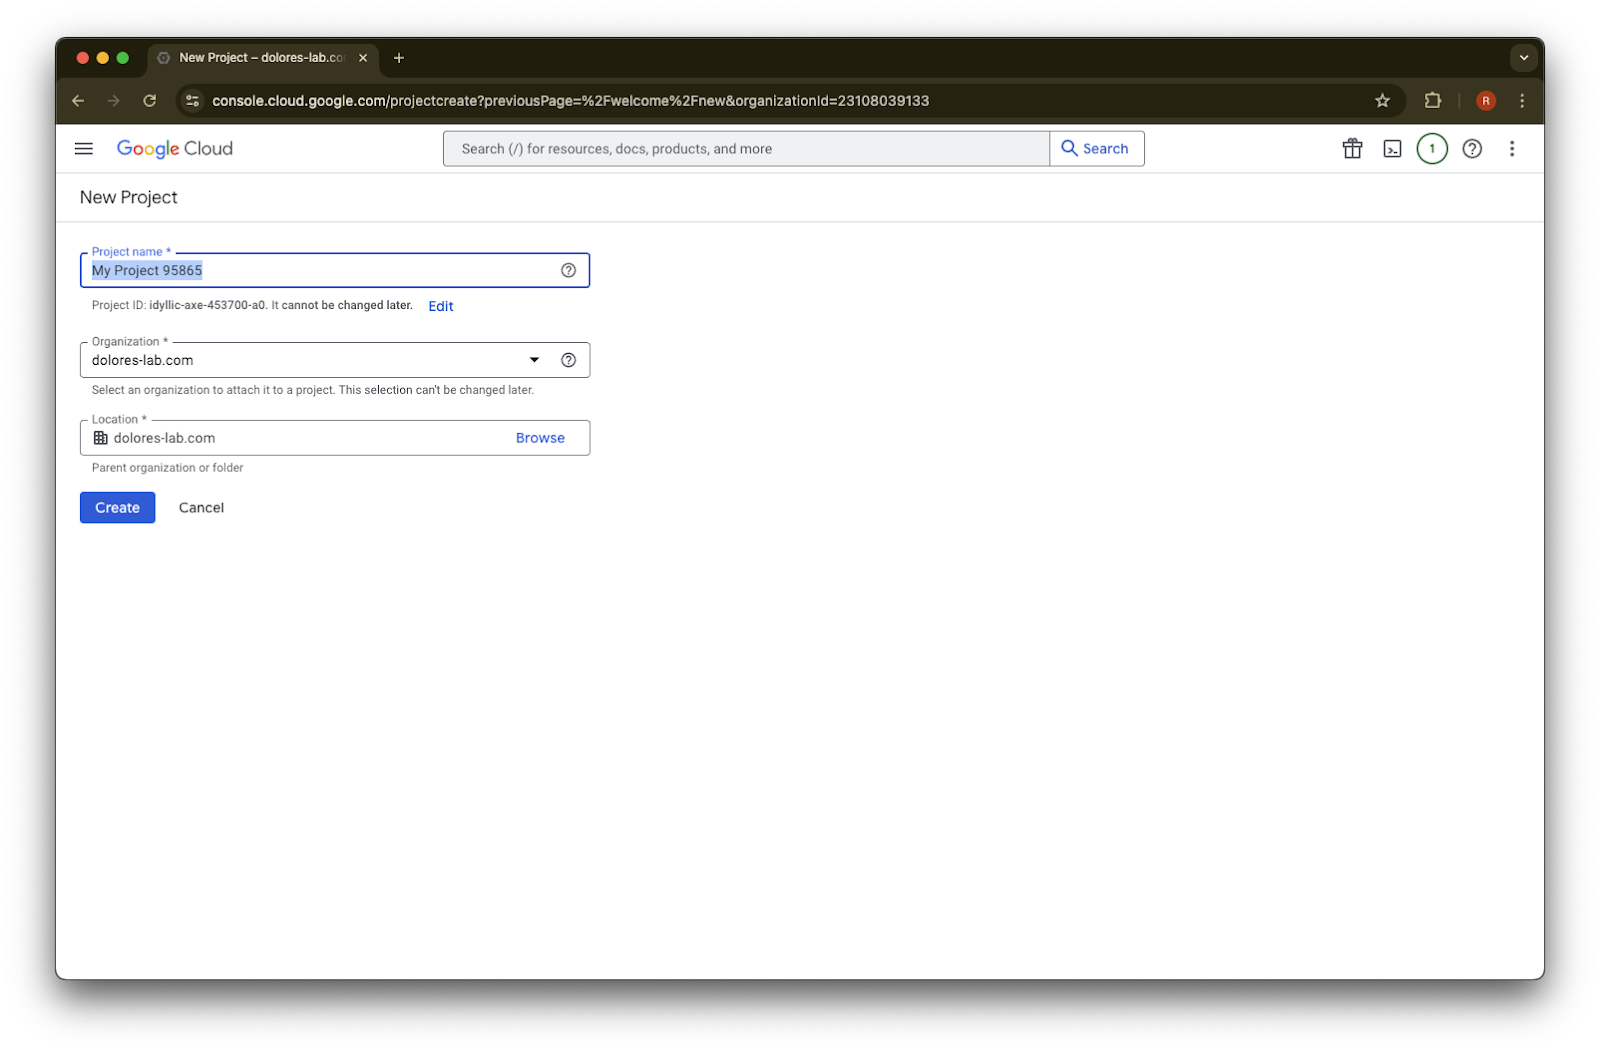
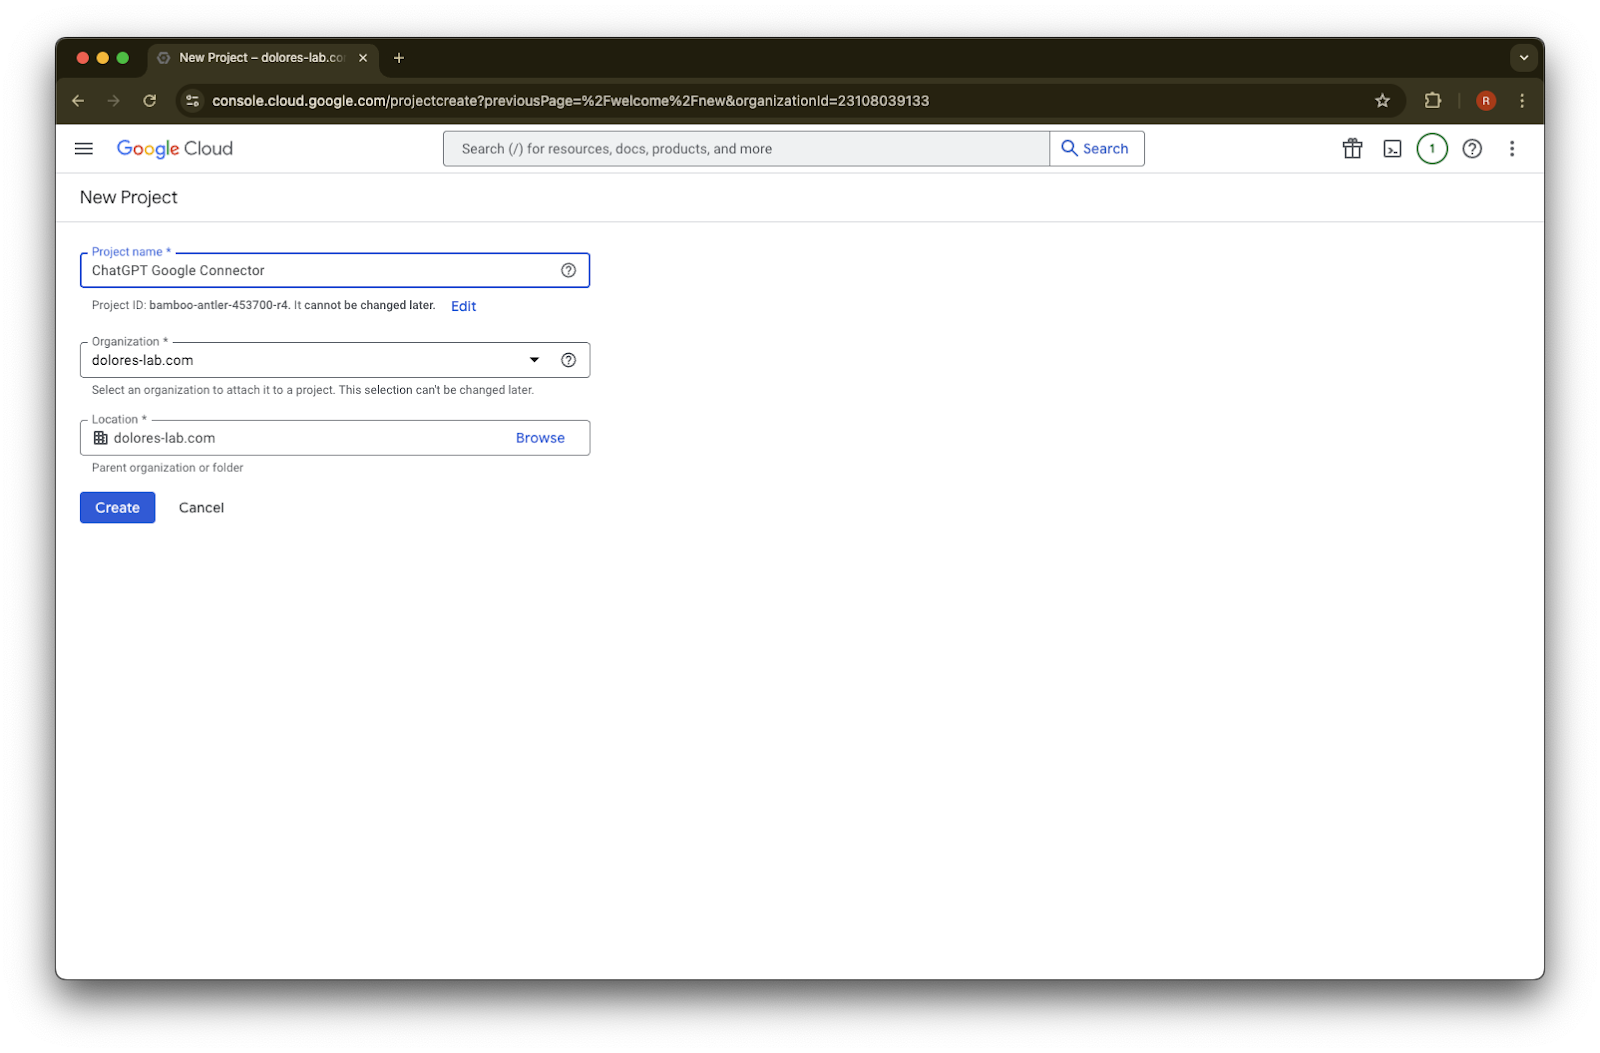
ป้อน Project Name
สร้างโปรเจกต์
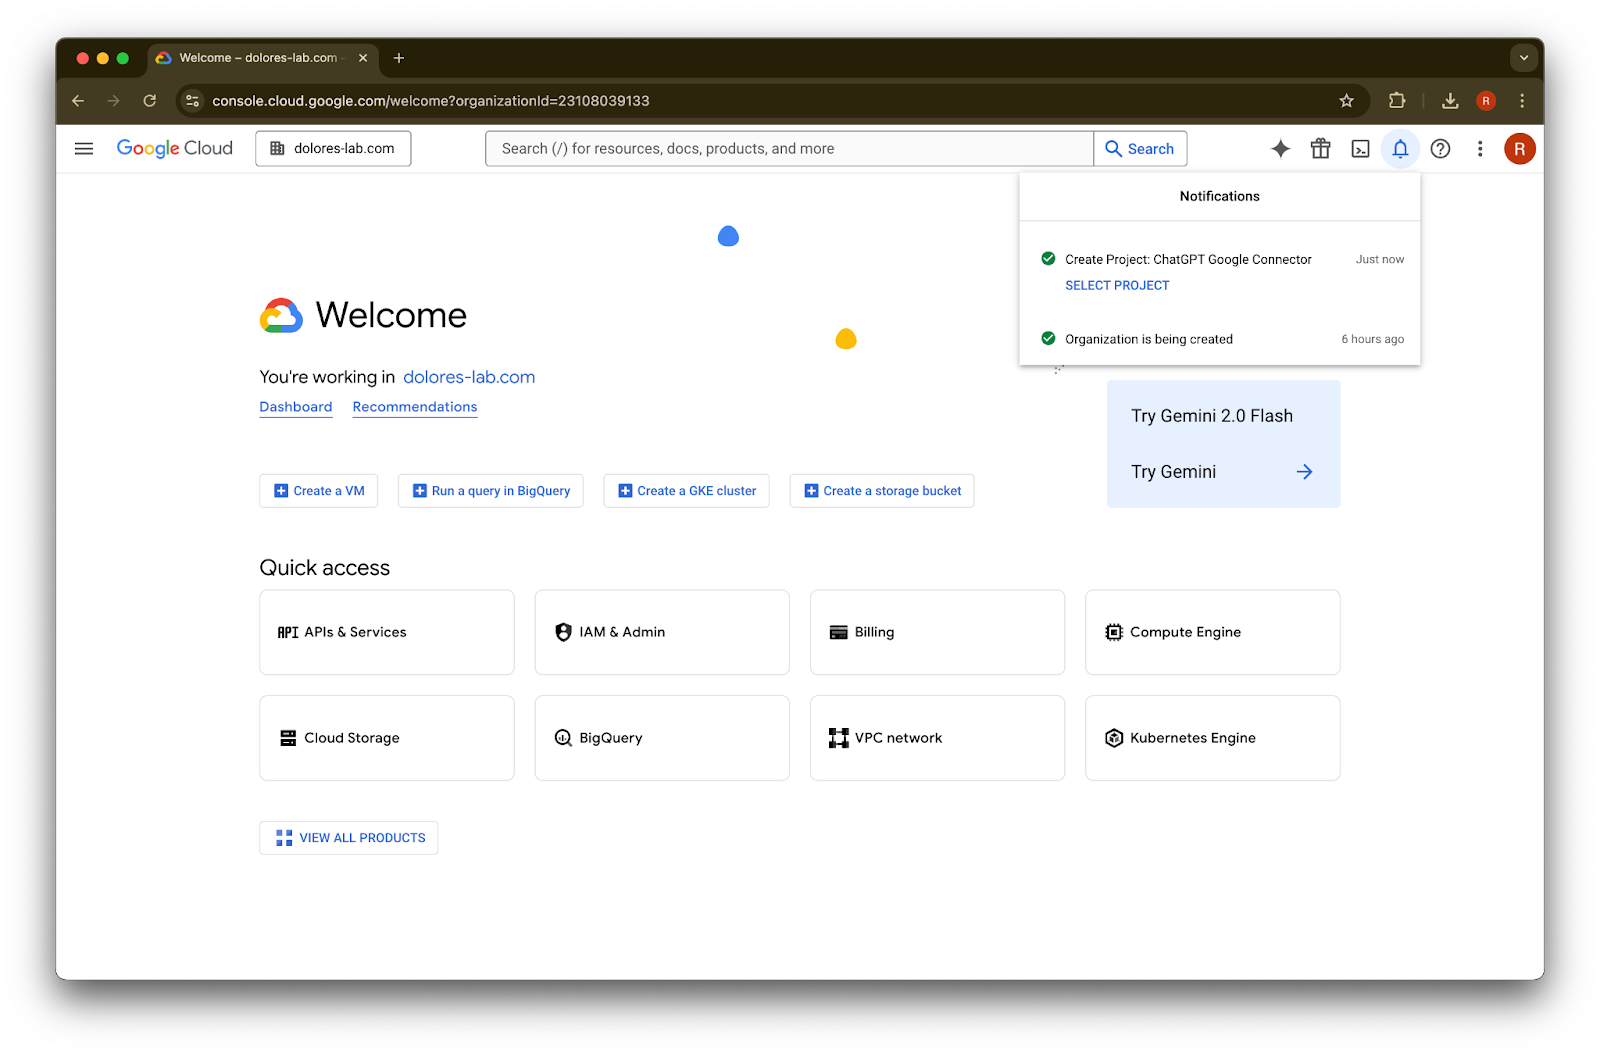
รอจนกว่าโปรเจกต์จะถูกสร้าง แล้วคลิก Select Project
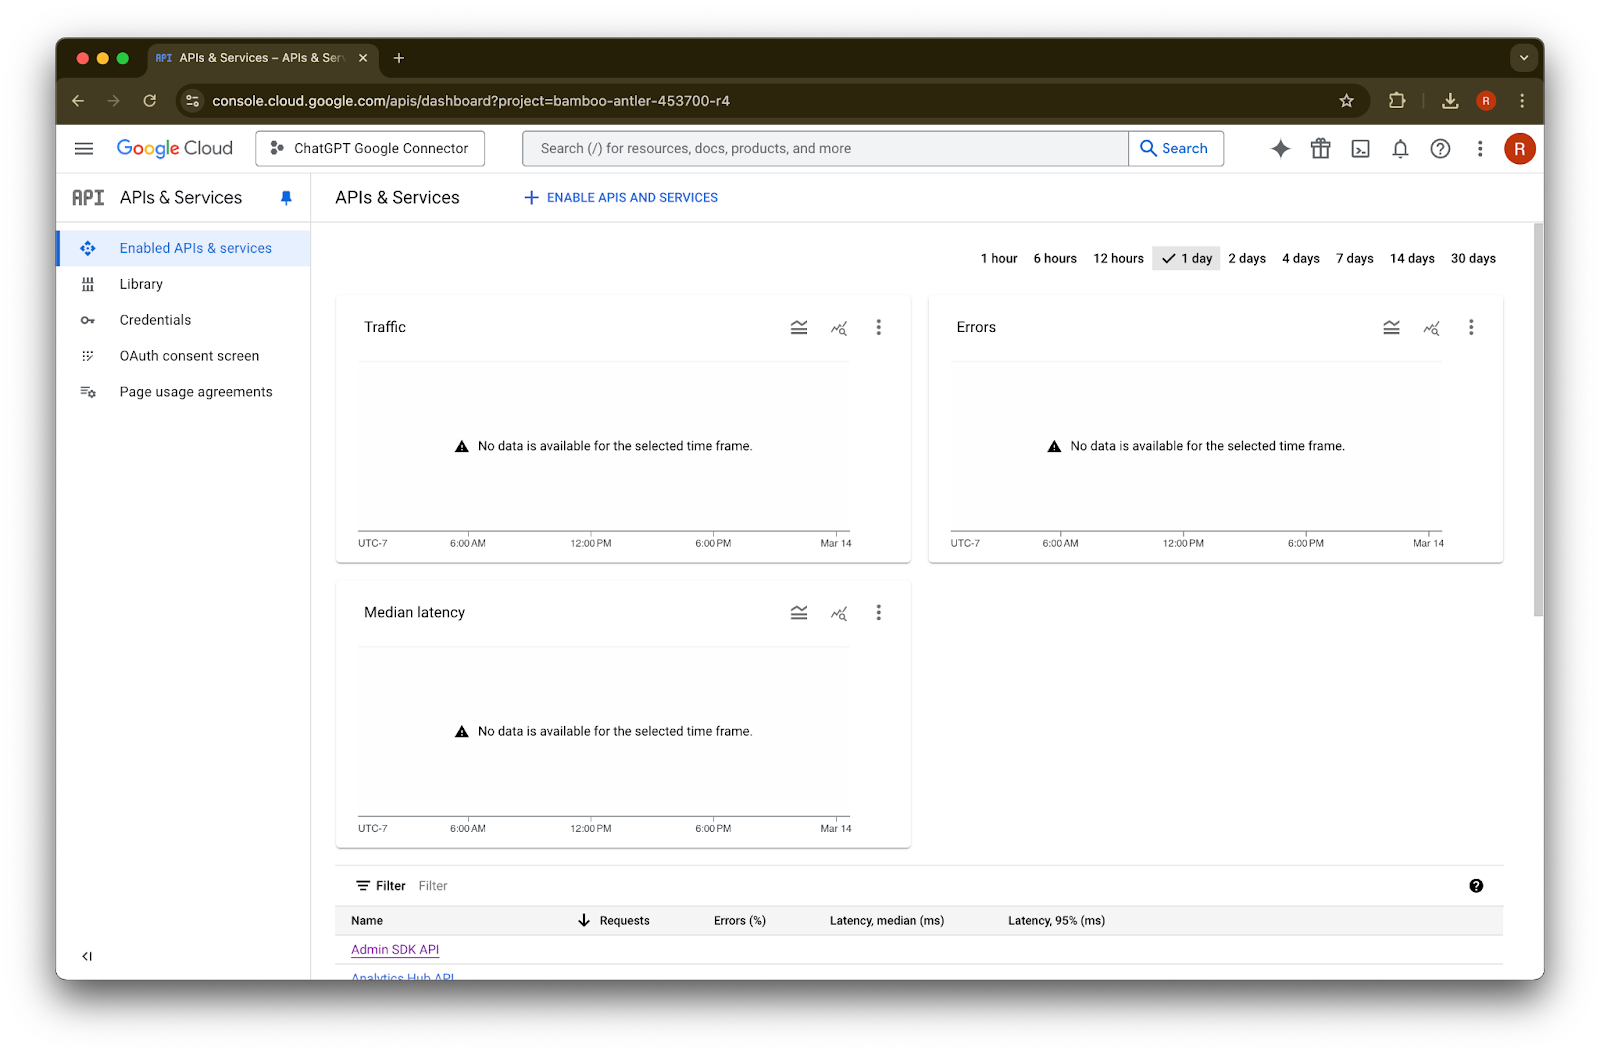
คลิก APIs & Services
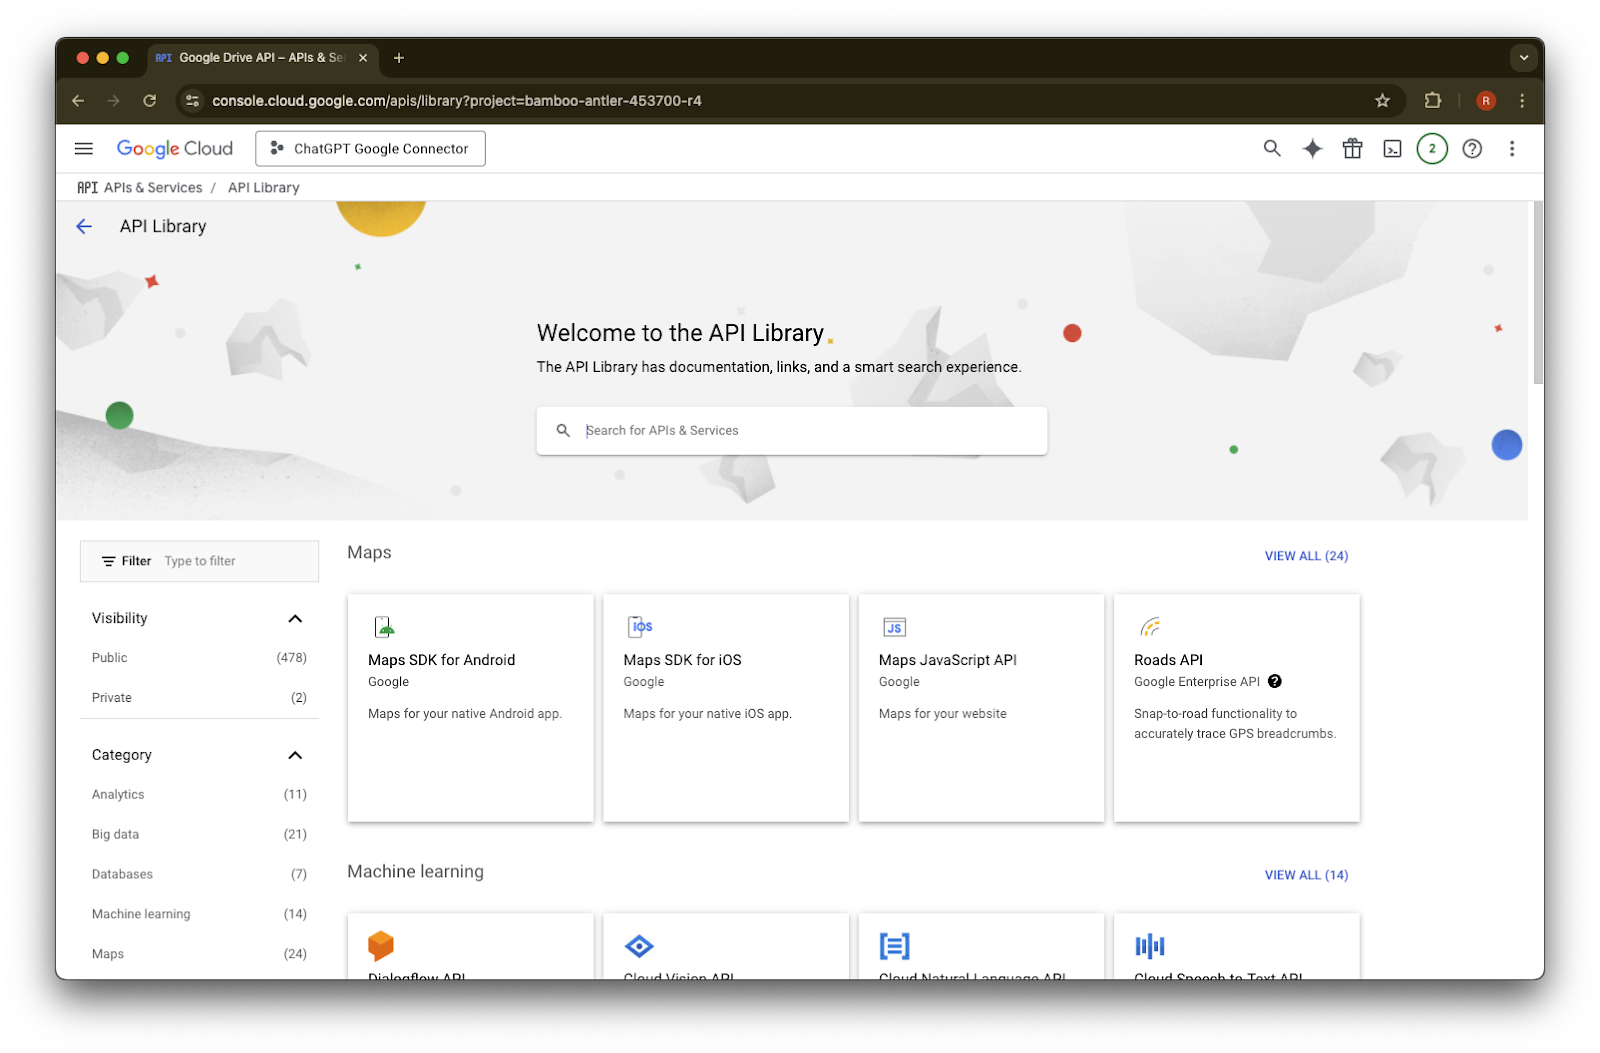
คลิก Library
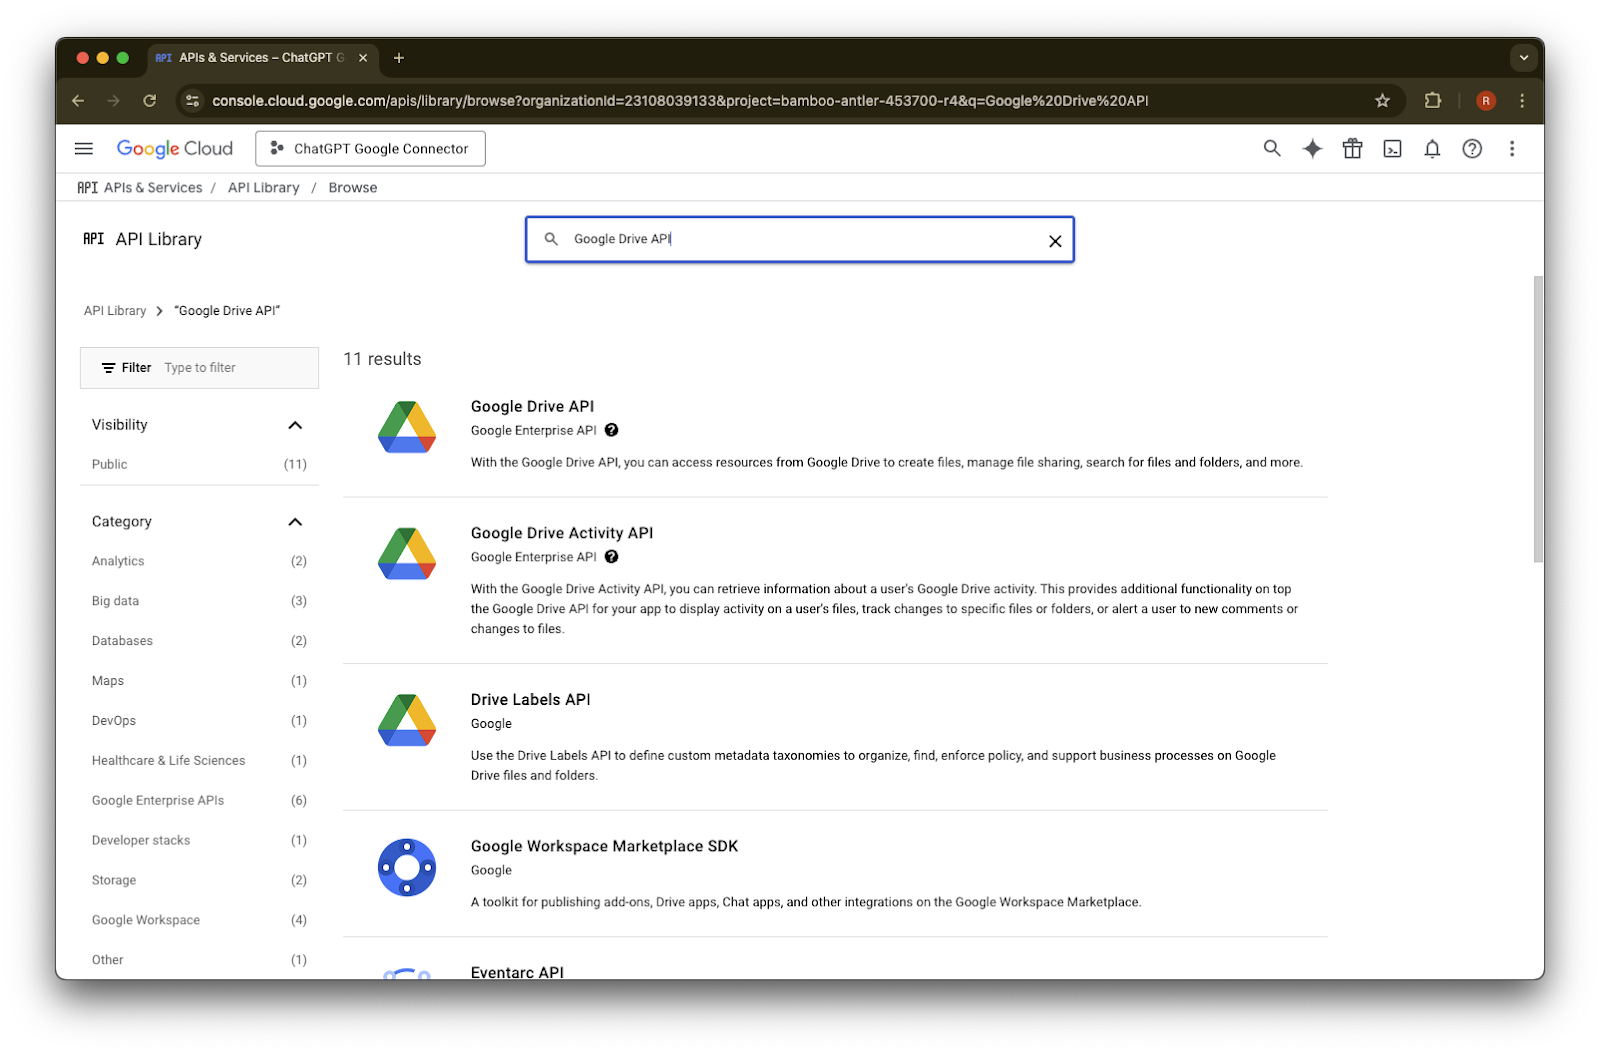
ตอนนี้เราจะเพิ่ม API สามรายการ โดยใช้ช่องค้นหาเพื่อค้นหา
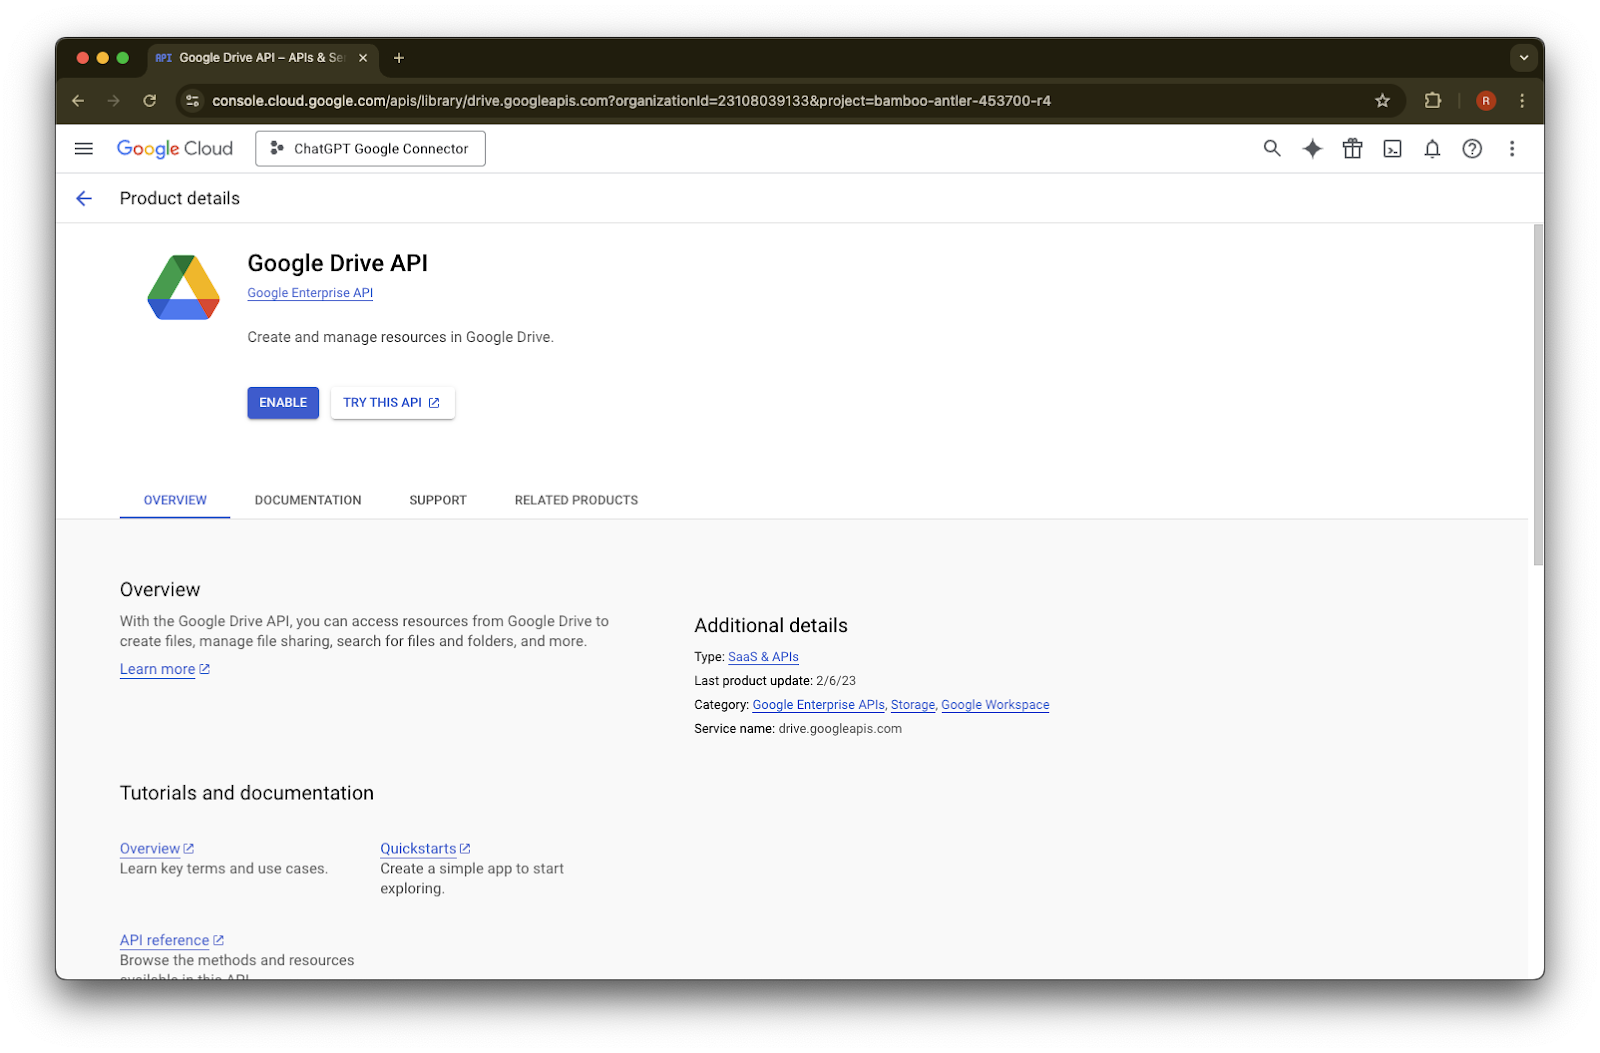
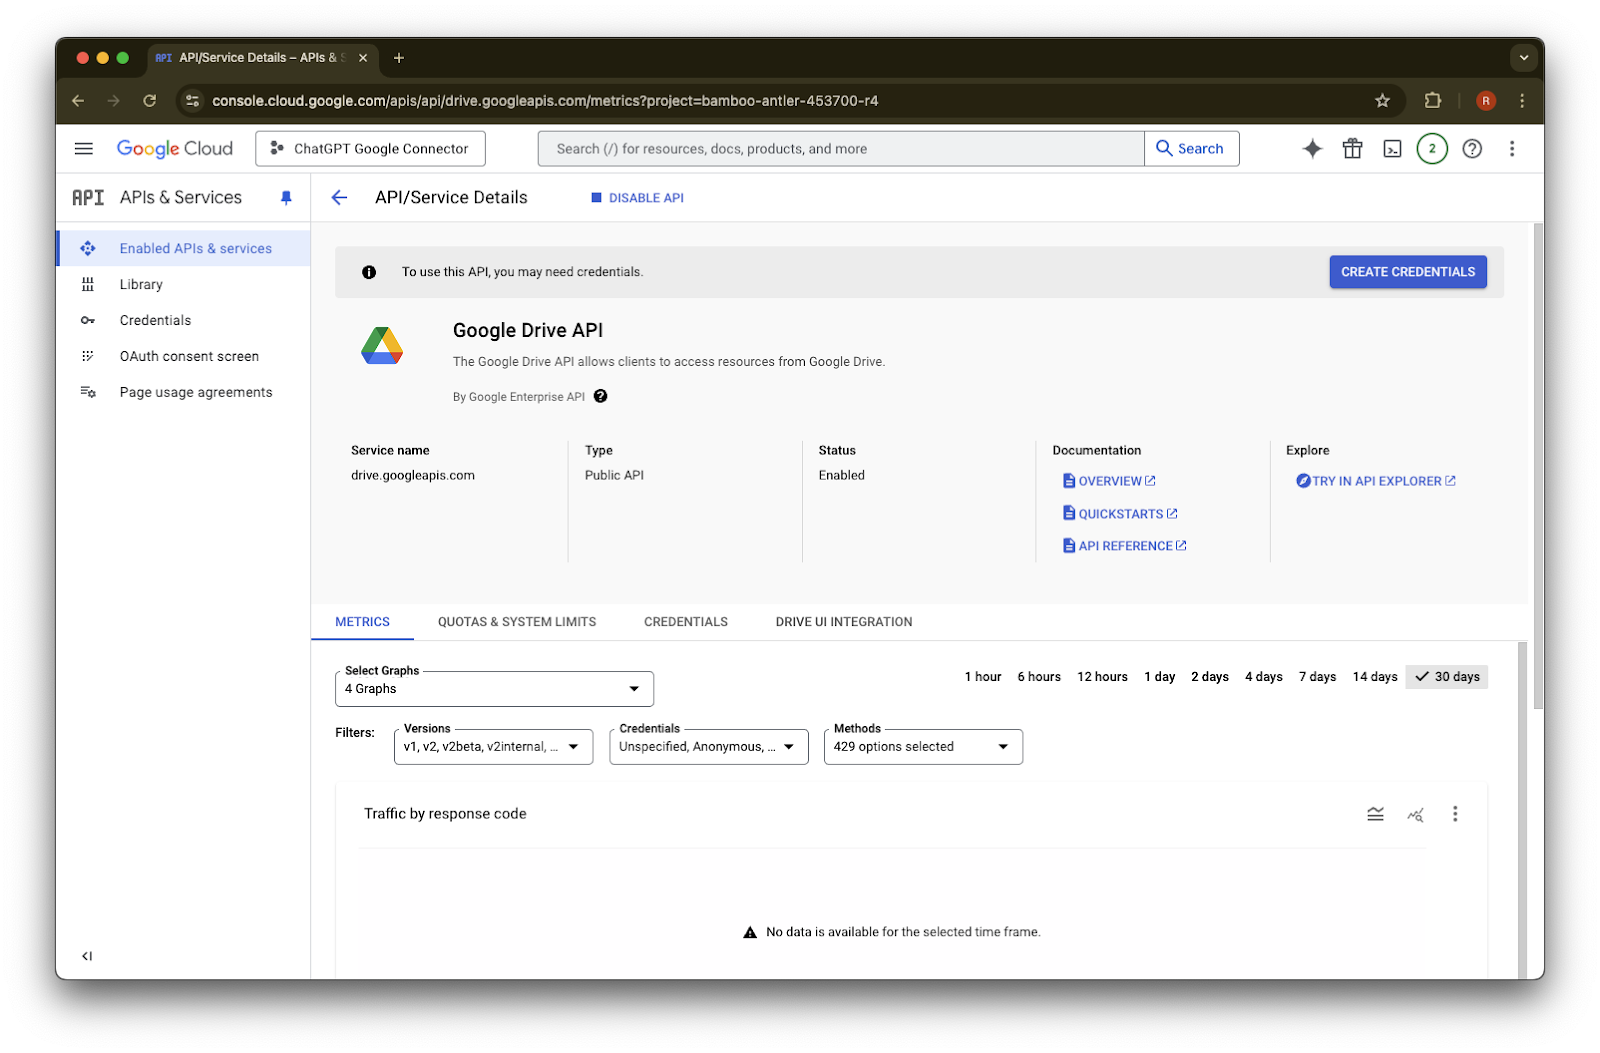
ค้นหาและเลือก Google Drive API
คลิก Enable
คลิก Library
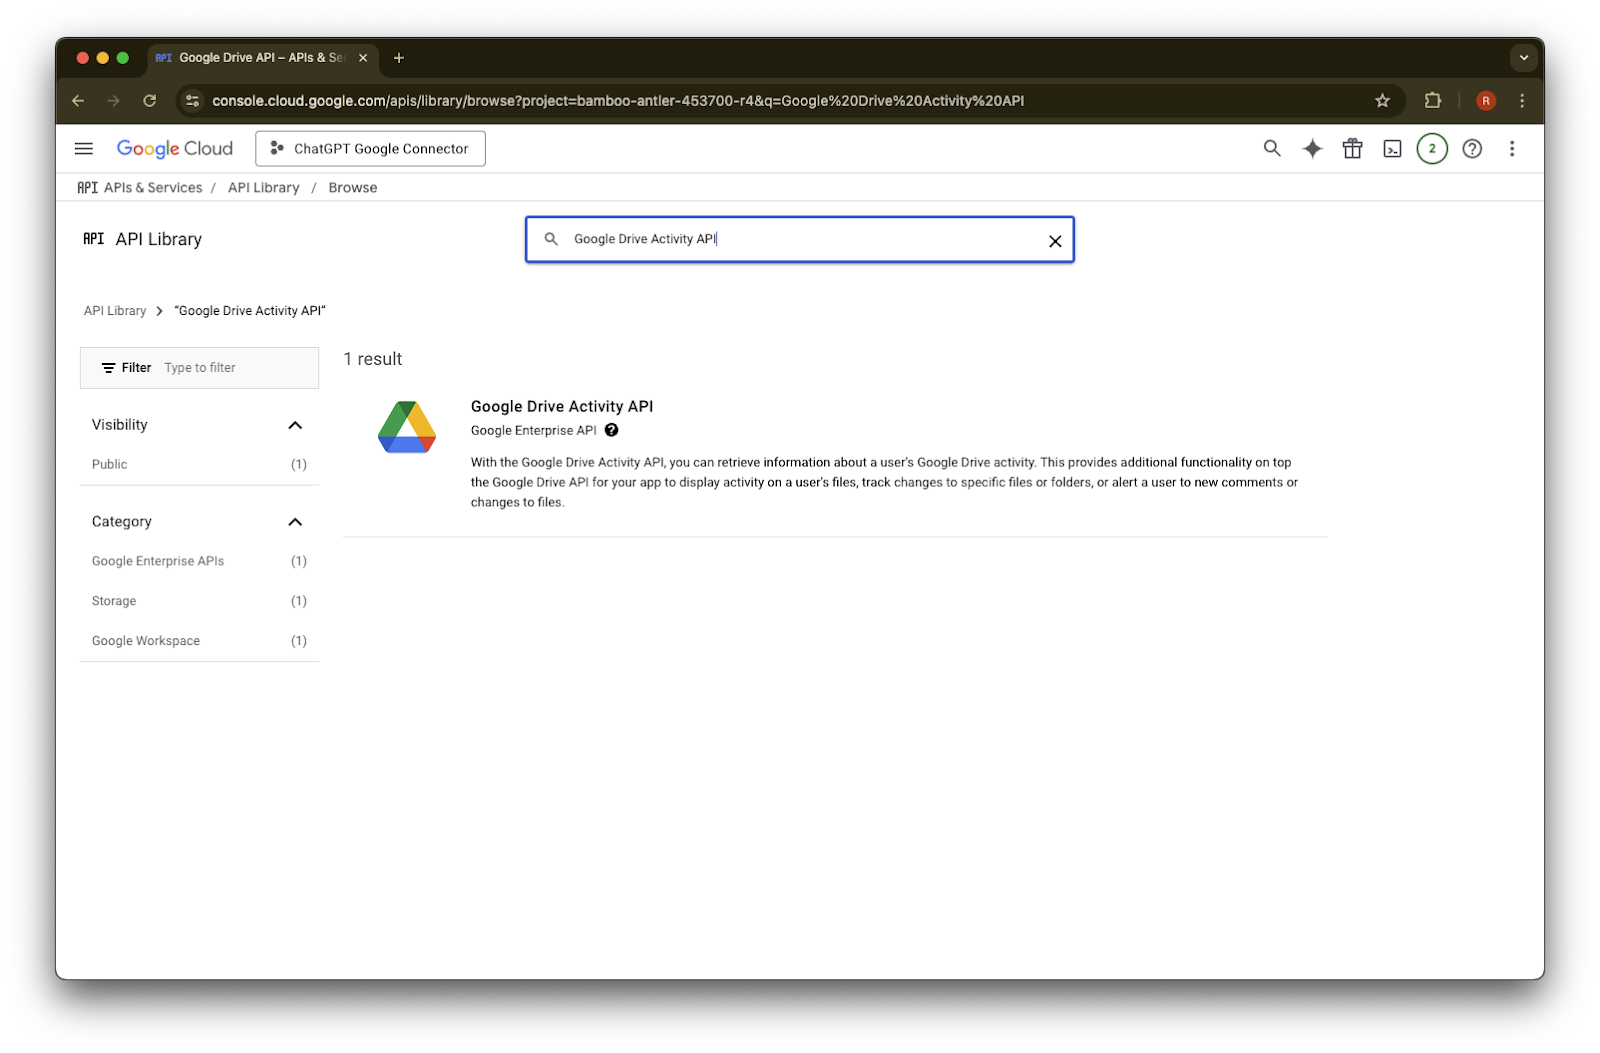
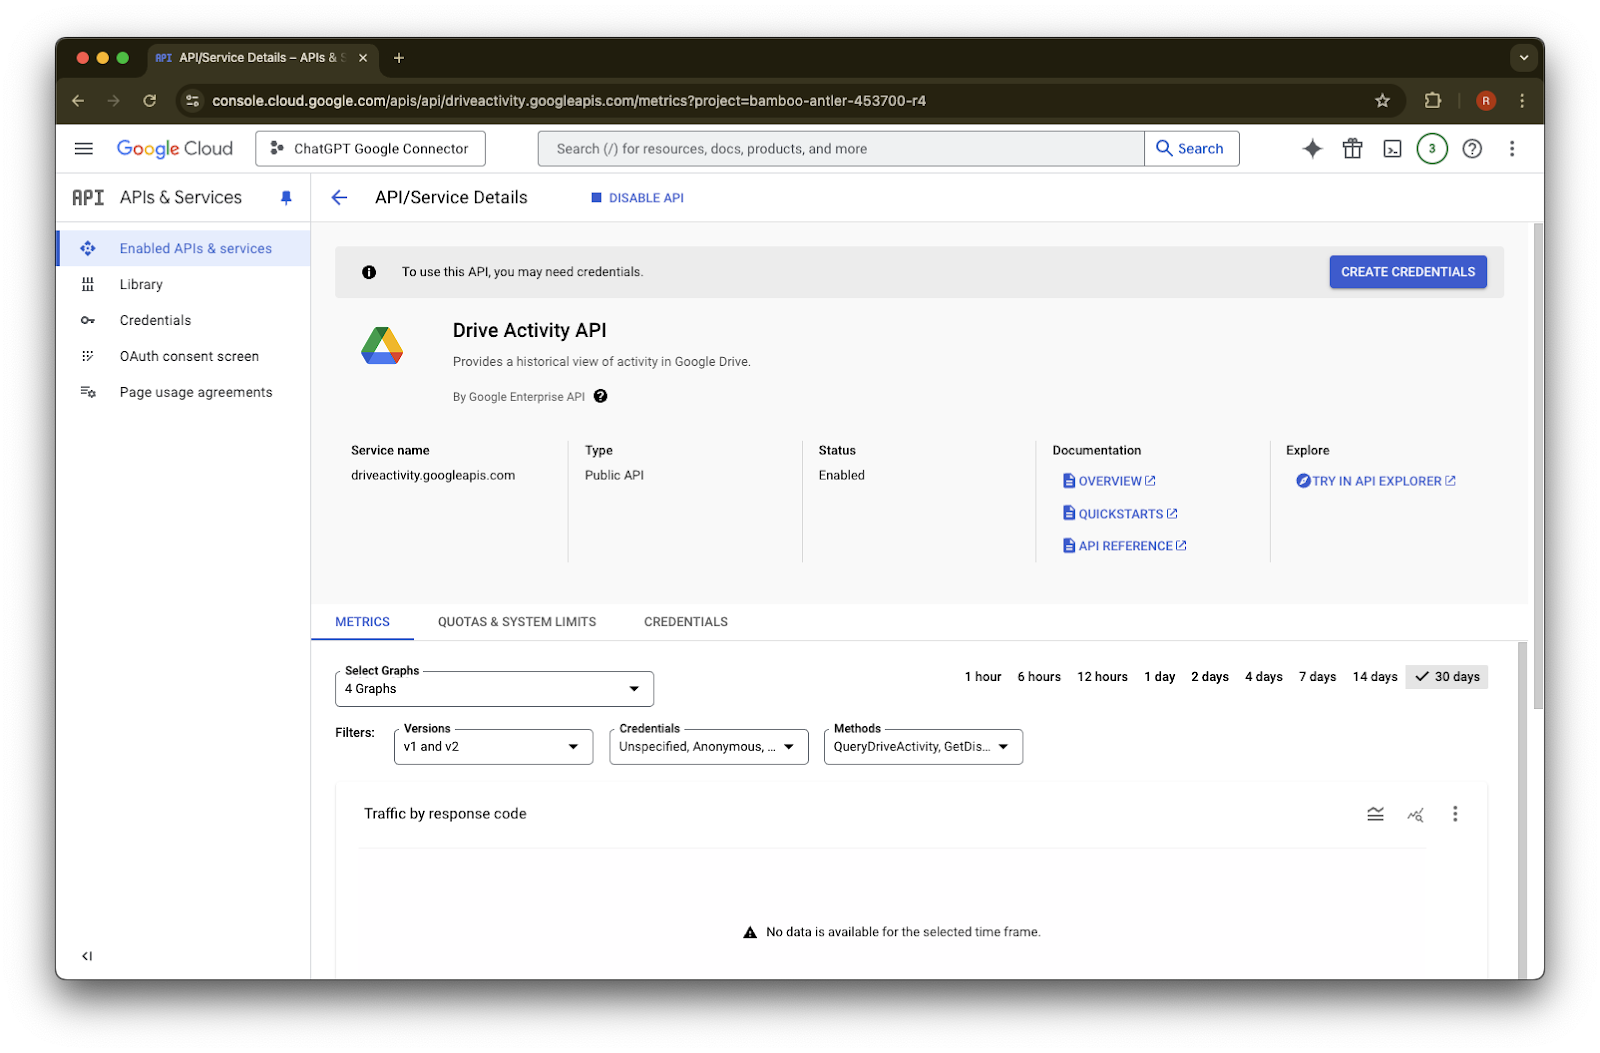
ค้นหา Google Drive Activity
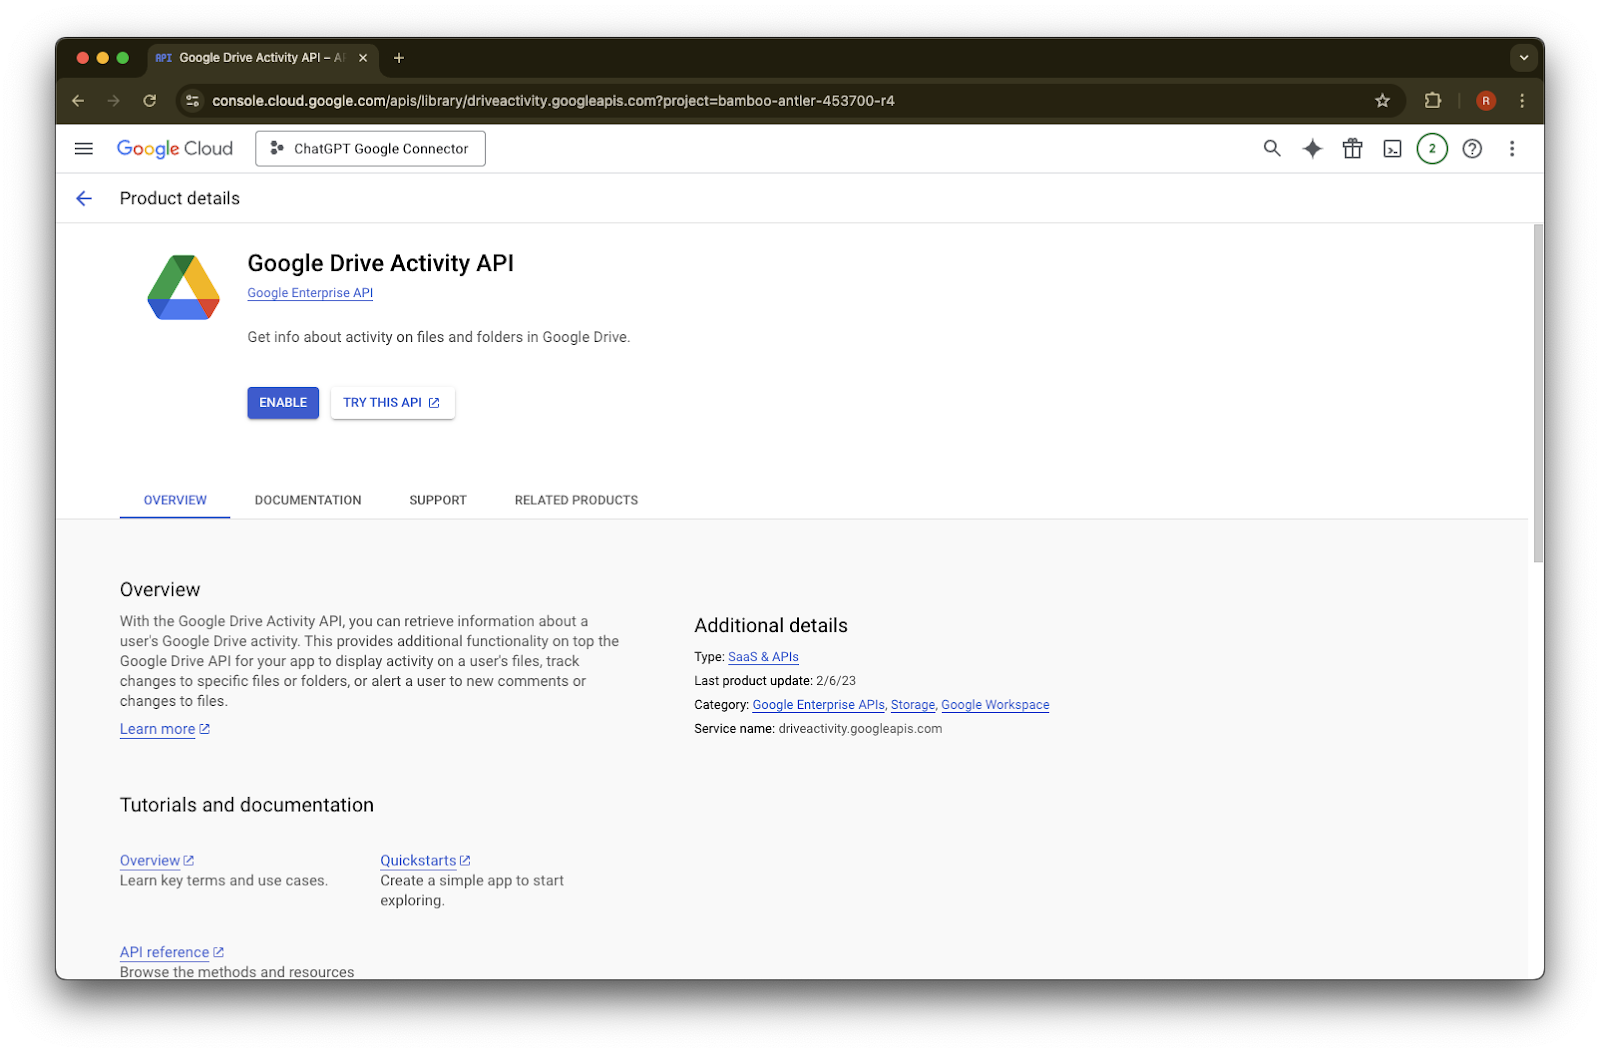
เลือก Google Drive Activity API
คลิก Enable
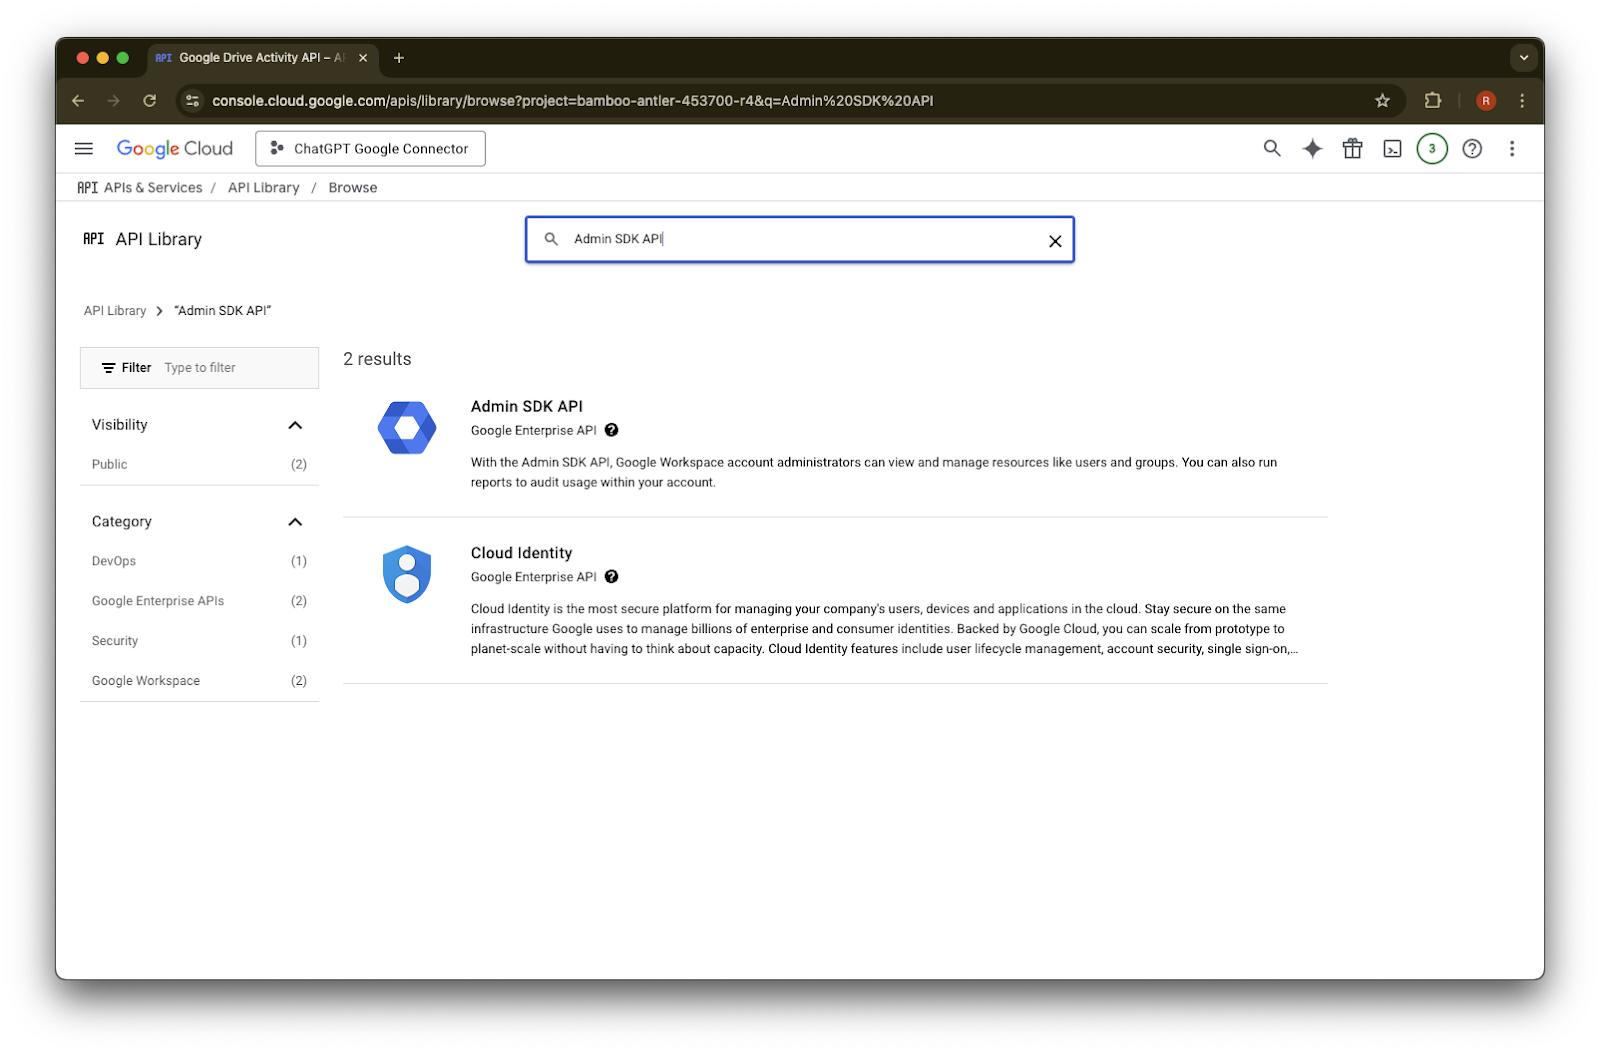
คลิก Library
ค้นหา Admin SDK API
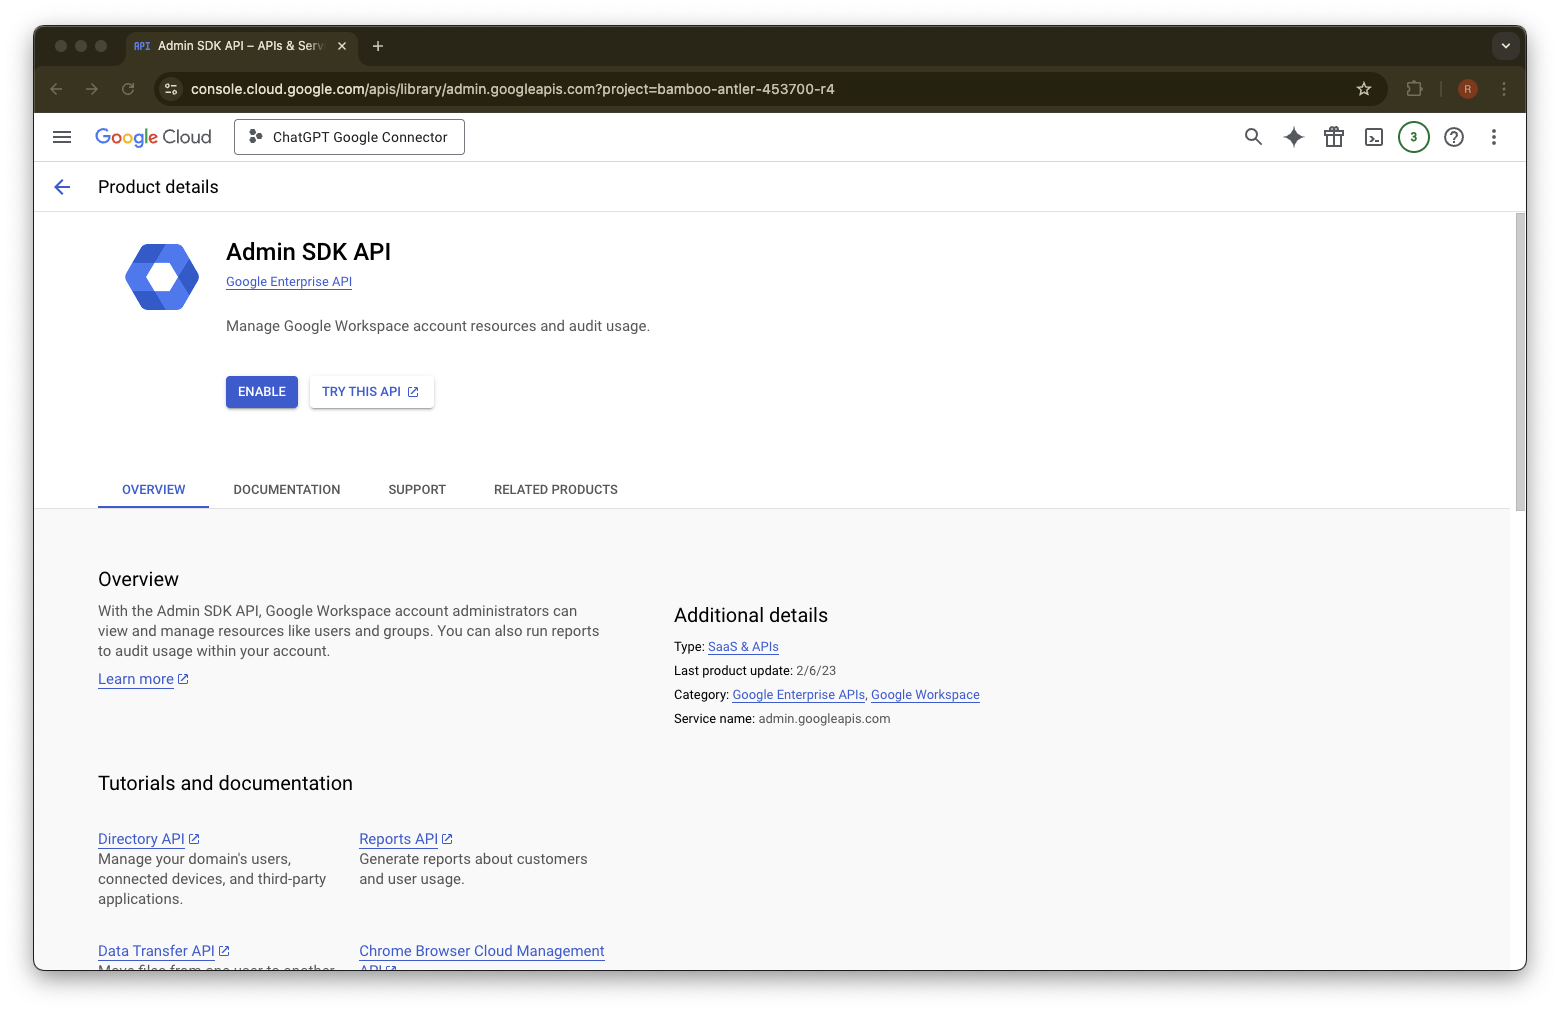
เลือก Admin SDK API
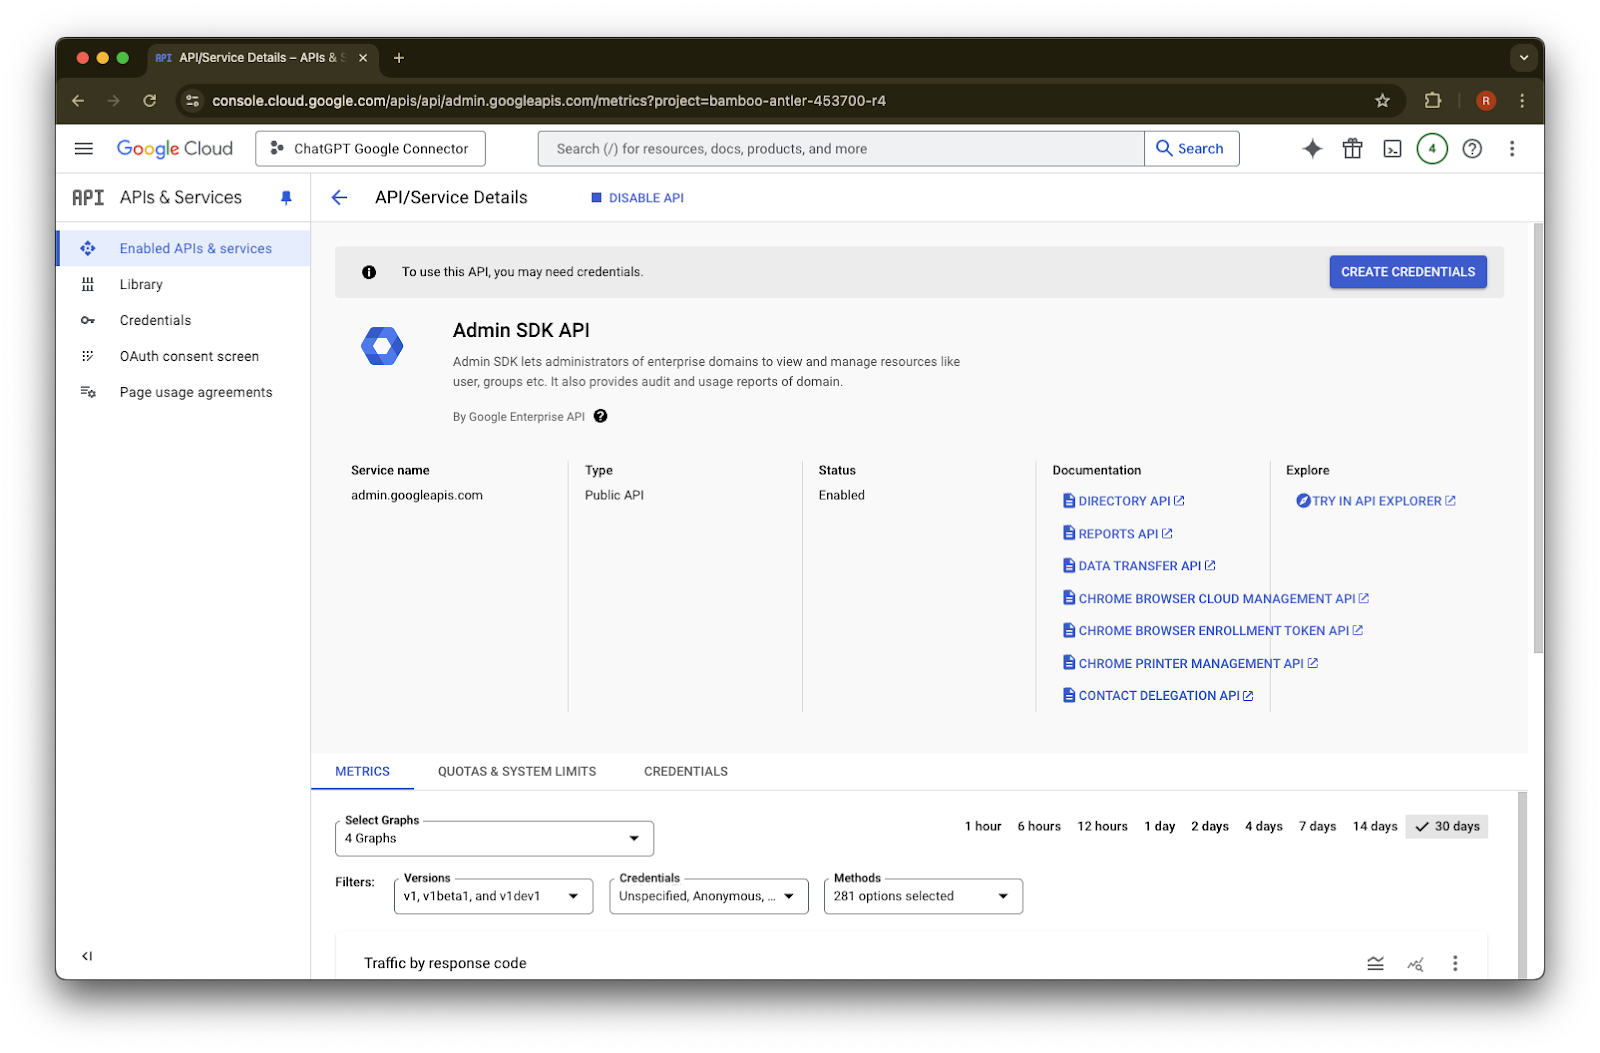
คลิก Enable
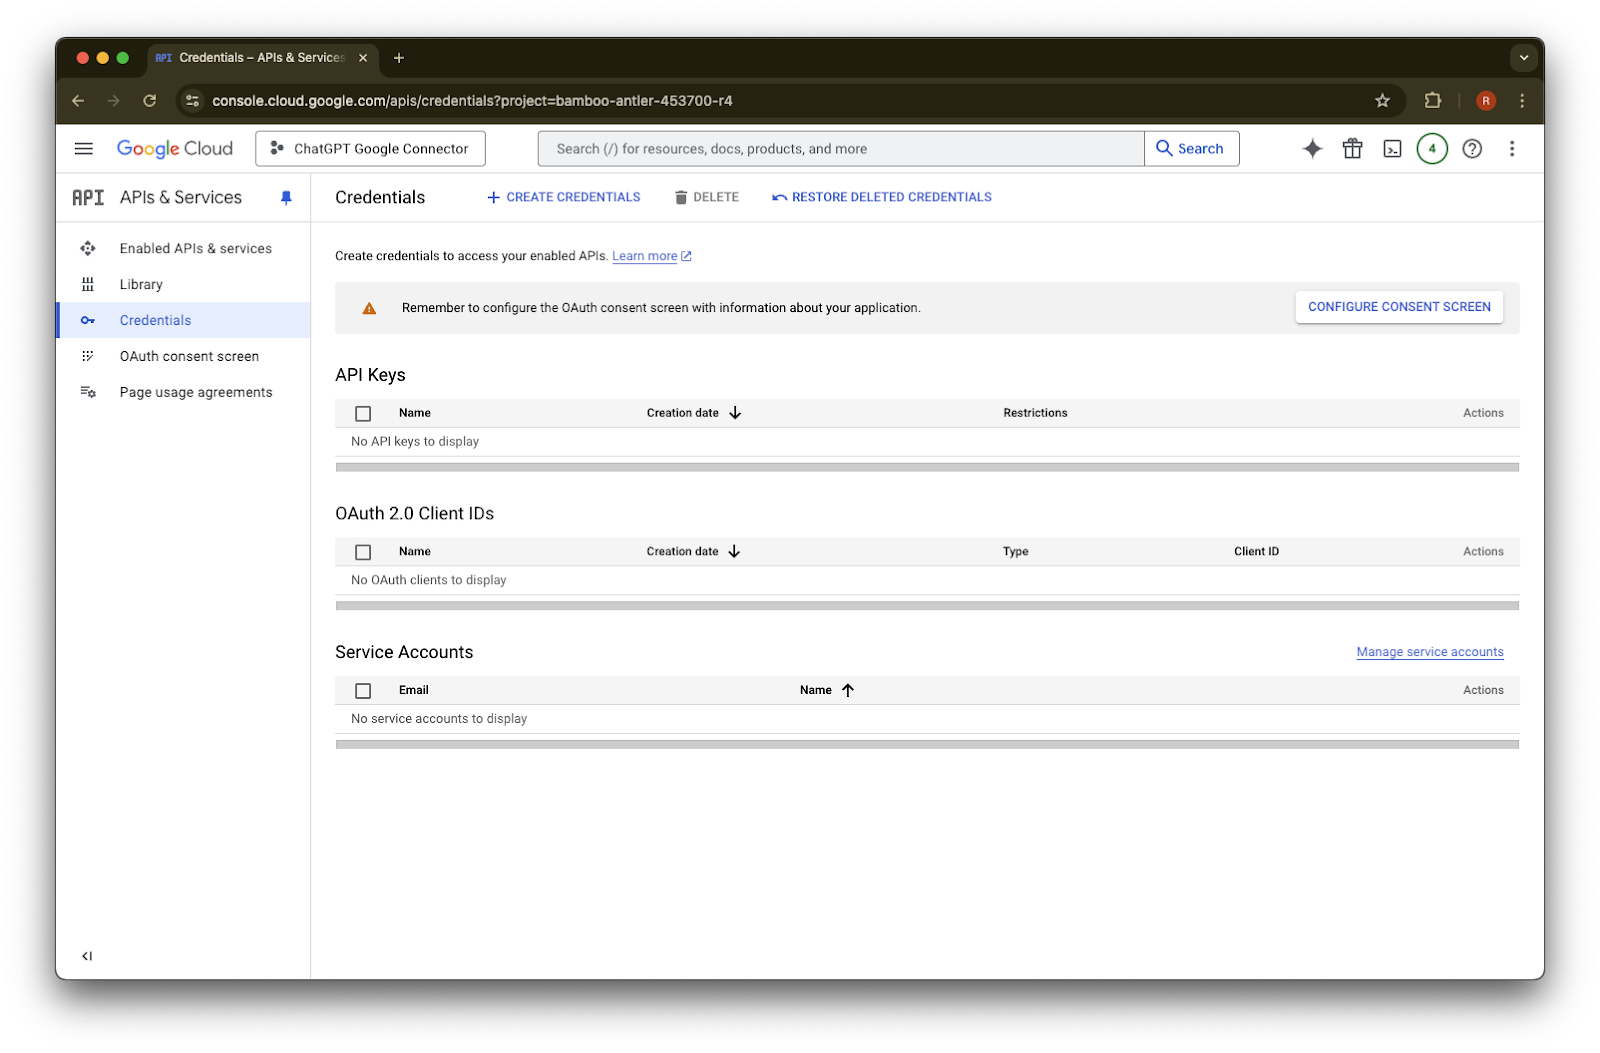
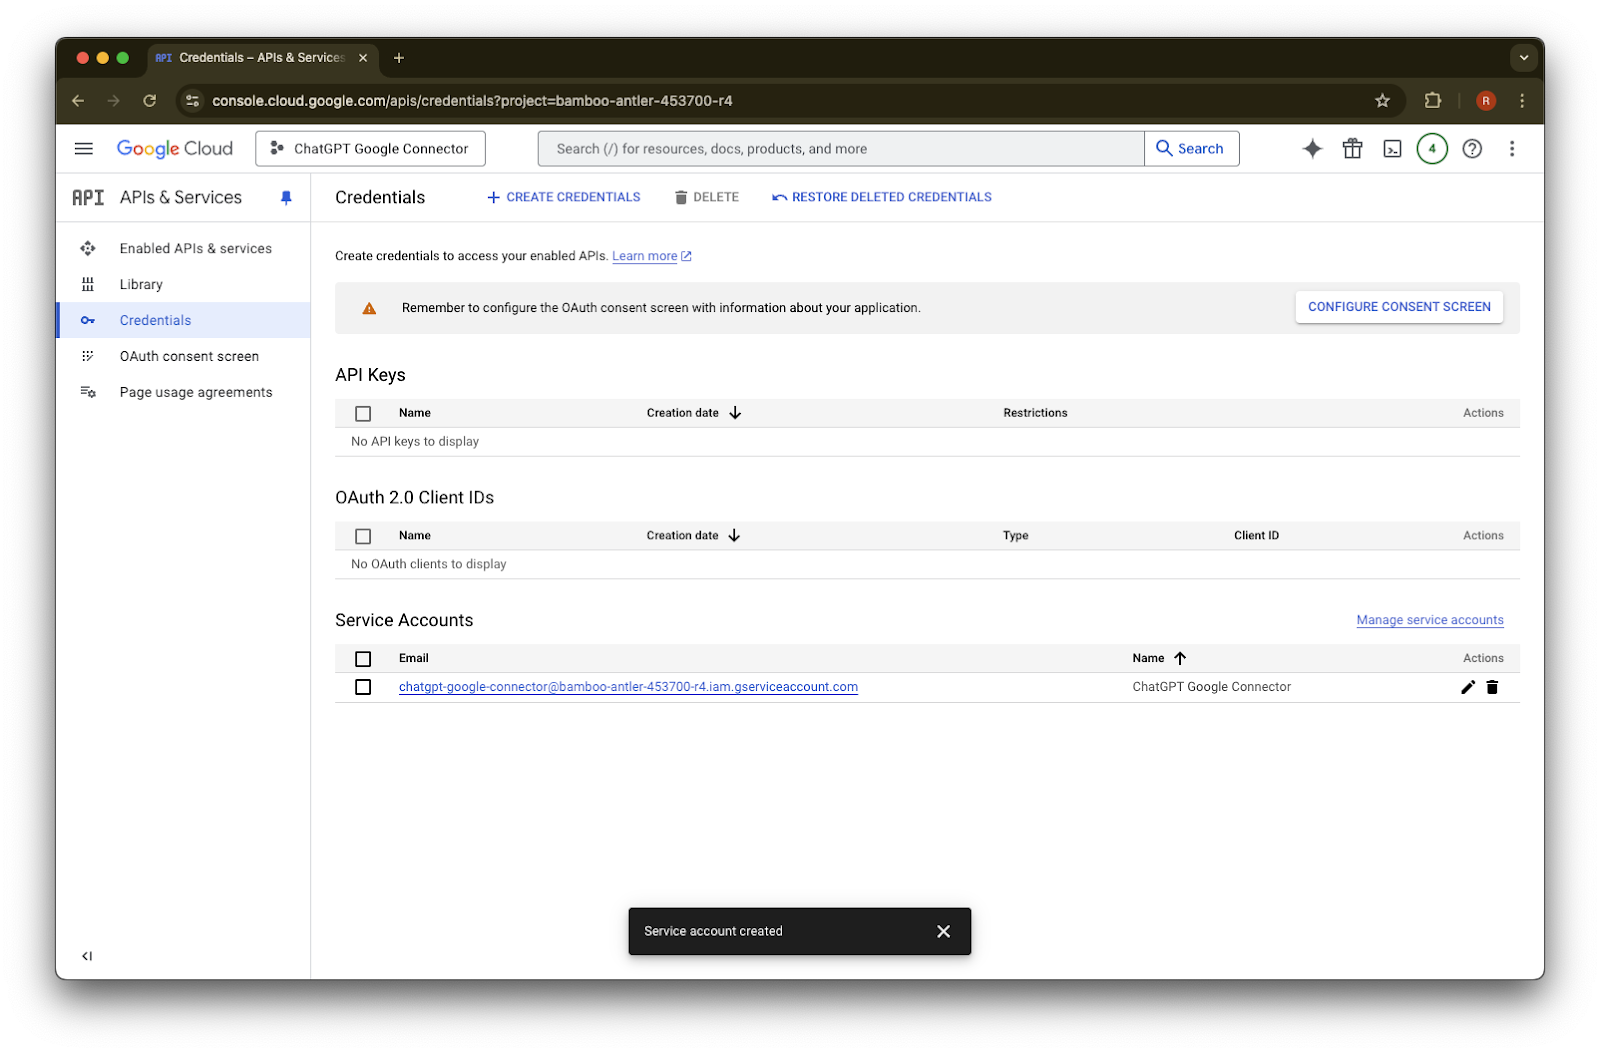
คลิก Credentials
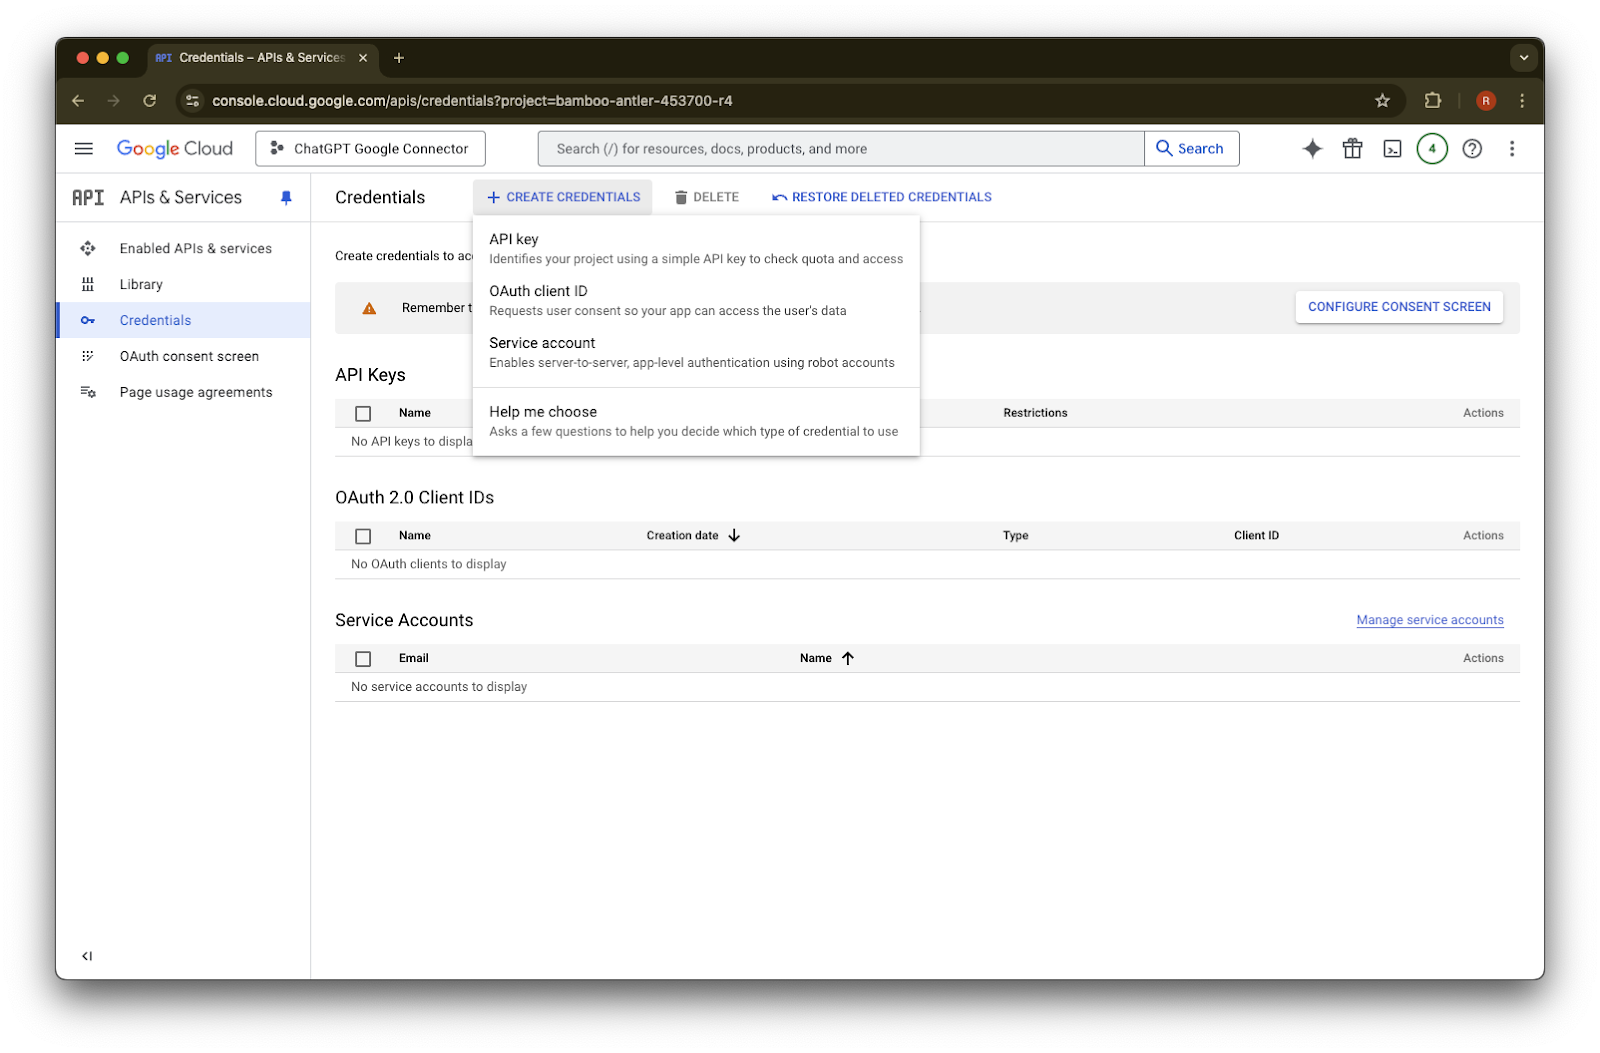
คลิก Create Credentials
คลิก Service account
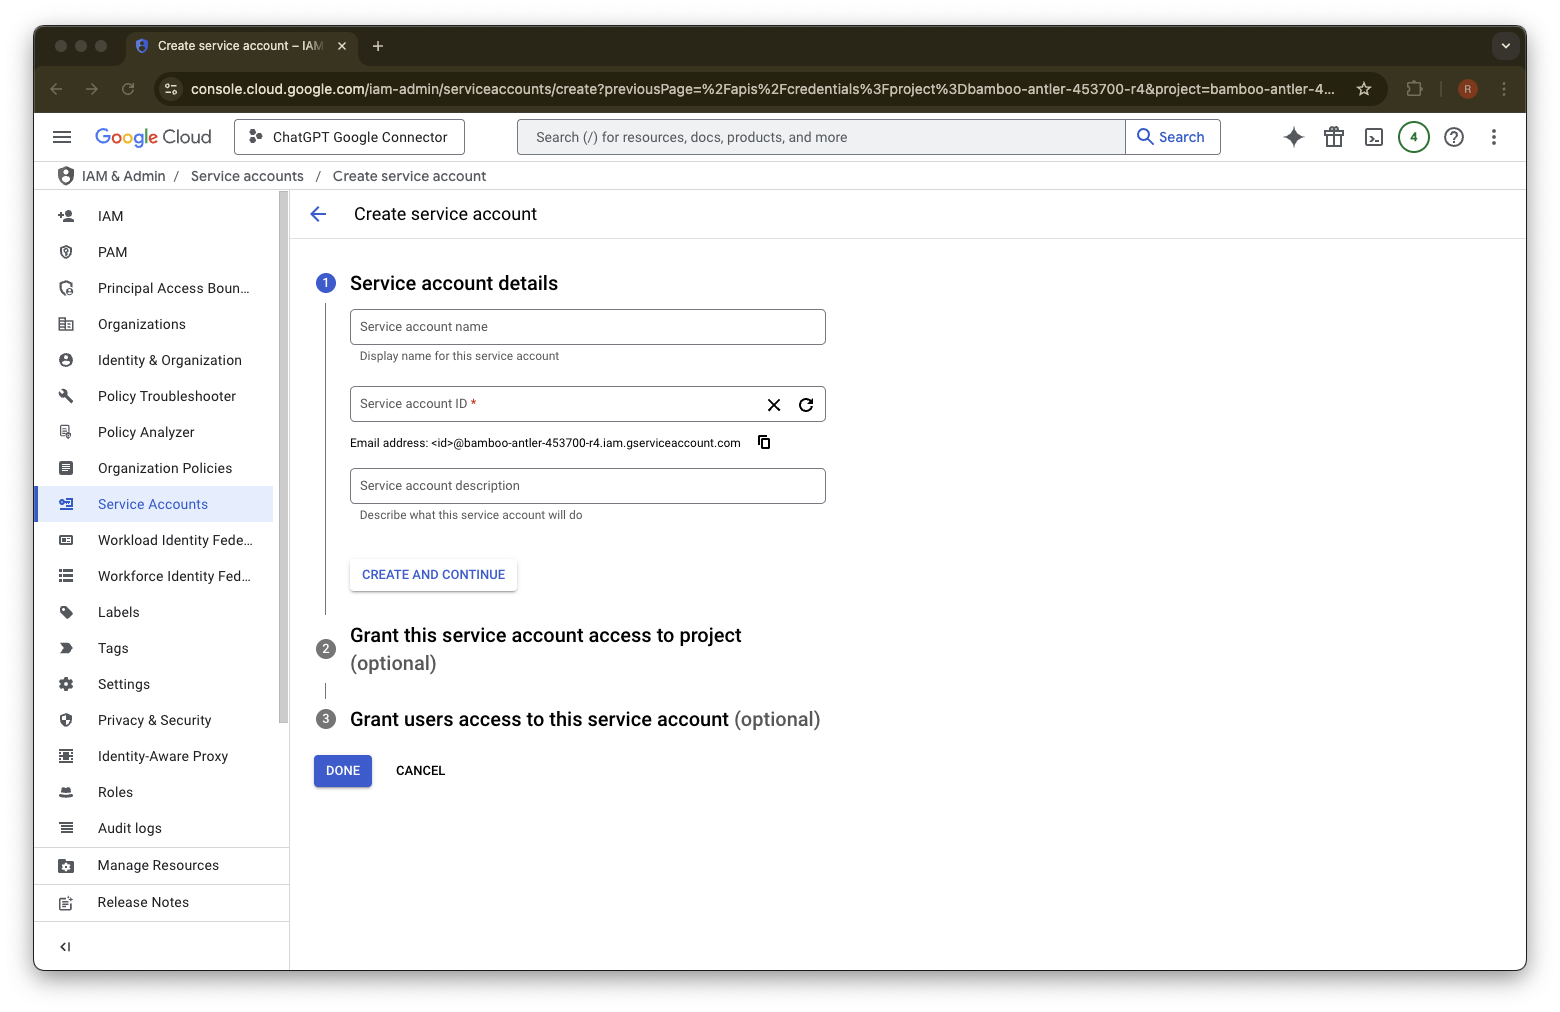
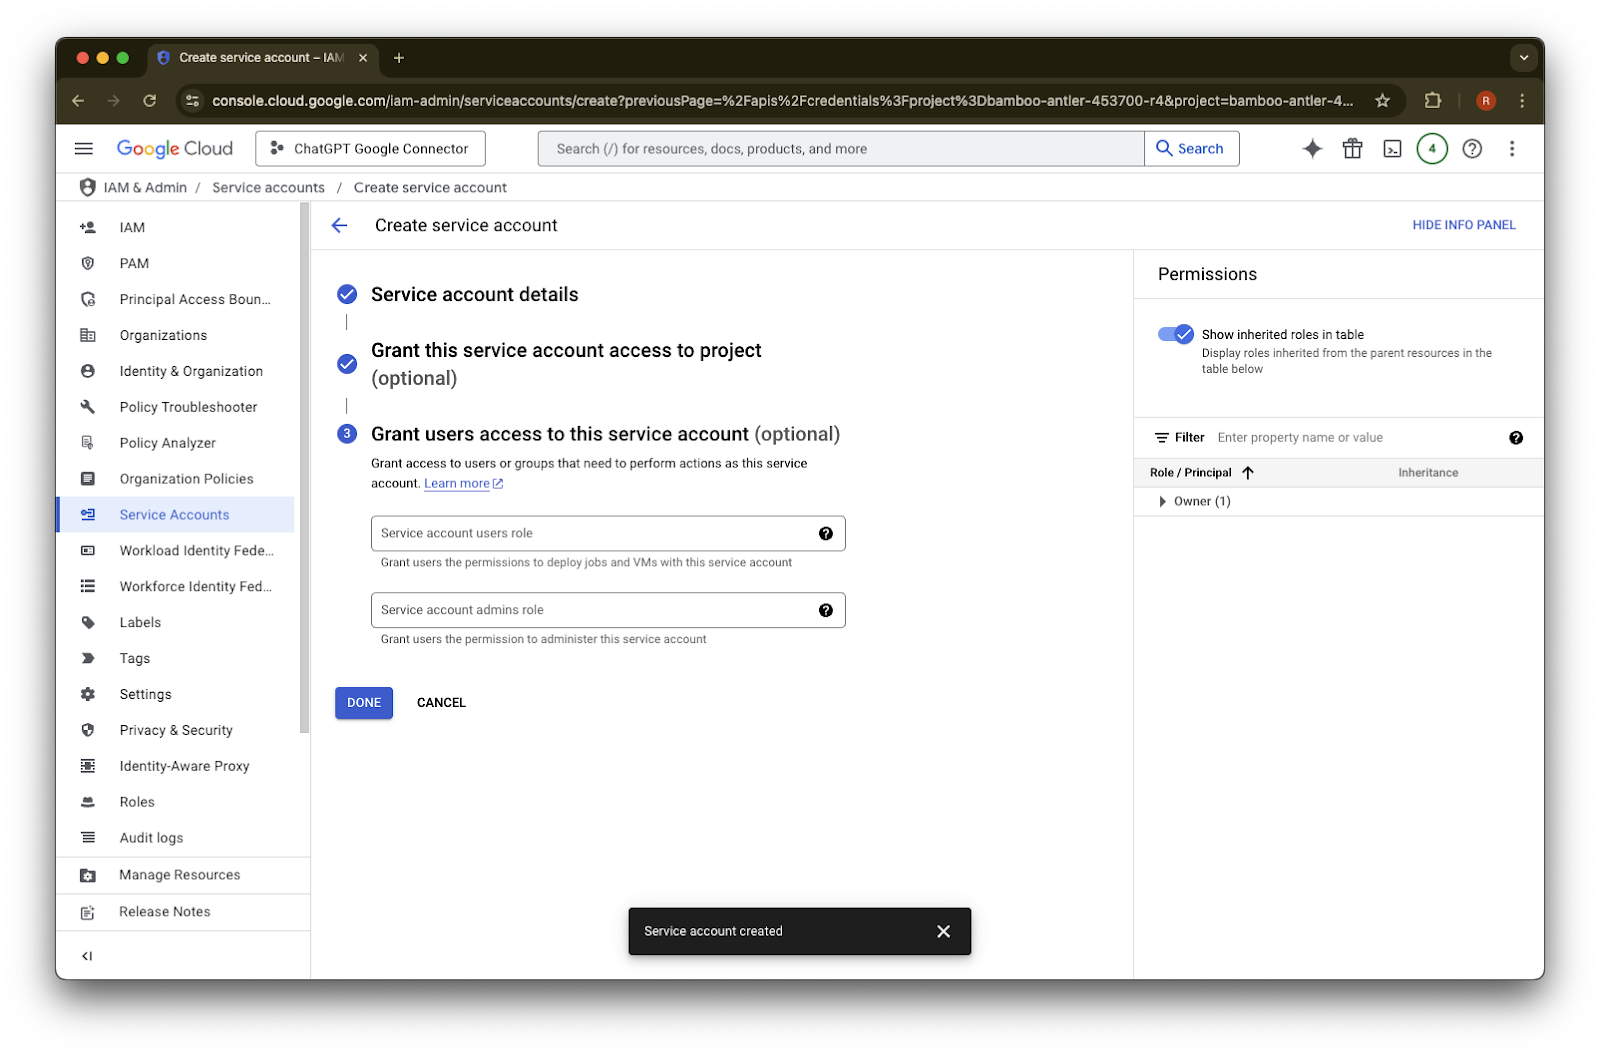
ระบุชื่อและคำอธิบายตามต้องการสำหรับบัญชีบริการนี้
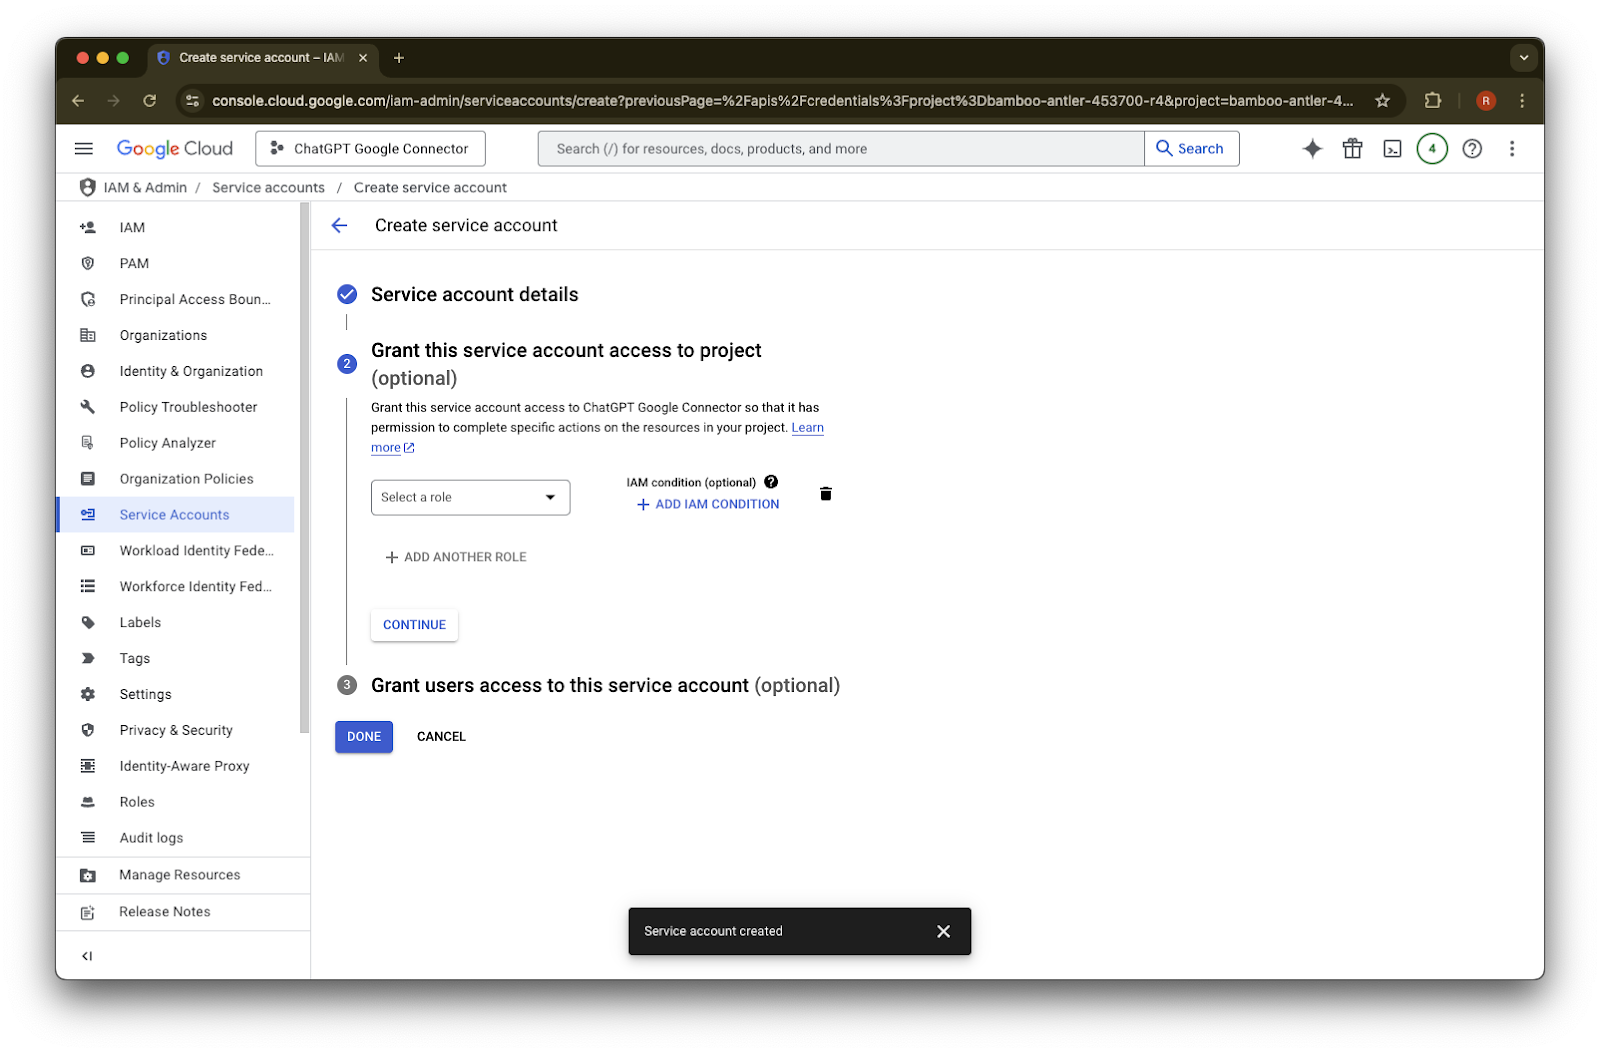
(ไม่บังคับ) คุณสามารถกำหนดบทบาทได้ ซึ่ง ChatGPT ไม่ได้กำหนดให้ต้องทำ
(ไม่บังคับ) คุณสามารถให้สิทธิ์การเข้าถึงกับบัญชีบริการได้ ซึ่ง ChatGPT ไม่ได้กำหนดให้ต้องทำ
คลิก Done
คลิกที่บัญชีบริการที่สร้างขึ้นแล้ว
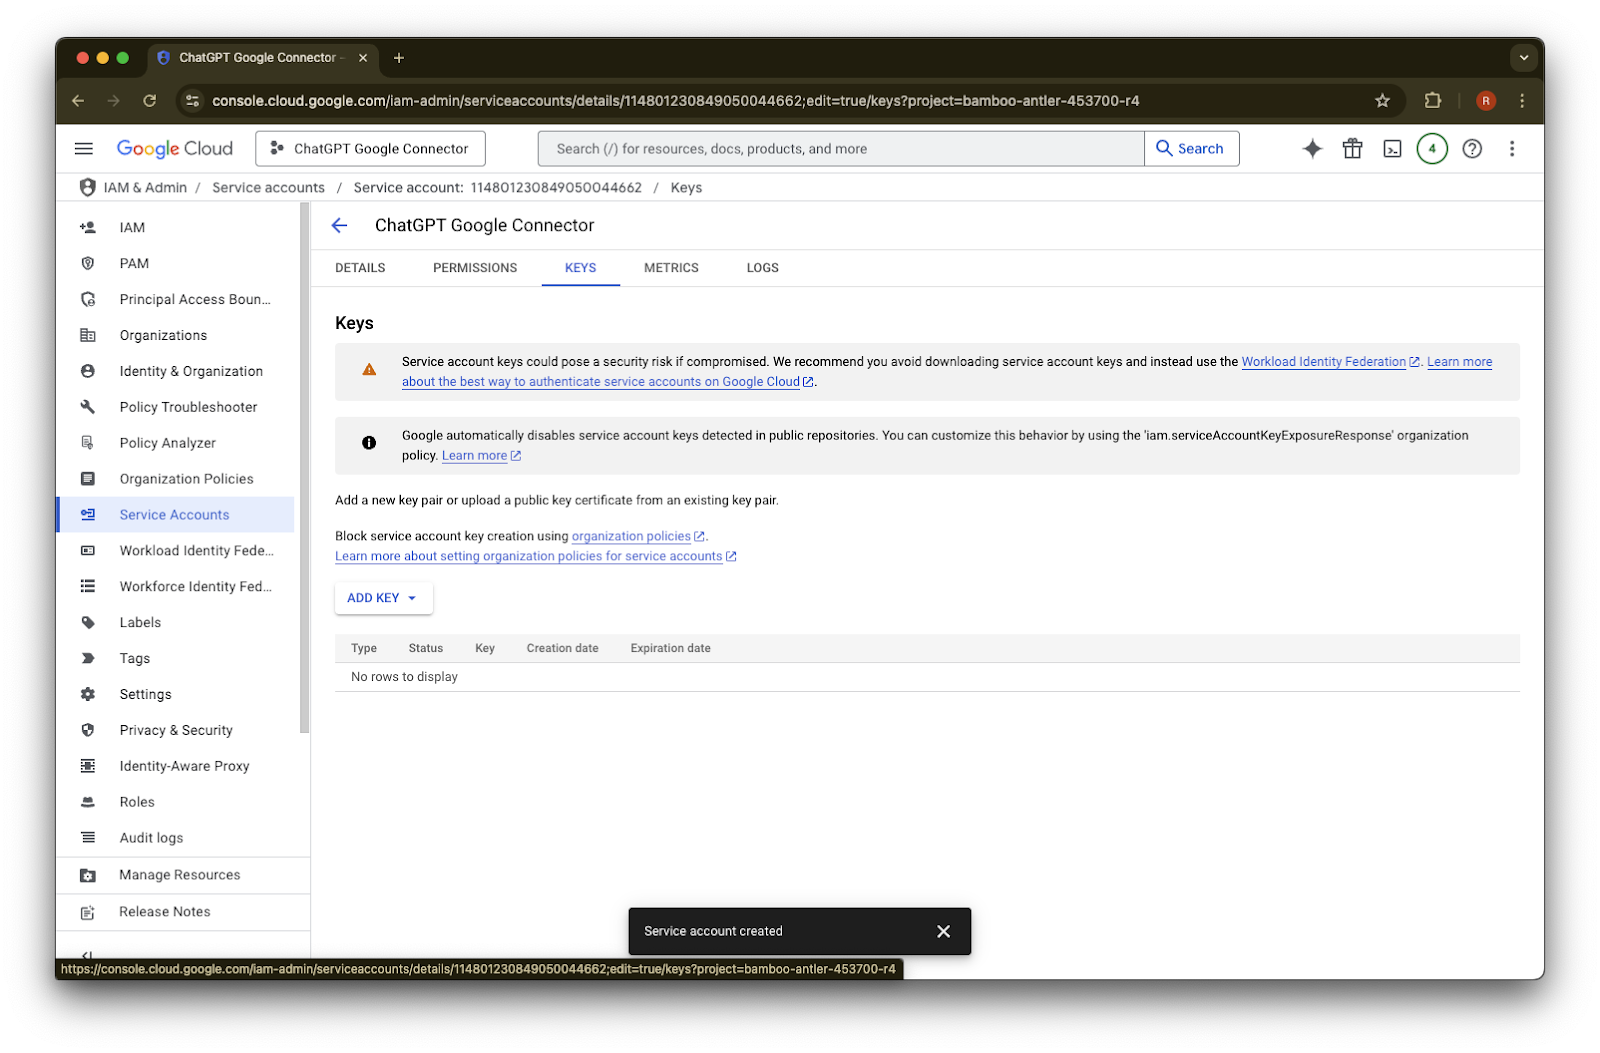
คลิก keys.
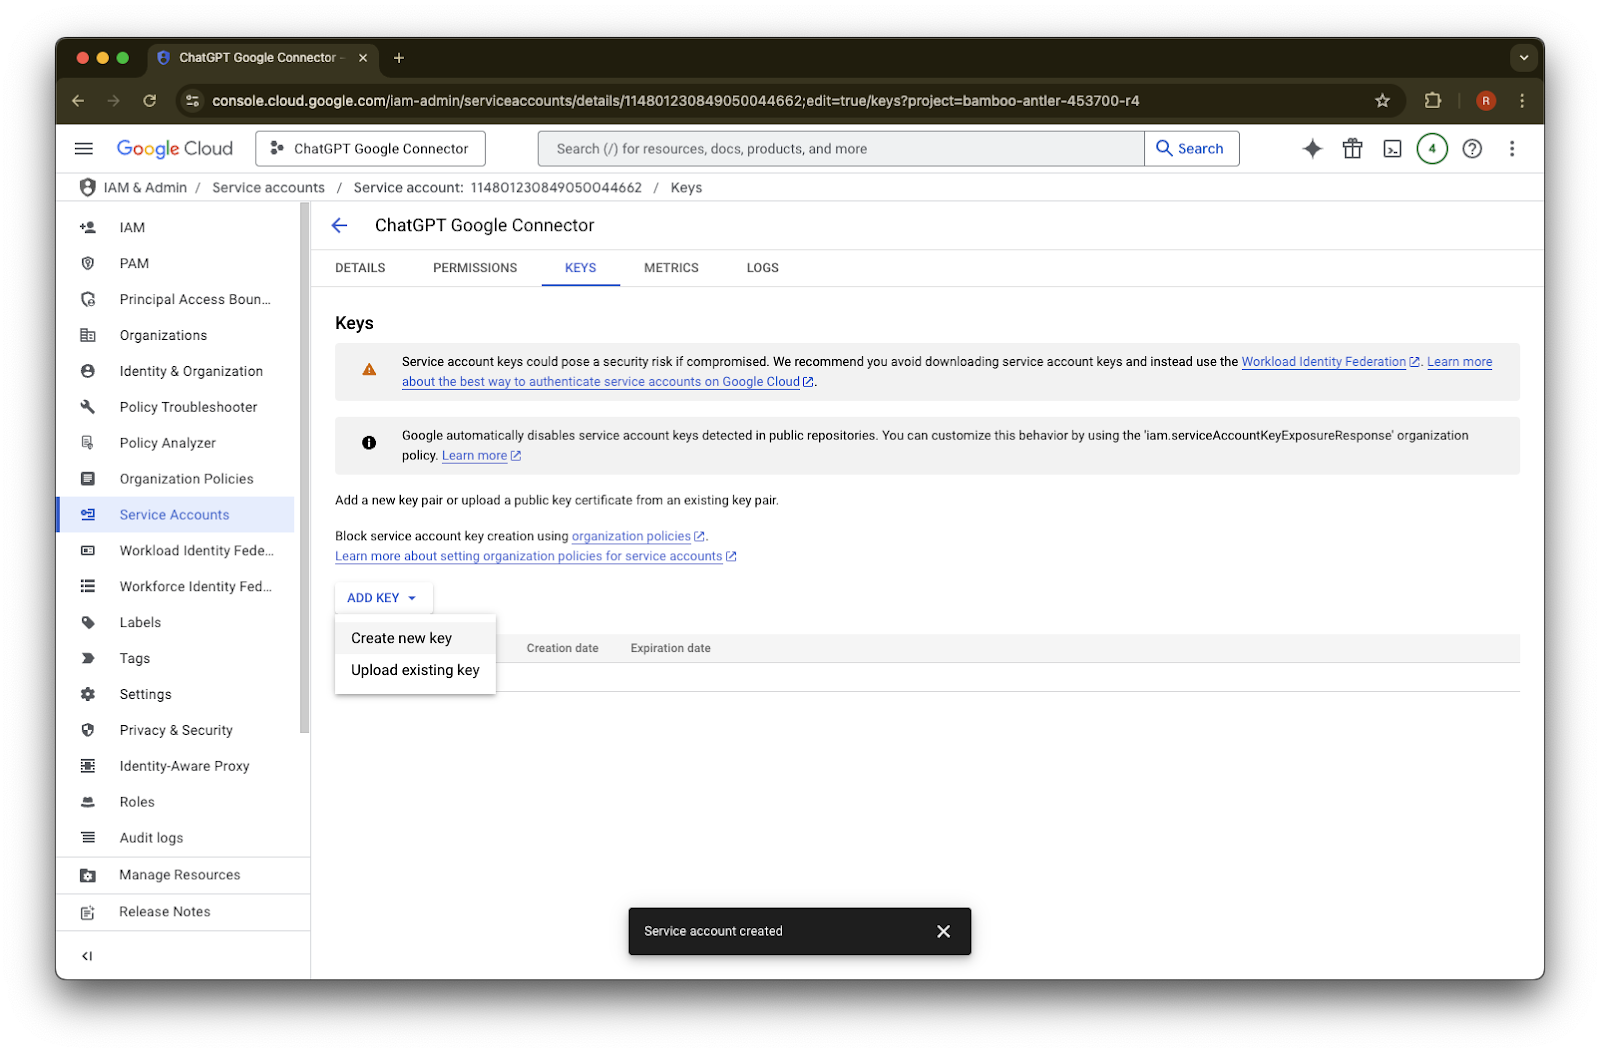
คลิก Add Key
คลิก Create new key
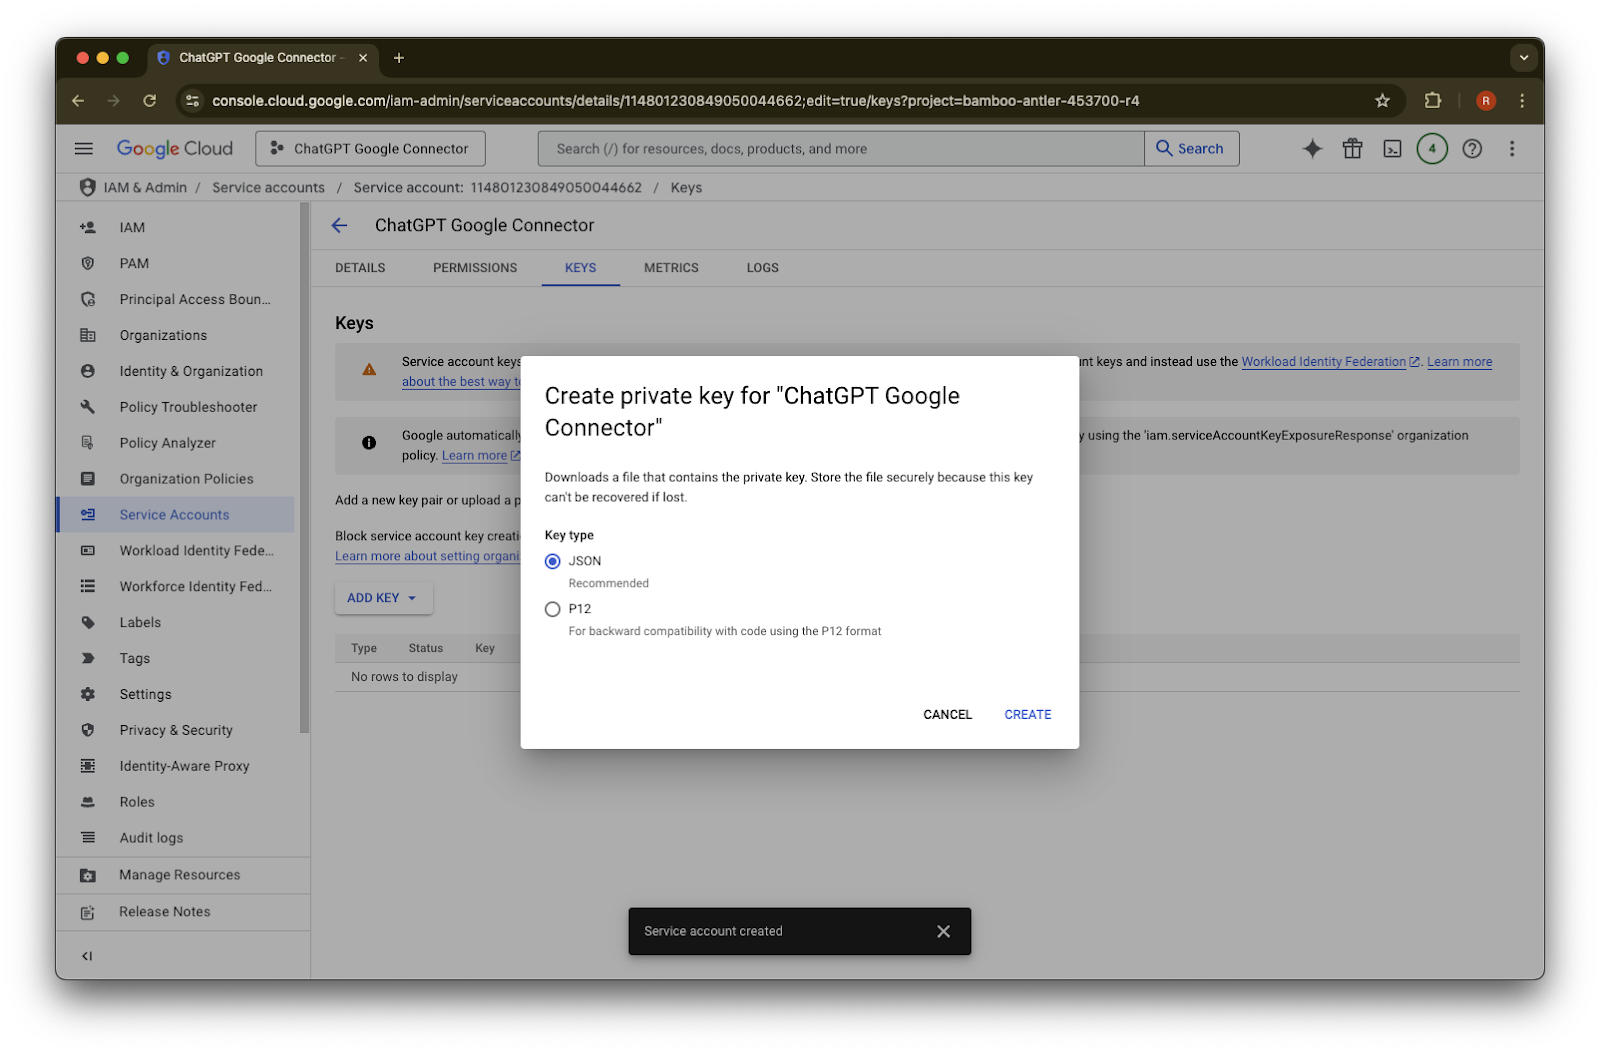
คงประเภทคีย์ JSON เริ่มต้นไว้แล้วคลิก Create
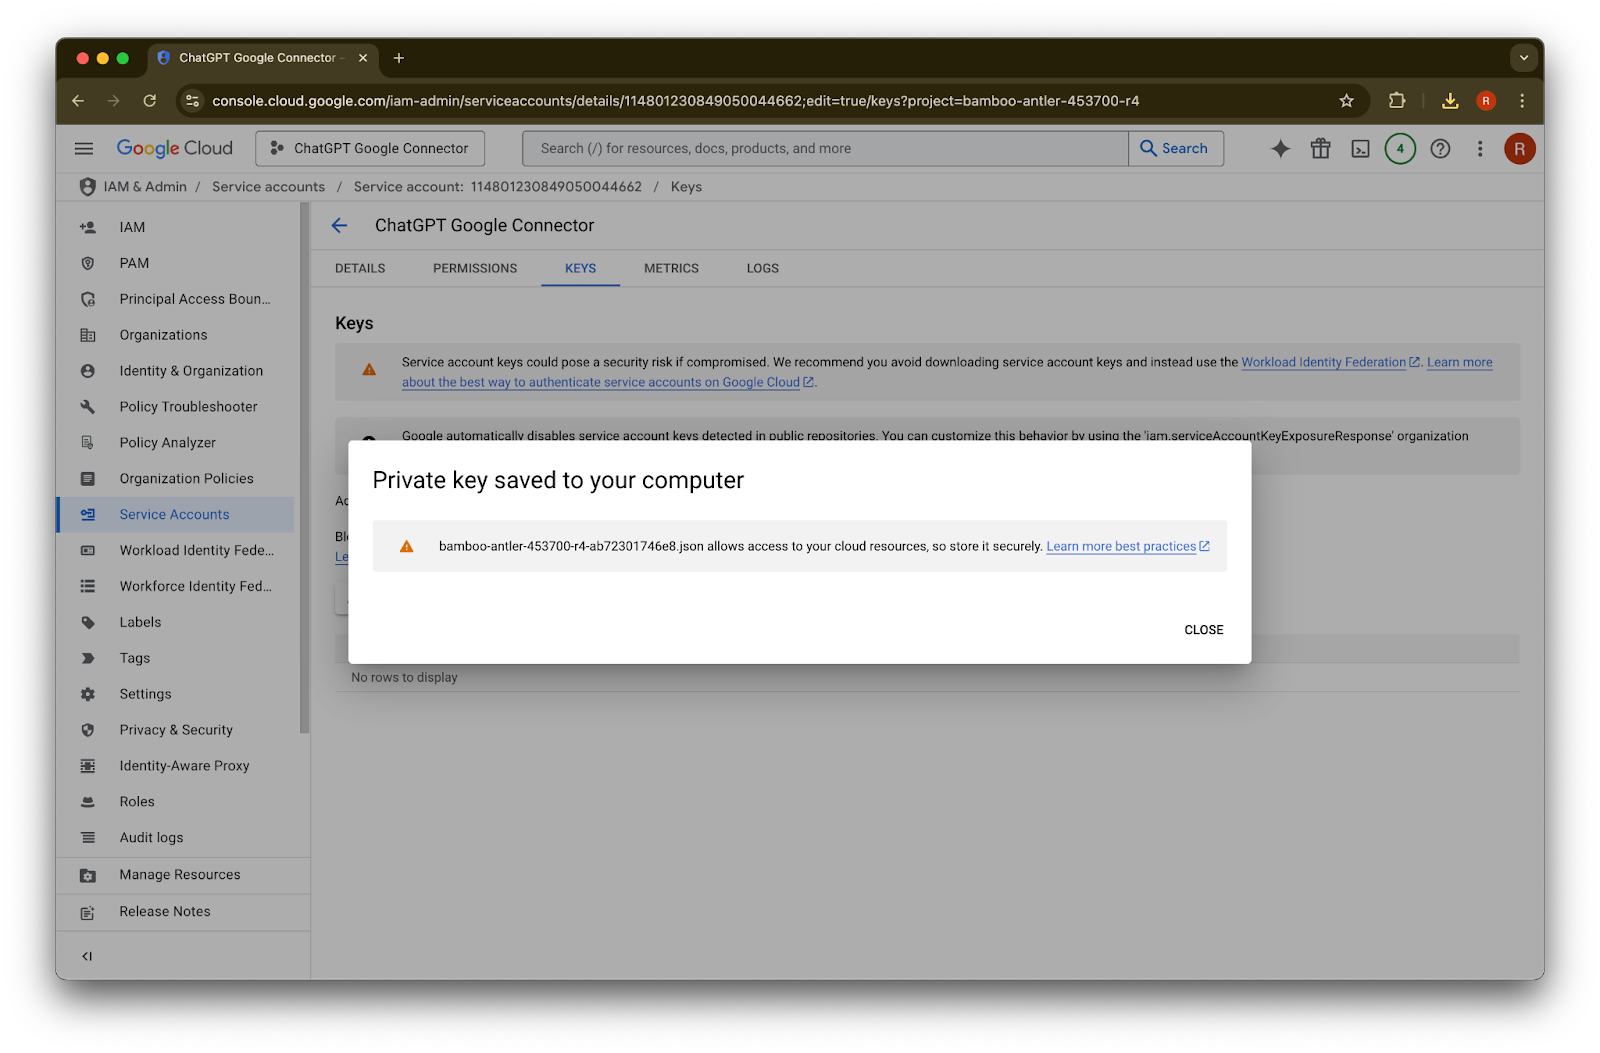
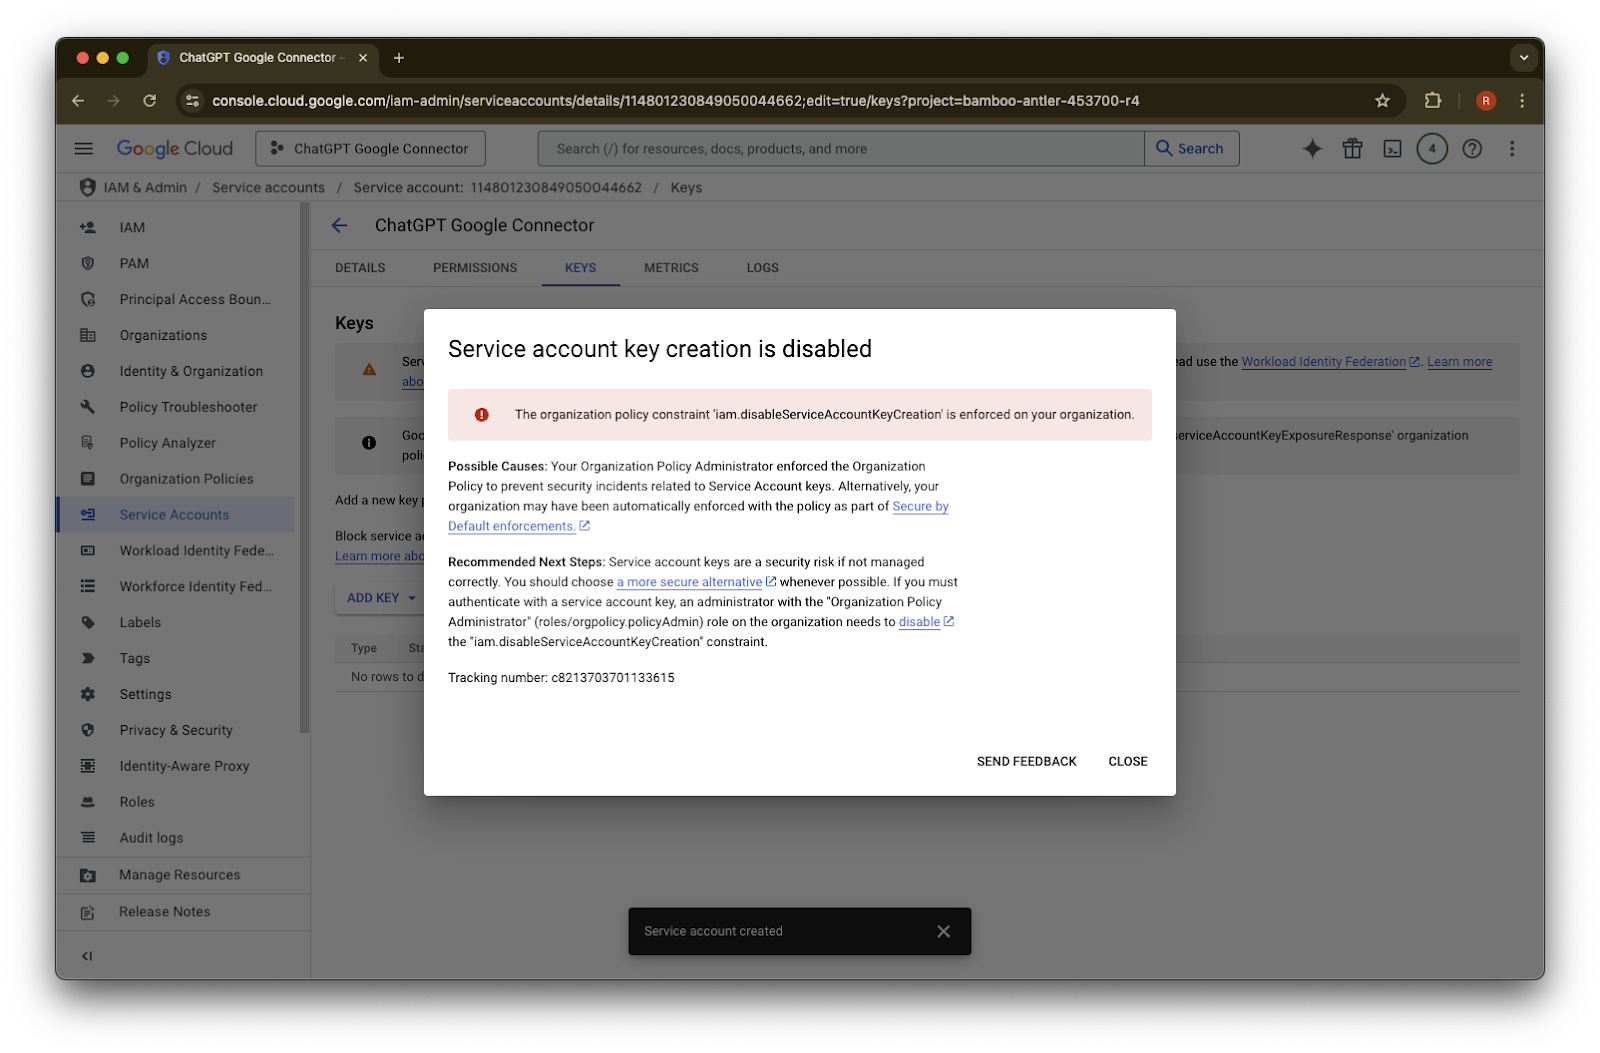
หากคุณเห็นข้อความแสดงข้อผิดพลาดว่า “Service account key creation is disabled” ให้ทำตามขั้นตอนเหล่านี้เพื่อเปิดใช้งานคลิก Close ตอนนี้คีย์ถูกดาวน์โหลดลงในคอมพิวเตอร์ของคุณแล้ว ภายหลังคุณจะอัปโหลดคีย์นี้ไปยังคอนโซลผู้ดูแลระบบ ChatGPT
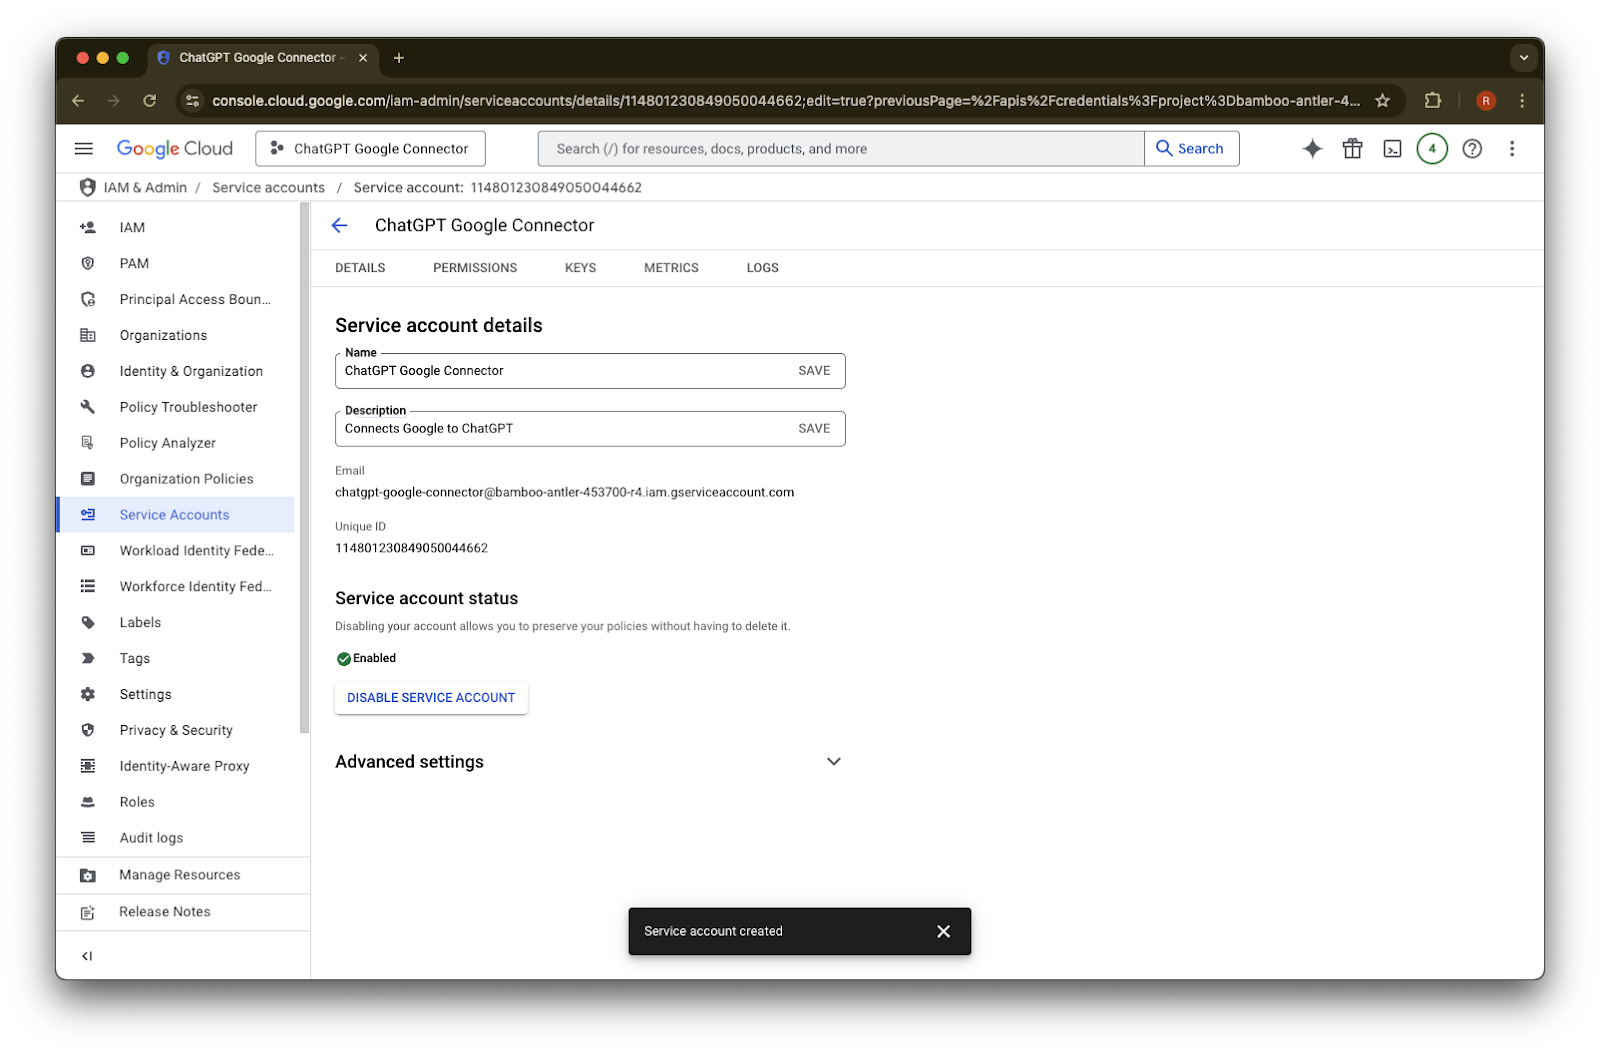
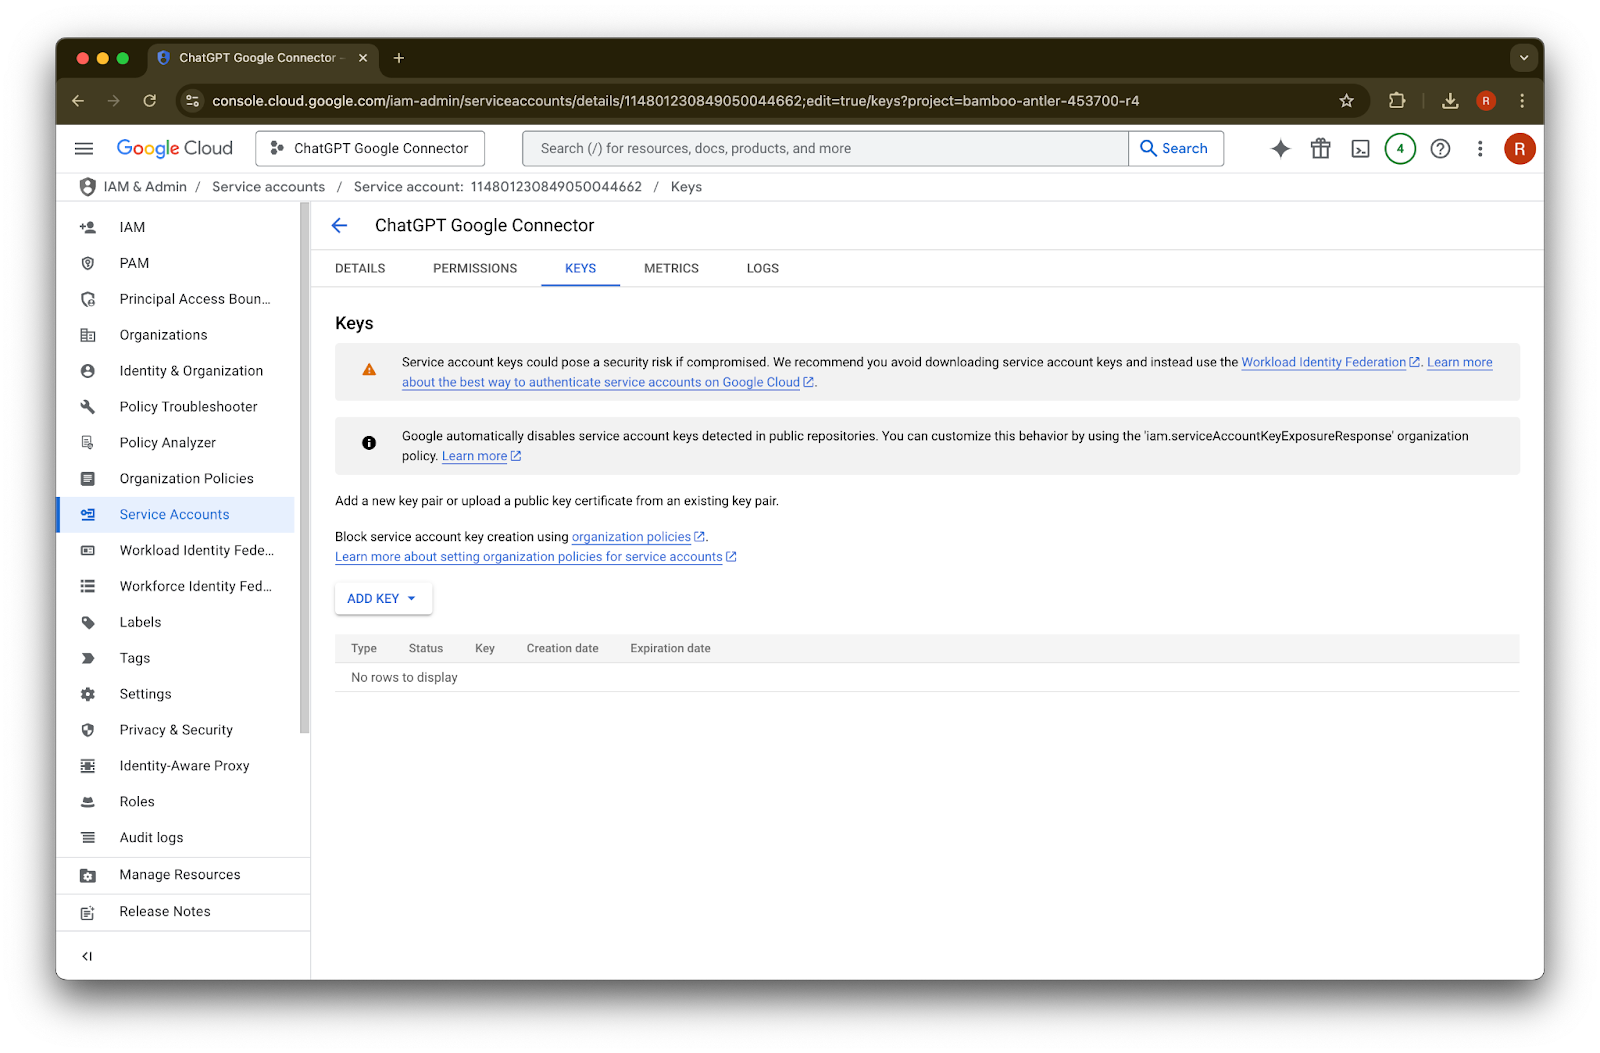
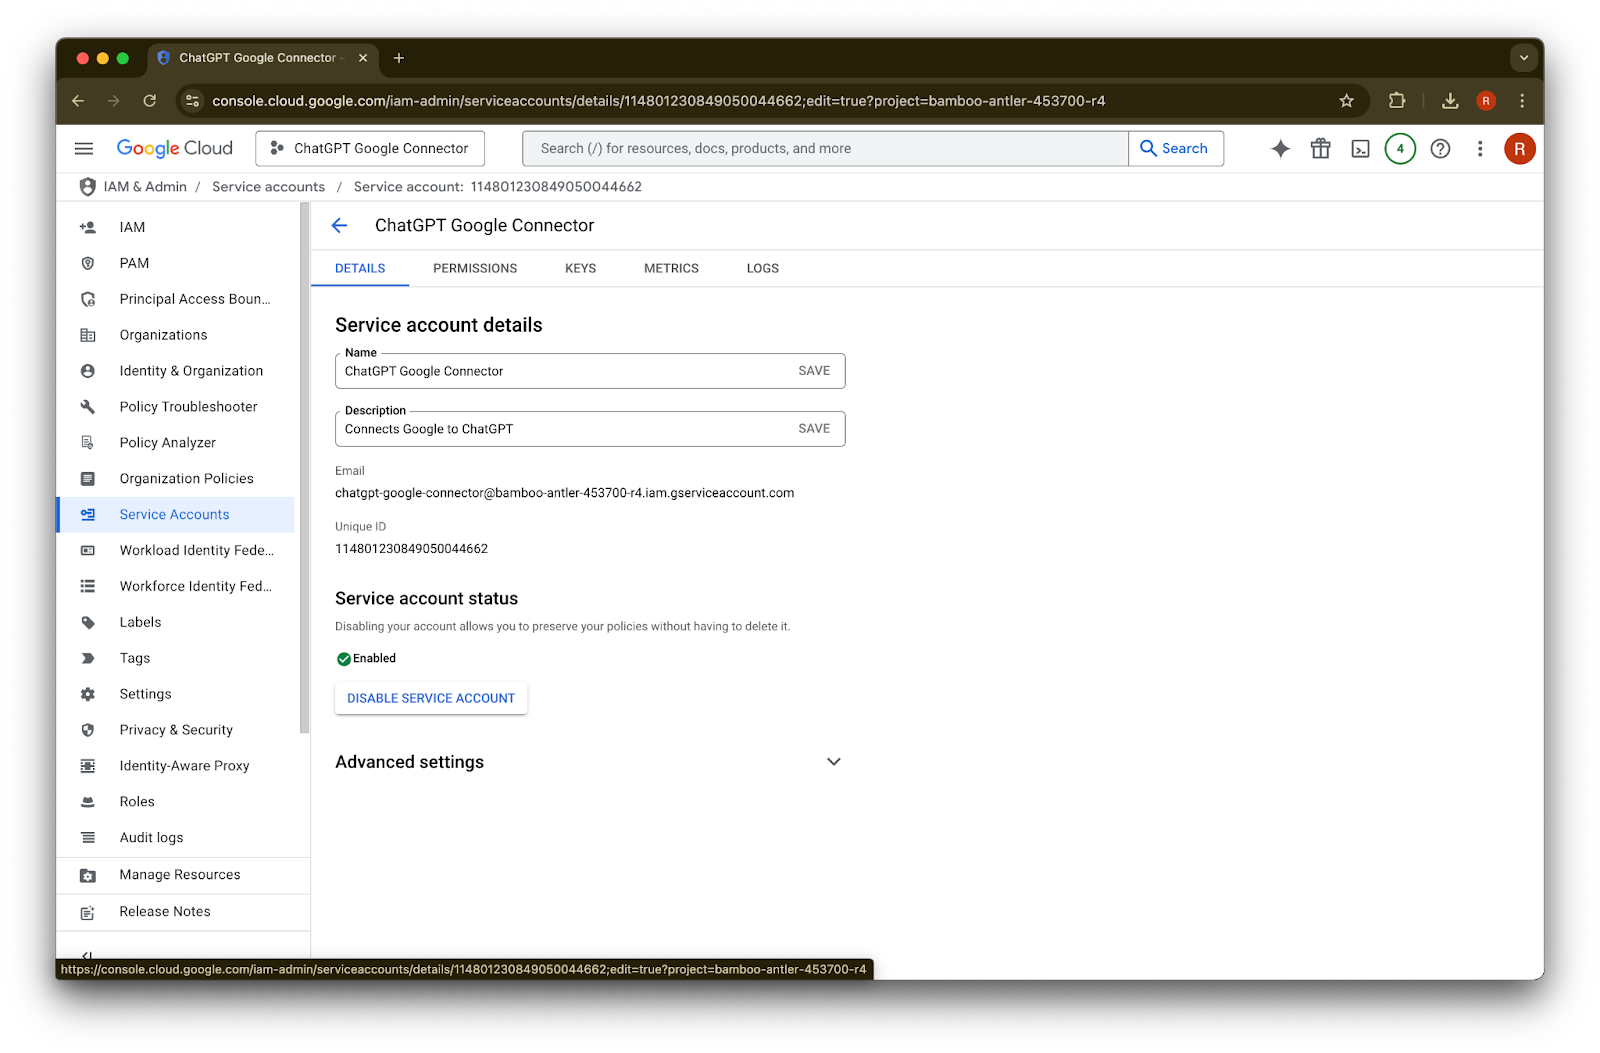
คลิก details
จด Unique ID ไว้ ซึ่งจะต้องใช้ในขั้นตอนที่ 42
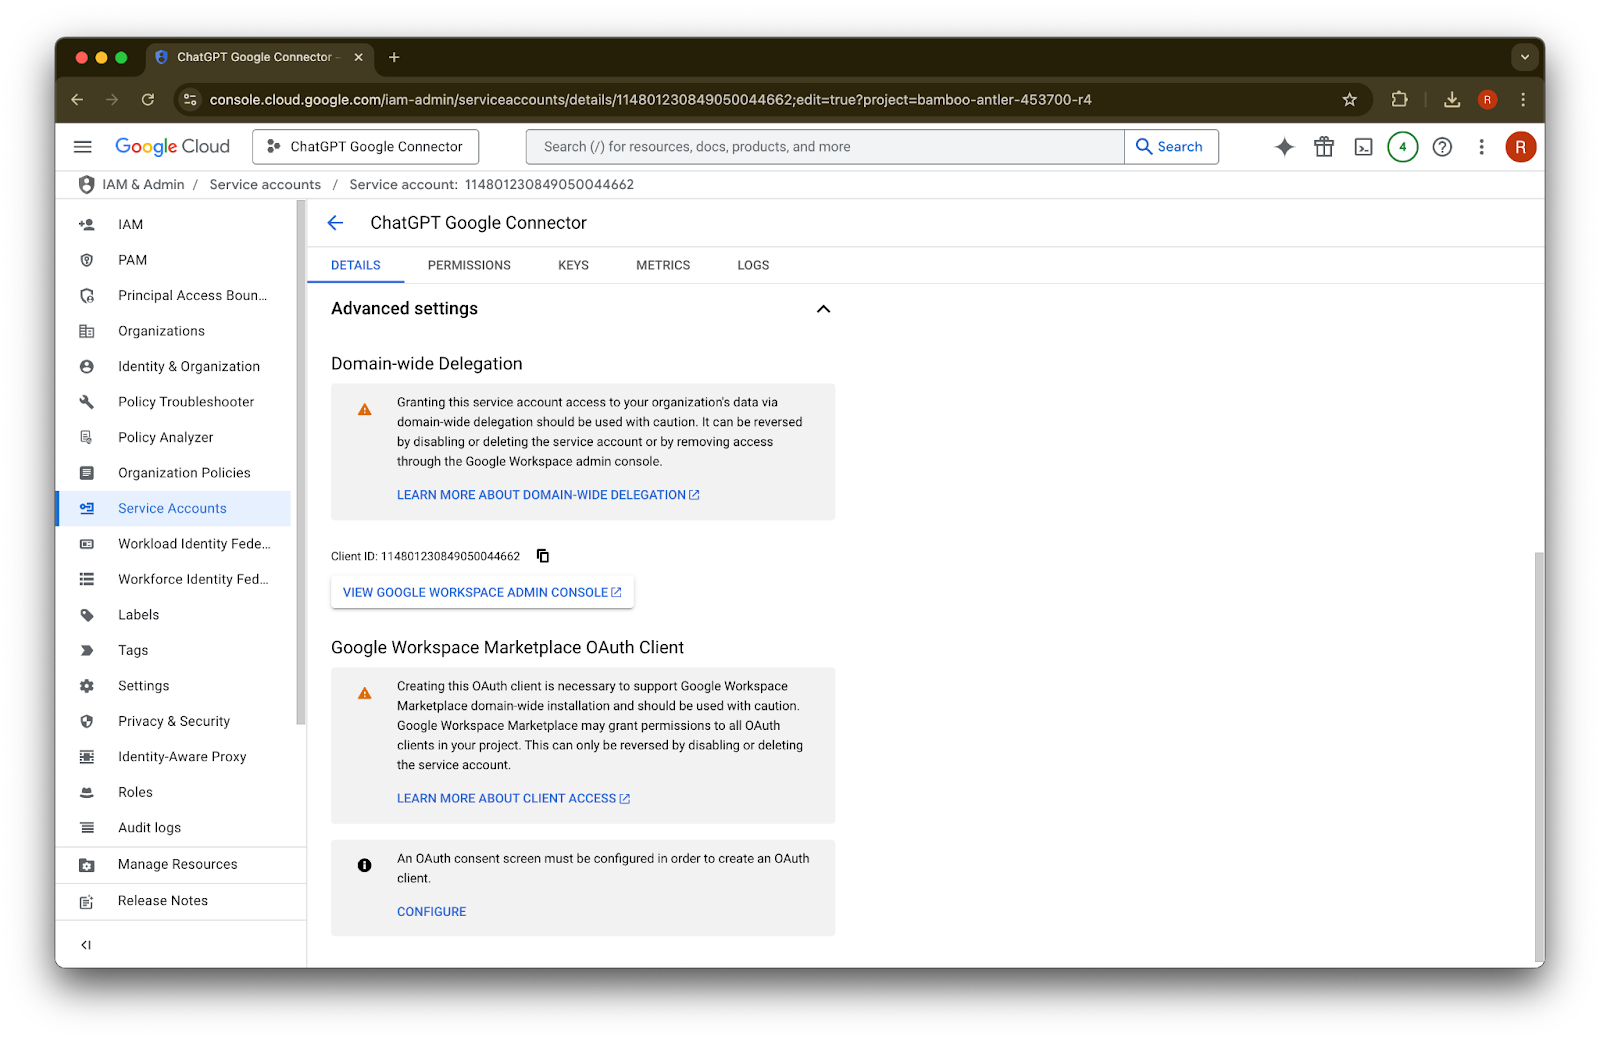
ขยาย Advanced settings
เลื่อนลงแล้วคลิก View Google Workspace Admin Console คอนโซล Google Workspace จะเปิดในแท็บใหม่
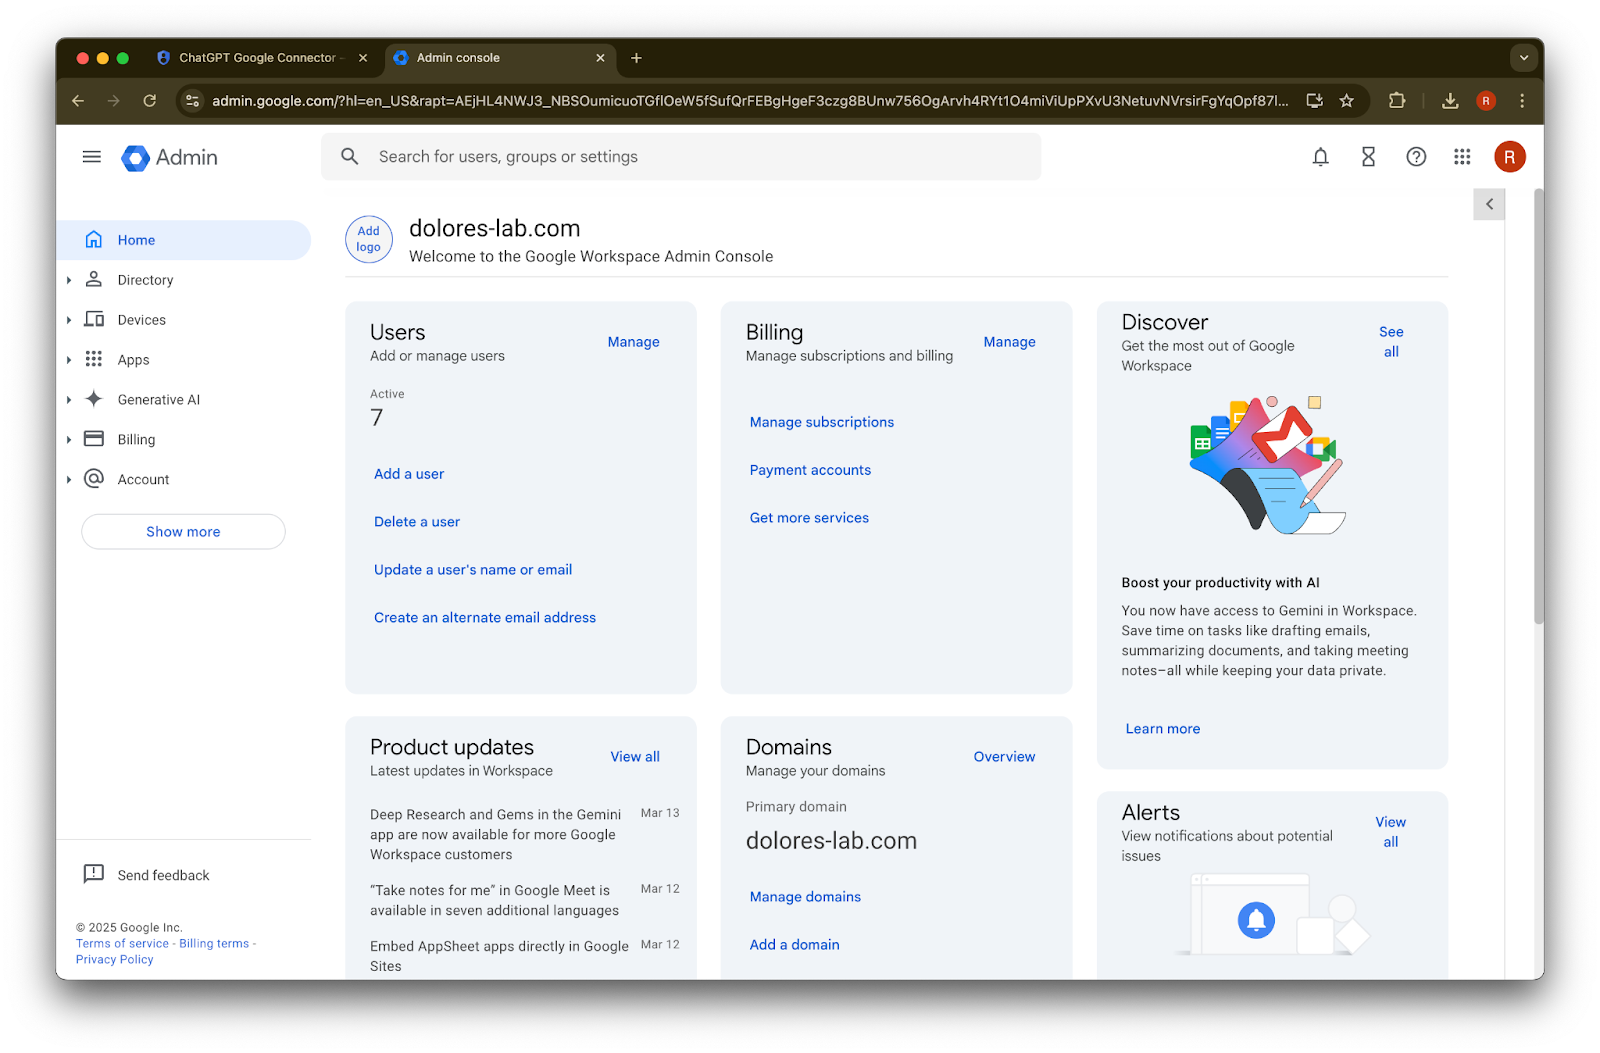
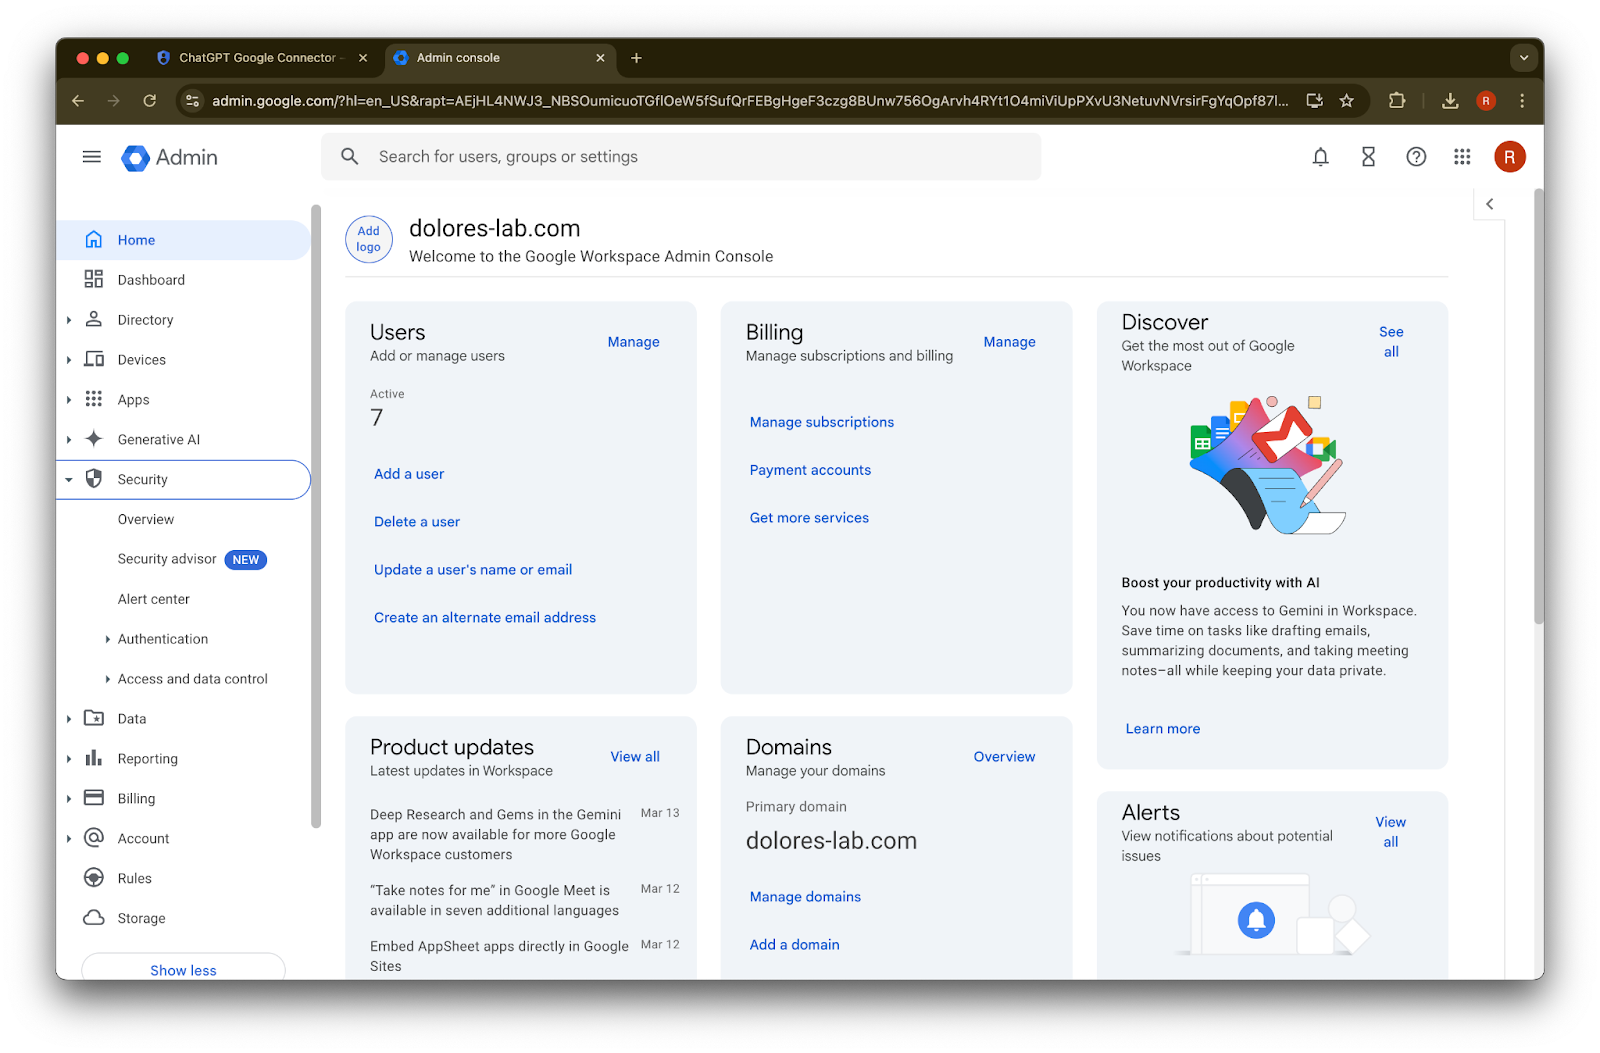
คลิก Show more
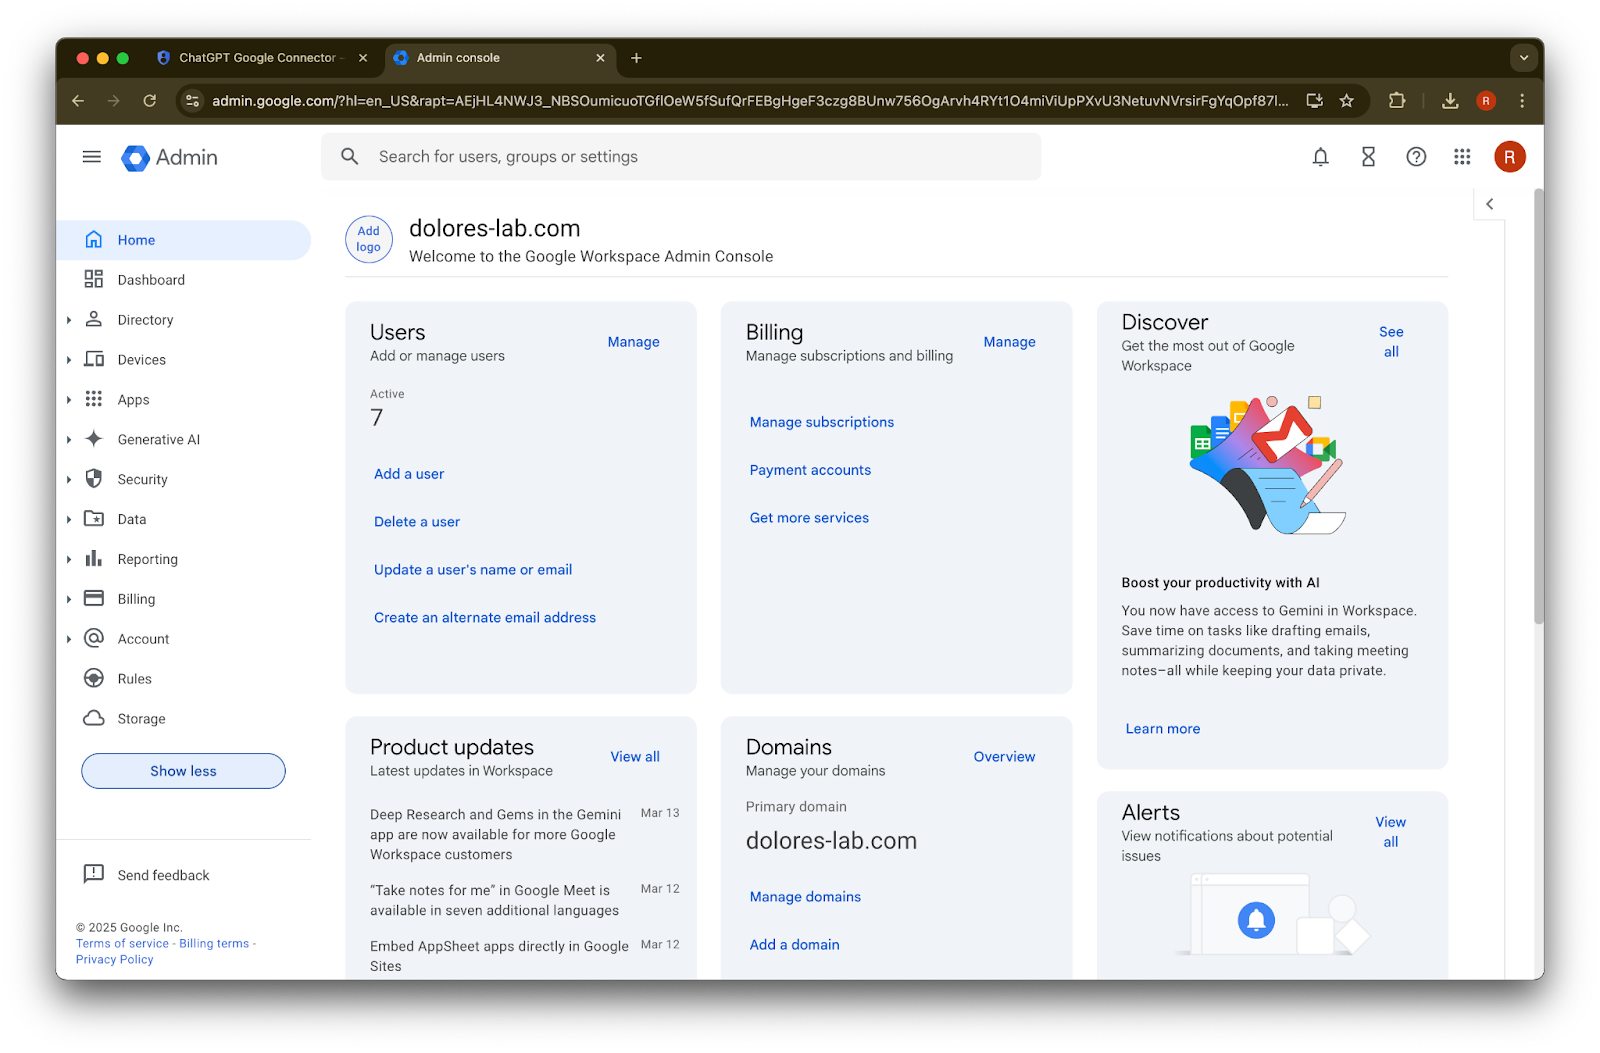
ขยายส่วน Security
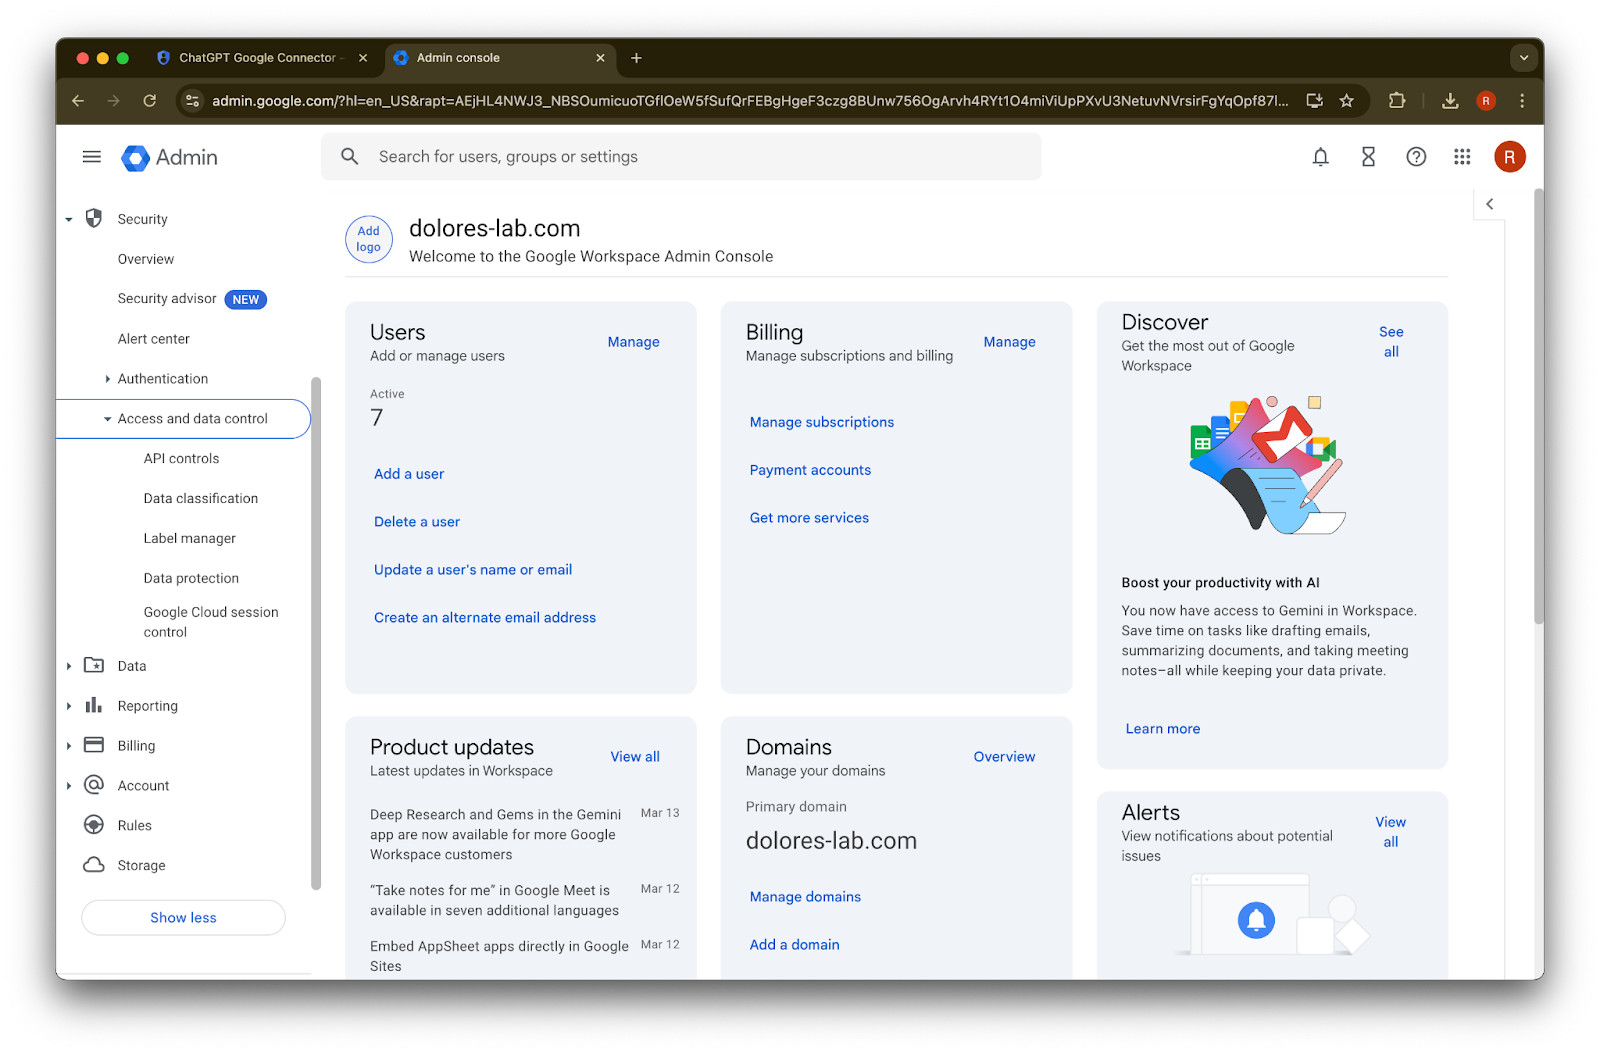
ขยายส่วน Access and data controls
คลิกส่วน API controls
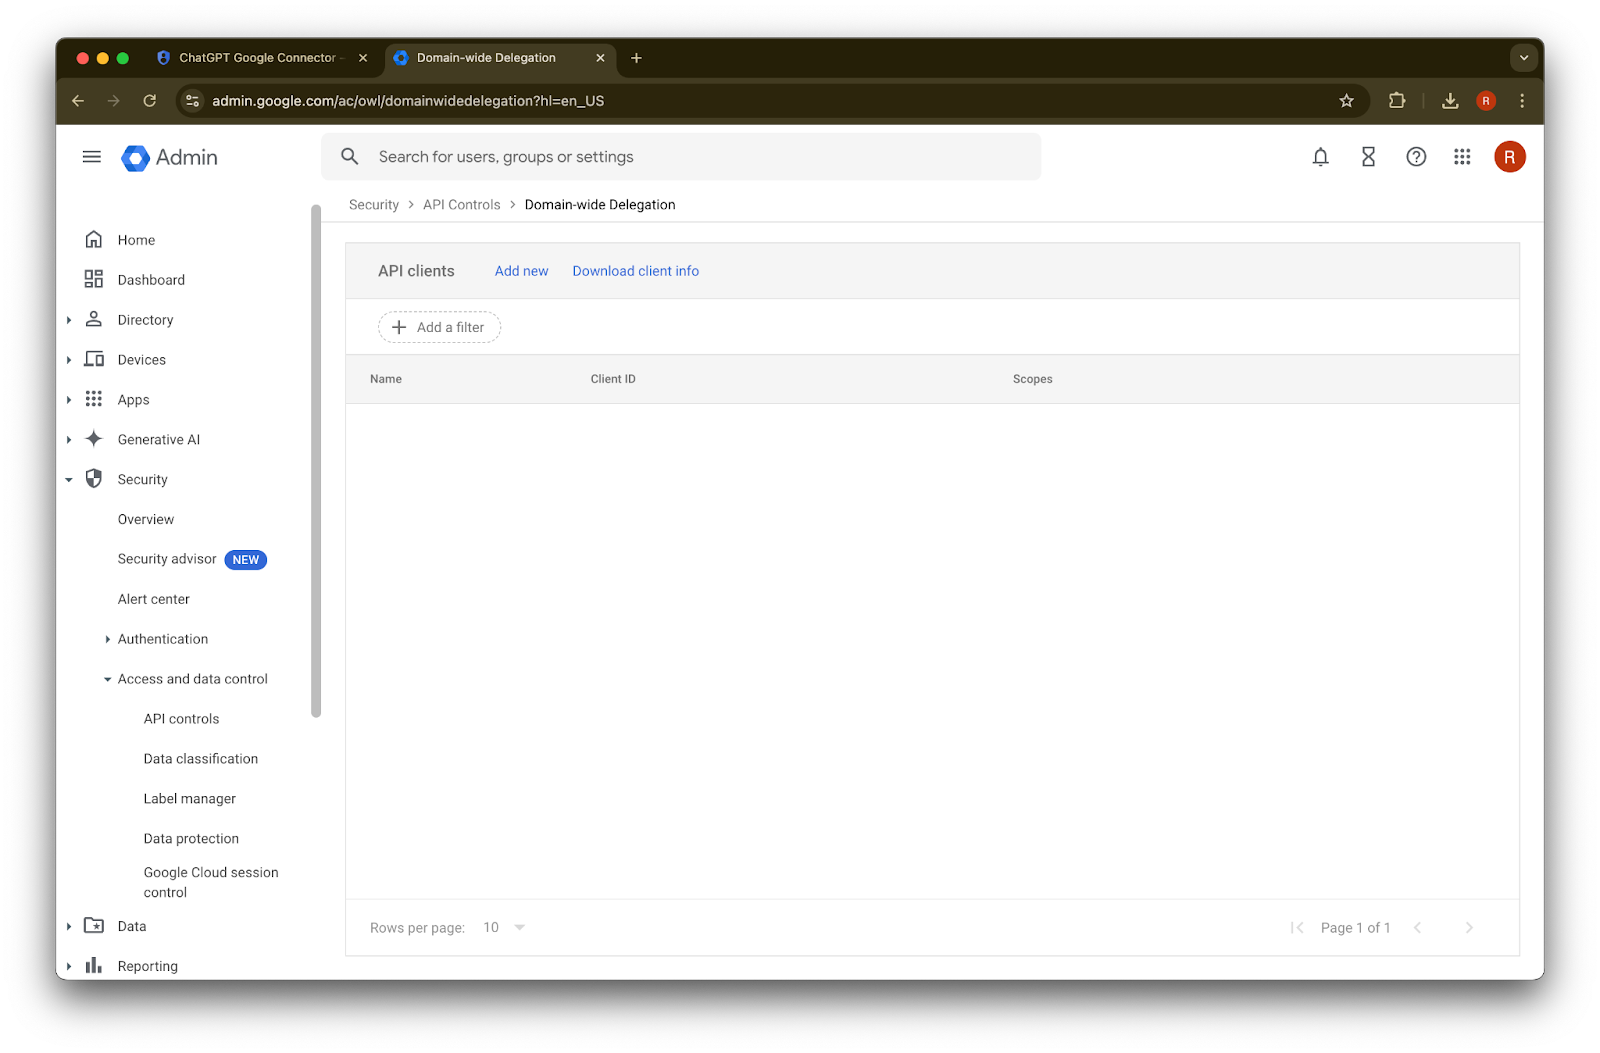
คลิก Manage Domain Wide Delegation
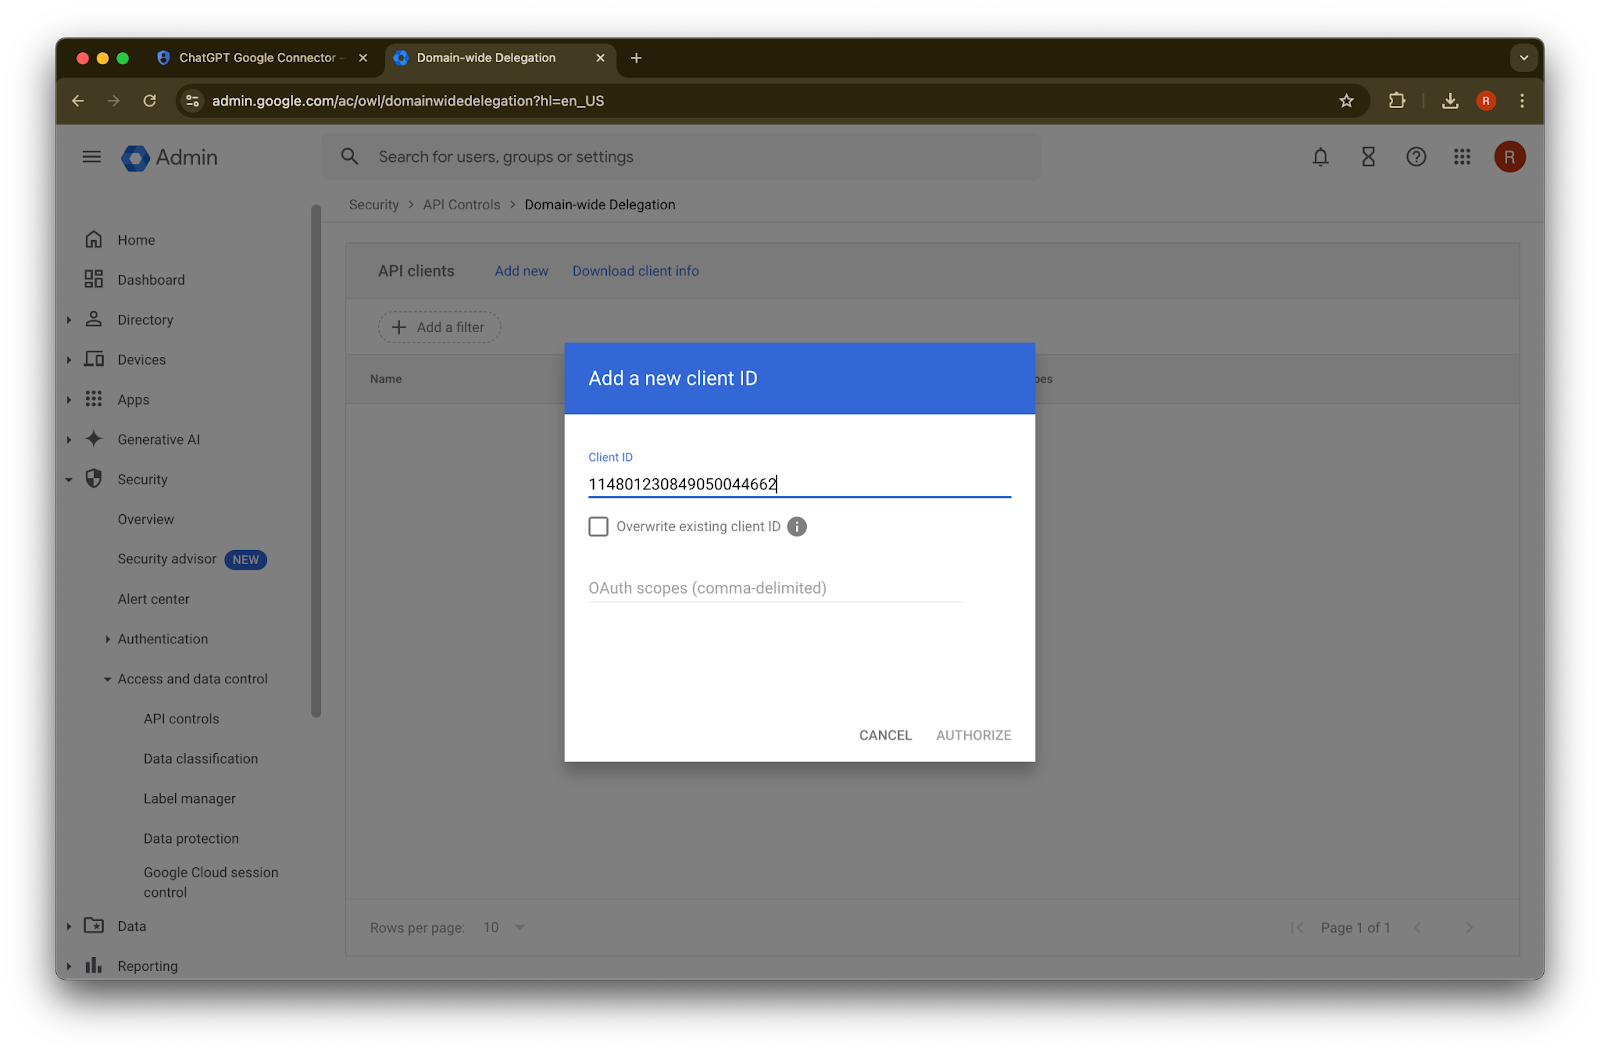
คลิก Add new
ใช้ Unique ID ที่จดไว้ก่อนหน้านี้เป็นค่าสำหรับ Client ID นี้
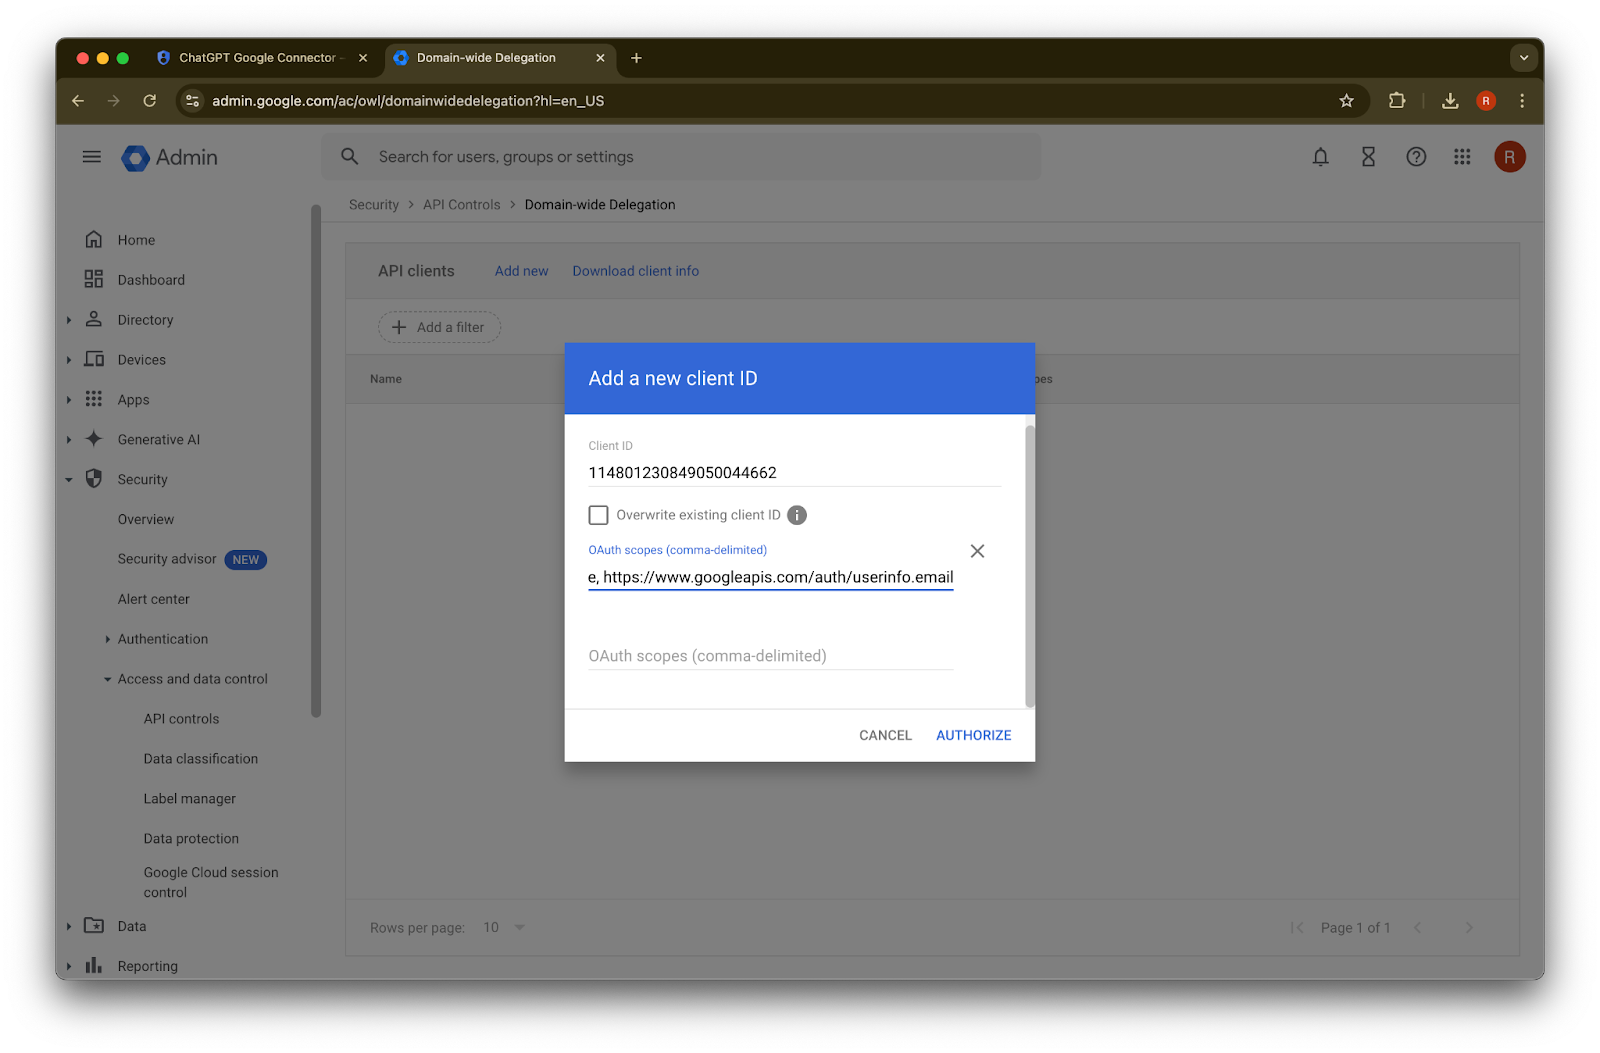
สำหรับ OAuth scopes โปรดดูค่า auth scopes ที่คั่นด้วยเครื่องหมายจุลภาคต่อไปนี้ ซึ่งคุณจะต้องคัดลอกและวาง:


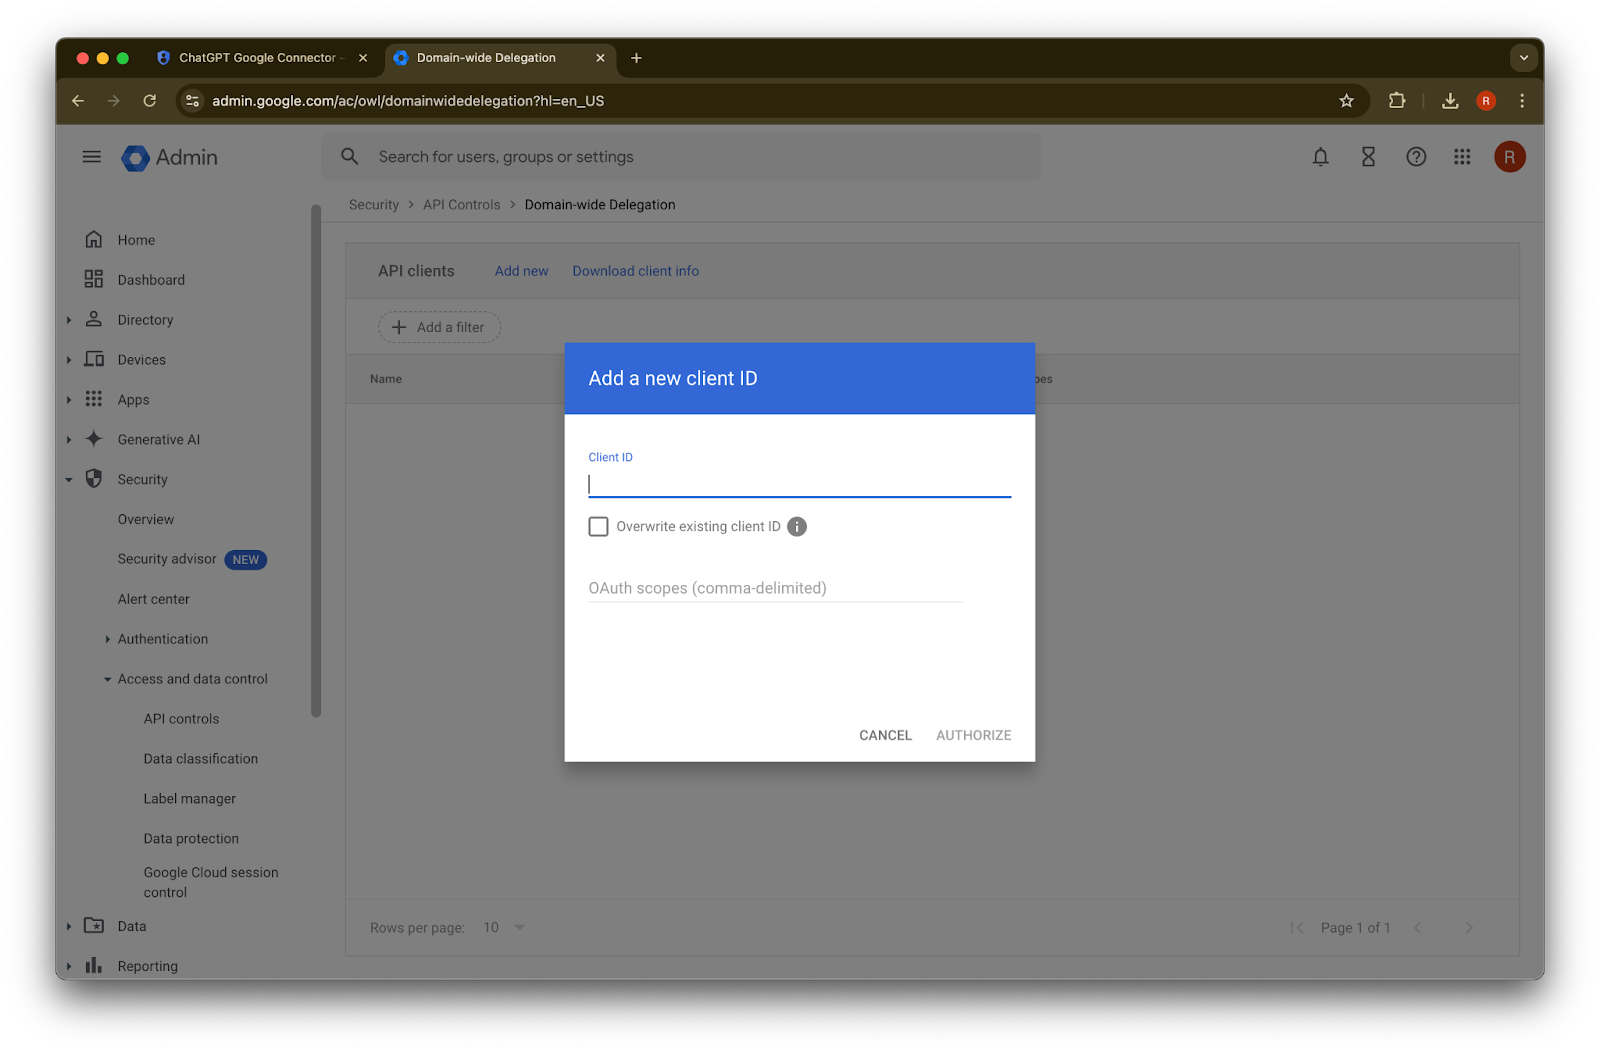
https://www.googleapis.com/auth/admin.directory.group.readonly, https://www.googleapis.com/auth/admin.directory.group.member.readonly, https://www.googleapis.com/auth/admin.directory.user.readonly, https://www.googleapis.com/auth/admin.directory.user.alias.readonly, https://www.googleapis.com/auth/drive.activity.readonly, https://www.googleapis.com/auth/drive.metadata.readonly, https://www.googleapis.com/auth/drive.readonly, https://www.googleapis.com/auth/userinfo.profile, https://www.googleapis.com/auth/userinfo.email| Scope | การให้เหตุผล |
| admin.directory.group.readonly | บังคับใช้สิทธิ์ตามกลุ่ม |
| admin.directory.group.member.readonly | บังคับใช้สิทธิ์ตามกลุ่ม |
| admin.directory.user.alias.readonly | รองรับกรณีที่ผู้ใช้ได้รับสิทธิ์ผ่าน alias |
| drive.activity.readonly | เพื่อรับการแจ้งเตือนเมื่อมีการเปลี่ยนแปลงกับไฟล์ |
| drive.metadata.readonly | ซิงค์เนื้อหาไฟล์และข้อมูลเมตาที่เกี่ยวข้อง (เช่น วันที่แก้ไขล่าสุด) |
| drive.readonly | ซิงค์เนื้อหาไฟล์และข้อมูลเมตาที่เกี่ยวข้อง (เช่น วันที่แก้ไขล่าสุด) |
| userinfo.profile | ระบุผู้ใช้ที่เรากำลังซิงค์ไฟล์ให้ |
| userinfo.email | ระบุผู้ใช้ที่เรากำลังซิงค์ไฟล์ให้ |
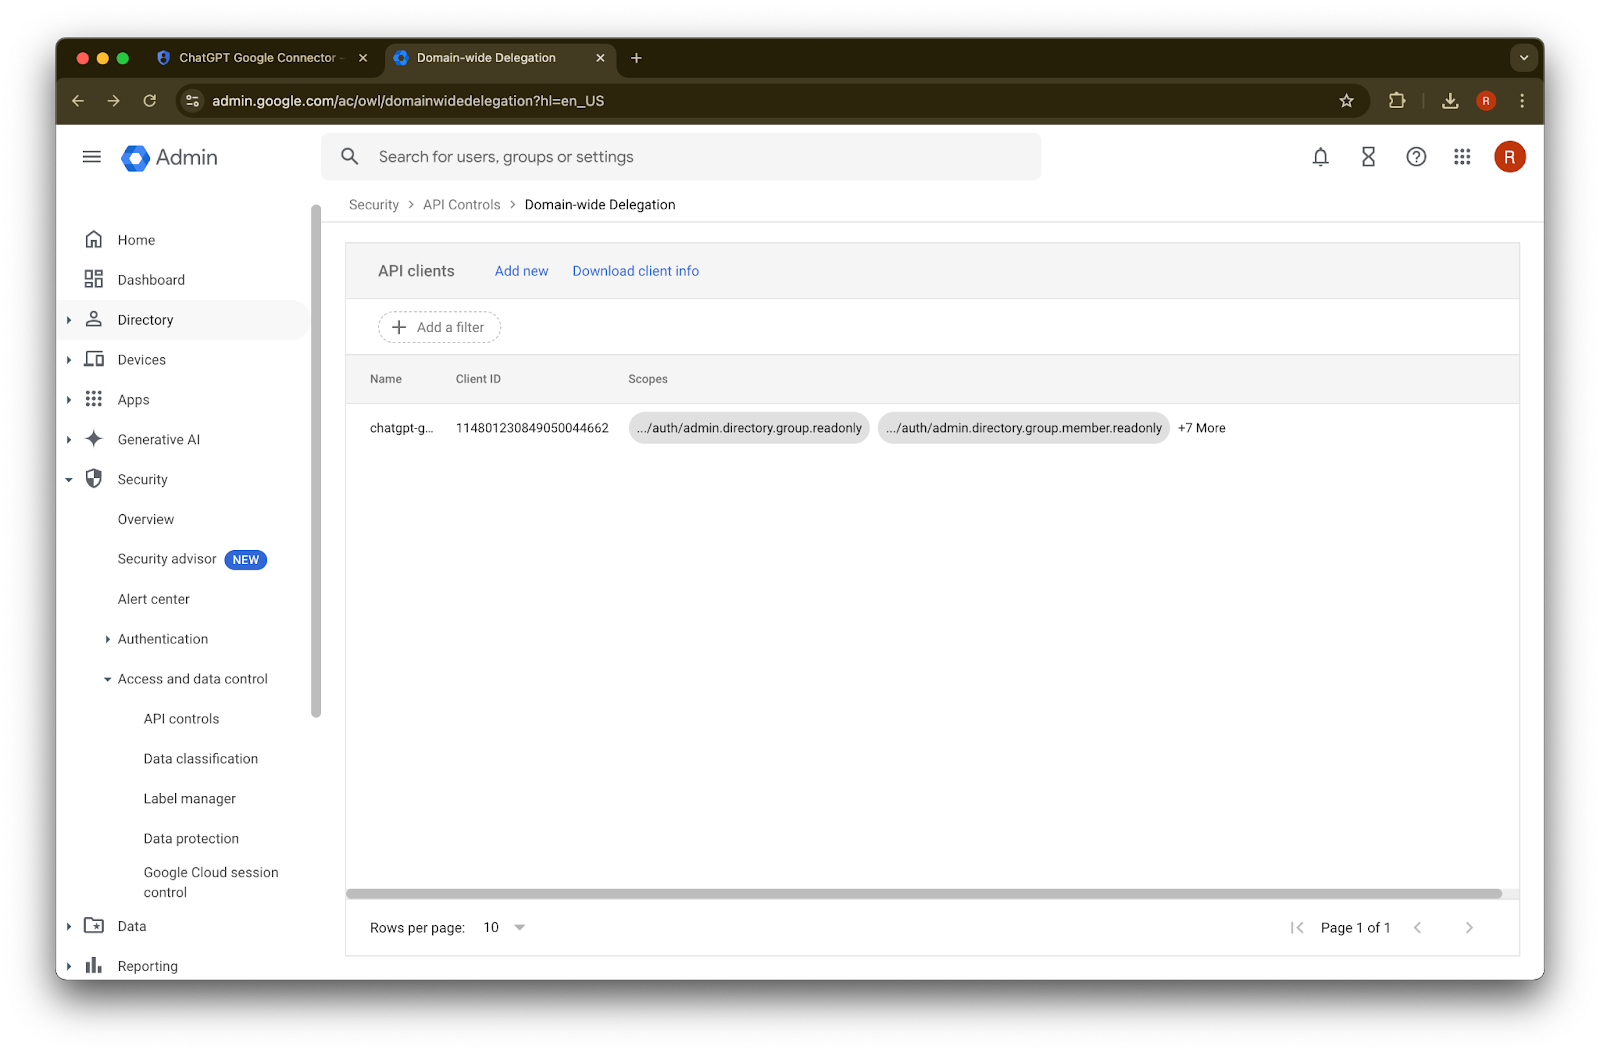
45. คลิก Authorize
46. สำเร็จ!
การตั้งค่าบัญชีผู้ดูแลระบบ
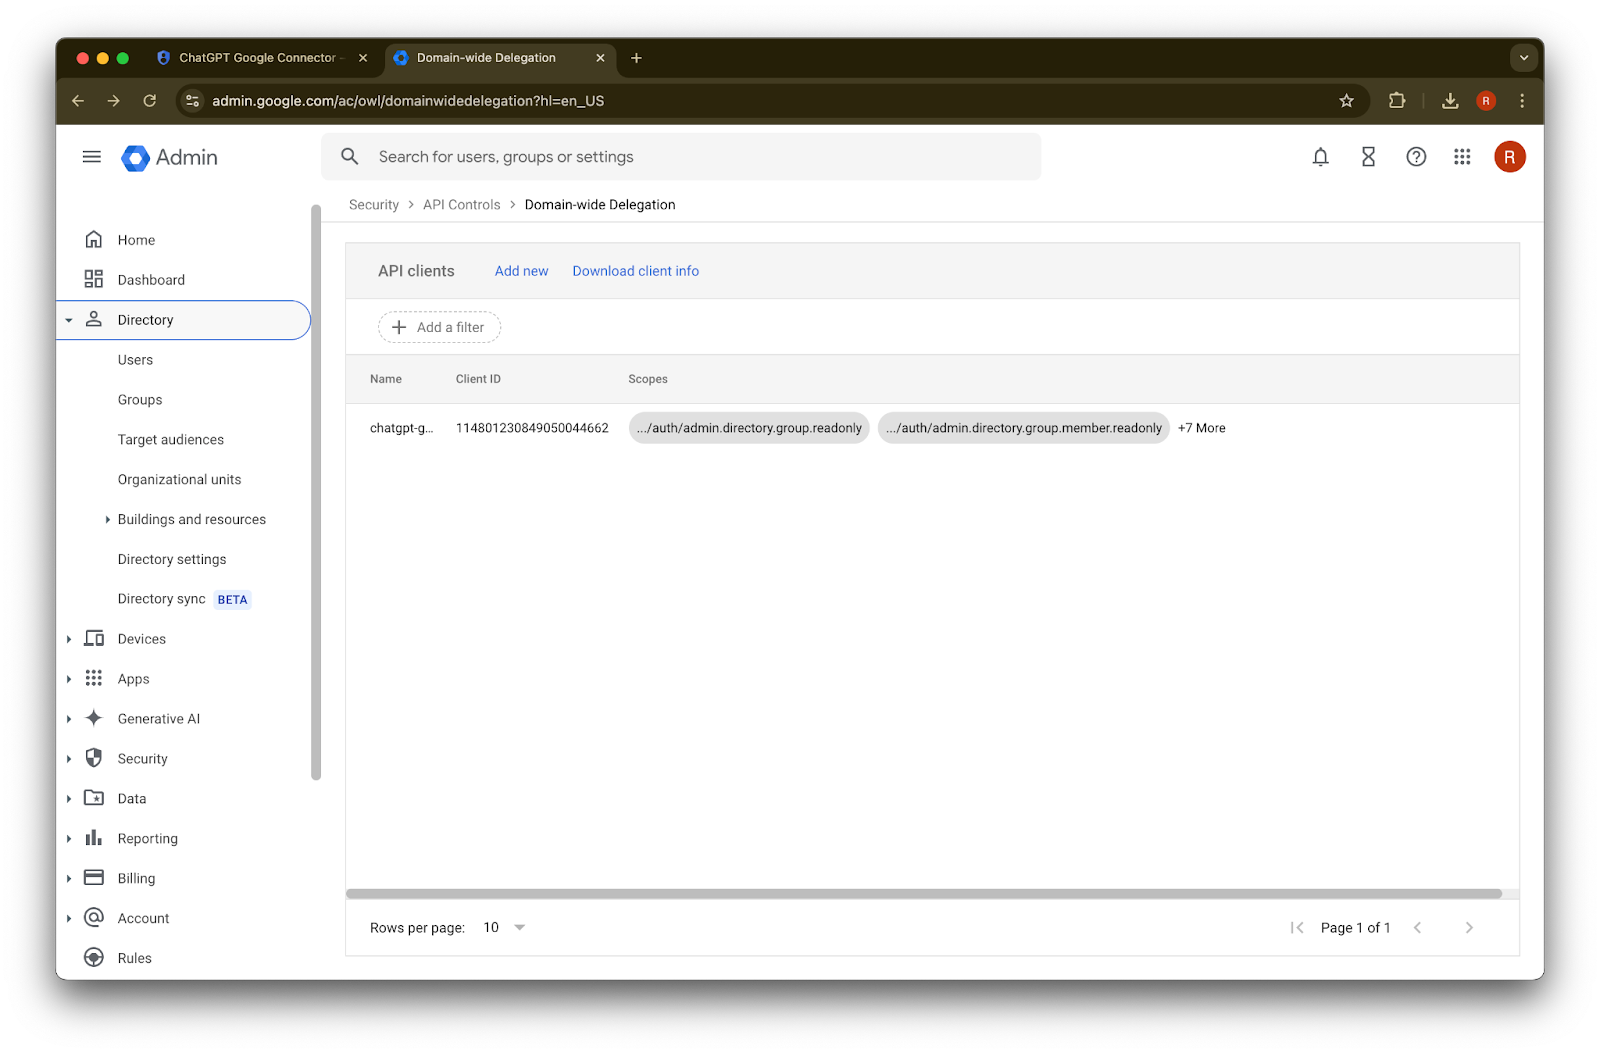
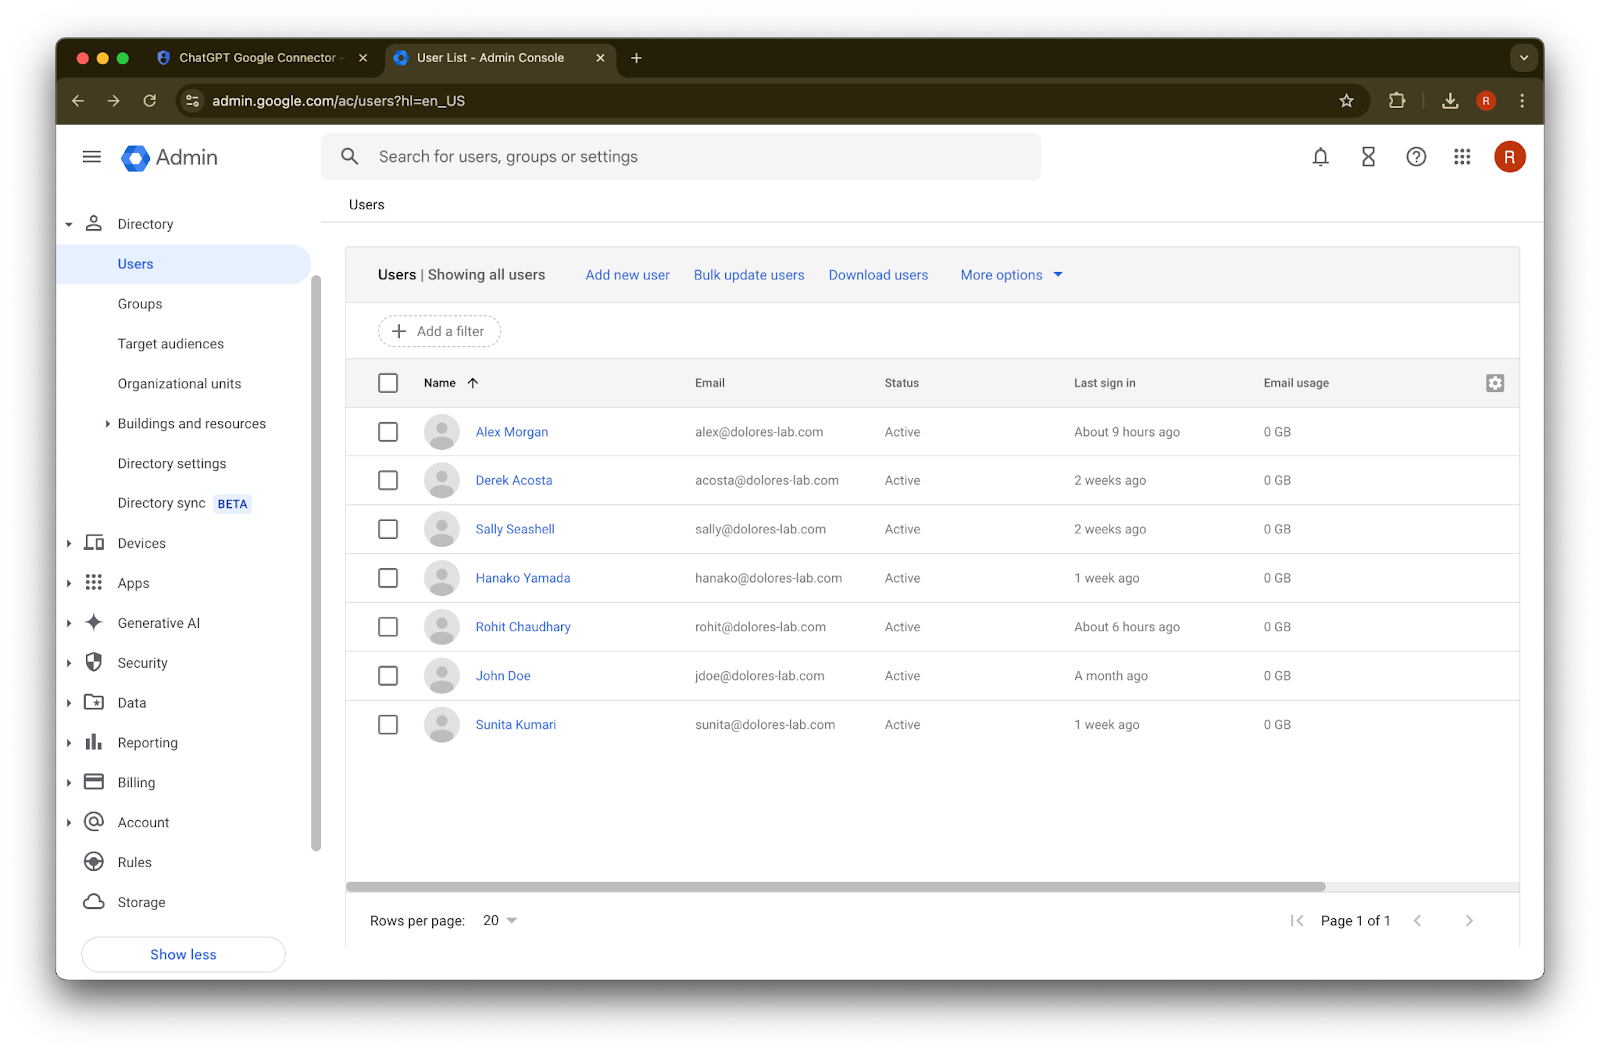
ขยาย Directory
คลิก Users
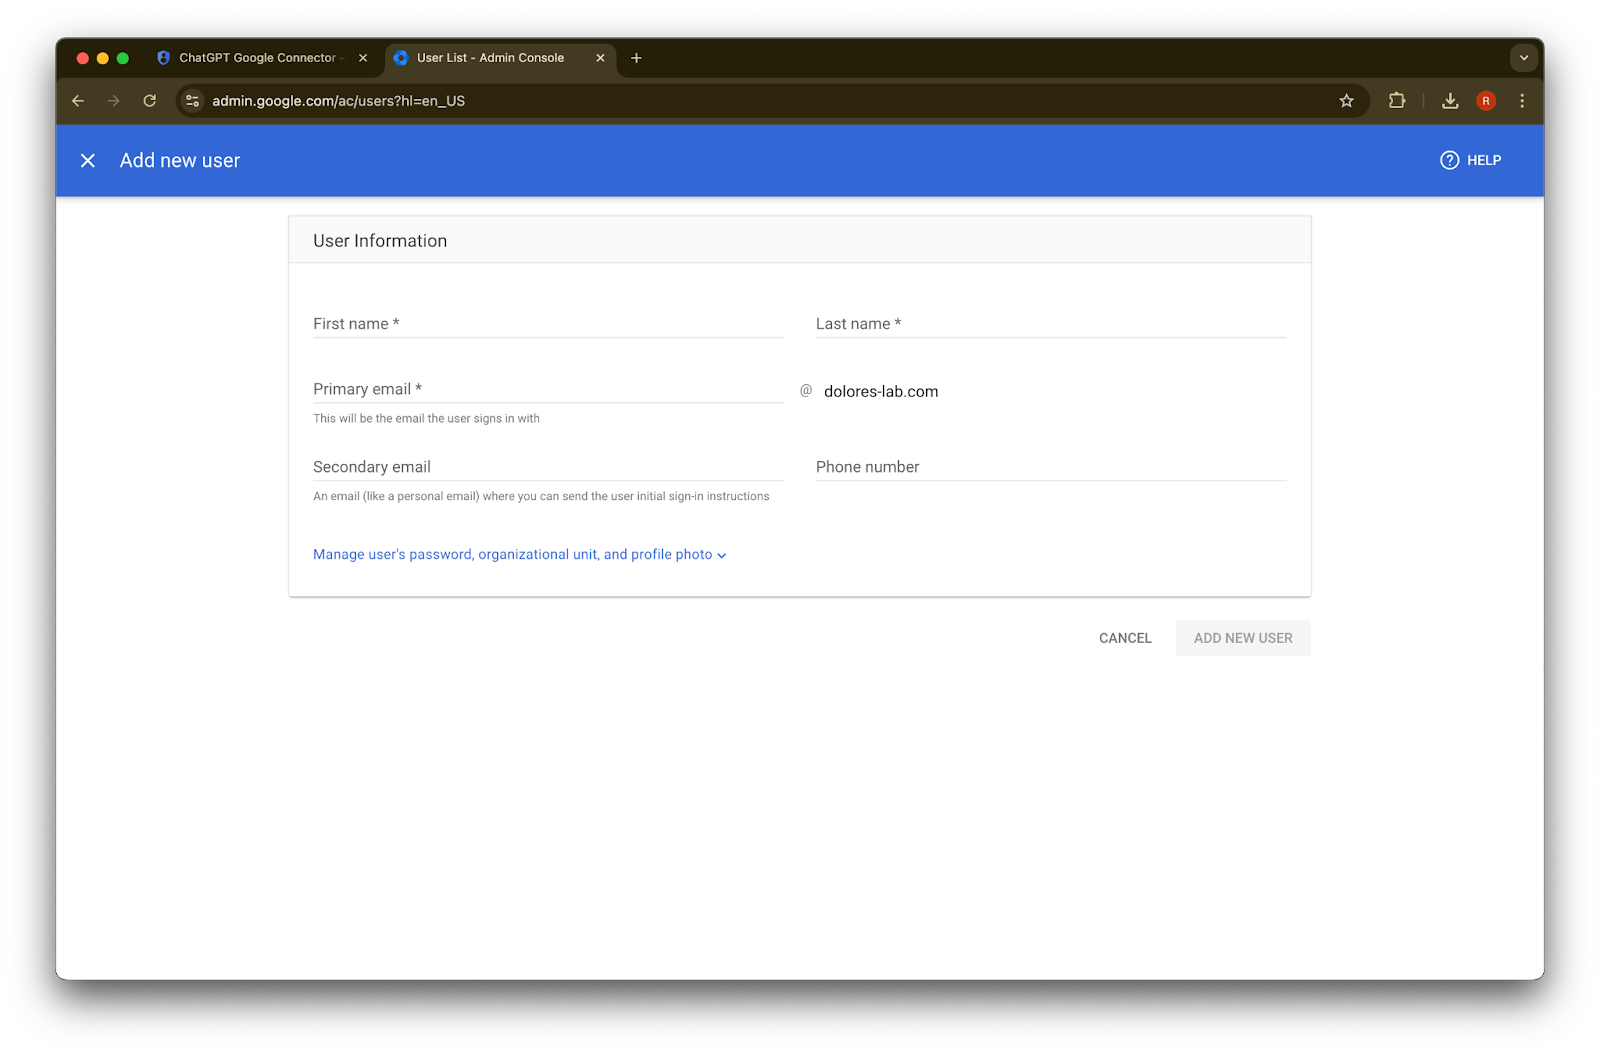
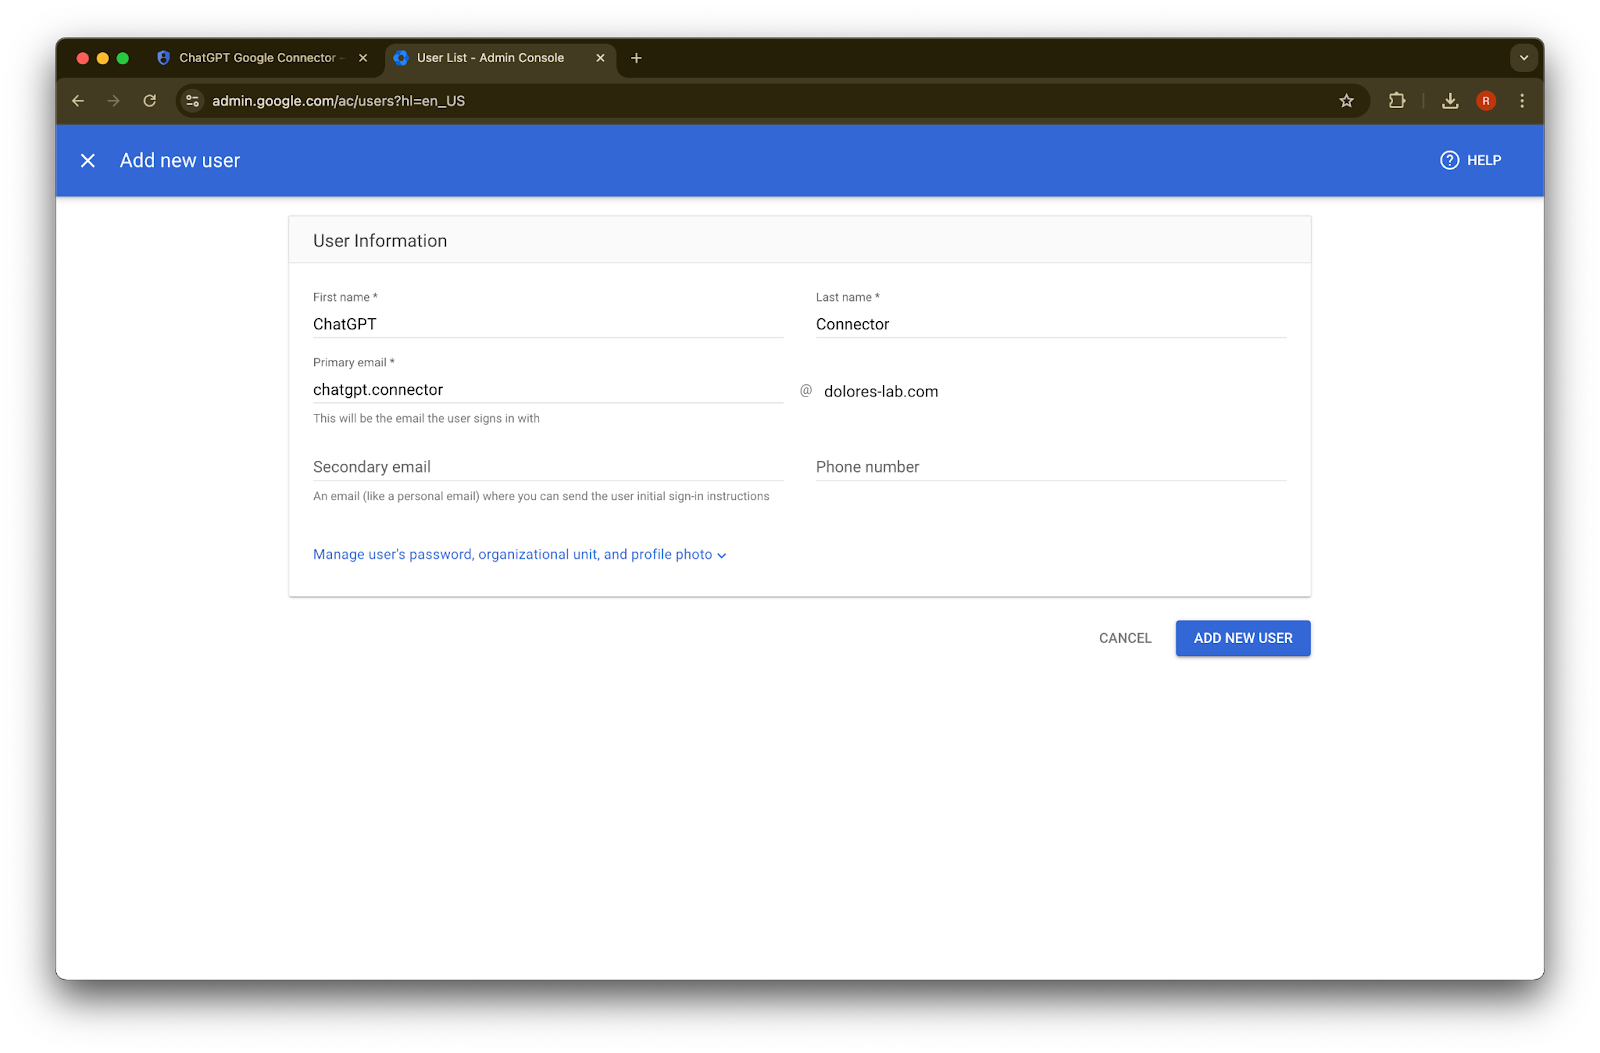
ระบุชื่อ นามสกุล และอีเมลหลักตามต้องการ
คลิก Add new user
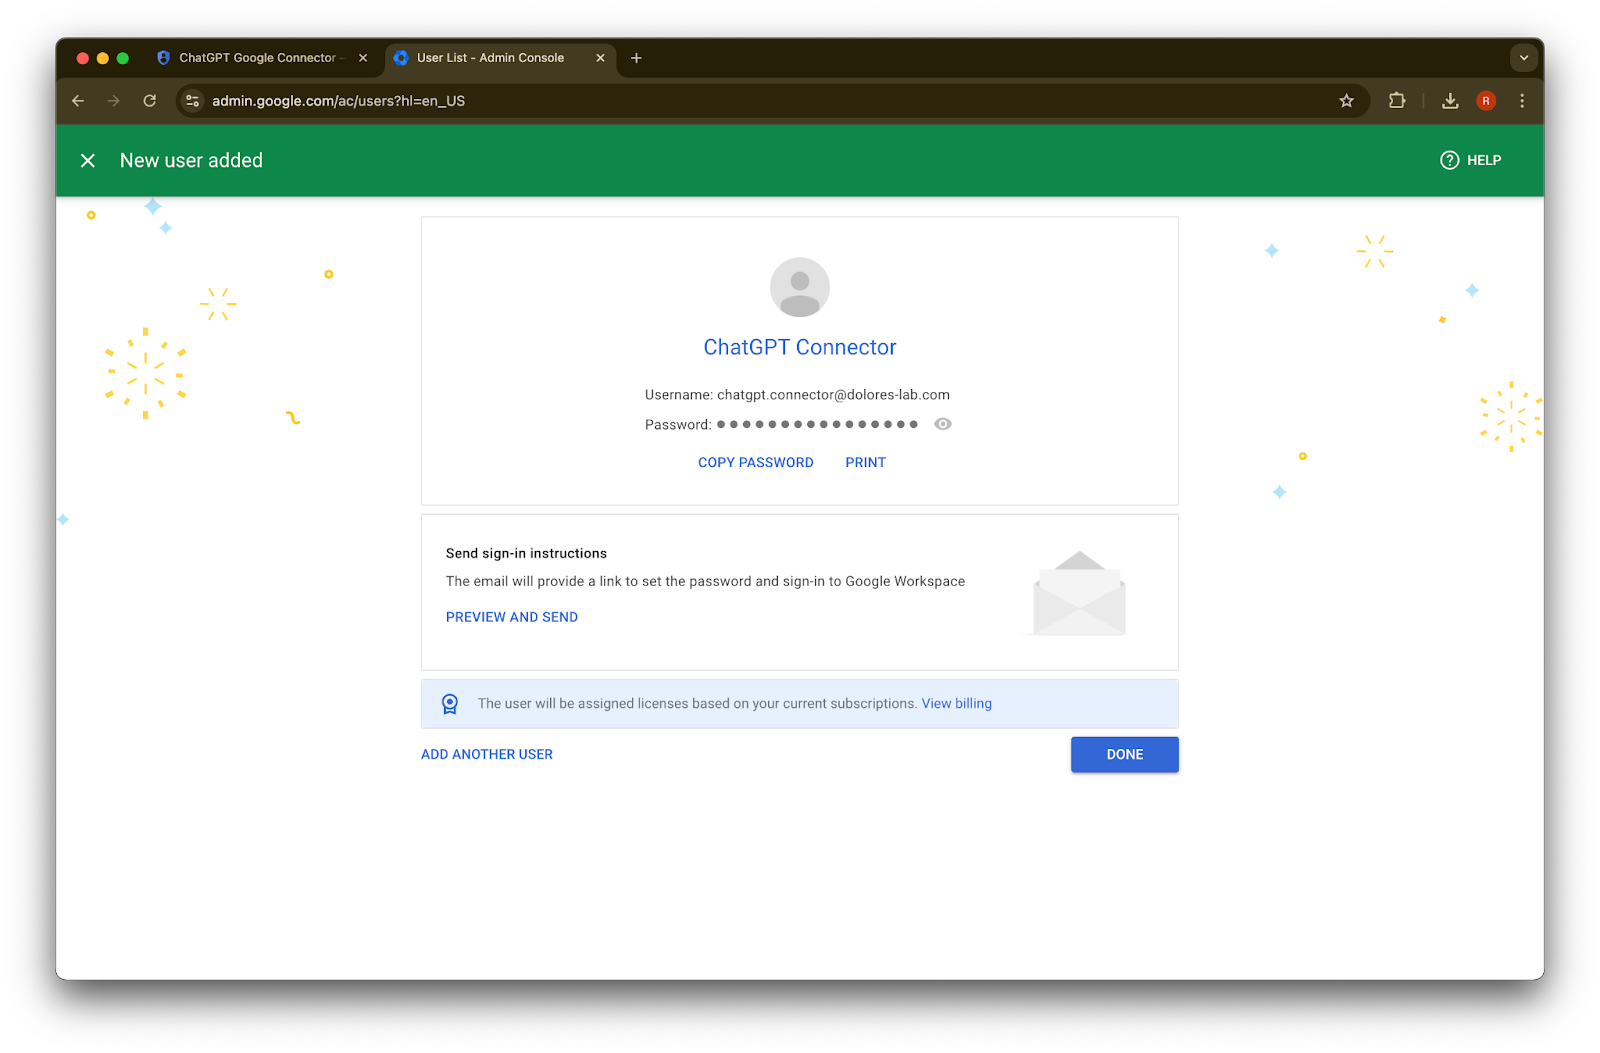
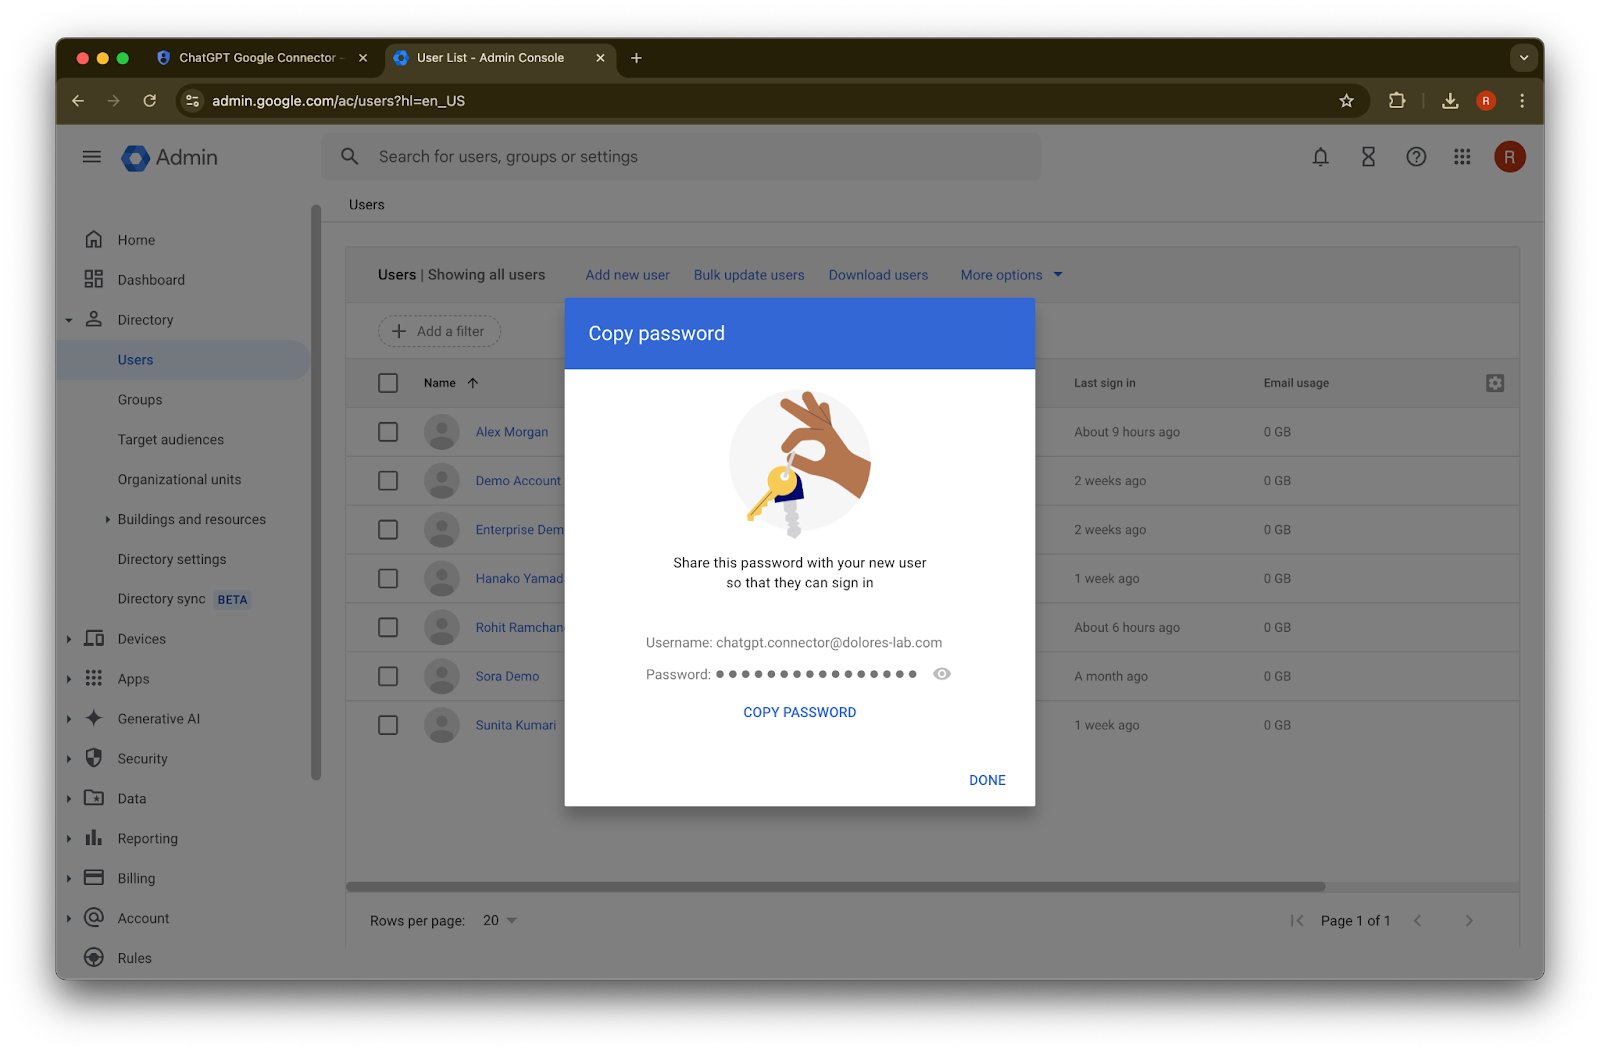
(ไม่บังคับ) บันทึกข้อมูลเข้าสู่ระบบเหล่านี้ไว้ ChatGPT ไม่ต้องใช้ข้อมูลเข้าสู่ระบบเหล่านี้
คลิก Done
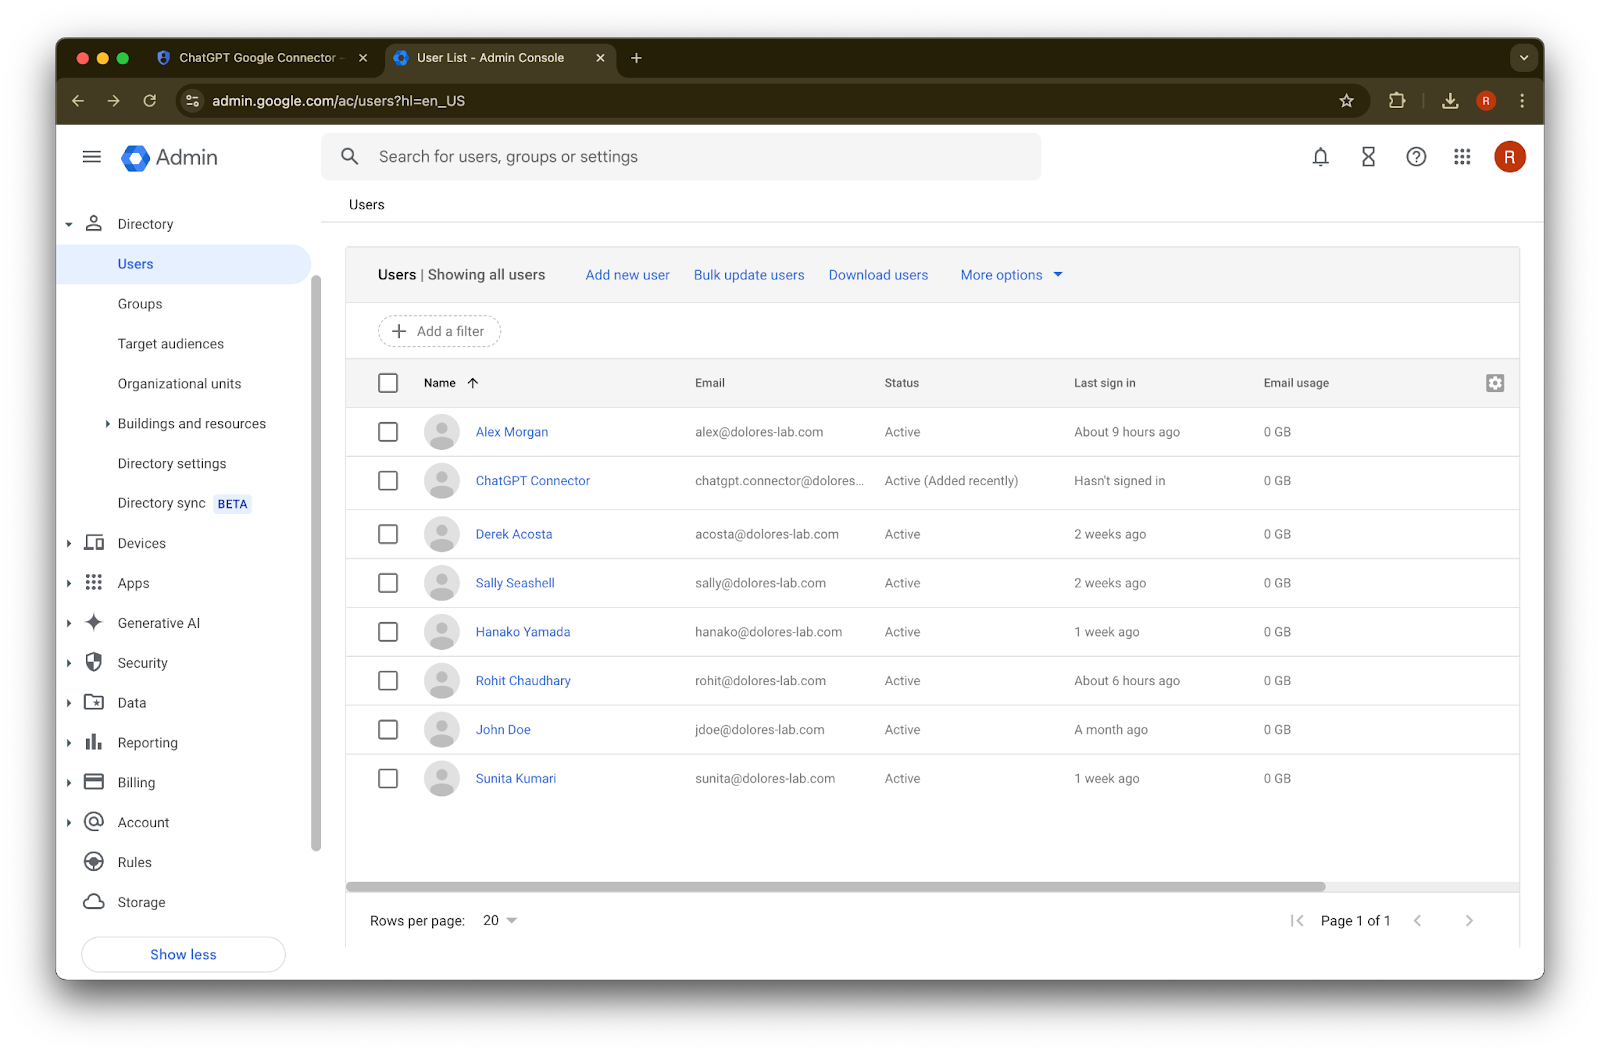
คลิกที่บัญชีที่คุณเพิ่งสร้าง หากไม่ปรากฏในรายการ ให้รีเฟรชหน้า หรือล้างแคชและคุกกี้แล้วลองอีกครั้ง
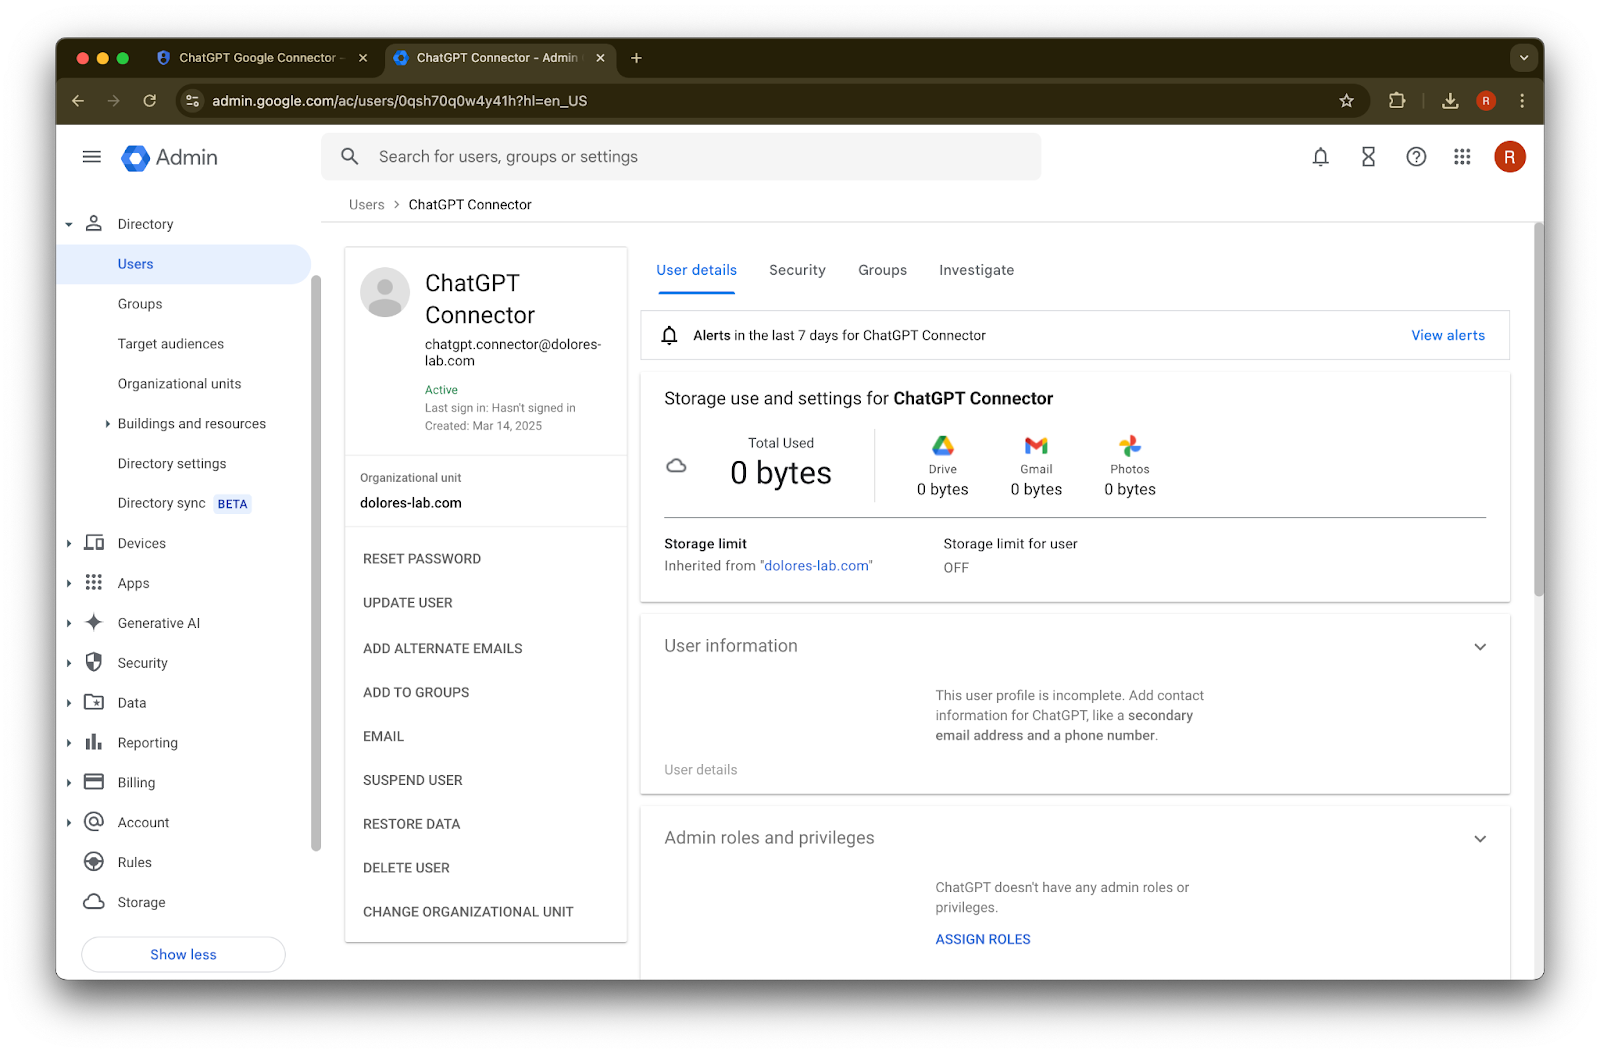
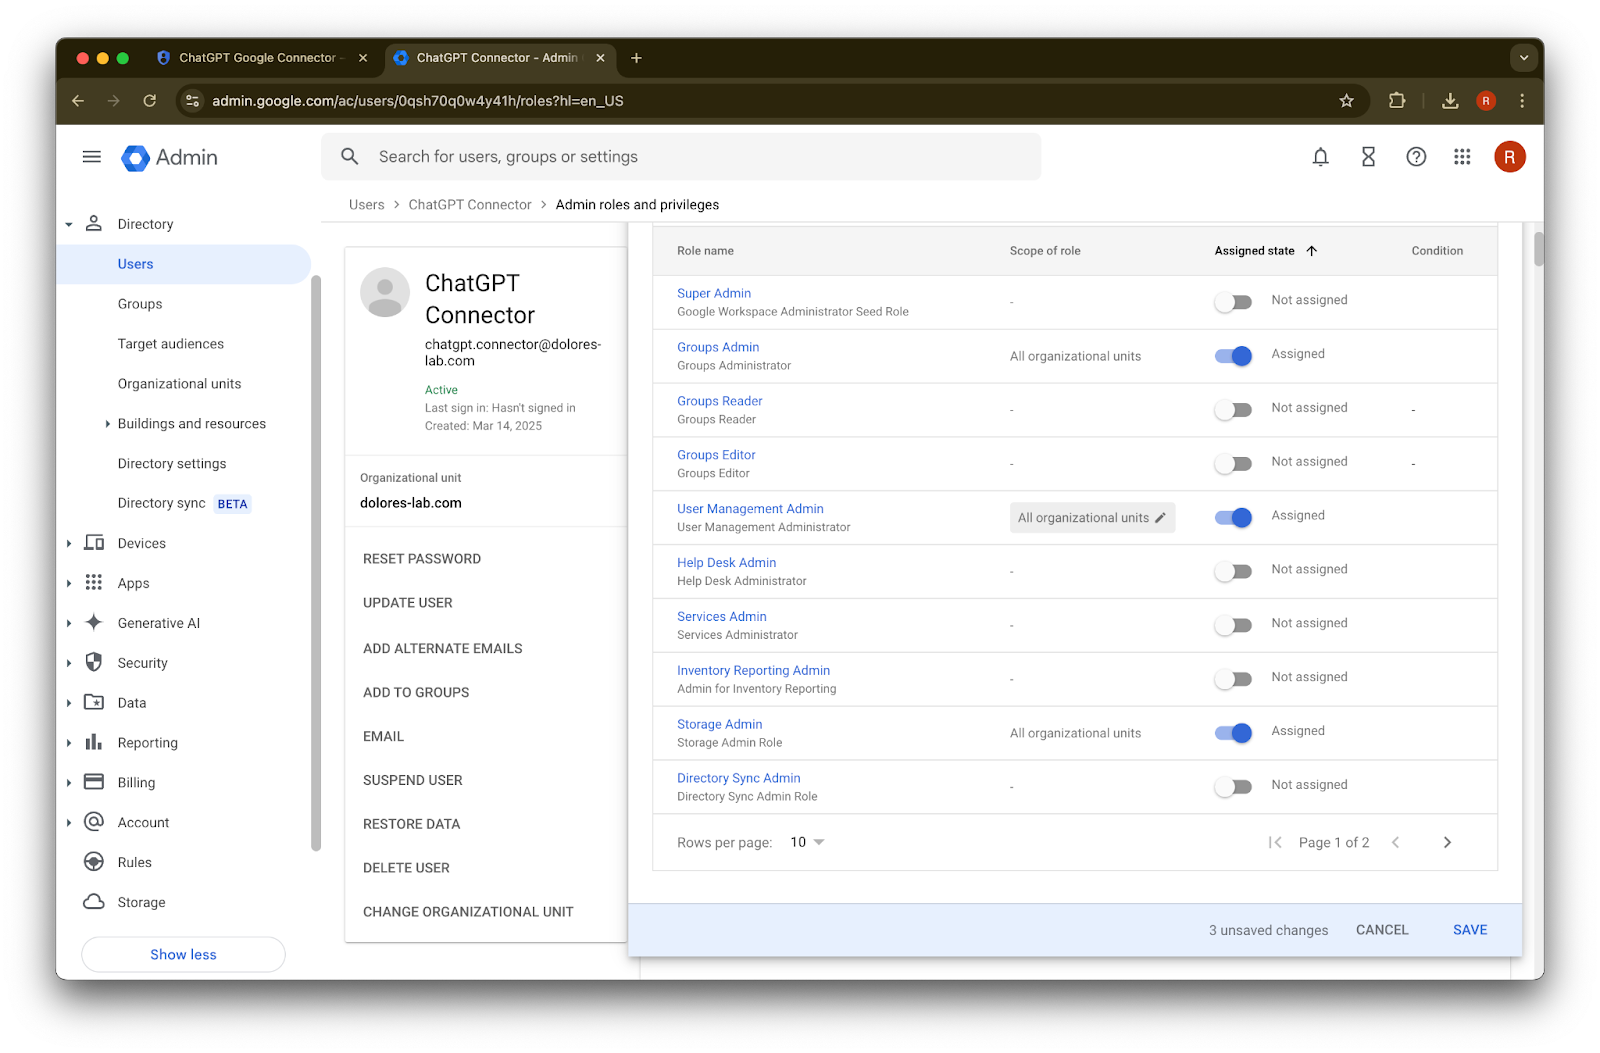
คลิก assign roles
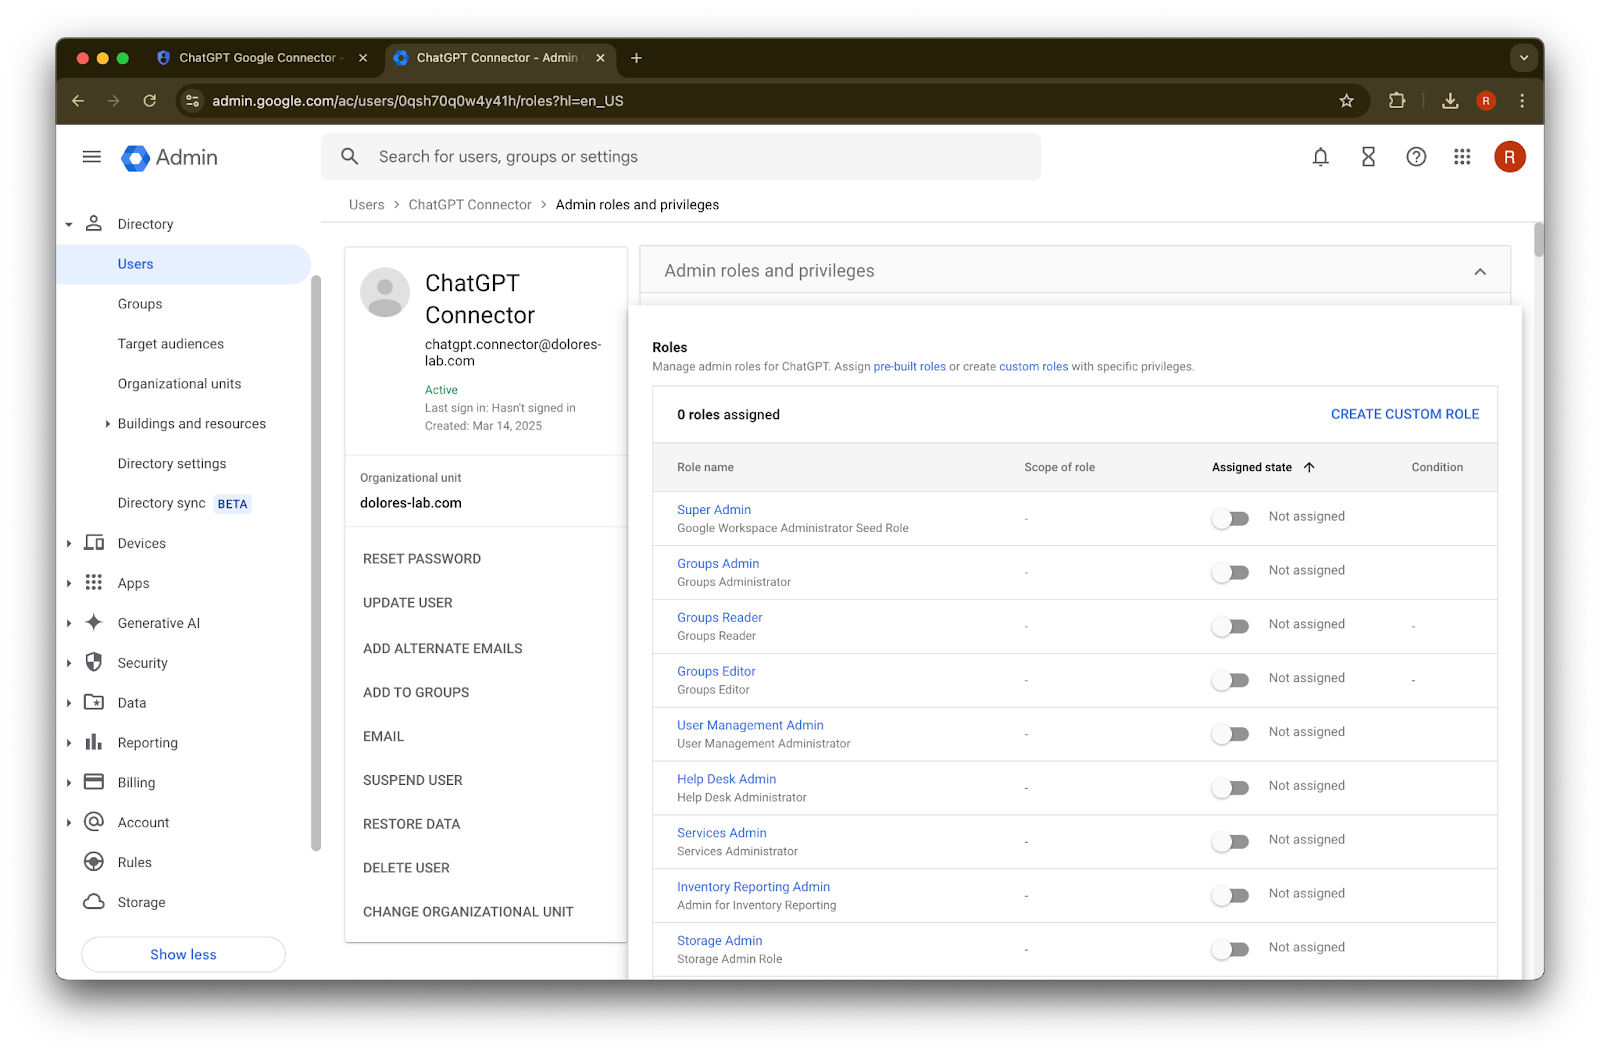
เปิดใช้บทบาท Groups Reader, User Management Admin, และ Storage Admin
เลื่อนลงแล้วคลิก Save. บัญชีผู้ดูแลระบบถูกสร้างและกำหนดค่าเรียบร้อยแล้ว

การตั้งค่าให้เสร็จสิ้นในคอนโซลผู้ดูแลระบบ ChatGPT
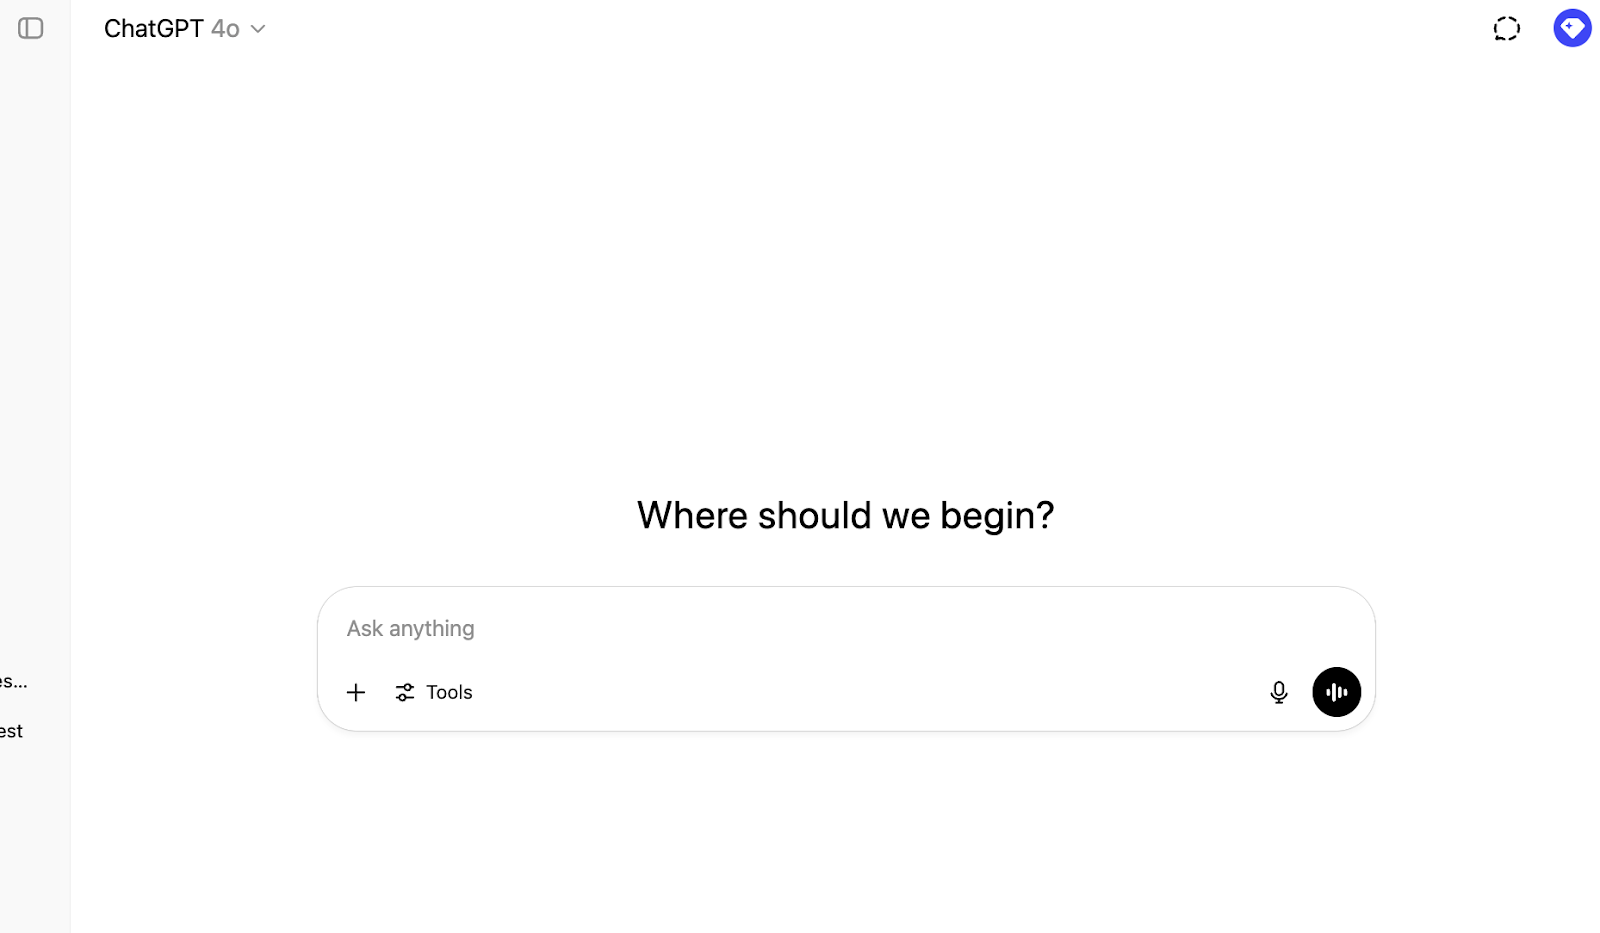
ไปที่ ChatGPT แล้วคลิกไอคอนโปรไฟล์ที่มุมขวาบนของหน้าเว็บ
คลิก Manage workspace
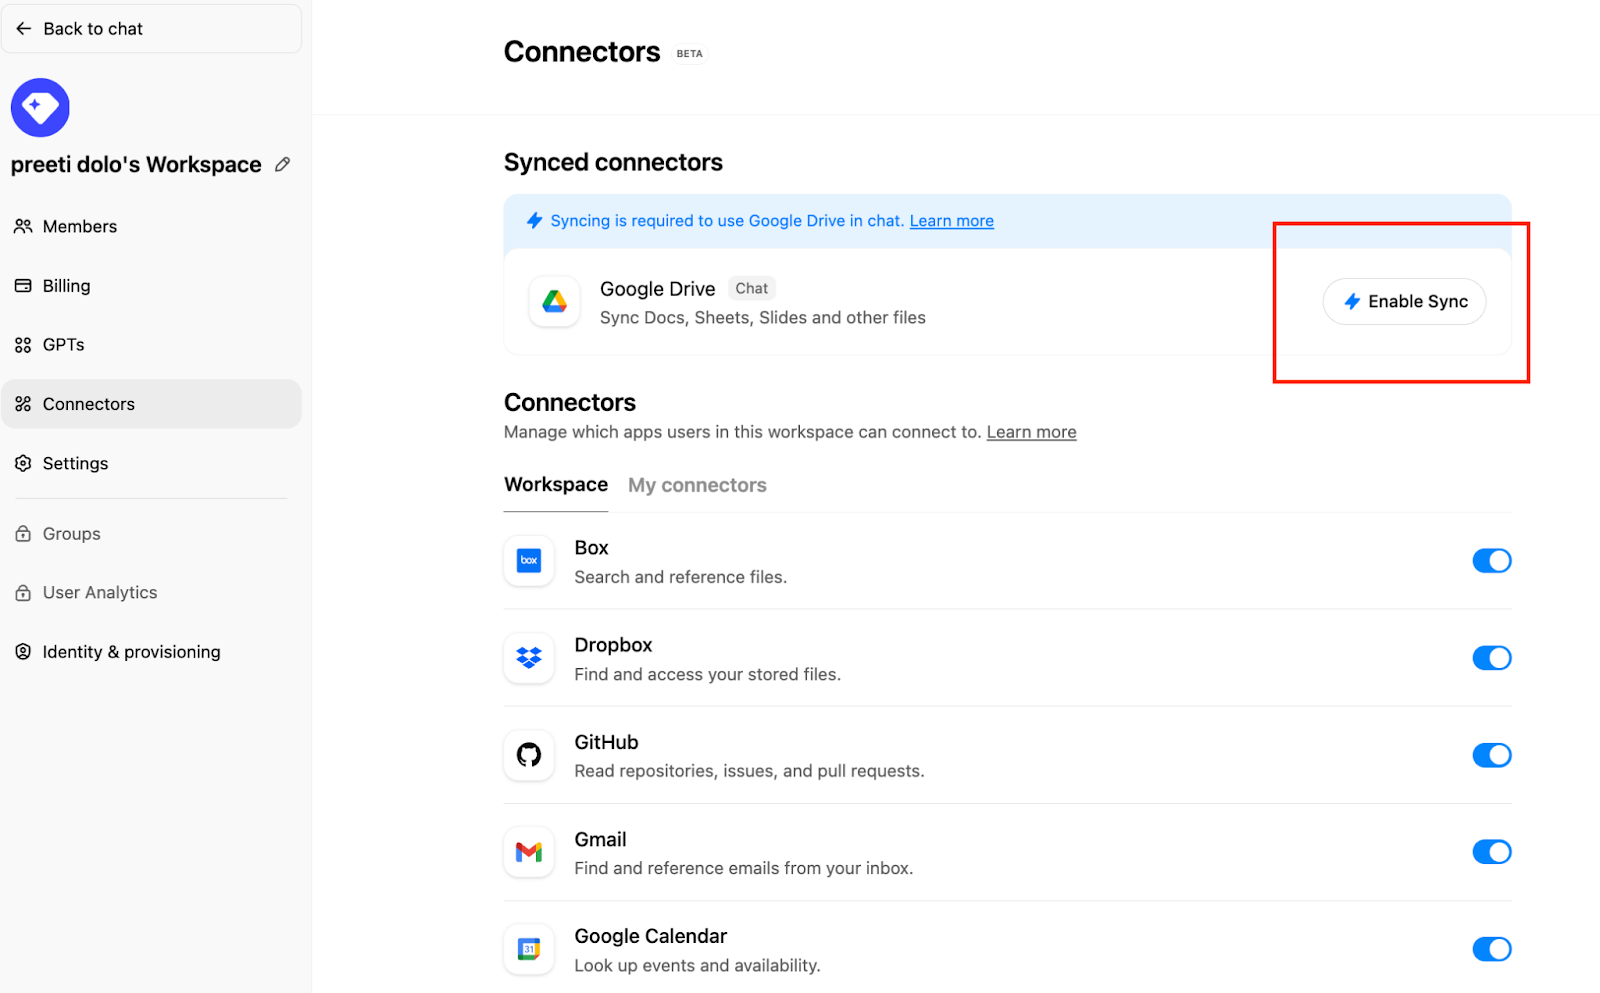
คลิก Connections แล้วภายใต้ ‘Synced connectors’ → Enable Sync
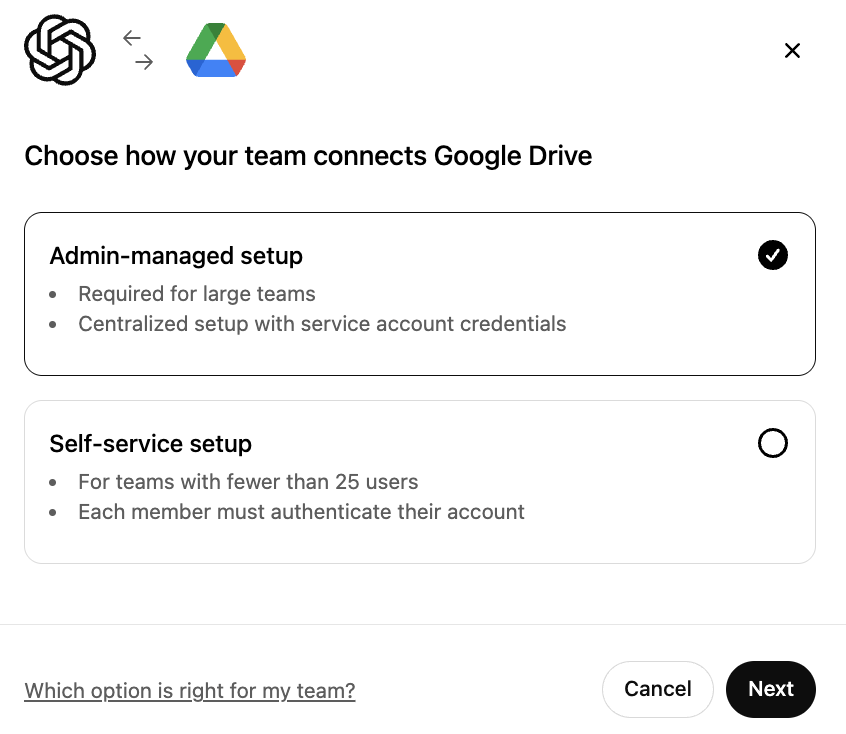
ตรวจสอบให้แน่ใจว่าเลือก Admin-managed แล้ว และคลิก Next
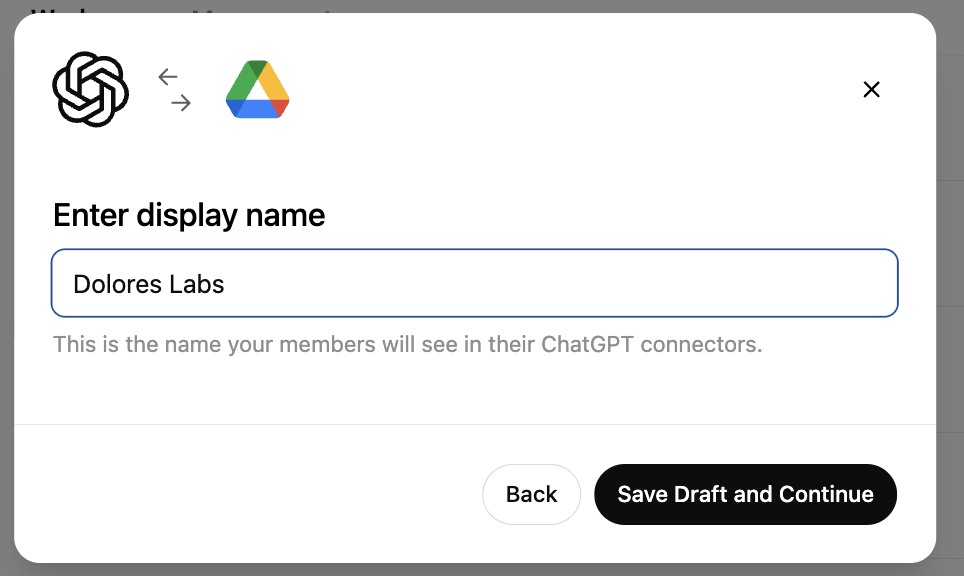
พิมพ์ชื่อที่แสดง เราแนะนำให้ใช้ชื่อของ Google Workspace ของคุณ
โปรดทราบว่าขณะนี้เราไม่รองรับการเปลี่ยนชื่อการเชื่อมต่อของคุณคลิก Save Draft and Continue
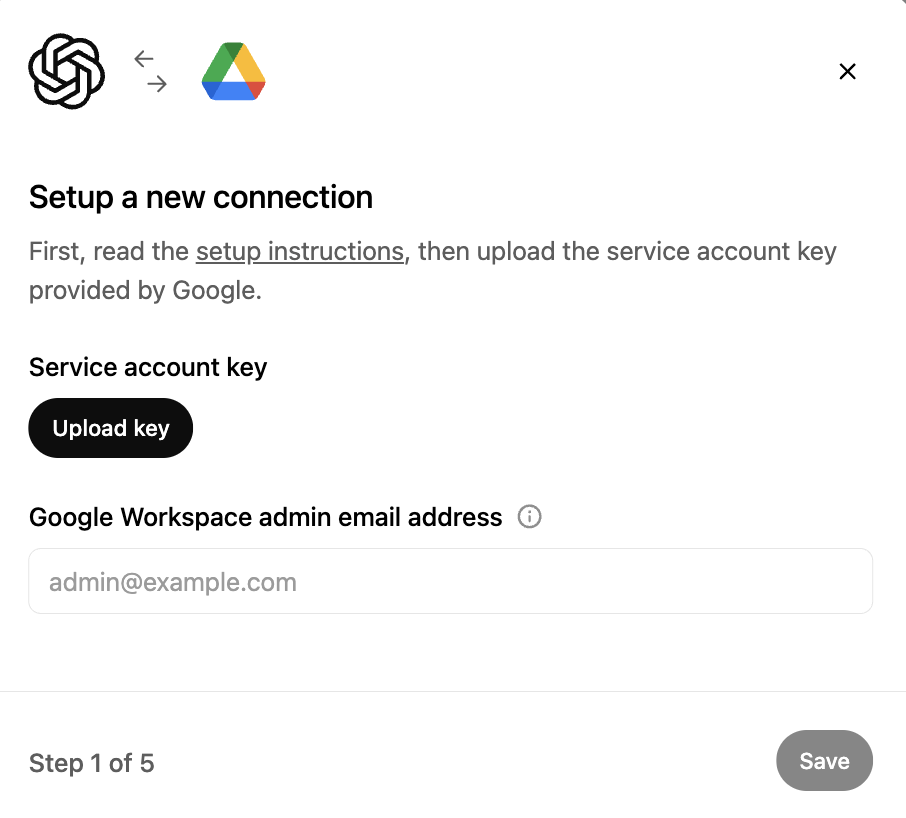
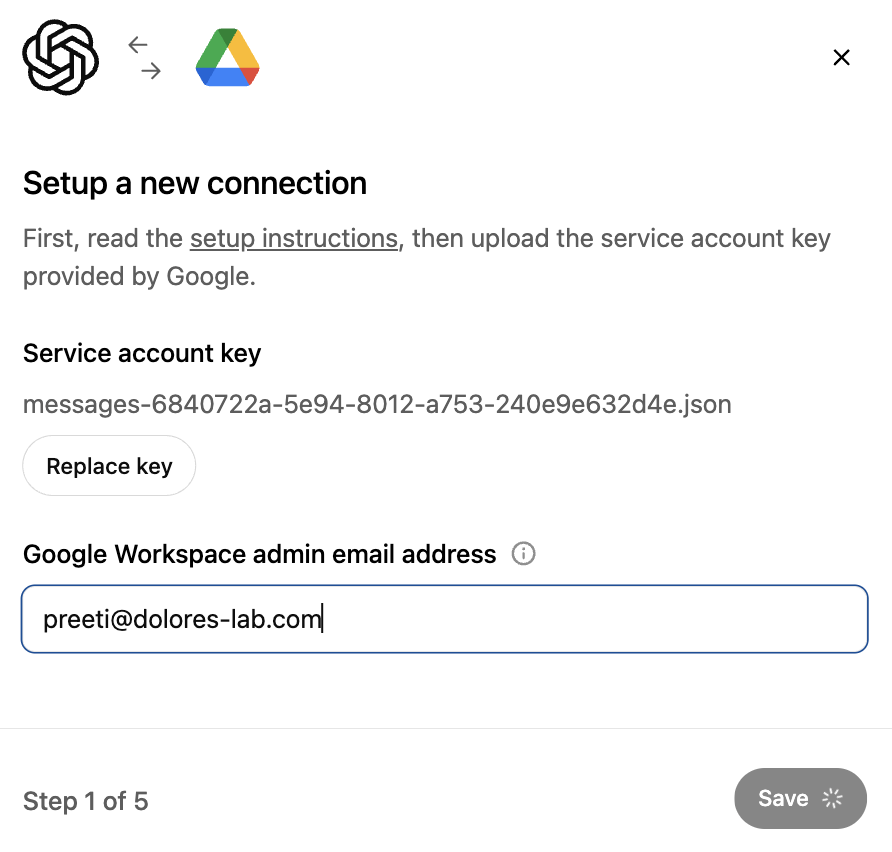
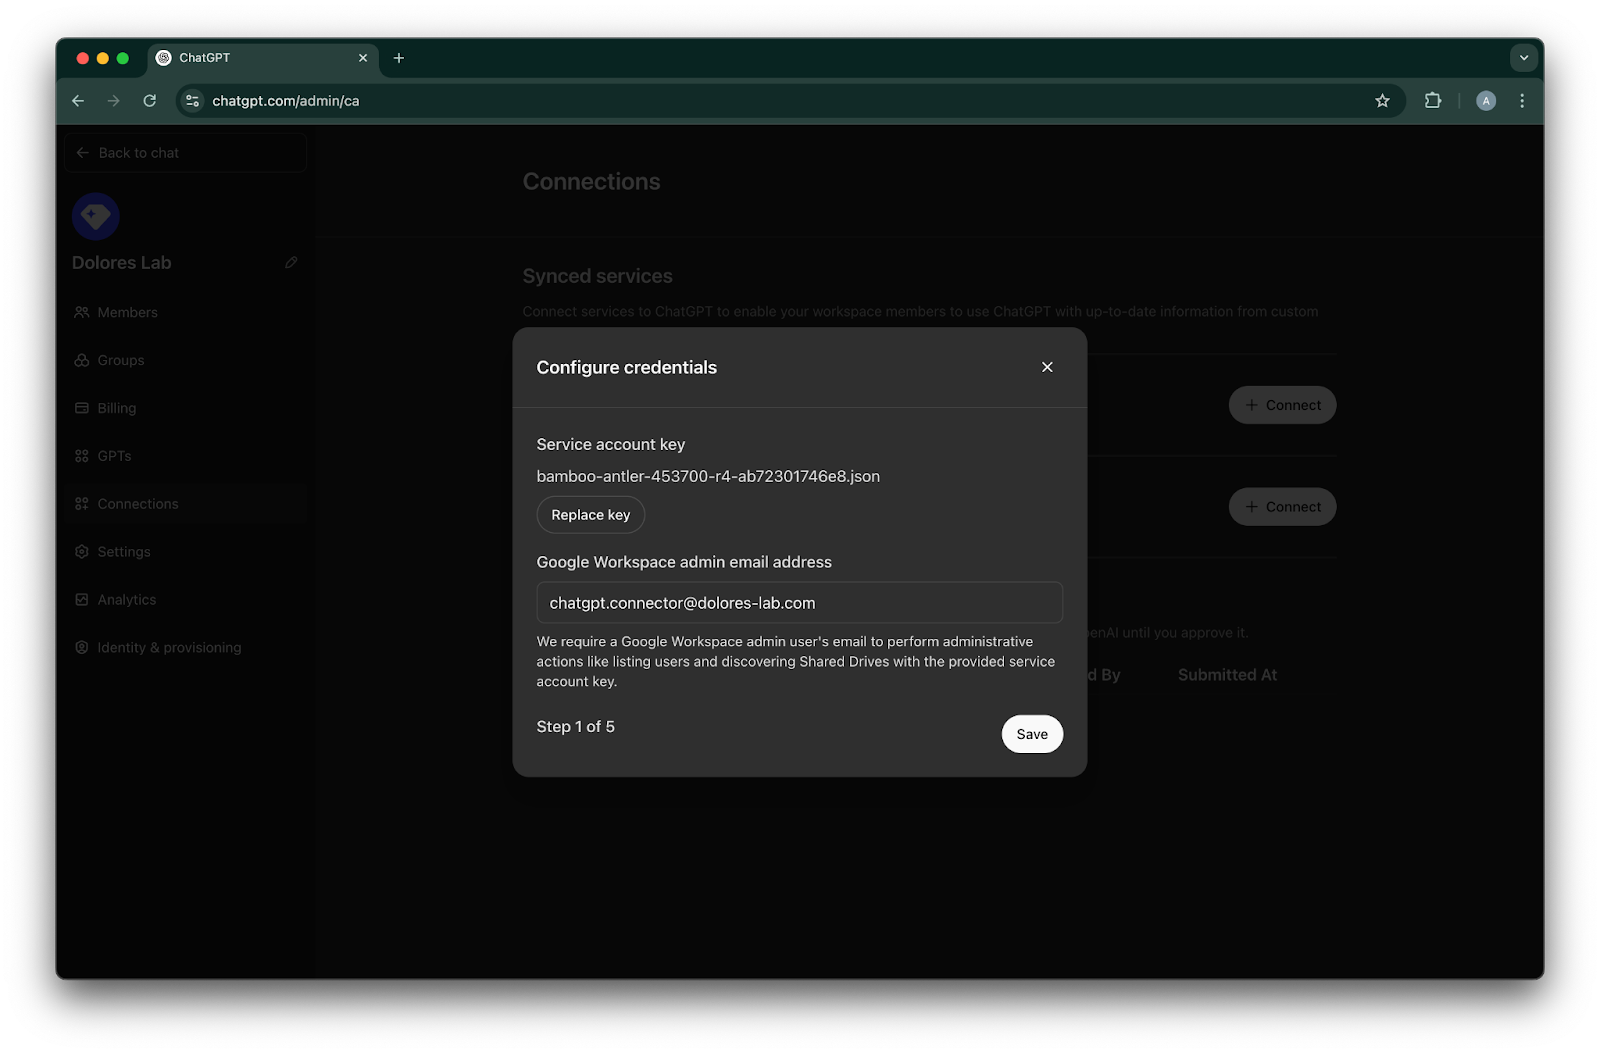
คลิก Upload key เลือกไฟล์ JSON ซึ่งเป็นคีย์ที่คุณดาวน์โหลดไว้ในขั้นตอนการตั้งค่าบัญชีบริการด้านบน ตรวจสอบให้แน่ใจว่าคีย์นี้ถูกต้อง
พิมพ์อีเมลแอดเดรสของผู้ดูแลระบบ นี่คือบัญชีผู้ดูแลระบบที่คุณสร้างไว้ก่อนหน้านี้
คลิก Save.
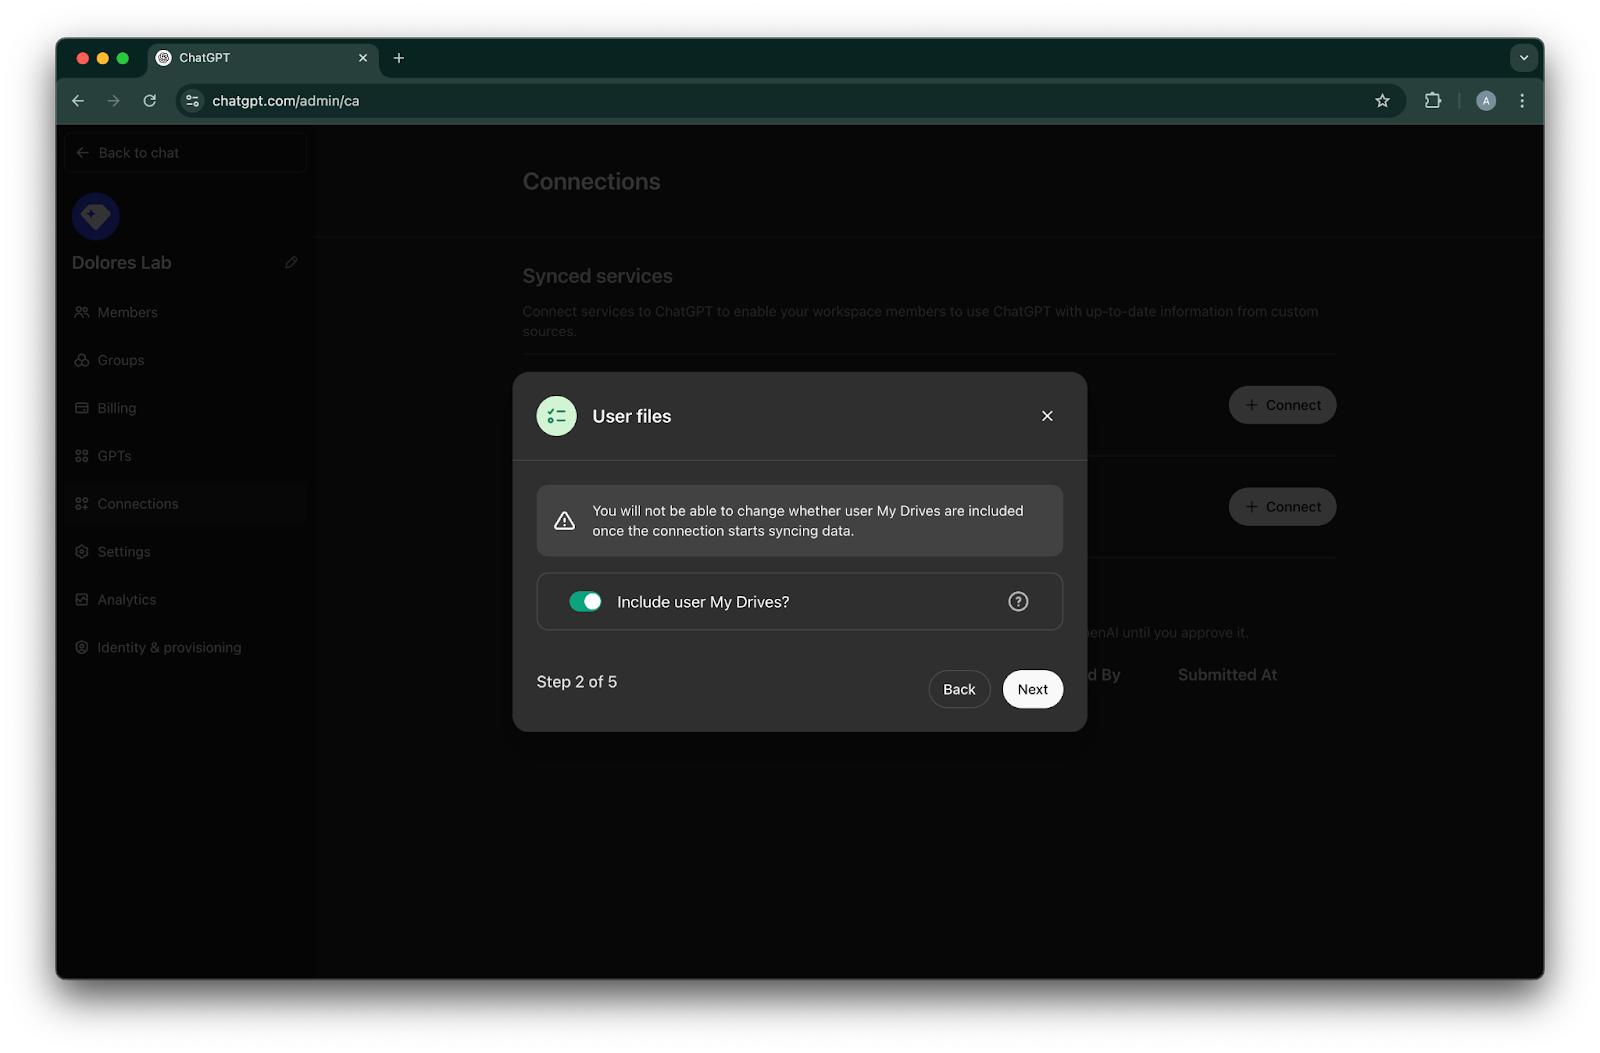
เลือกว่าคุณต้องการรวมไฟล์ใน My Drive ของผู้ใช้ทั้งหมดหรือไม่
คลิก Next
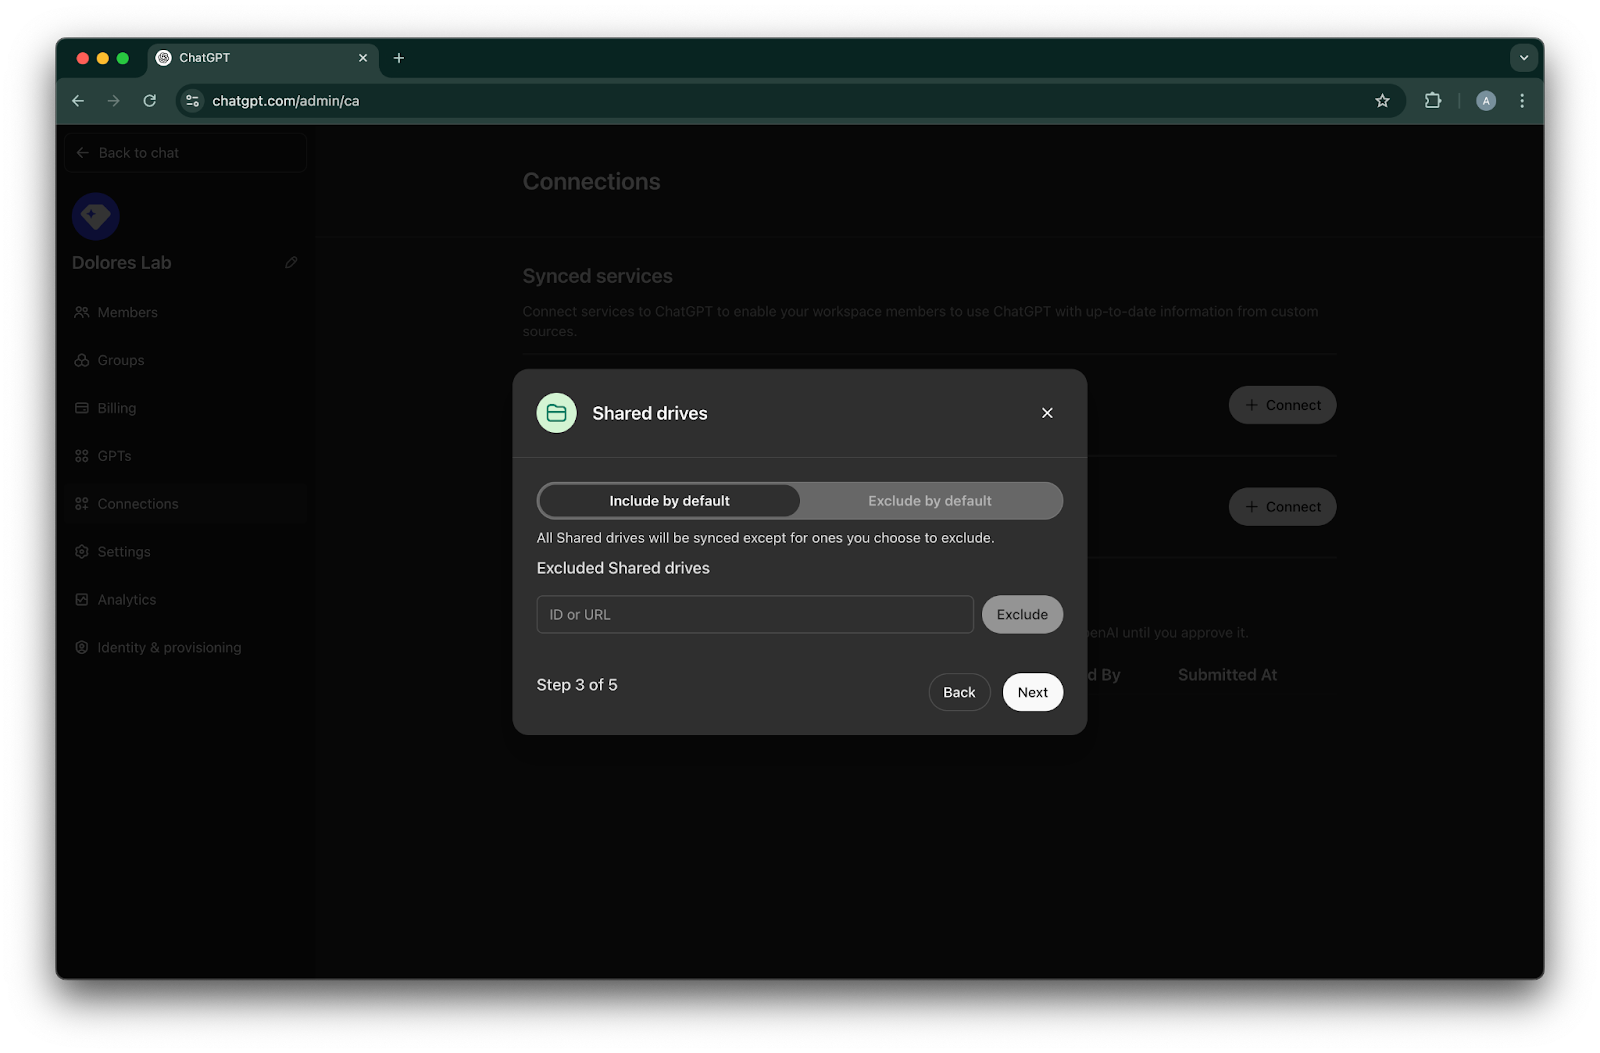
เลือกวิธีจัดการไดรฟ์ที่แชร์ เรารองรับ 3 กรณีต่อไปนี้:
หากคุณต้องการรวมไดรฟ์ที่แชร์ทั้งหมด ให้เลือก Include by default และอย่าเพิ่ม ID ของไดรฟ์ที่แชร์ที่ต้องการยกเว้น
หากคุณต้องการรวมไดรฟ์ที่แชร์ส่วนใหญ่ ให้เลือก Include by default และเพิ่ม ID ของไดรฟ์ที่แชร์ที่คุณต้องการยกเว้น
หากคุณต้องการยกเว้นไดรฟ์ที่แชร์ส่วนใหญ่ ให้เลือก Exclude by default และเพิ่ม ID ของไดรฟ์ที่แชร์ที่คุณต้องการรวม
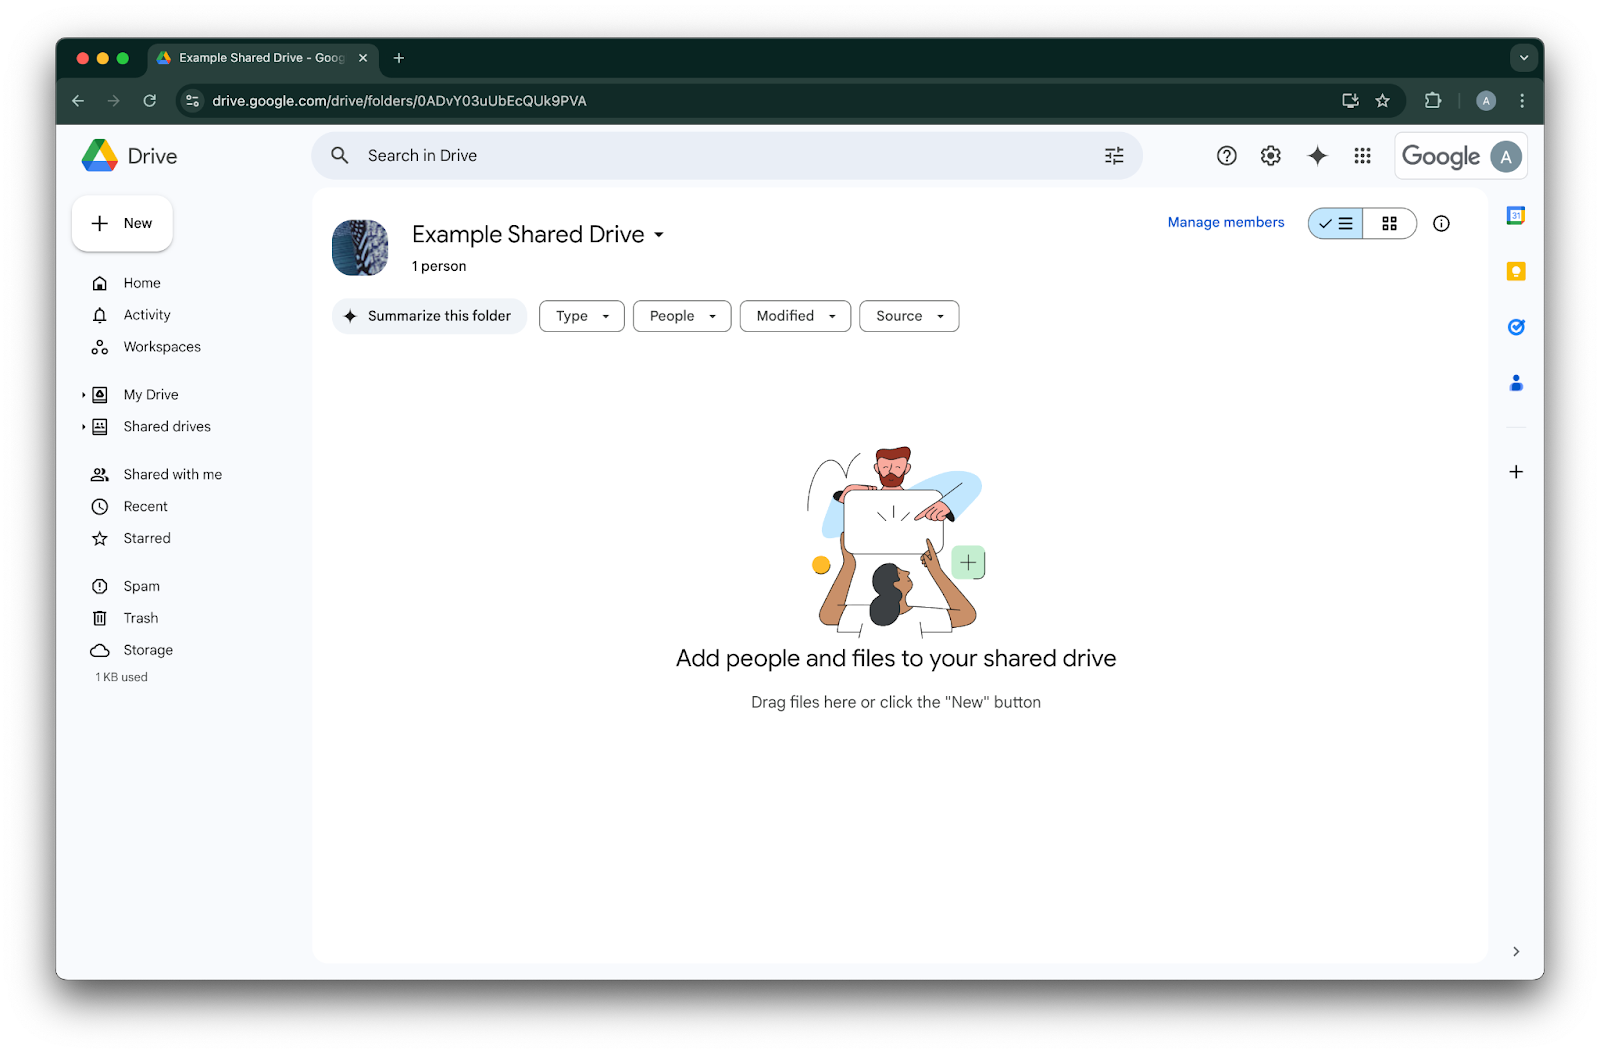
หากต้องการดู ID ของไดรฟ์ที่แชร์ ให้เปิดไดรฟ์นั้นในเว็บเบราว์เซอร์ ส่วนท้ายของ URL คือ ID ของไดรฟ์ที่แชร์
ในตัวอย่างต่อไปนี้ คือ `0ADvY03uUbEcQUk9PVA`'คลิก Next
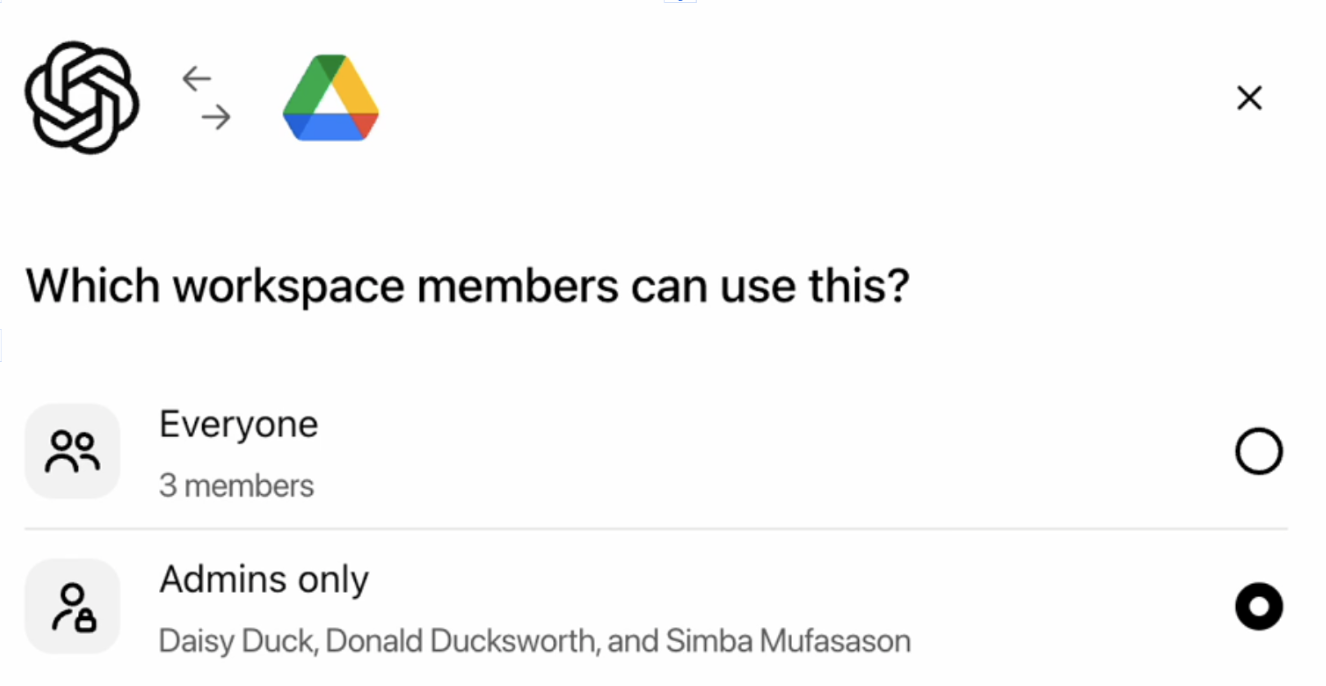
เลือกผู้ที่ควรมีสิทธิ์เข้าถึงการเชื่อมต่อ Google Drive คุณสามารถเลือกเฉพาะผู้ดูแลระบบของเวิร์กสเปซ ChatGPT หรือเปิดใช้ให้ทุกคนก็ได้ หากเปิดใช้ให้ทุกคน ผู้ใช้ใหม่ที่เพิ่มเข้ามาในเวิร์กสเปซจะถูกรวมโดยอัตโนมัติ
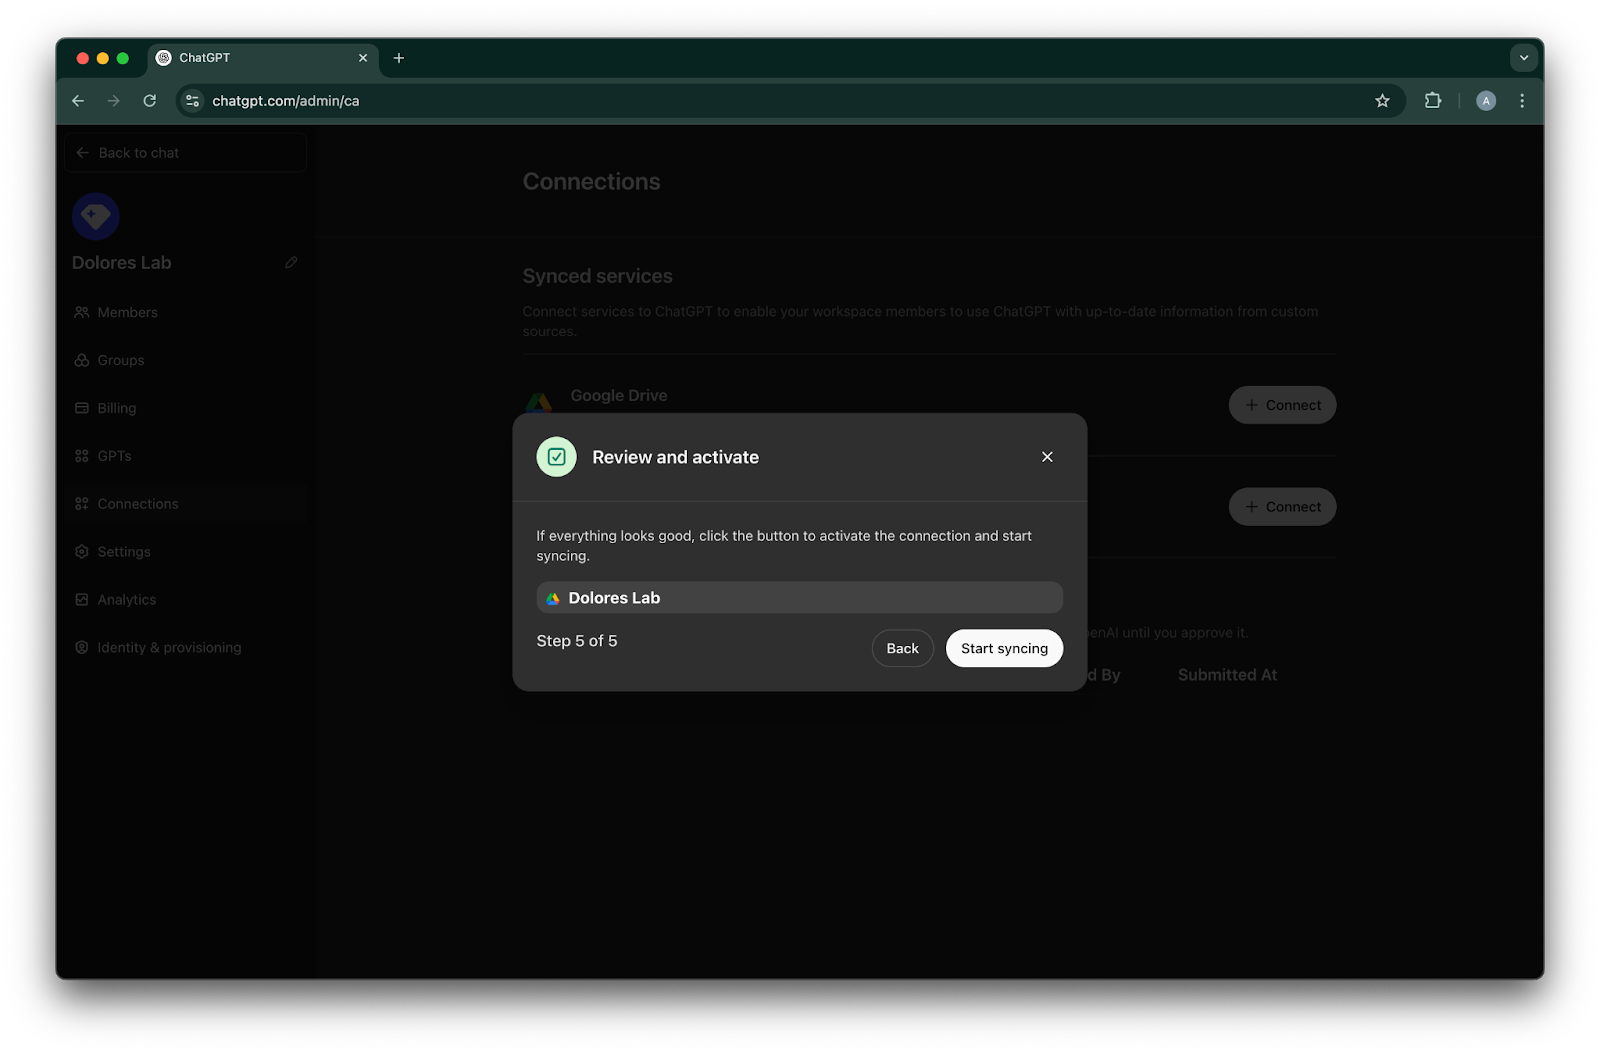
คลิก Start syncing
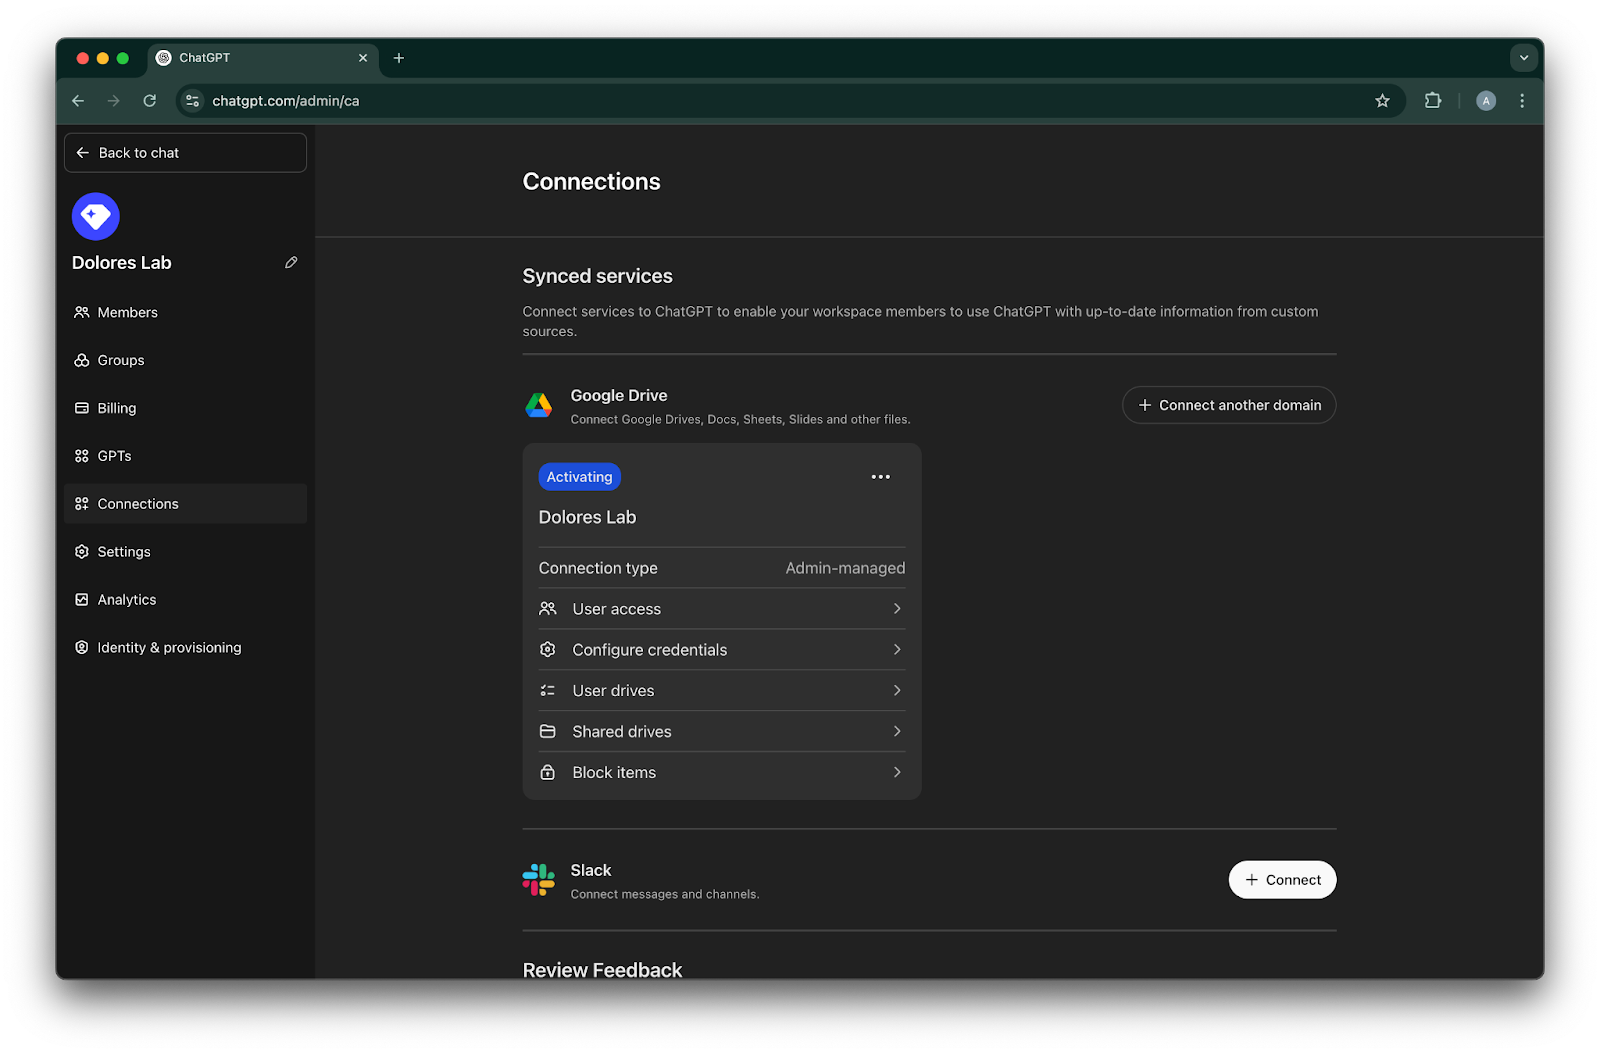
สร้างการเชื่อมต่อ Google Drive ของคุณสำเร็จแล้ว!
โปรดทราบว่า แม้จะเริ่มซิงค์ทันที แต่การซิงค์อาจใช้เวลาหลายชั่วโมงถึงหลายวันจึงจะเสร็จสิ้น ขึ้นอยู่กับจำนวนไฟล์ที่ถูกรวมตามการตั้งค่าของคุณ
เมื่อไฟล์ที่ถูกเพิ่ม/แก้ไขในช่วง 30 วันที่ผ่านมาซิงค์เสร็จแล้ว ตัวเชื่อมต่อจะพร้อมใช้งานสำหรับผู้ใช้ที่คุณเปิดใช้ให้


การเปิดใช้การสร้างคีย์บัญชีบริการ
หากคุณได้รับข้อผิดพลาดต่อไปนี้ คุณจะต้องเปิดใช้การสร้างบัญชีบริการสำหรับโปรเจกต์นี้โดยเฉพาะ:
> ข้อจำกัดนโยบายขององค์กร ‘iam.disableServiceAccountKeyCreation’ ถูกบังคับใช้กับองค์กรของคุณ
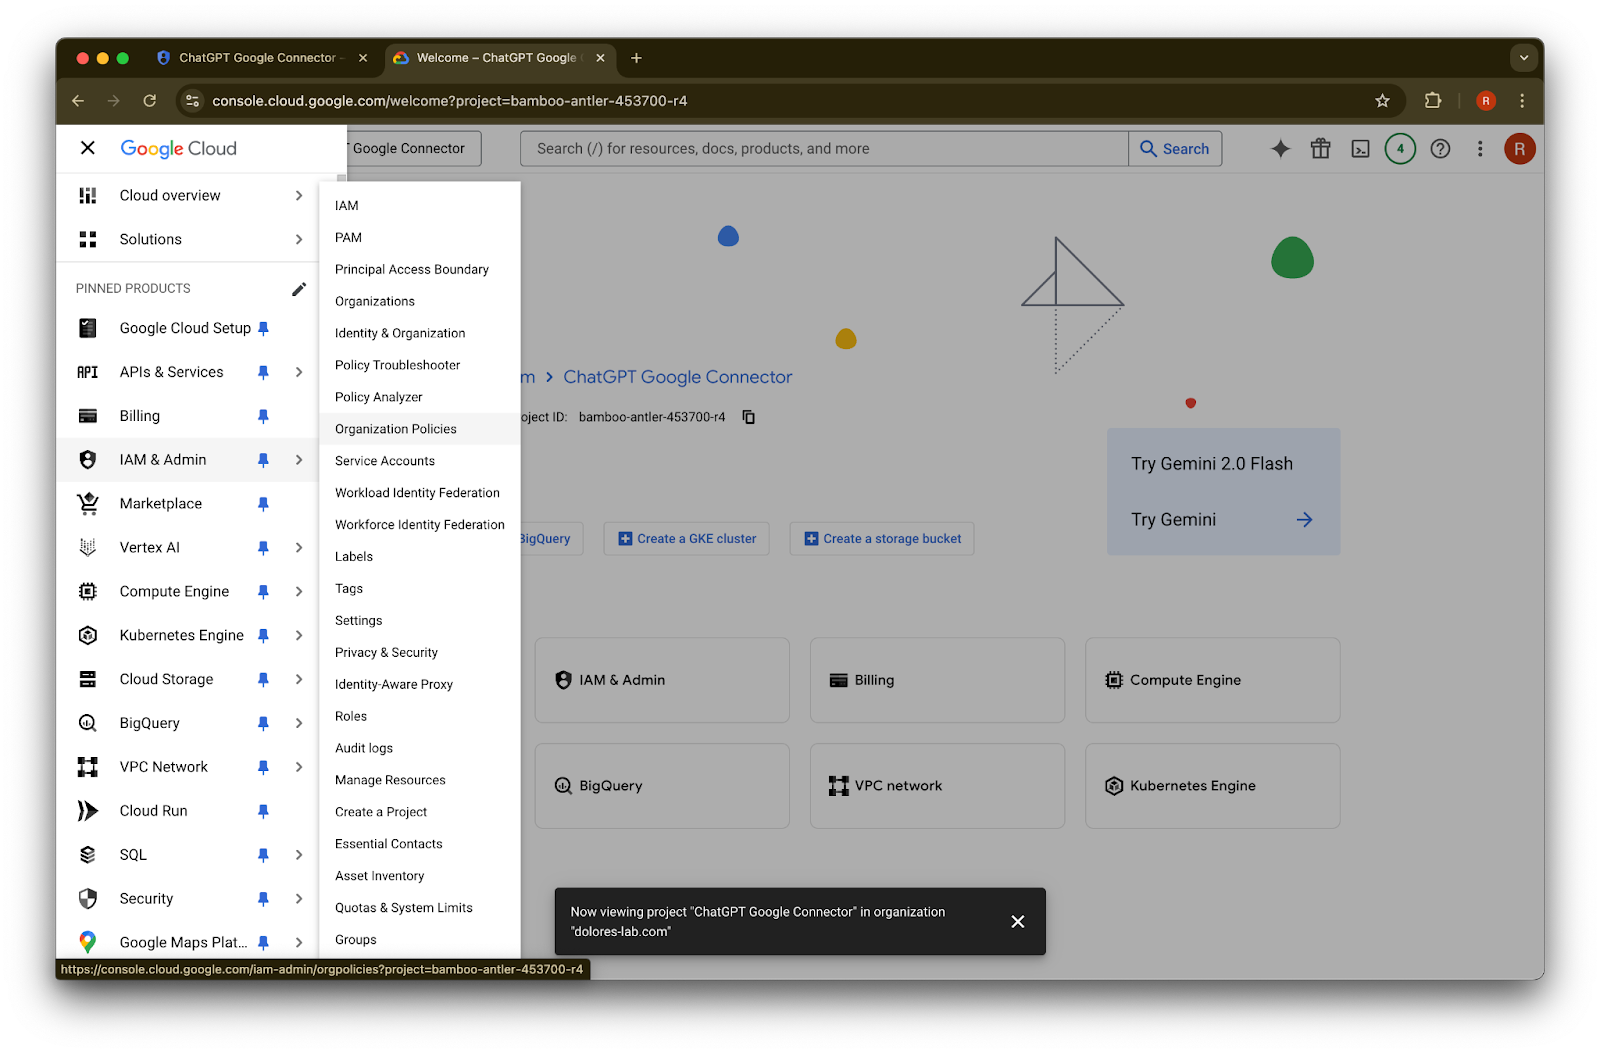
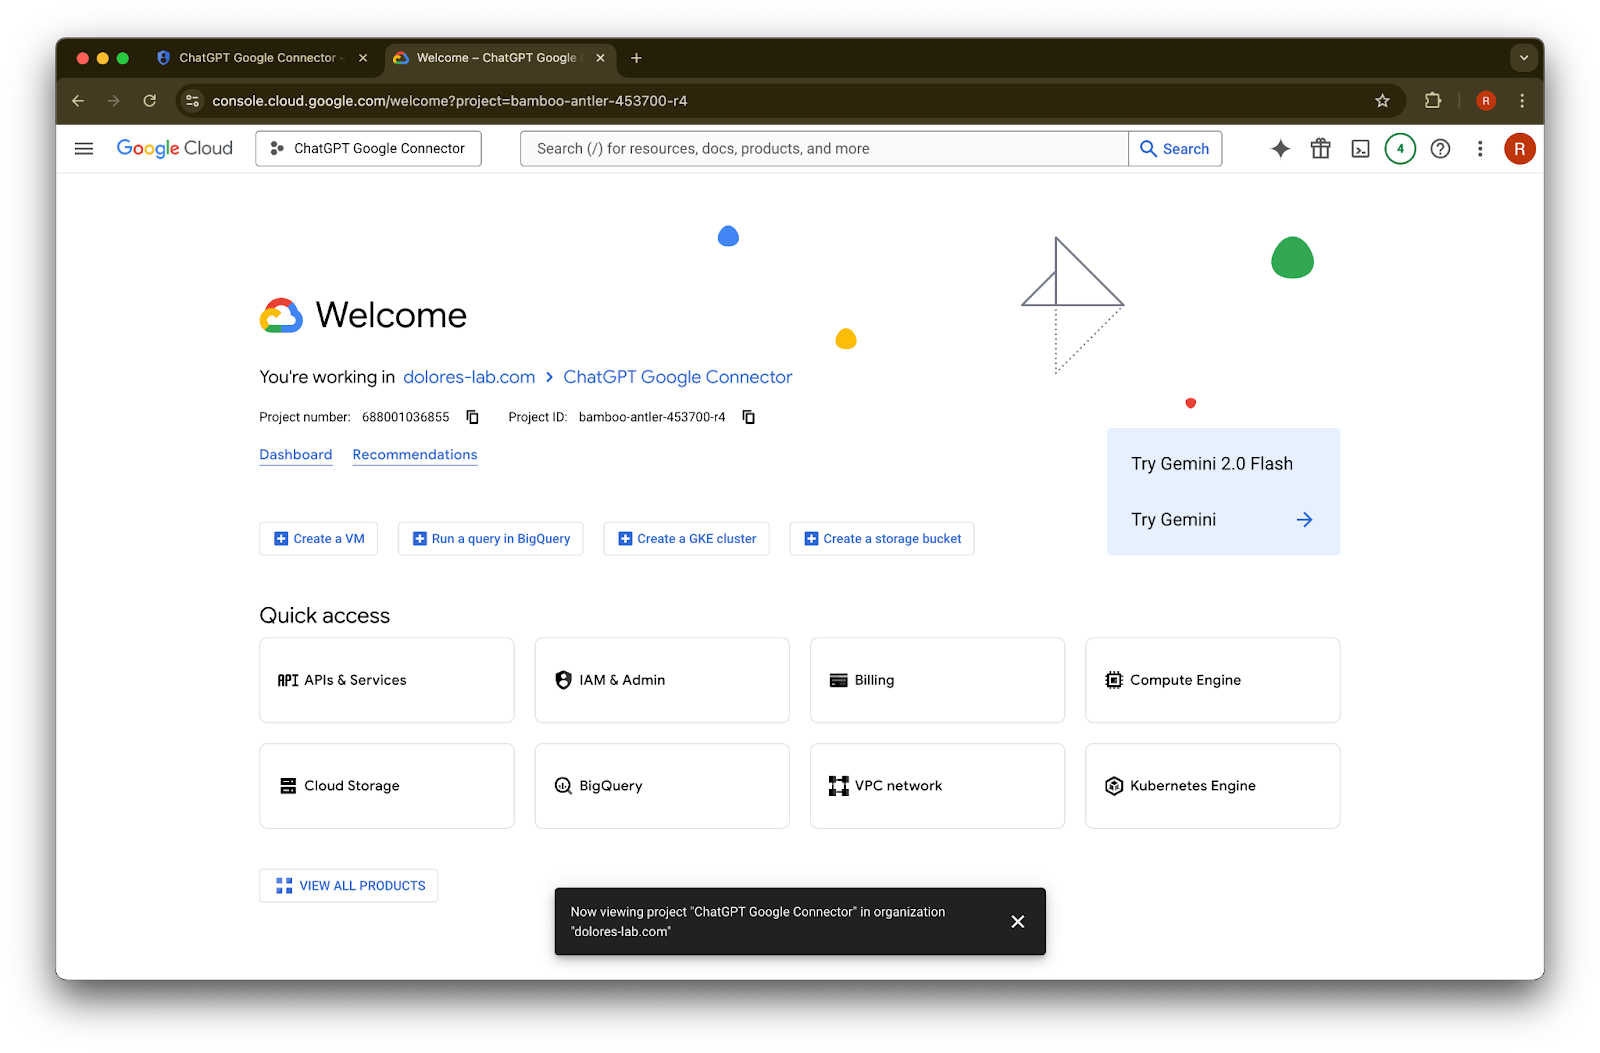
เปิดแท็บใหม่แล้วไปที่ console.cloud.google.com ตรวจสอบให้แน่ใจว่าโปรเจกต์ที่เลือกคือโปรเจกต์ที่คุณเลือกไว้แล้ว
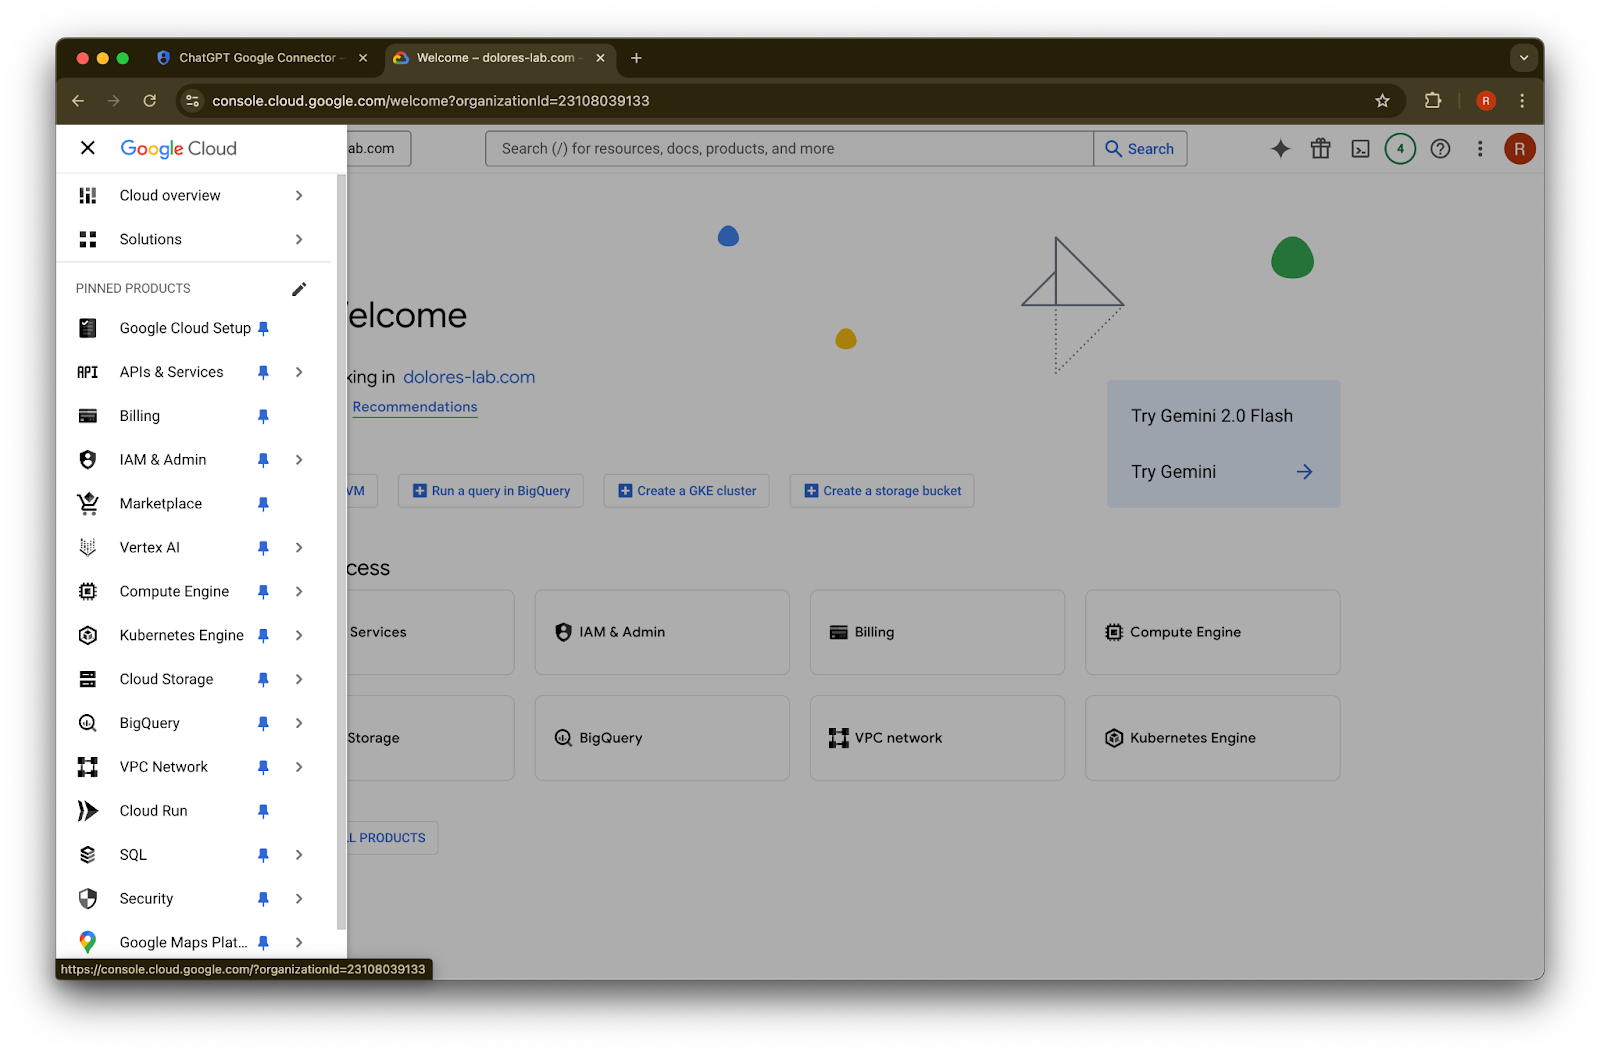
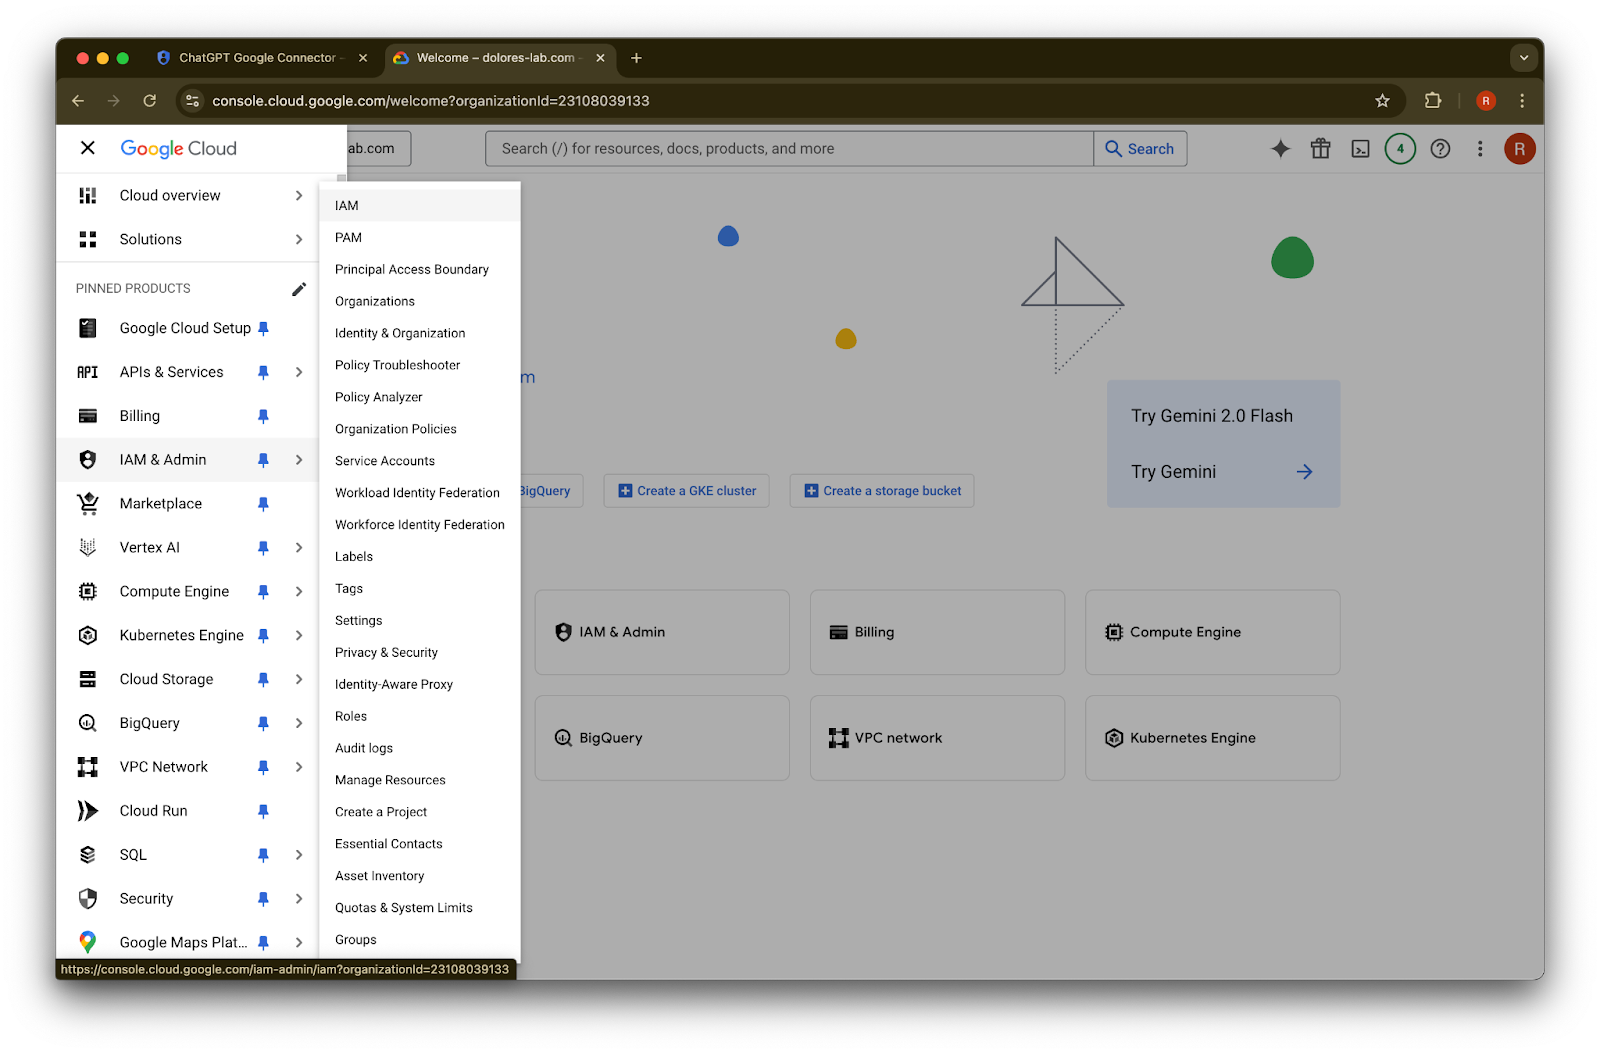
คลิกไอคอนเมนูที่มุมซ้ายบนชี้ไปที่ IAM & Admin
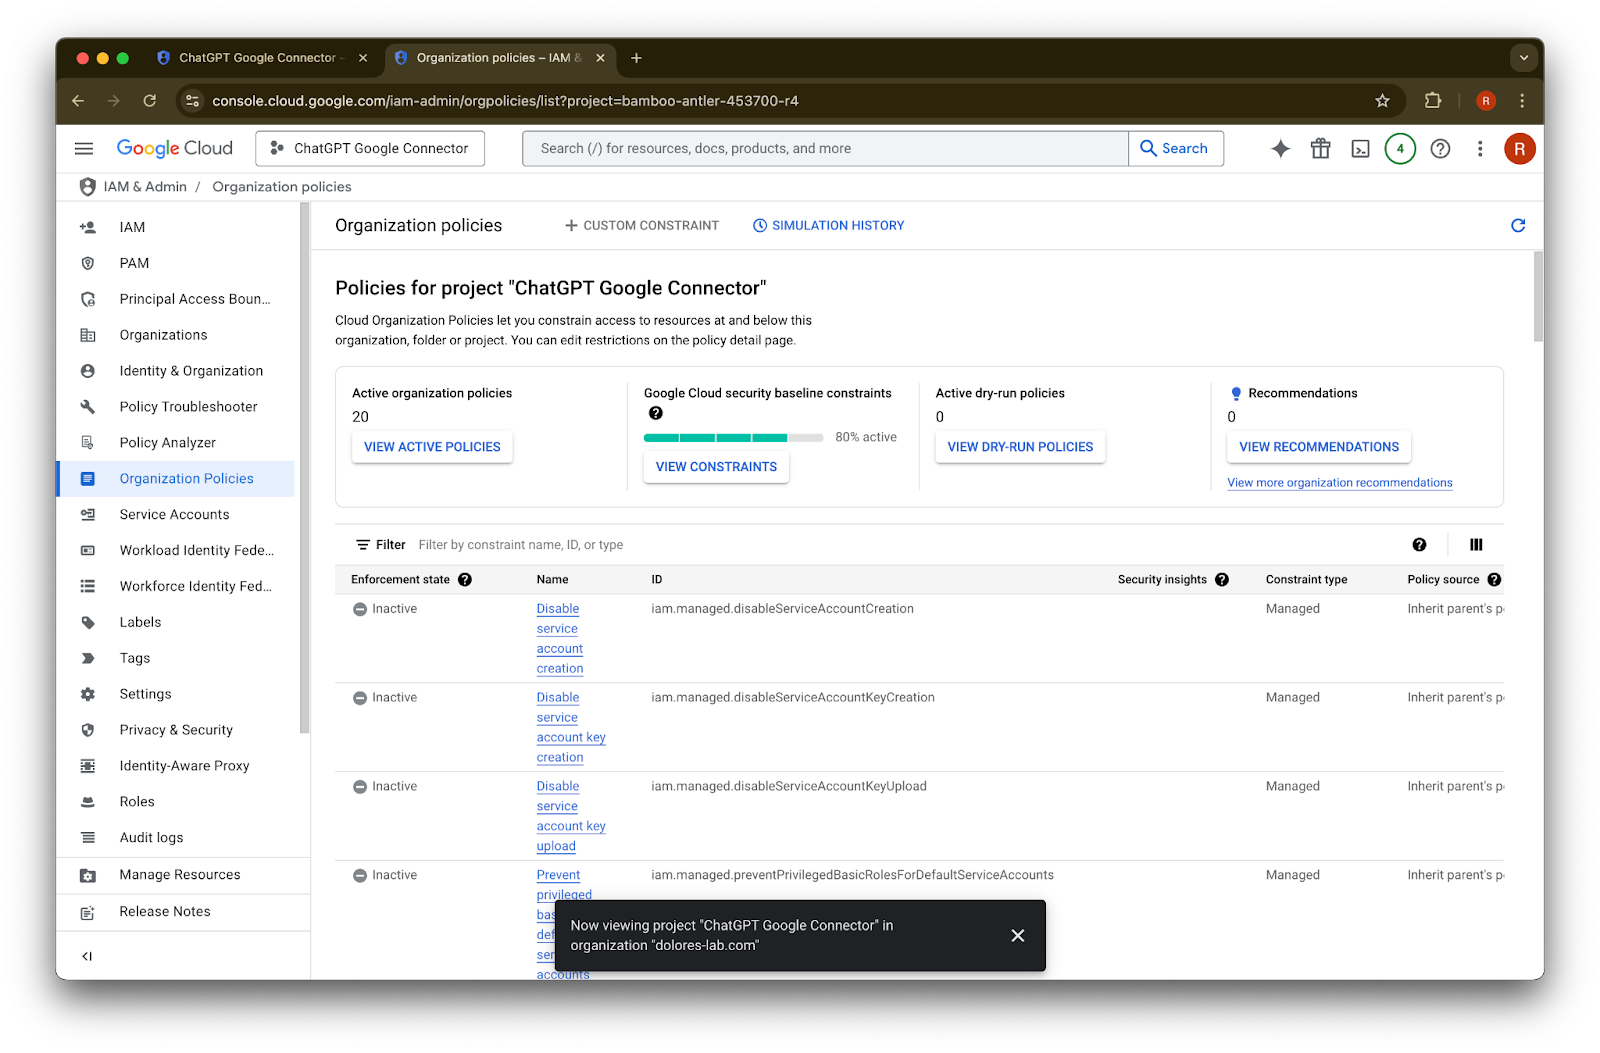
คลิก Organizational Policies
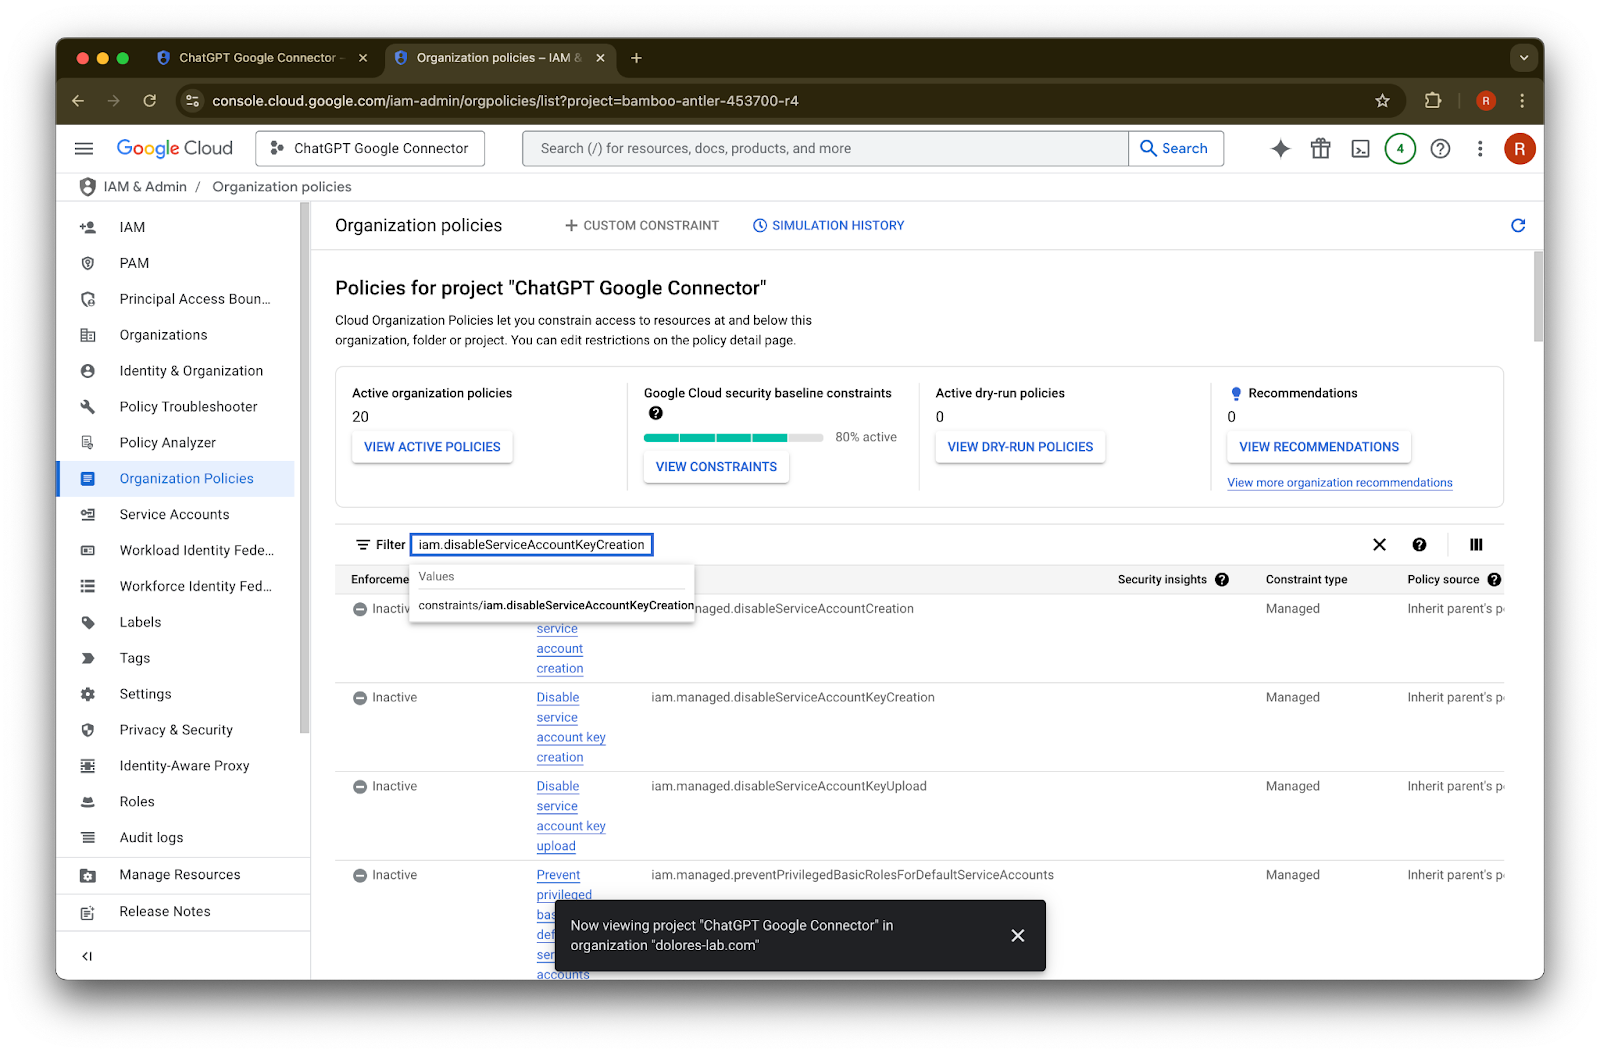
ค้นหา iam.disableServiceAccountKeyCreation
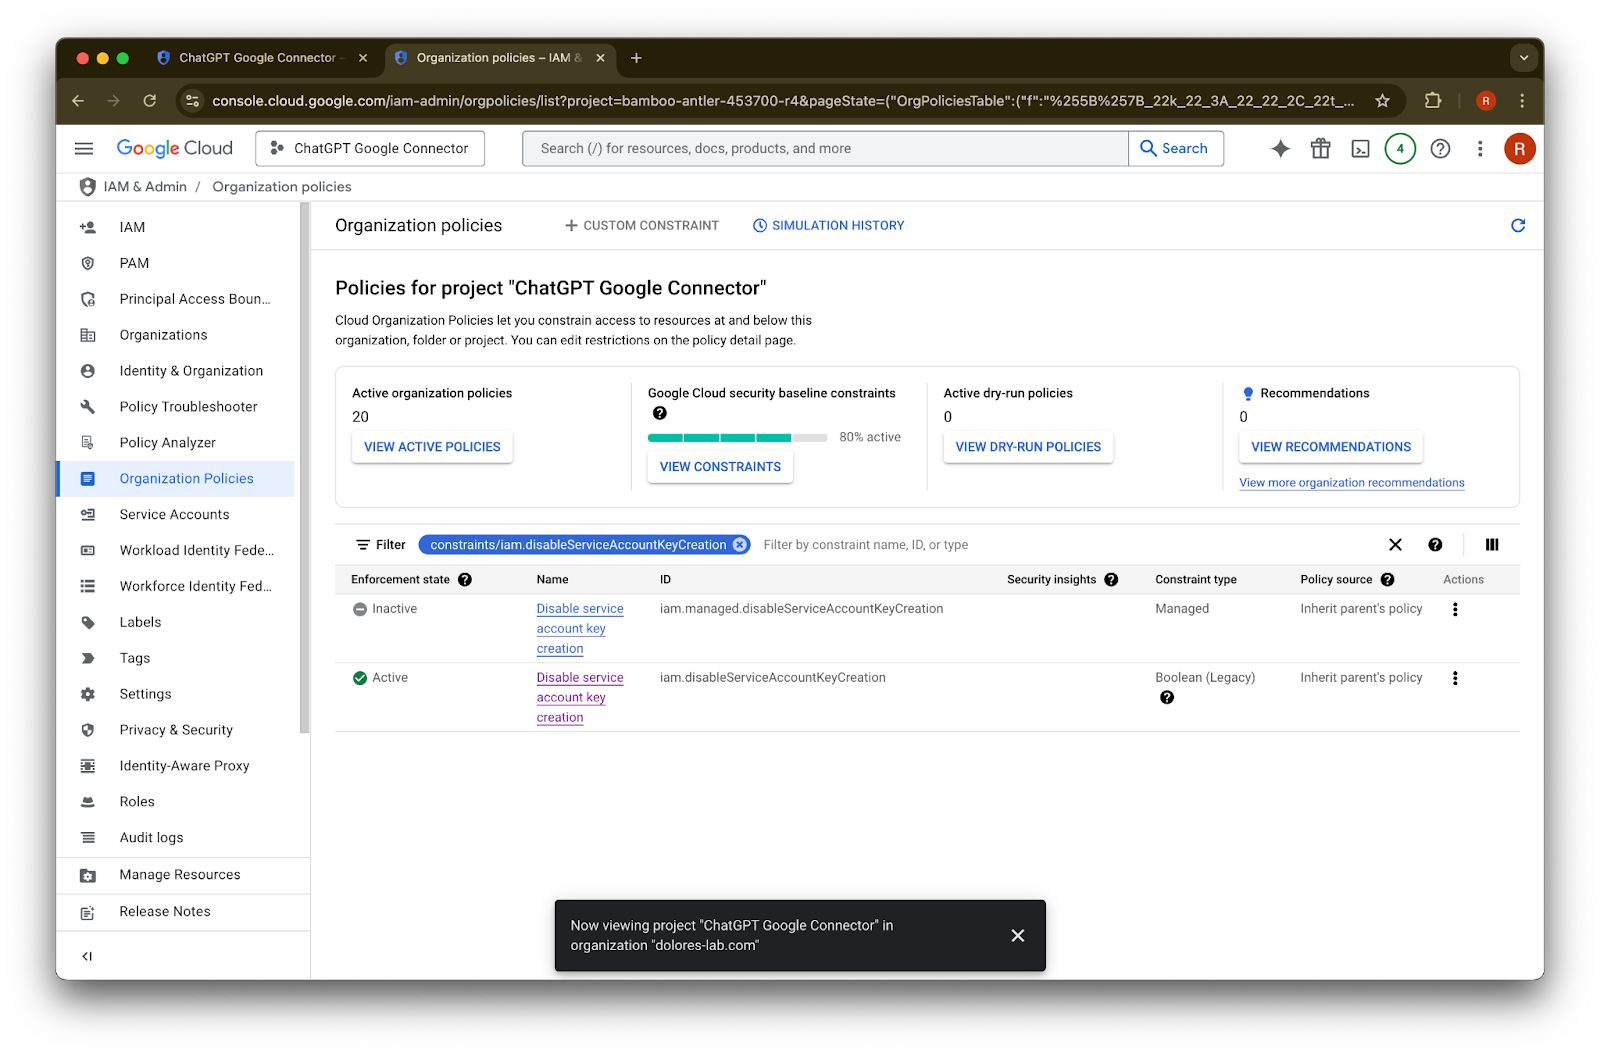
คลิกผลลัพธ์สำหรับ constraints/iam.disableServiceAccountKeyCreation
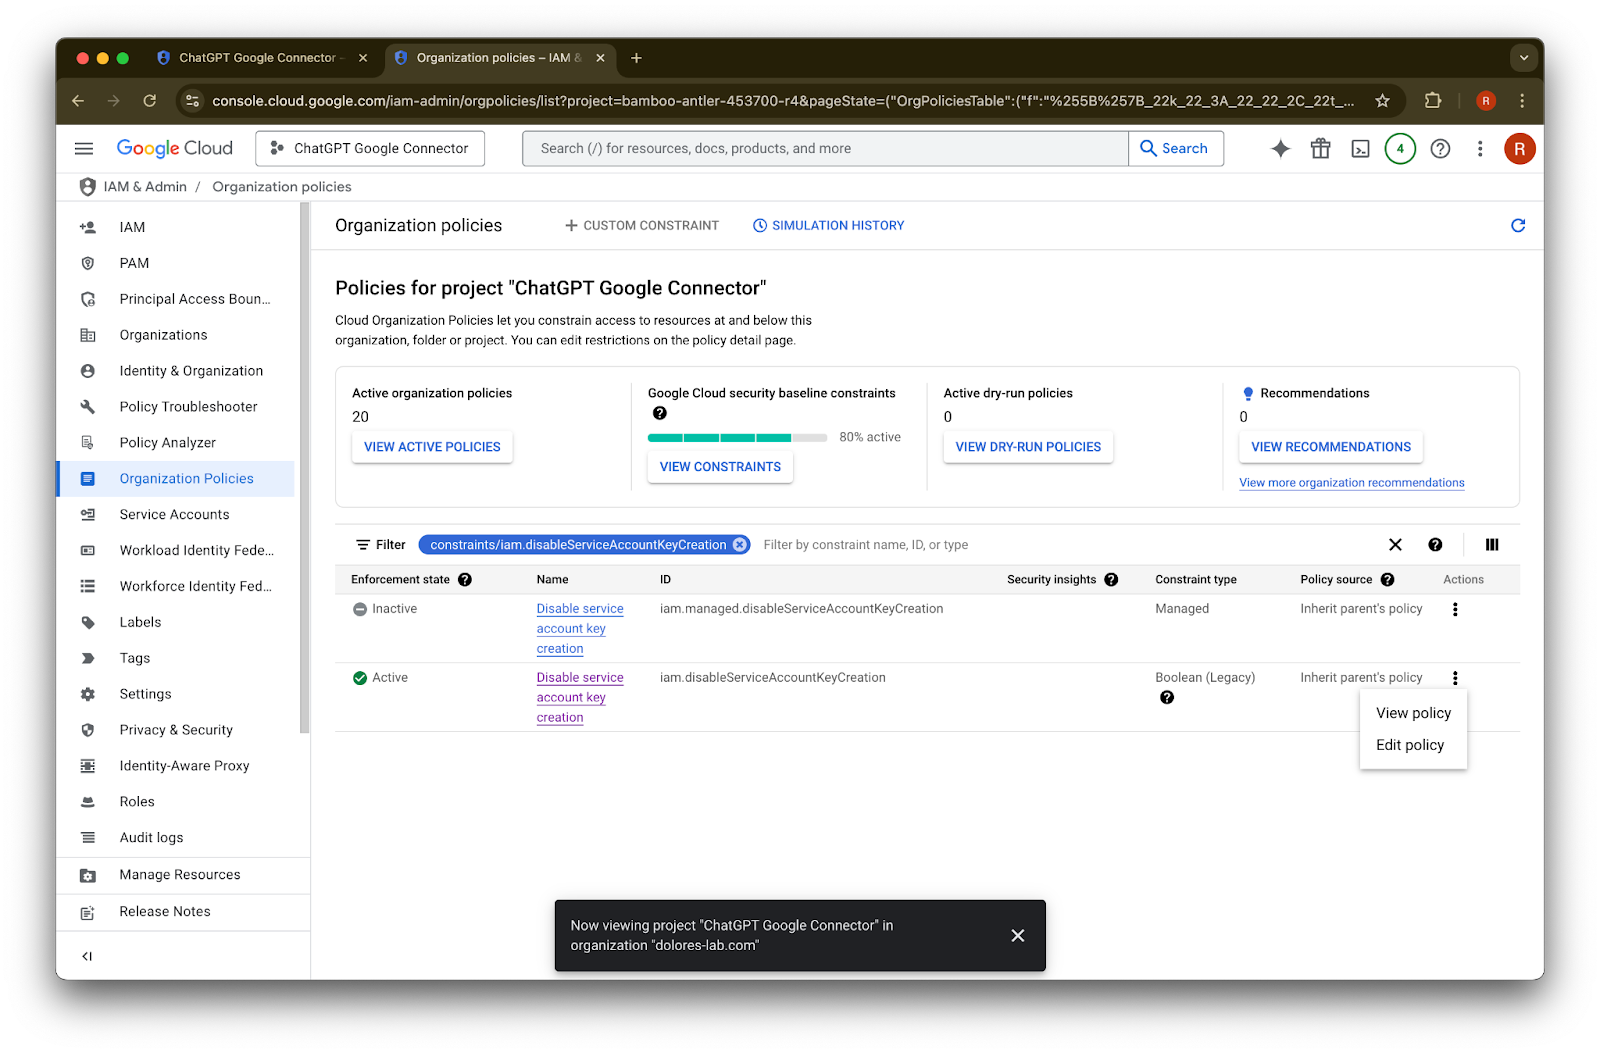
คลิก … ของแถวที่มี ID เป็น iam.disableServiceAccountKeyCreation
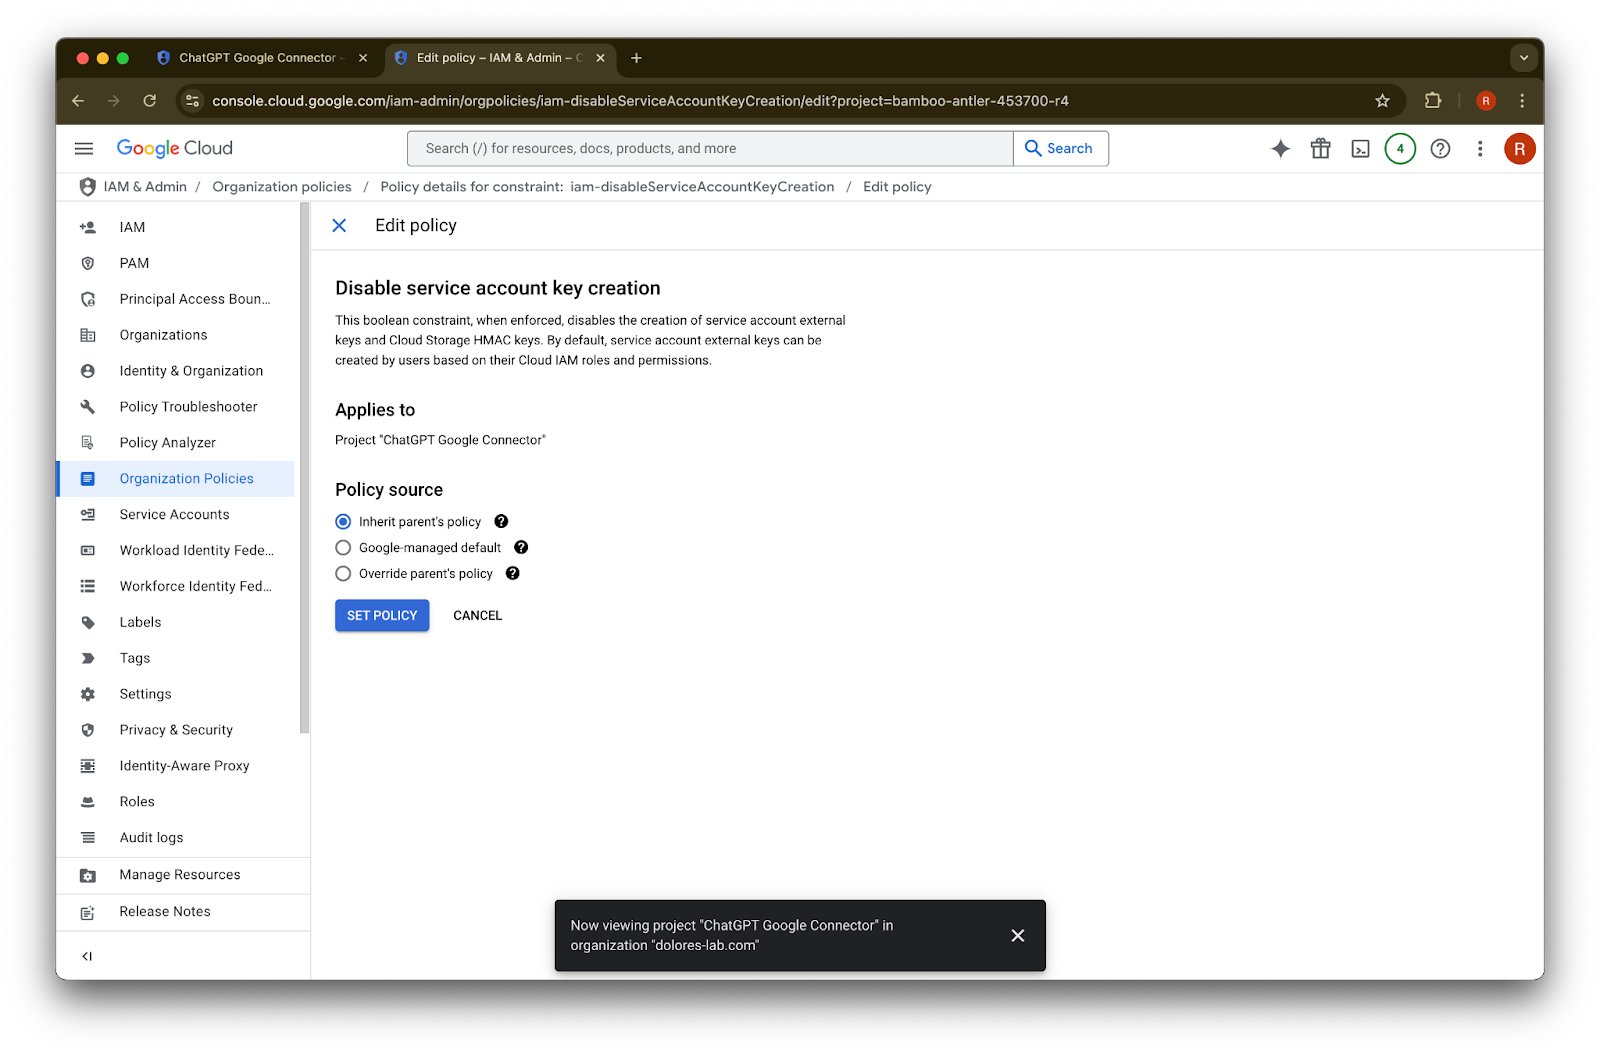
คลิก Edit policy หาก Edit policy ถูกปิดใช้งาน คุณจะต้องเป็น Organization Policy Administrator
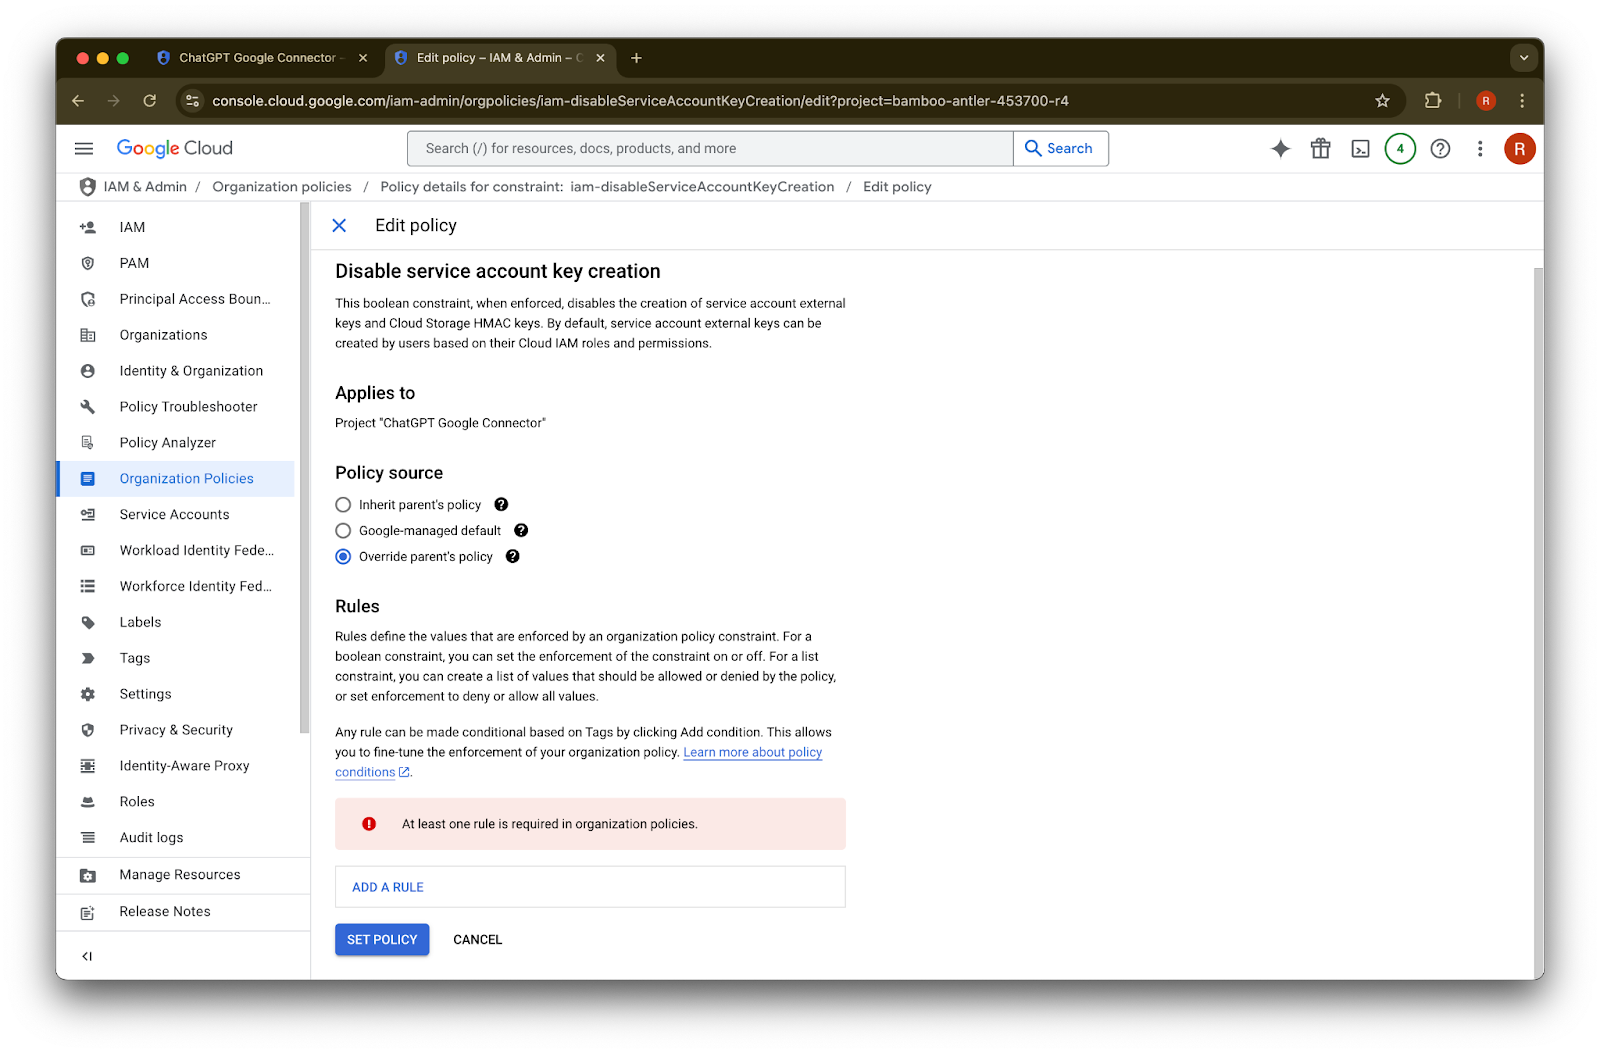
คลิก Override parent’s policy
คลิก Add a rule
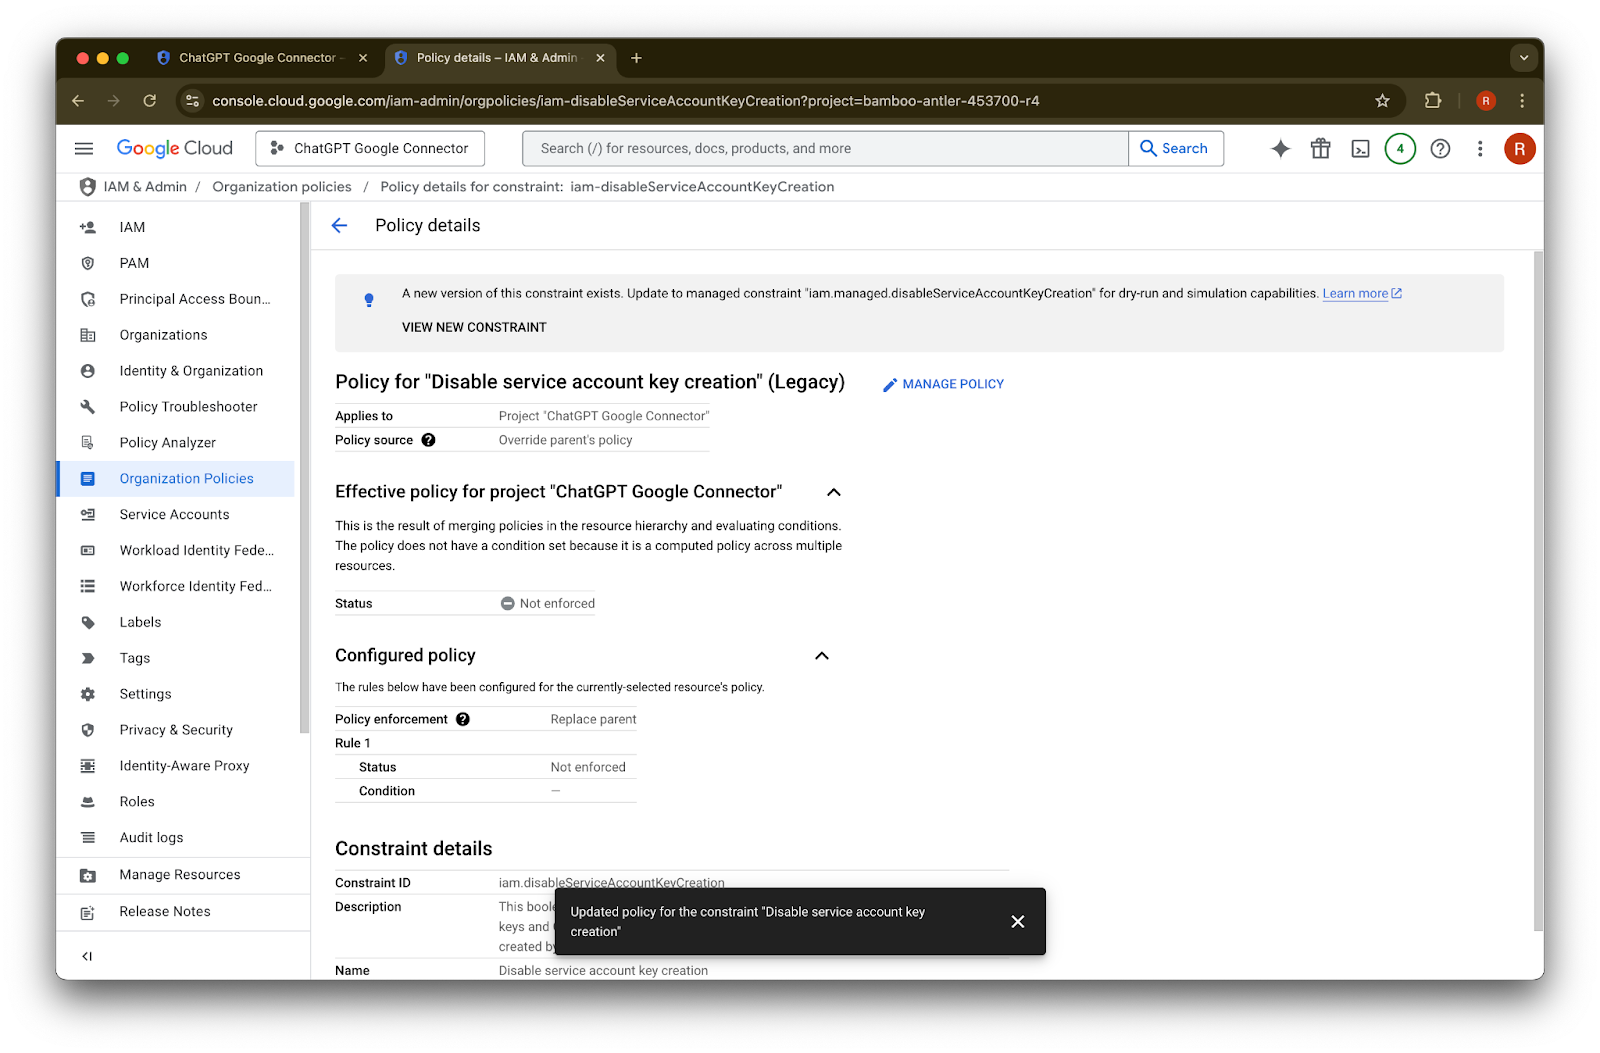
คลิก Set Policy
ตอนนี้คุณสามารถสร้างคีย์บัญชีบริการได้แล้ว การเปิดใช้นี้อาจใช้เวลาหลายนาทีจึงจะมีผล


การเป็น Organization Policy Administrator
ไปที่ console.cloud.google.com แล้วคลิก ตัวเลือกโปรเจกต์/องค์กร
คลิก องค์กรของคุณ
คลิกไอคอนเมนูที่มุมซ้ายบน
ชี้ไปที่ IAM & Admin
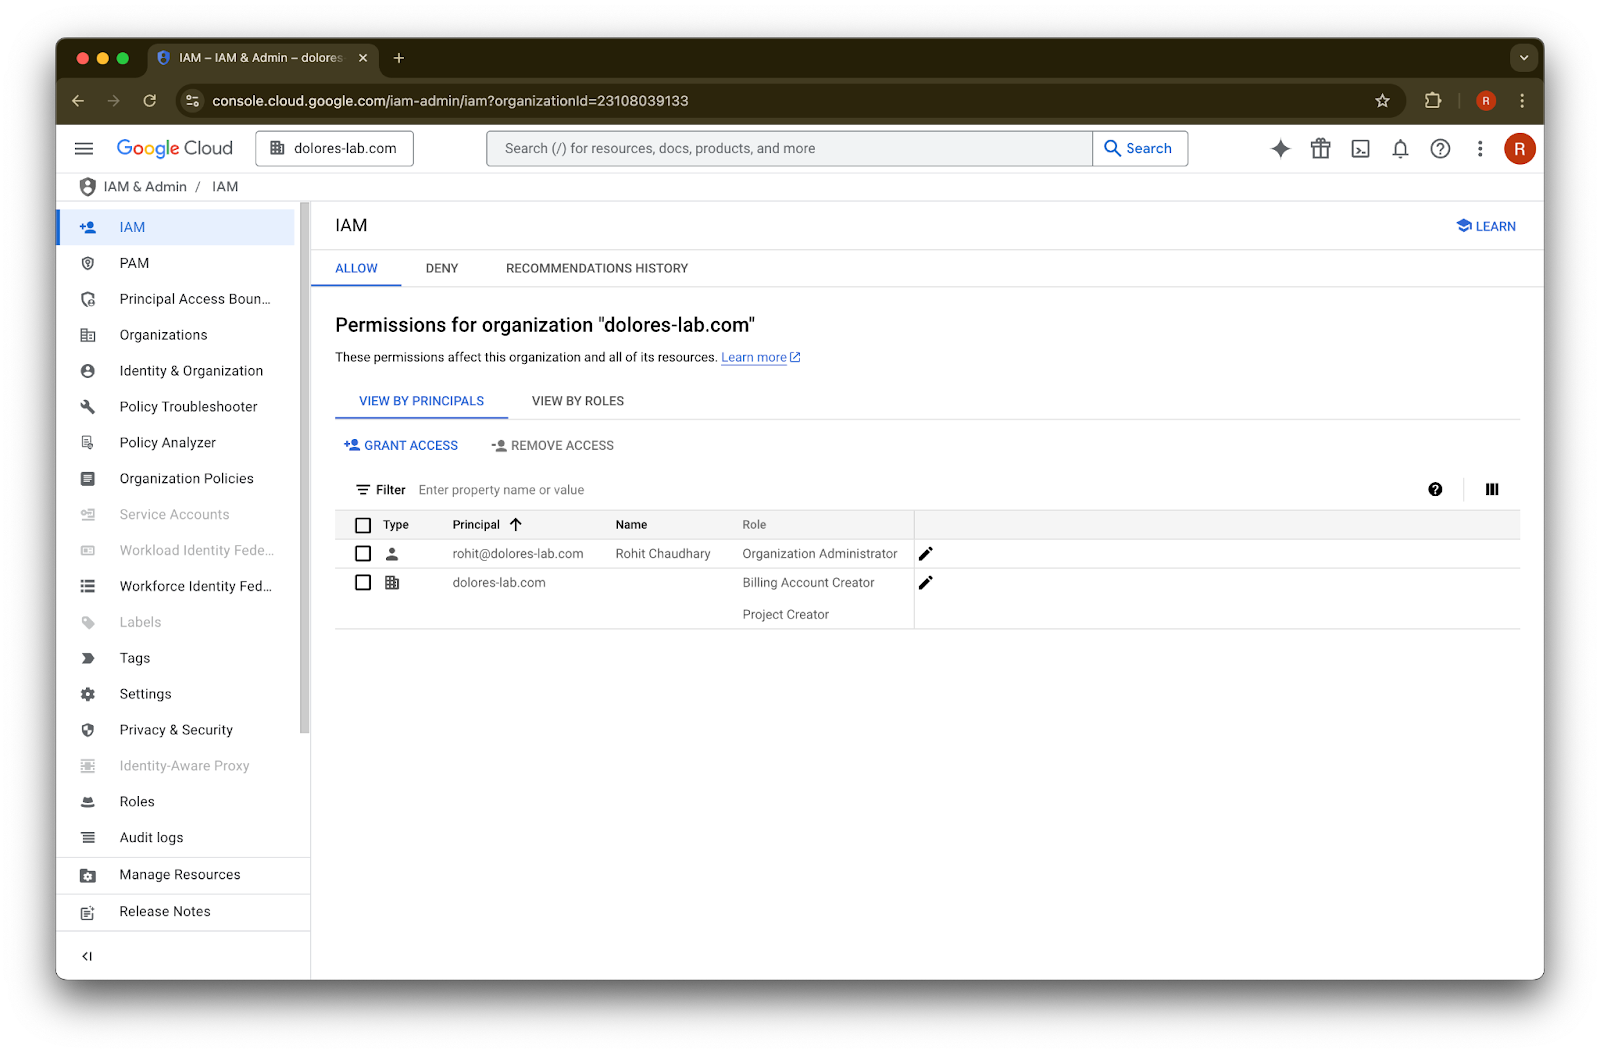
คลิก IAM
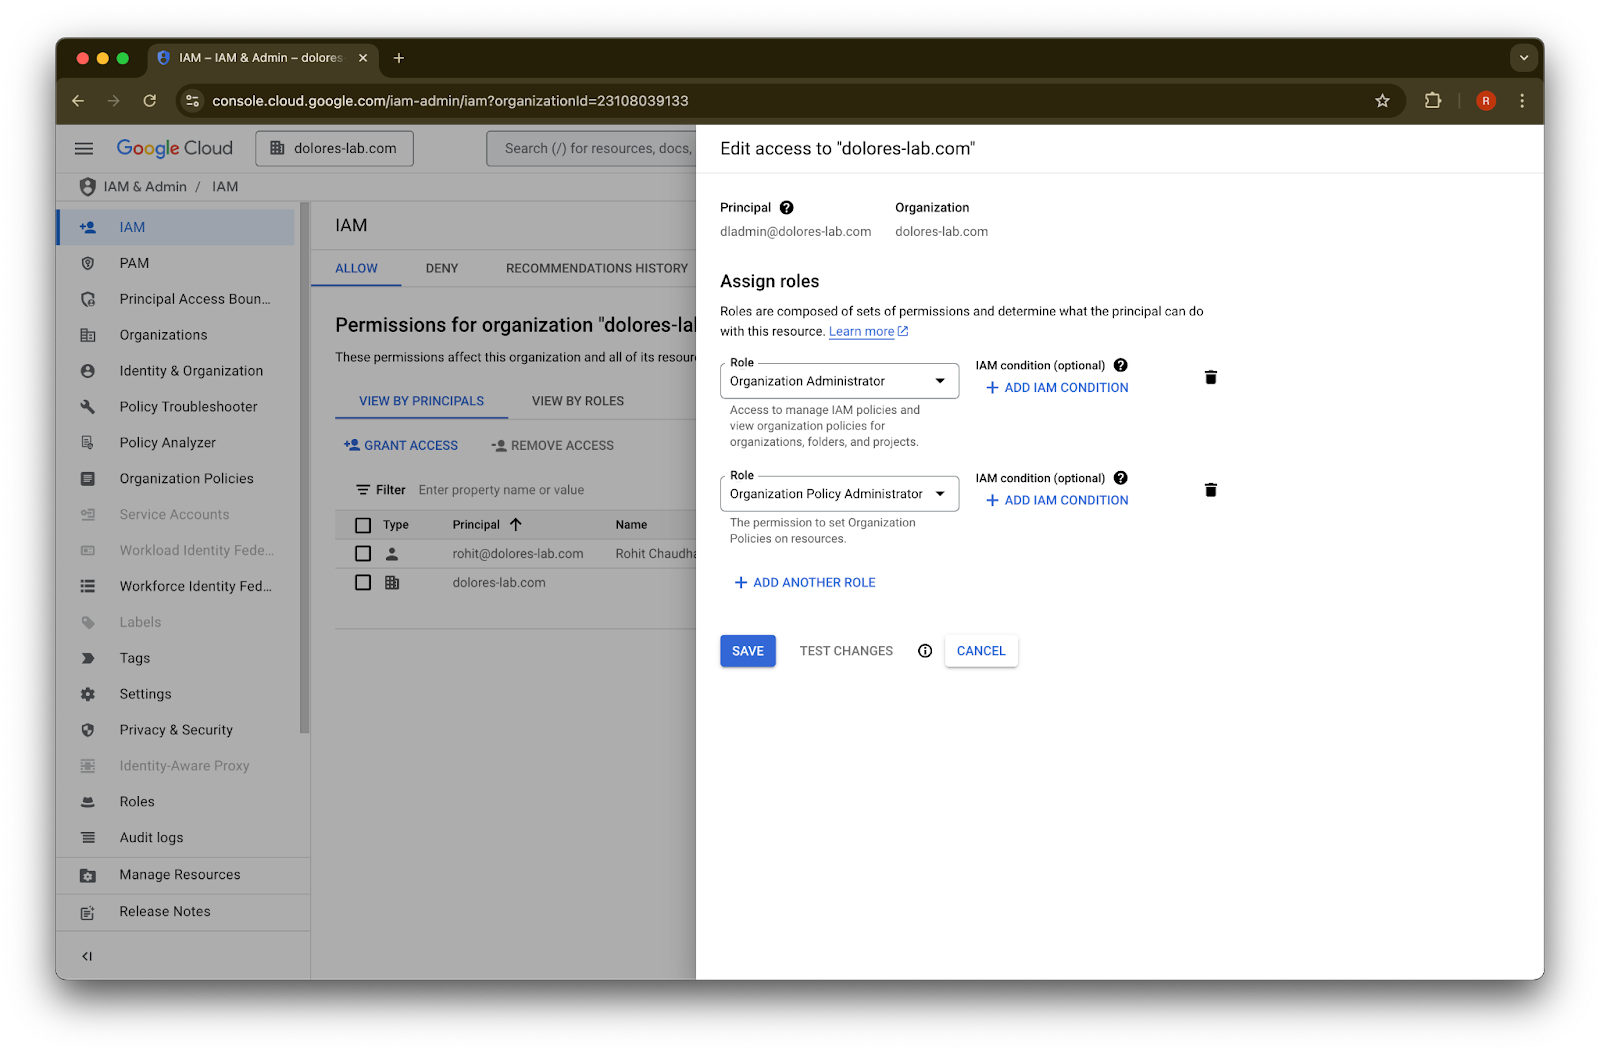
คลิกไอคอนดินสอสำหรับบัญชีของคุณ
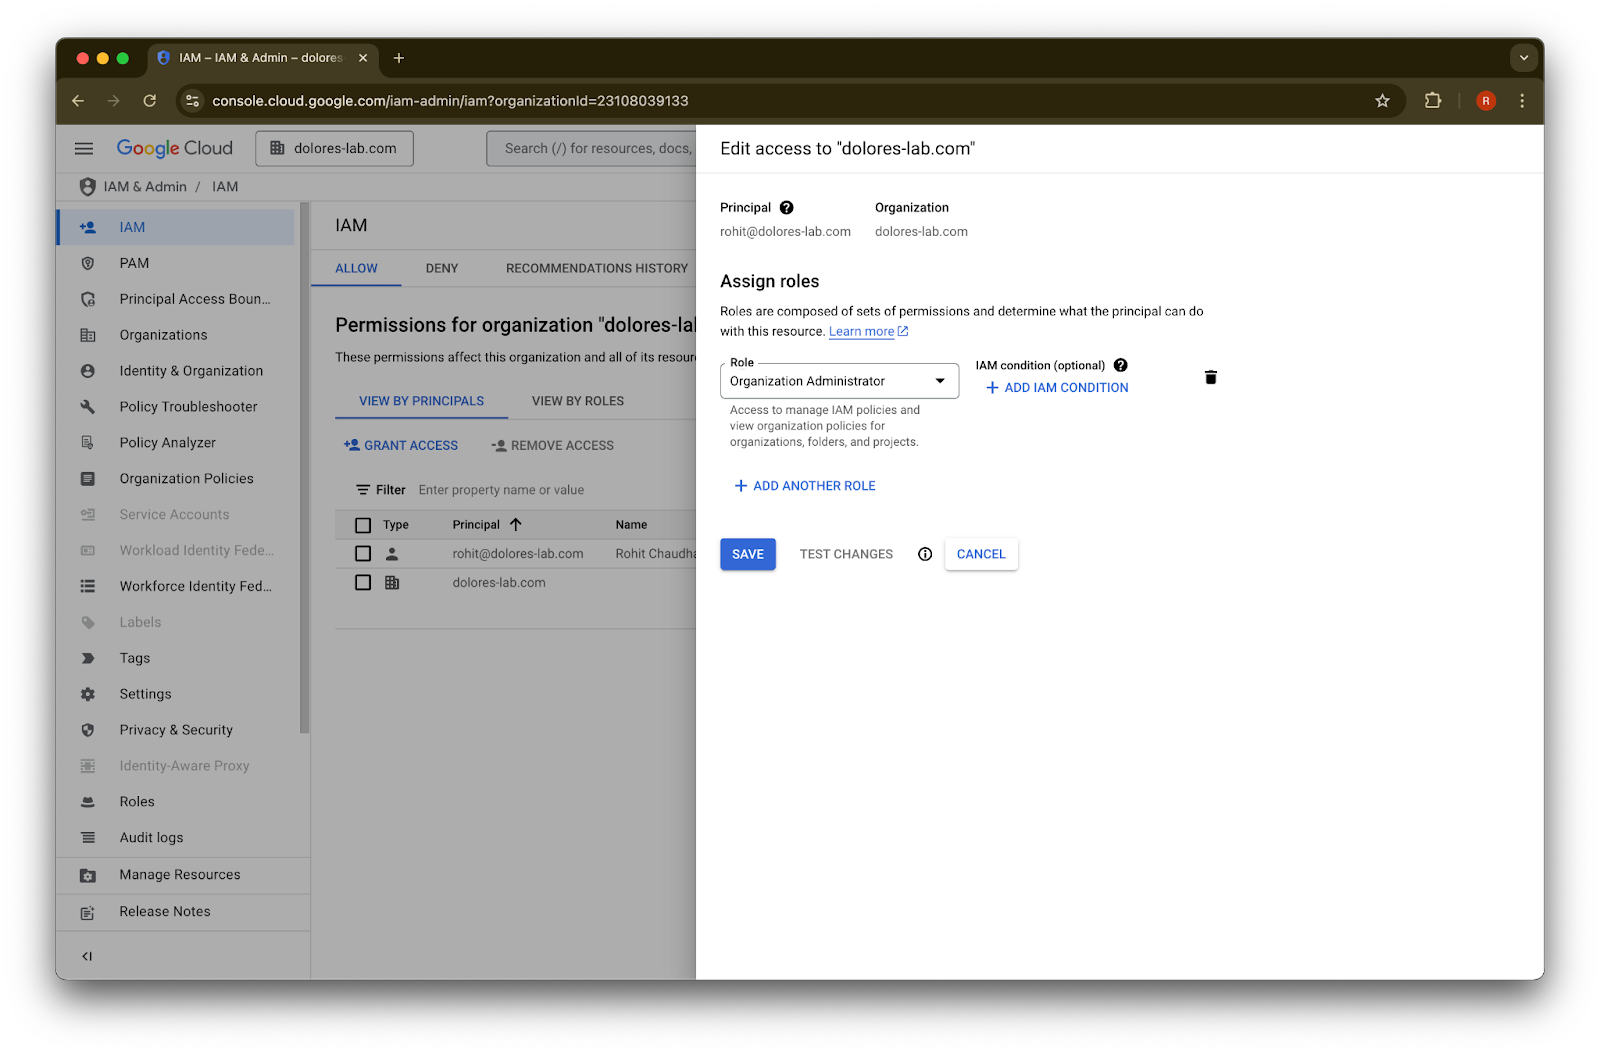
คลิก Add Another Role
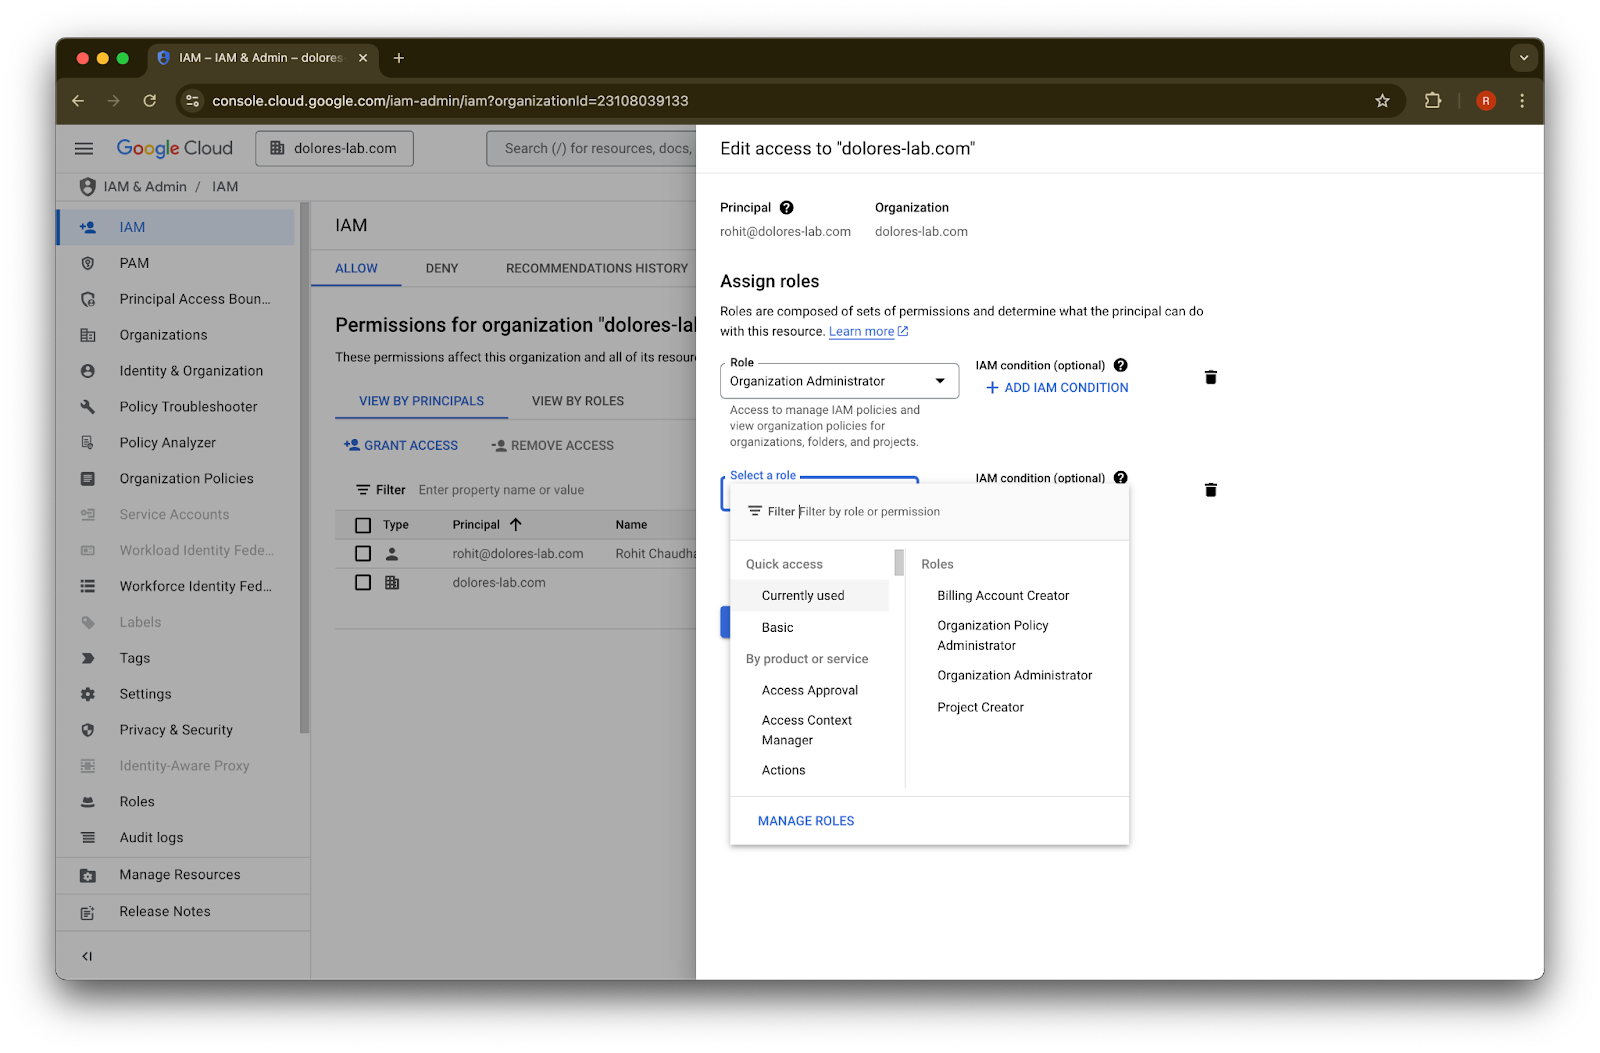
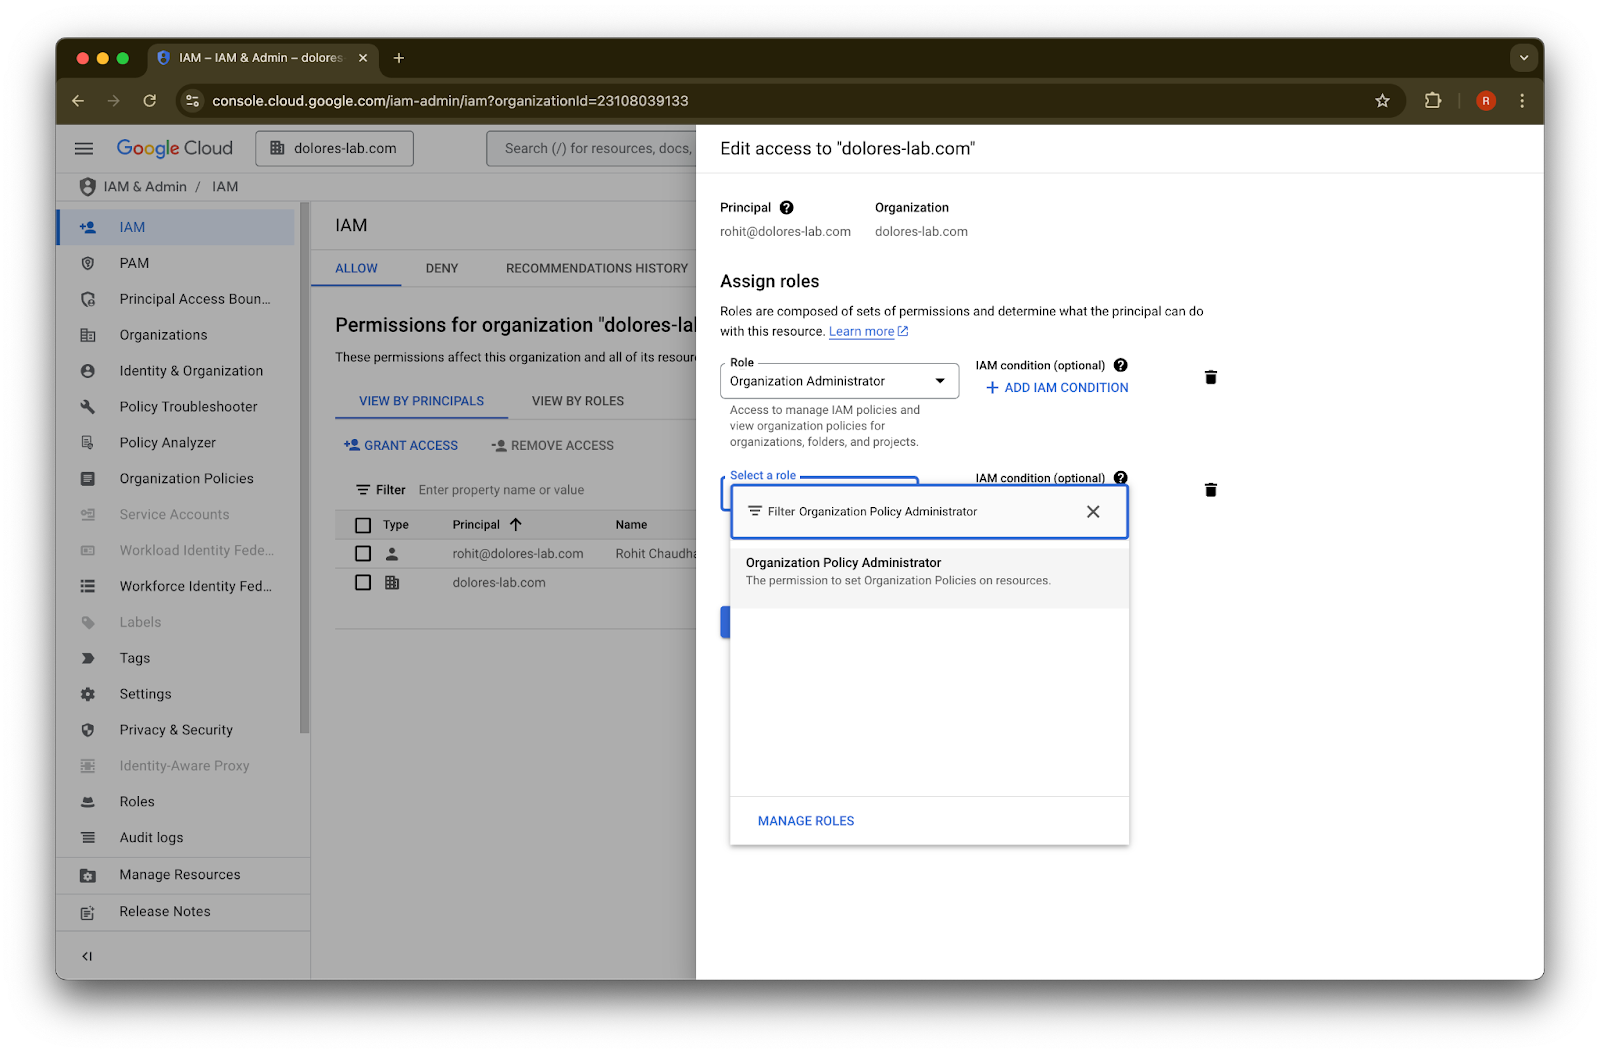
ค้นหา Organization Policy Administrator
คลิก Organization Policy Administrator
คลิก Save
ตอนนี้บัญชีของคุณมีสิทธิ์เปิดใช้การสร้างคีย์บัญชีบริการแล้ว อาจใช้เวลาหลายนาทีจึงจะมีผล
การใช้ Google Email Alias เพื่อคงบัญชีอีเมลที่แตกต่างกันสำหรับ Google Workspace และ ChatGPT
หากคุณเป็นผู้ดูแลระบบที่กำลังเชื่อมต่อ Google Workspace กับเวิร์กสเปซ ChatGPT ของคุณโดยใช้การตั้งค่าแบบ admin-managedสำหรับตัวเชื่อมต่อที่ซิงค์กับ Google Drive และองค์กรของคุณใช้โดเมนอีเมลที่ต่างกันสำหรับ ChatGPT และ Google Workspace คุณจะต้องทำขั้นตอนเพิ่มเติมเพื่อให้แน่ใจว่าผู้ใช้สามารถเข้าถึงตัวเชื่อมต่อที่ซิงค์กับ Google Drive ได้สำเร็จ
คำแนะนำ: หากเป็นไปได้ ให้ใช้อีเมลหลักเดียวกันทั้งสำหรับบัญชี Google Workspace และ ChatGPT
หากไม่สามารถทำได้ ให้ทำตามคำแนะนำด้านล่างเพื่อกำหนดค่า Google Workspace email alias ให้ตรงกับอีเมลที่ใช้ลงชื่อเข้าใช้ ChatGPT
ขั้นตอนการเพิ่ม Google Workspace Alias
ทำตามขั้นตอนเหล่านี้ใน Google Admin Console เพื่อให้แน่ใจว่าอีเมล ChatGPT ของผู้ใช้แต่ละรายสามารถเชื่อมโยงกับบัญชี Google Workspace ของตนได้:
ไปที่ Admin Console ไปที่: Directory > Users
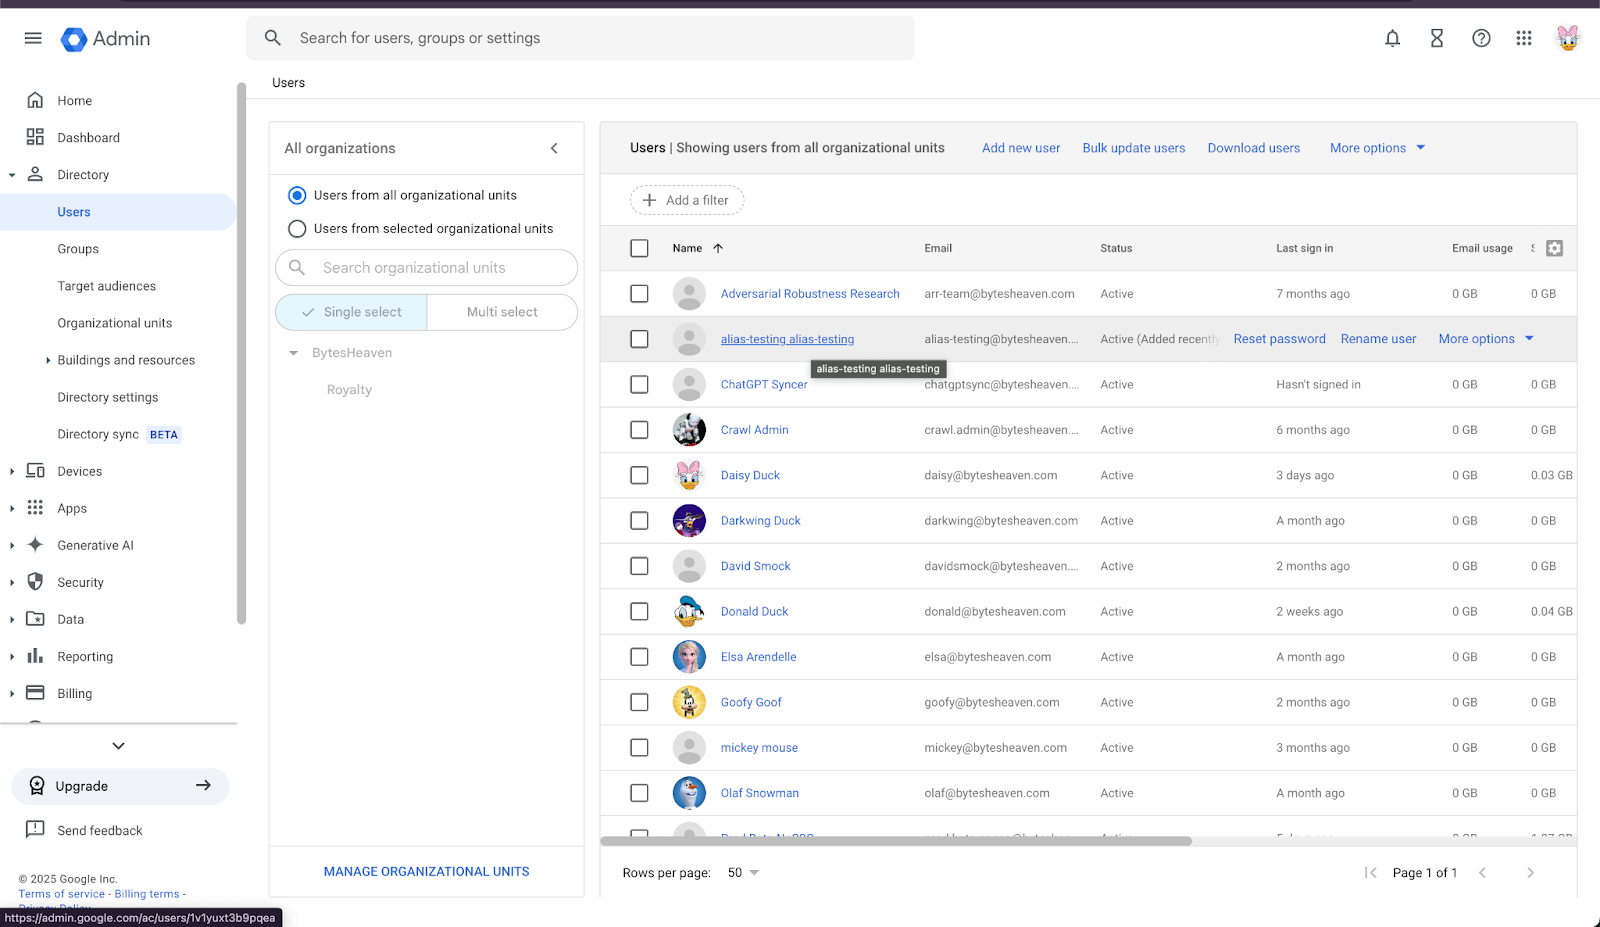
2. เลือกผู้ใช้ จากนั้นเลือก “ADD ALTERNATIVE EMAILS”
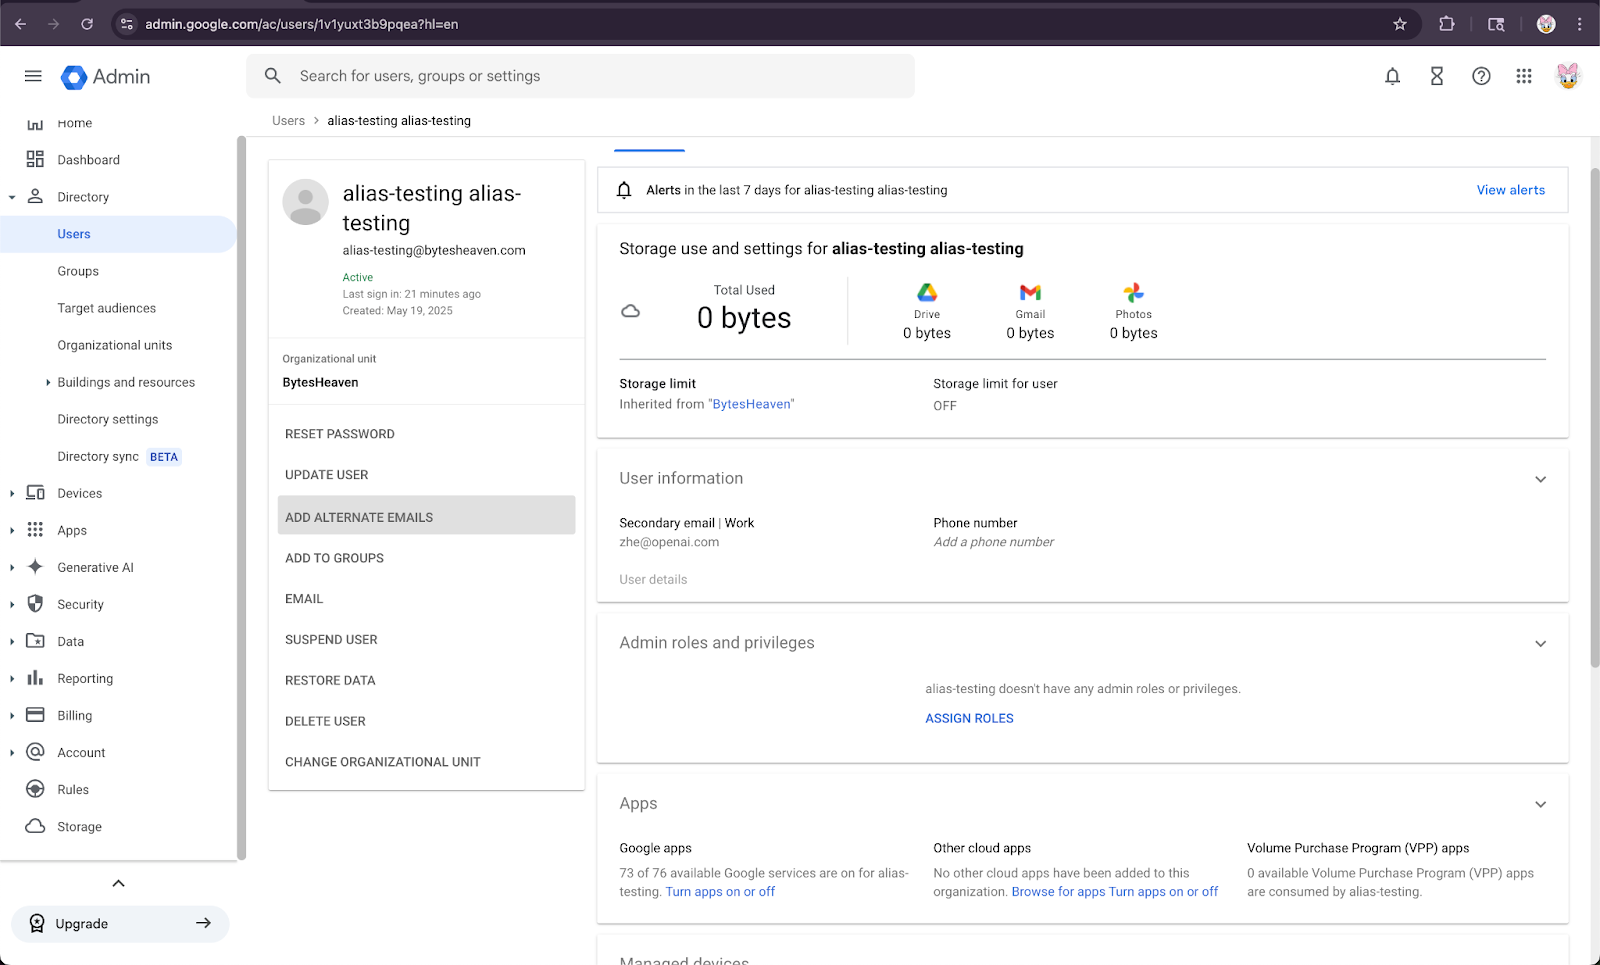
3. เพิ่มอีเมลสำรอง ตรวจสอบให้แน่ใจว่าตรงกับบัญชี ChatGPT ของผู้ใช้

4. เลือก Save
ข้อจำกัดที่ทราบ
ไม่รองรับอีเมลส่วนบุคคล
ผู้ใช้ที่สมัคร ChatGPT ด้วยอีเมลส่วนบุคคล (เช่น example@gmail.com) จะไม่สามารถเชื่อมต่อกับ Google Workspace ได้ การตั้งค่านี้ไม่ได้รับการรองรับและมีความเสี่ยงด้านความปลอดภัย เนื่องจากทำให้เข้าถึงข้อมูลภายในจากภายนอกองค์กรได้
ไม่รองรับ Gmail alias แบบ "+"
Gmail อนุญาตให้ผู้ใช้สร้าง alias โดยเพิ่ม "+" ต่อท้ายอีเมลของตน (เช่น user+alias@gmail.com) alias ประเภทนี้ใช้ไม่ได้กับตัวเชื่อมต่อที่ซิงค์กับ Google Drive โดยต้องกำหนด alias ไว้อย่างชัดเจนใน Google Workspace
ข้อความแสดงข้อผิดพลาดที่พบบ่อย
หากอีเมลไม่ได้เชื่อมโยงอย่างถูกต้อง ผู้ใช้อาจพบข้อความนี้: "We were unable to connect your account to Google Drive. คลิกเพื่อดูเพิ่มเติม."
หากผู้ใช้ได้รับข้อความนี้ ให้ตรวจสอบขั้นตอนในเอกสารนี้และให้แน่ใจว่าทำตามอย่างถูกต้อง หากต้องการความช่วยเหลือเพิ่มเติม โปรดติดต่อทีมสนับสนุนของเรา