Overview
Single sign-on (SSO) lets your team sign in using an existing work account. Your setup depends on whether identity is managed by a ChatGPT Business workspace, a shared OpenAI tenant, or an eligible standalone API Platform organization.
Before you begin, identify the product you are configuring and the admin who can manage its identity settings. For an introduction to tenants and product access, see: Getting started with OpenAI identity and access for managed workspaces.
Choose the right SSO setup for your plan
| What you need to manage | Who can make changes | Where to start | What to know |
|---|---|---|---|
| ChatGPT Enterprise or Edu | global admin | Open Admin Console and select your tenant’s Access settings. | The shared identity-provider connection can apply to supported ChatGPT workspaces and other eligible products. Review each product’s sign-in policy separately. |
| Standalone ChatGPT Business | workspace owner | Open your Business workspace’s Identity & access settings. | Use the existing workspace identity settings for SSO and domain verification. If they are read-only, ask a global admin to manage the shared tenant connection. For setup, see: Setting up single sign-on for ChatGPT Business. |
| API organization linked to a tenant | global admin | Start in API Platform identity settings. If SSO or domain controls are read-only, follow the link to Admin Console. | Manage the shared connection and applicable API product policy in Admin Console. API members, projects, billing, and API organization settings stay in the API Platform. |
| Ads Manager | global admin | Open Admin Console and select the relevant tenant and Ads product. | Turning on the shared connection does not automatically turn on Ads SSO or grant an advertising-account role. For the Ads-specific flow, see: Managing identity and access for Ads Manager. |
If your identity settings are read-only, you are usually looking at a product that now uses the tenant’s shared connection. Follow the link to Admin Console instead of setting up a second identity provider.
If a ChatGPT workspace shows Cloud Console ↗ beside read-only identity settings, use it to open Admin Console. Ask an authorized global admin to manage the shared connection.
SSO controls how people sign in. Invitations, product membership, and administrator roles remain separate.
Check your access before you begin
Confirm which OpenAI tenant, ChatGPT workspace, API organization, or Ads account you need to manage.
Confirm that you are a global admin for a tenant-managed connection or the workspace owner for a standalone ChatGPT Business connection.
Check that your subscription or API billing plan includes the relevant SSO capability.
Confirm that you can update DNS records for a domain controlled by your company or school.
Confirm that you can create or update the application in your identity provider.
Identify the users who need access and any existing product memberships, invitations, or SCIM connections.
SSO availability and identity-provider options depend on the product, plan, tenant, and current setup. A ChatGPT subscription does not automatically include API organization access or API SSO.
Apply identity-provider security policies
Configure multi-factor authentication (MFA), device restrictions, and conditional-access rules in your identity provider. Those controls apply when someone authenticates through that provider. Users who can sign in another permitted way may not be covered by the same identity-provider rules.
Protect administrator access
Keep one authenticated administrator session open in your regular browser.
Use a private or incognito window to test the identity-provider sign-in flow.
Leave SSO Optional while you verify the connection and affected accounts, when that setting is available.
Confirm that another authorized administrator or approved recovery method is available before selecting Required or Off, changing a connection, or rotating a certificate.
Do not use Off as a substitute for “not enforced”: it disables SSO for the selected product and can sign out affected users.
SSO setup guide
When you begin the SSO setup flow in Admin Console, you’ll be redirected to a setup guide. The guide is an interactive setup process, not just documentation. It:
Generates credentials specific to your SSO connection.
Creates the SSO connection on OpenAI’s side and runs setup tests.
Guides you through the exact steps required to configure OpenAI SSO.
Please follow the guide from the beginning. Do not configure the connection in advance or reuse credentials from a previous SSO connection, as these will not work for the new setup.
To get a sense of the steps involved and estimate the time and complexity before you begin, review our sample setup instructions. These provide a preview; the steps in the live guide may vary as the product evolves.
Open your tenant’s identity settings
Sign in to Admin Console as a global admin.
Select the OpenAI tenant you need to manage.
Open Access and review Domains, Single Sign-On (SSO), and any available product sign-in policies.
If a ChatGPT workspace or API Platform organization is linked to the same tenant, its own identity page may be read-only and direct you here. Existing API organization membership, projects, and billing remain in the API Platform.
Verify a company or school domain

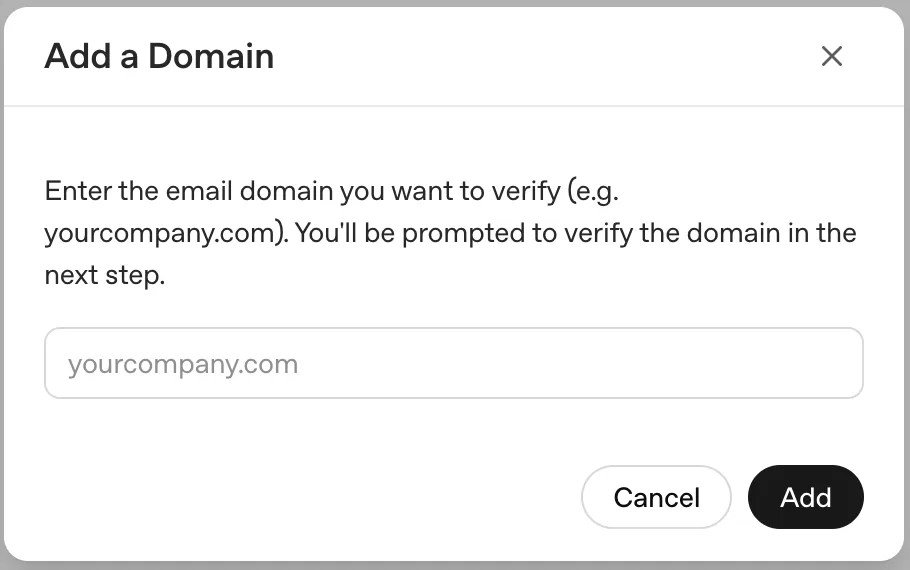
Domain verification can affect sign-in, existing personal or API accounts, account migration, and email changes. Review the people and products that use the domain before continuing.
Under Domains, select the add (+) button.
Enter an email domain your company or school controls.
Copy the DNS TXT record shown in the setup flow.
Add that TXT record to the domain’s public DNS configuration.
Return to Admin Console and select Check Domain.
Confirm that the domain status is Verified.
DNS changes can take up to 24 hours to become publicly visible. After the TXT record appears, return to Admin Console and select Check Domain. The setup flow allows up to 7 days to complete verification and supports up to 99 verified domains where that limit applies. If another tenant has already verified the domain, contact your OpenAI account team or Support before changing the existing setup.
For domain verification and product eligibility, see: Verifying your domain for OpenAI identity.
Connect your identity provider

Under Single Sign-On (SSO), select Set up SSO.
Choose one of the providers shown, such as Okta, Entra, or Custom SAML when available.
If your provider is not listed, select Custom SAML when offered; an existing configuration may also offer Custom OIDC.
Follow the setup flow to create or connect the application in your identity provider.
Copy the SSO URL, audience or entity identifier, and other requested values into the identity-provider application.
Provider-specific screens differ. Use the values shown for your actual tenant and connection; do not reuse setup values from another workspace or API organization.
The number of identity-provider connections you can add depends on your tenant’s enabled features and administrator permissions.
An identity-provider app tile or bookmark must use the connection-specific sign-in URL for its product. ChatGPT and API Platform can use different URLs; update the tile or bookmark if its connection changes.
Resetting or replacing an existing connection can change SSO URLs, audience values, certificates, and saved sign-in bookmarks. Update the identity-provider application and user instructions before replacing a working connection.
Configure identity-provider metadata
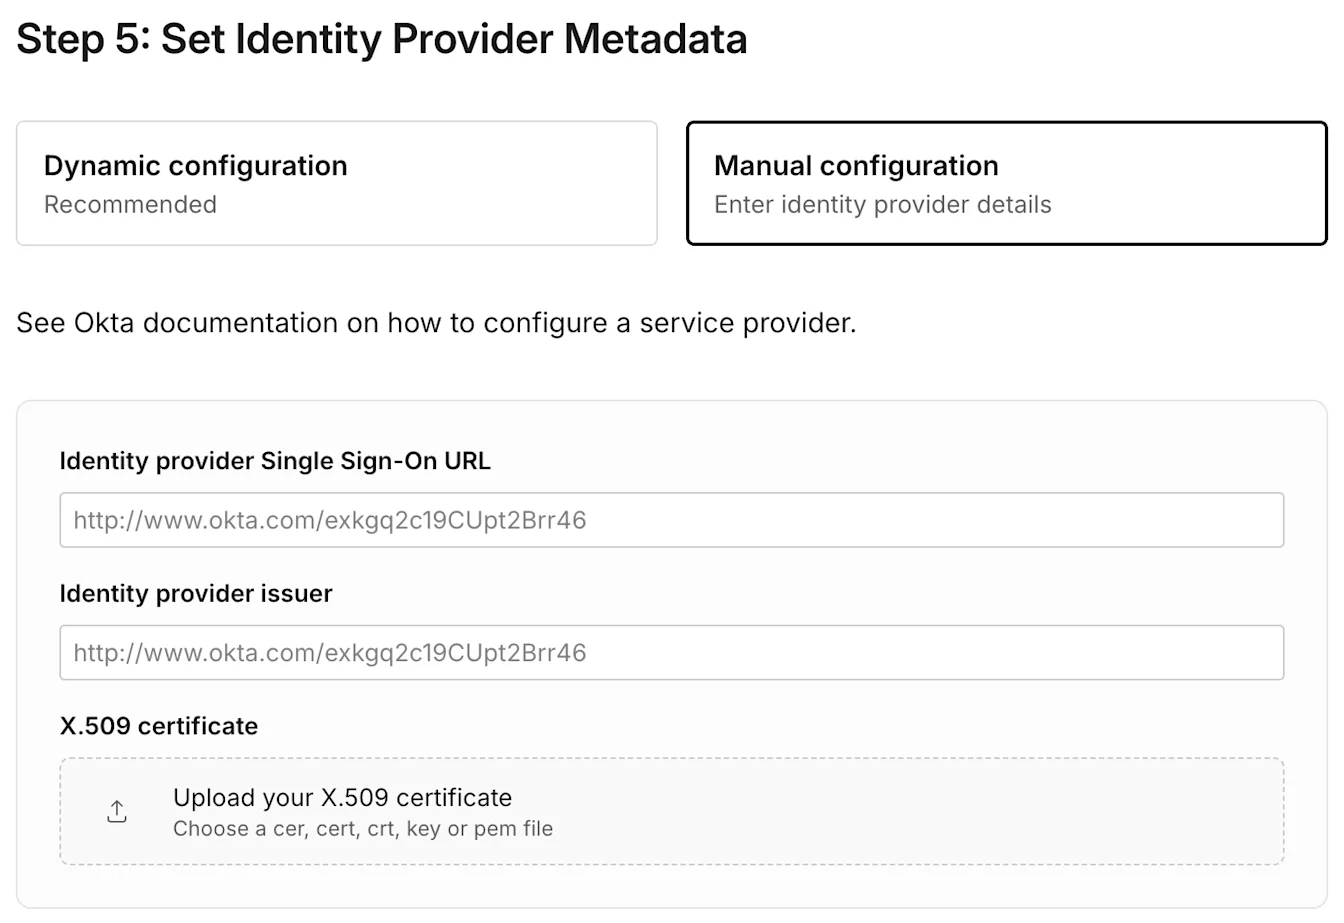
Use dynamic configuration
When your identity provider offers a metadata URL, enter that URL in the setup flow. The provider’s metadata supplies the supported issuer, sign-in endpoint, and signing-certificate details.
Use manual configuration
If a metadata URL is not available, enter the identity-provider SSO URL, issuer, and X.509 signing certificate shown in your provider’s configuration. Confirm that the certificate matches the one used to sign the SAML response.
Map user identity attributes
Configure your identity provider to return one stable primary email address for each person. First and last name are optional but recommended when your provider supports them.
Email address: Required. It must identify the same OpenAI account the person uses for product access.
First name: Optional but recommended.
Last name: Optional but recommended.
OpenAI does not decrypt encrypted SAML responses or assertions. Send an unencrypted SAML response and assertion signed with the expected X.509 certificate.
Use the correct account email
If your identity provider returns an alias, a different email, or more than one email claim, OpenAI may match the wrong account. That can make an existing account, chat history, or workspace appear missing.
For Microsoft Entra ID, check whether the sign-in claim uses the person’s email address, user principal name (UPN), or preferred_username. Configure the SSO and SCIM mappings to identify the intended existing OpenAI account. If the destination email already belongs to another account, stop and contact OpenAI Support before making changes.
Coordinate managed email changes
Changing an SSO email claim alone does not update an existing OpenAI account. Tenant-wide SCIM can synchronize a managed user’s primary email with their existing account when both the current and new email domains are verified for the directory’s tenant. For a ChatGPT workspace-level SCIM connection, both domains must be verified for that workspace and its tenant.
Update the existing SCIM user and coordinate the SSO mapping to use the new address. The email change signs the user out, so they must sign in again. Product-level API organization SCIM email changes are not currently available.
For managed email-change steps, see: SCIM provisioning and management.
Assign users and confirm product access
Assign the intended people or groups to the OpenAI application in your identity provider.
Confirm that each person also has the right ChatGPT workspace invitation, API organization membership, or Ads account role.
If your tenant uses SCIM, verify the synchronized group and its supported product assignment.
Test a user who belongs to the product or workspace you are configuring.
An identity-provider assignment may be required for authentication, but it does not invite that person to every workspace, assign an API role, or grant access to an advertising account.
Choose a sign-in policy for each product

After the shared identity-provider connection is active, review the policy for each product that appears in Admin Console. An available product may offer Required, Optional, or Off.
| Product | How the policy applies | What to check |
|---|---|---|
| ChatGPT | A product-wide policy can apply to ChatGPT workspaces. Where supported, individual workspaces can have their own policy. | Verify the intended workspace, member invitation, and workspace-specific setting. |
| API Platform | The API Platform sign-in policy applies to linked API organizations. If Customize by API Org is available, an authorized global admin can set API-organization-specific policies. | Verify API organization membership and the API organization selected in the API Platform. |
| Ads Manager | Ads has its own product sign-in policy. | Verify that Ads SSO is enabled as intended and that the person also has the correct advertising-account role. |
| Admin Console | Admin Console has its own sign-in policy. | Protect access for at least one authorized global admin before requiring SSO. |
Turning on the shared connection does not automatically enable SSO for every product. If a product’s policy is Off, users cannot use SSO for that product. Users also need the correct identity-provider assignment and product membership.
For ChatGPT workspaces, Required SSO also applies to external members unless their membership is exempt. Turning off Allow External Domain Invites limits new invitations; it does not remove existing members or invitations already sent, or change a member’s SSO exemption.
Changing a ChatGPT policy to Required or Off can sign out affected users. Review workspace overrides and communicate the change before applying a broad policy.
Manage SSO exemptions for external workspace members
An external member is a member of the workspace whose email domain is not verified by that workspace. The same person can be external to one workspace and use a verified domain in another.
An exemption lets an external member use another permitted sign-in method when that workspace requires SSO. It applies only to that workspace’s SSO requirement. It does not grant membership, an administrator role, or access to another workspace or product. This feature does not exempt members whose email domain is verified by the workspace.
Why can some existing members sign in without SSO while new members must use it?
When individual SSO settings for external members were introduced, some existing external members of workspaces that required SSO received an exemption to preserve their access. New external memberships do not receive an exemption automatically.
Learn more in the ChatGPT Business or ChatGPT Enterprise and Edu release notes.
If your workspace requires SSO, an external member must use SSO unless their setting is Allow login without SSO. Workspace owners can change this setting. Check each member’s current setting under Workspace login rather than relying on when they joined.
An exemption lets the member use another permitted sign-in method already available to their account. It does not create a password or add a sign-in method.
Temporary deactivation and reactivation preserve an exemption. Leaving or removal clears it, and reinvitation does not restore it.
How did SSO work before individual settings for external members were introduced?
Before individual SSO settings for external members were introduced, members whose email domains were not verified by the workspace could use another permitted sign-in method, even when the workspace required SSO.
Individual SSO settings let workspace owners manage exceptions for each external member. New external memberships follow the workspace’s SSO policy by default. They must use SSO when that workspace requires it, unless a workspace owner grants an exemption.
Signing in to an OpenAI account with a password does not, by itself, show that the user accessed a particular workspace without SSO. A member’s current setting also does not show how they accessed it in the past.
Review a member’s workspace login settings
Workspace owners and admins can review these settings. Only workspace owners can change an external member’s SSO setting.
Open Admin Console and select the affected ChatGPT workspace.
Go to Members and open the member’s details.
Under Workspace login, check Email domain. Not verified by this workspace means the member’s email domain is external to this workspace. Select View domain settings to review the workspace’s domains.
For an external member, check the selected option under Single sign-on (SSO).
Allow login without SSO: The member can access this workspace without SSO, even when the workspace requires it.
Follow workspace SSO policy: If this workspace requires SSO, the member must log in with SSO to access it.
Both options apply only to this workspace. The setting does not show the member’s current sign-in method or whether they have a working SSO login. Check the workspace’s SSO policy and the member’s identity-provider access separately.
If Email domain shows Verified by this workspace, the external-member SSO control does not appear.
Change an external member’s SSO setting
After reviewing the member’s settings above, sign in as a workspace owner to grant or remove an exemption:
Under Single sign-on (SSO), choose Allow login without SSO or Follow workspace SSO policy.
Select Save changes and check for the confirmation Changes saved.
Refresh the member’s details to verify the saved setting.
If an external member needs non-SSO access, a workspace owner can select Allow login without SSO if it is permitted by the organization’s policy. If the setting is unavailable, refresh member details. If it remains unavailable or the member still cannot sign in after the saved change, contact OpenAI Support or your account team.
Do not remove and reinvite the member to fix sign-in. Removal clears an existing exemption, and reinvitation does not restore it.
Test the connection and apply the correct policy
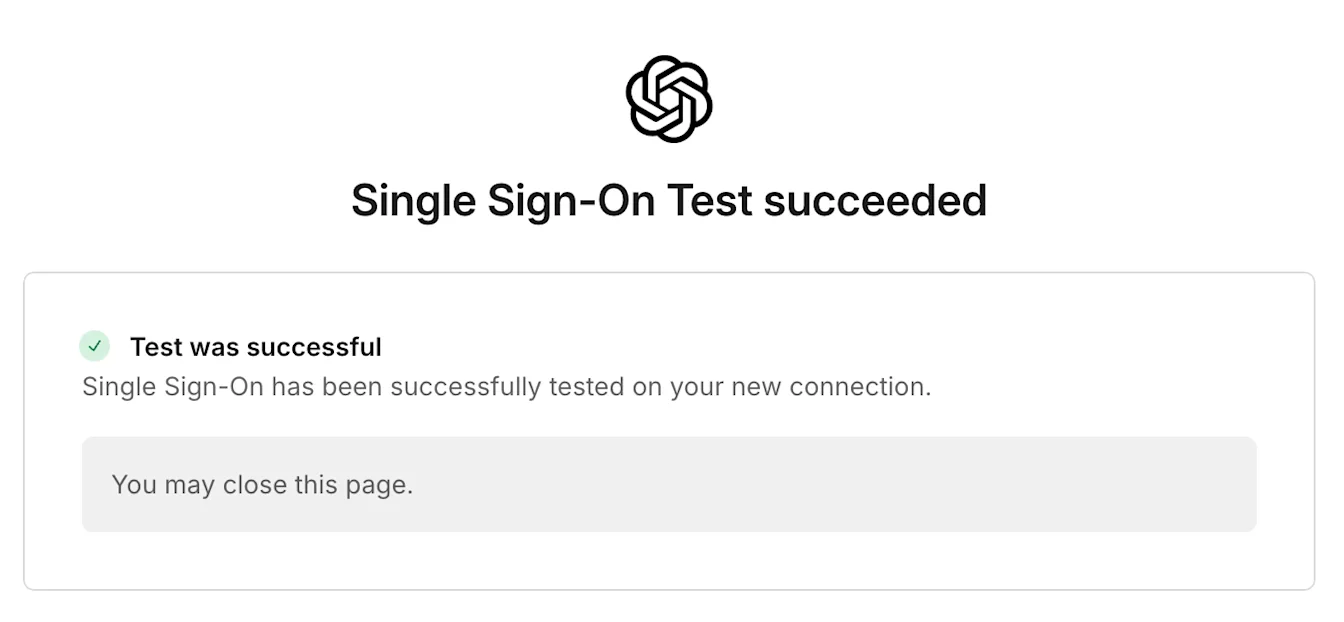
Select Test Single Sign-On or the equivalent test step shown in the setup flow.
Authenticate with the intended identity provider in a private browser window.
Confirm that the user reaches the correct ChatGPT workspace, API organization, or Ads account.
Verify the required invitation, membership, or account role.
Review the applicable product or workspace sign-in policy.
Change the policy to Required only after successful testing and an approved administrator recovery plan.
Resolve sign-in or access problems
If someone cannot sign in, check the verified domain, identity-provider assignment, email claim, X.509 certificate, product membership, and applicable product sign-in policy. A successful tenant sign-in does not guarantee access to a specific workspace, API organization, or Ads account.
For product-specific errors and recovery steps, see: Troubleshooting SSO, workspace access, and domain verification. If you cannot restore administrator access, contact OpenAI Support.